How to Set Up a Lead Action
Prerequisites: Ensure that you are logged into your Thinkstack account and that you have at least one trained bot available.
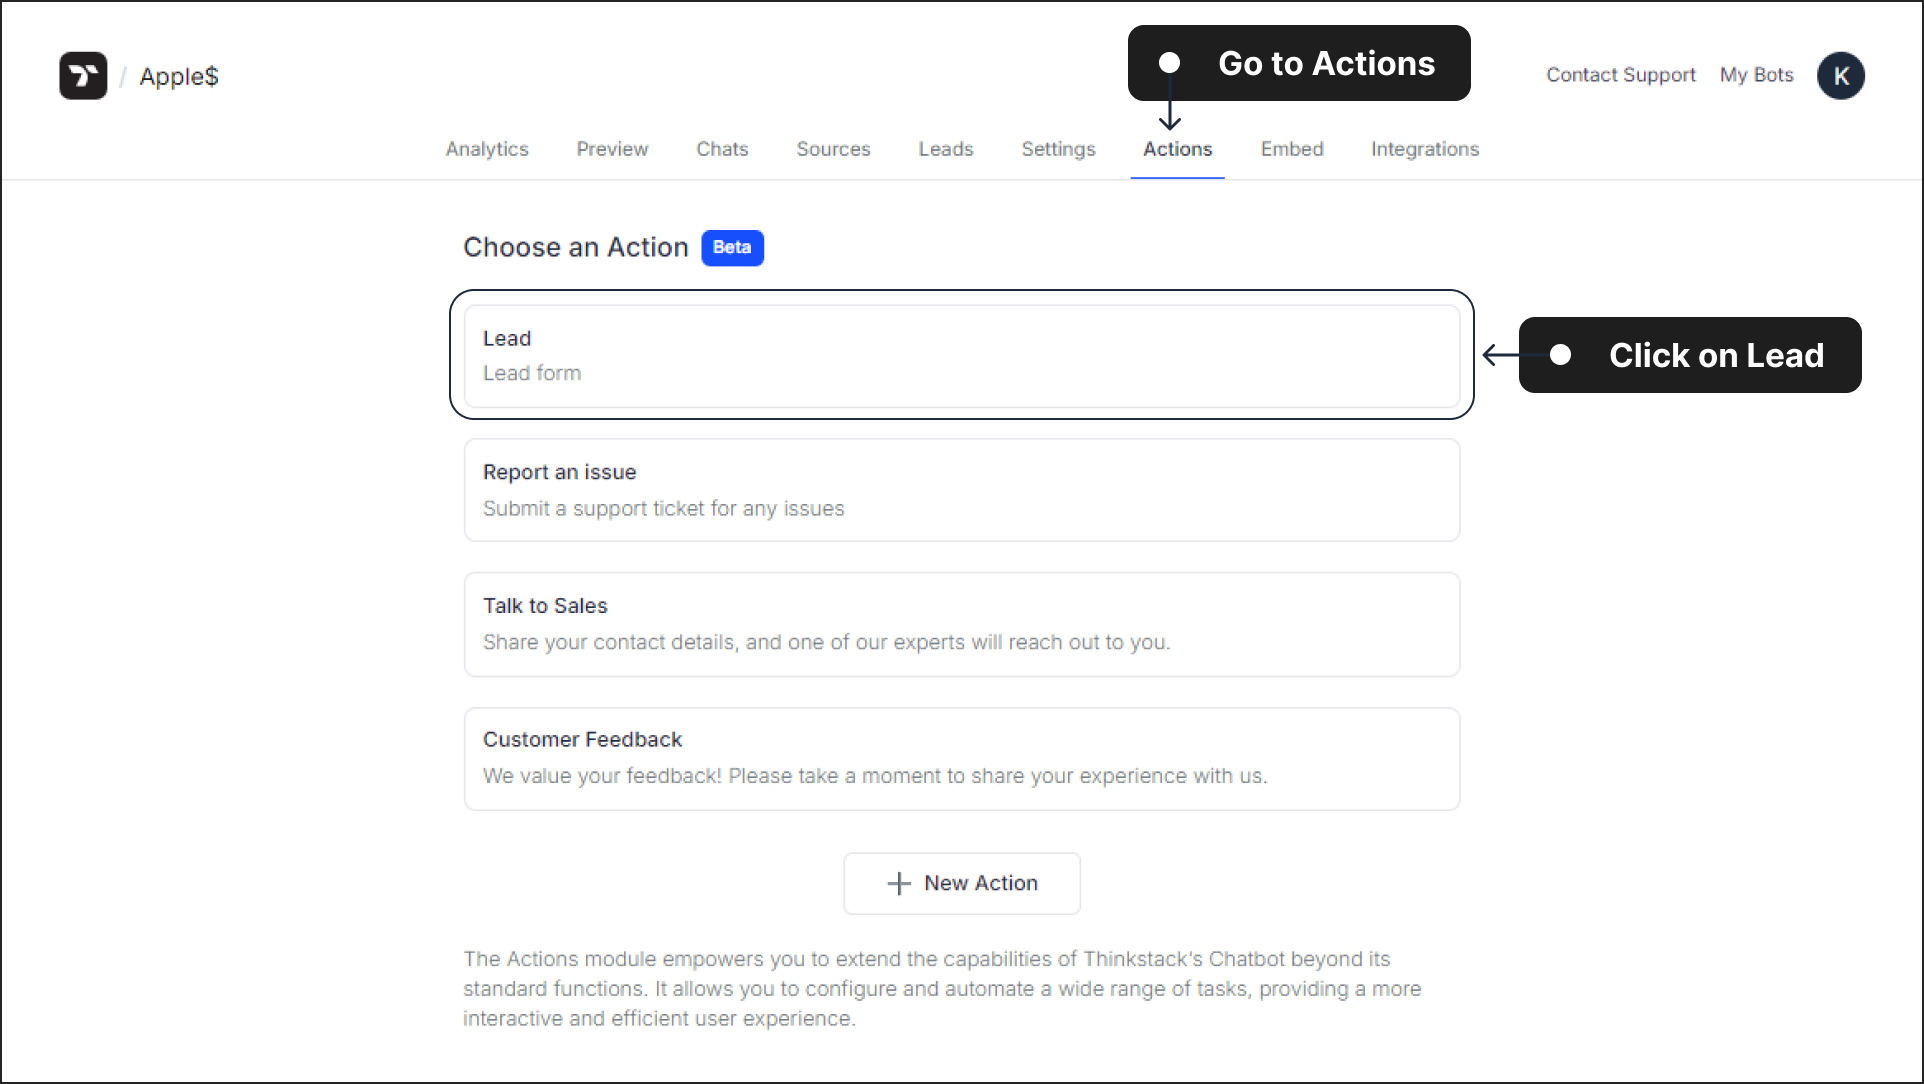
Click on the bot for which you want to set up the Action. Navigate to Actions in the top menu, and select Lead from the list.
You'll see a input
JSONtemplate designed to collect leads. You can also customize thisJSONto suit your requirements.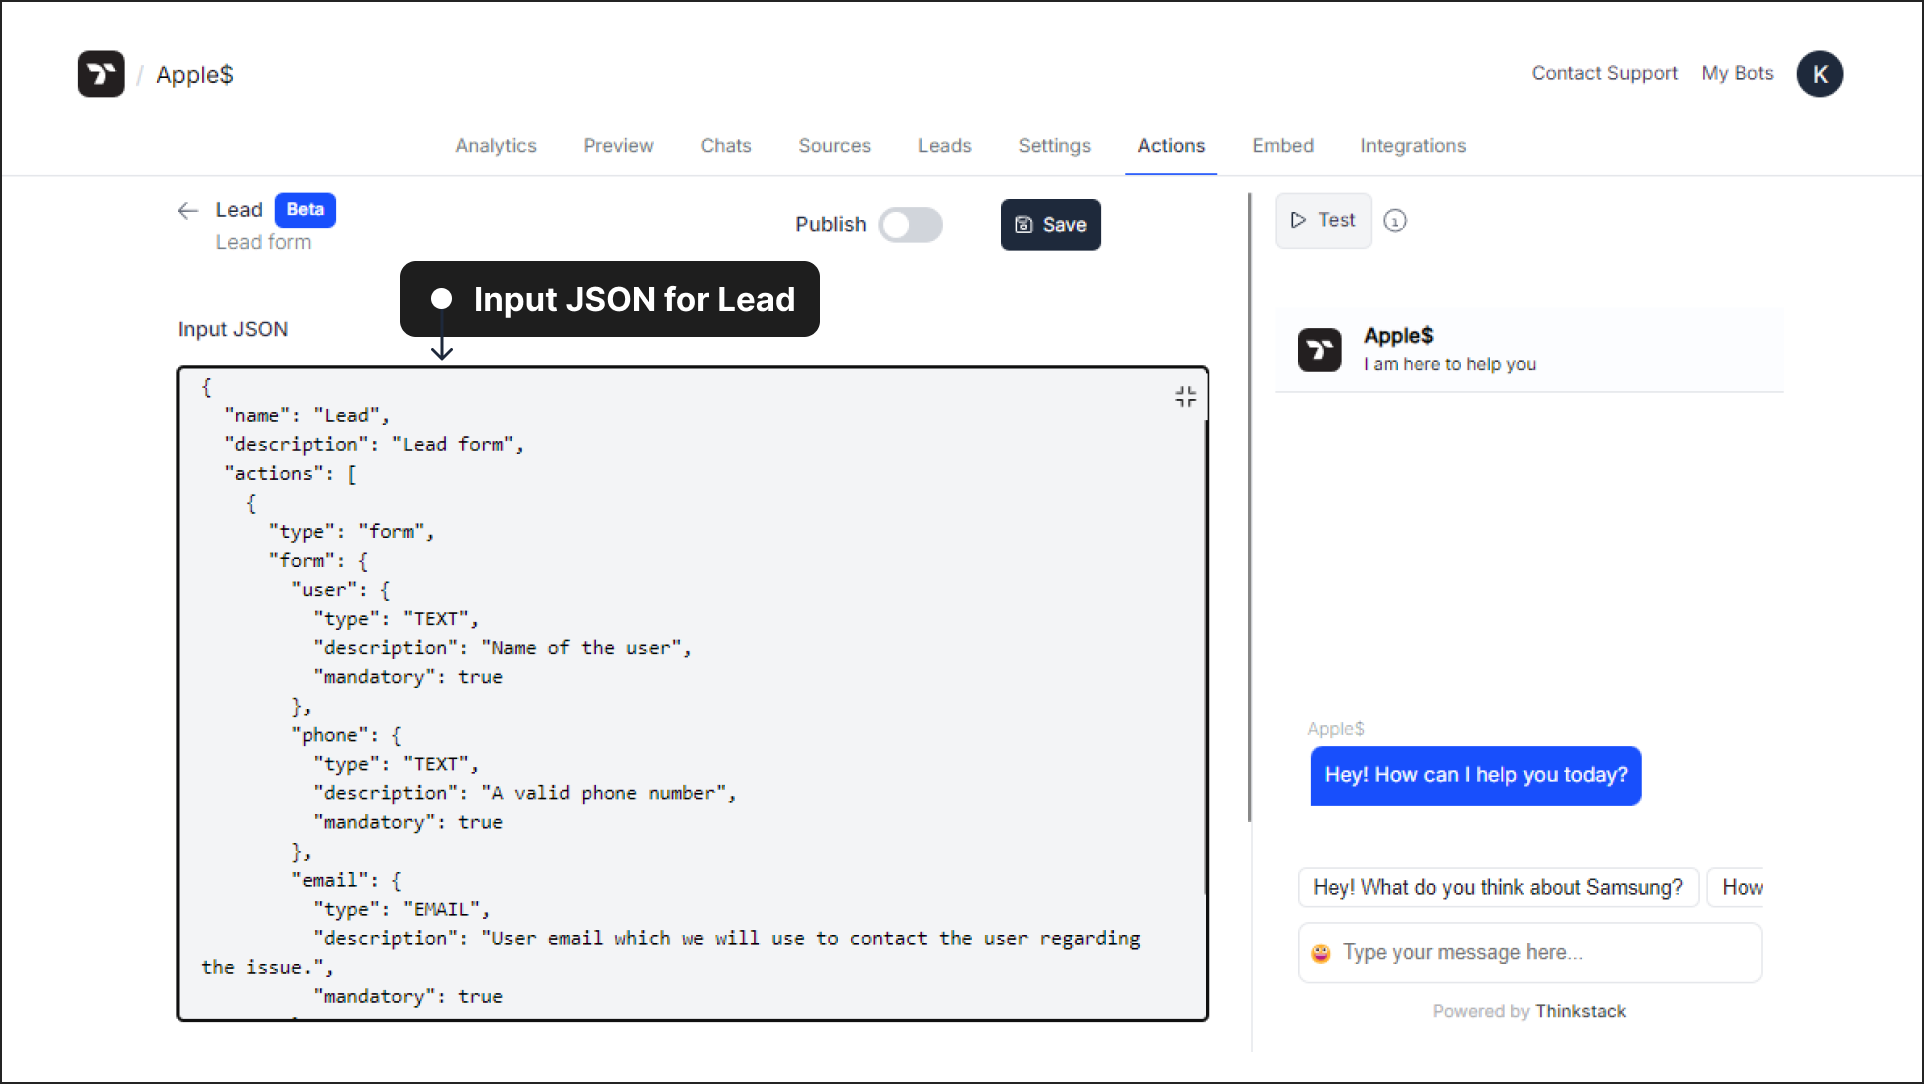
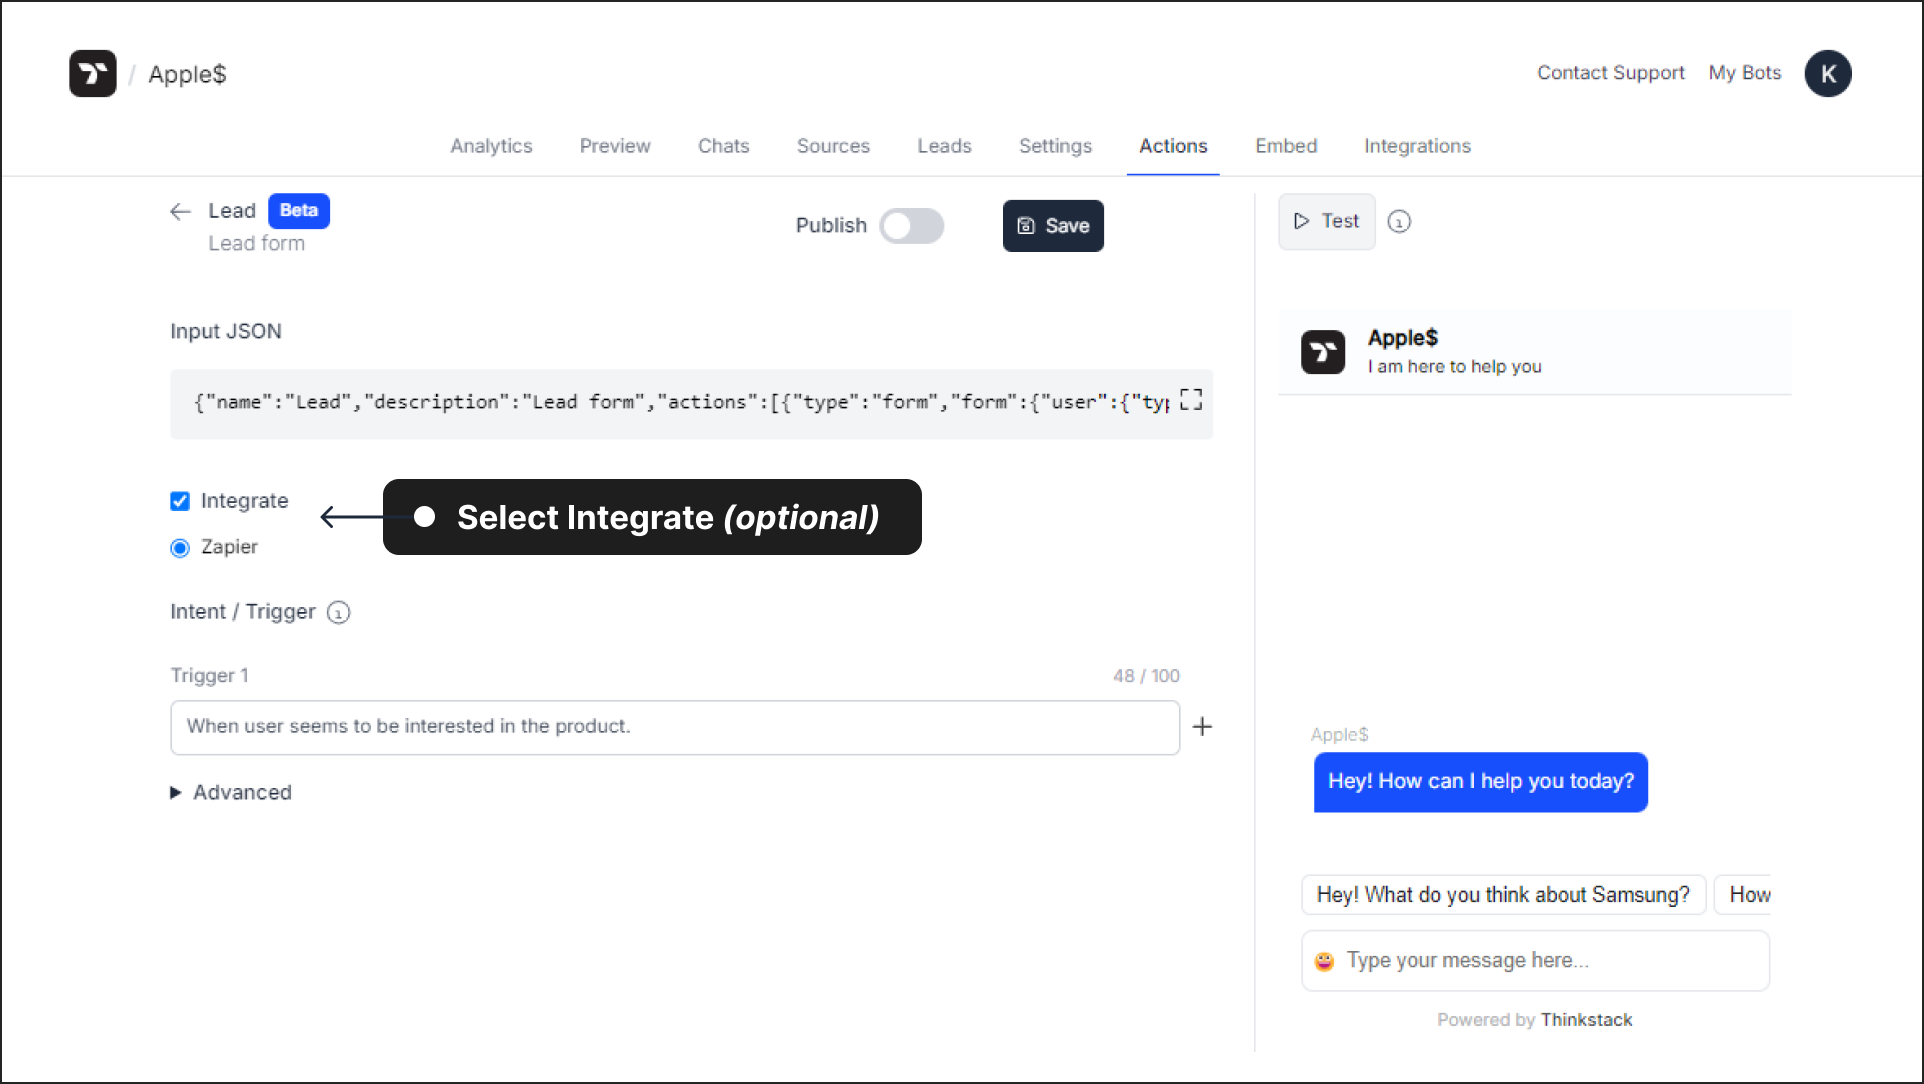
If you want to automate the flow of action with third-party apps like Zapier, click Integrate. This step will trigger the Zap you have already set up. This step is optional.
Set the Trigger to help the chatbot identify when to start the lead generation action. Carefully provide the triggers. The best practice is to use 2-3 distinct triggers to assist the chatbot in recognizing the intent.
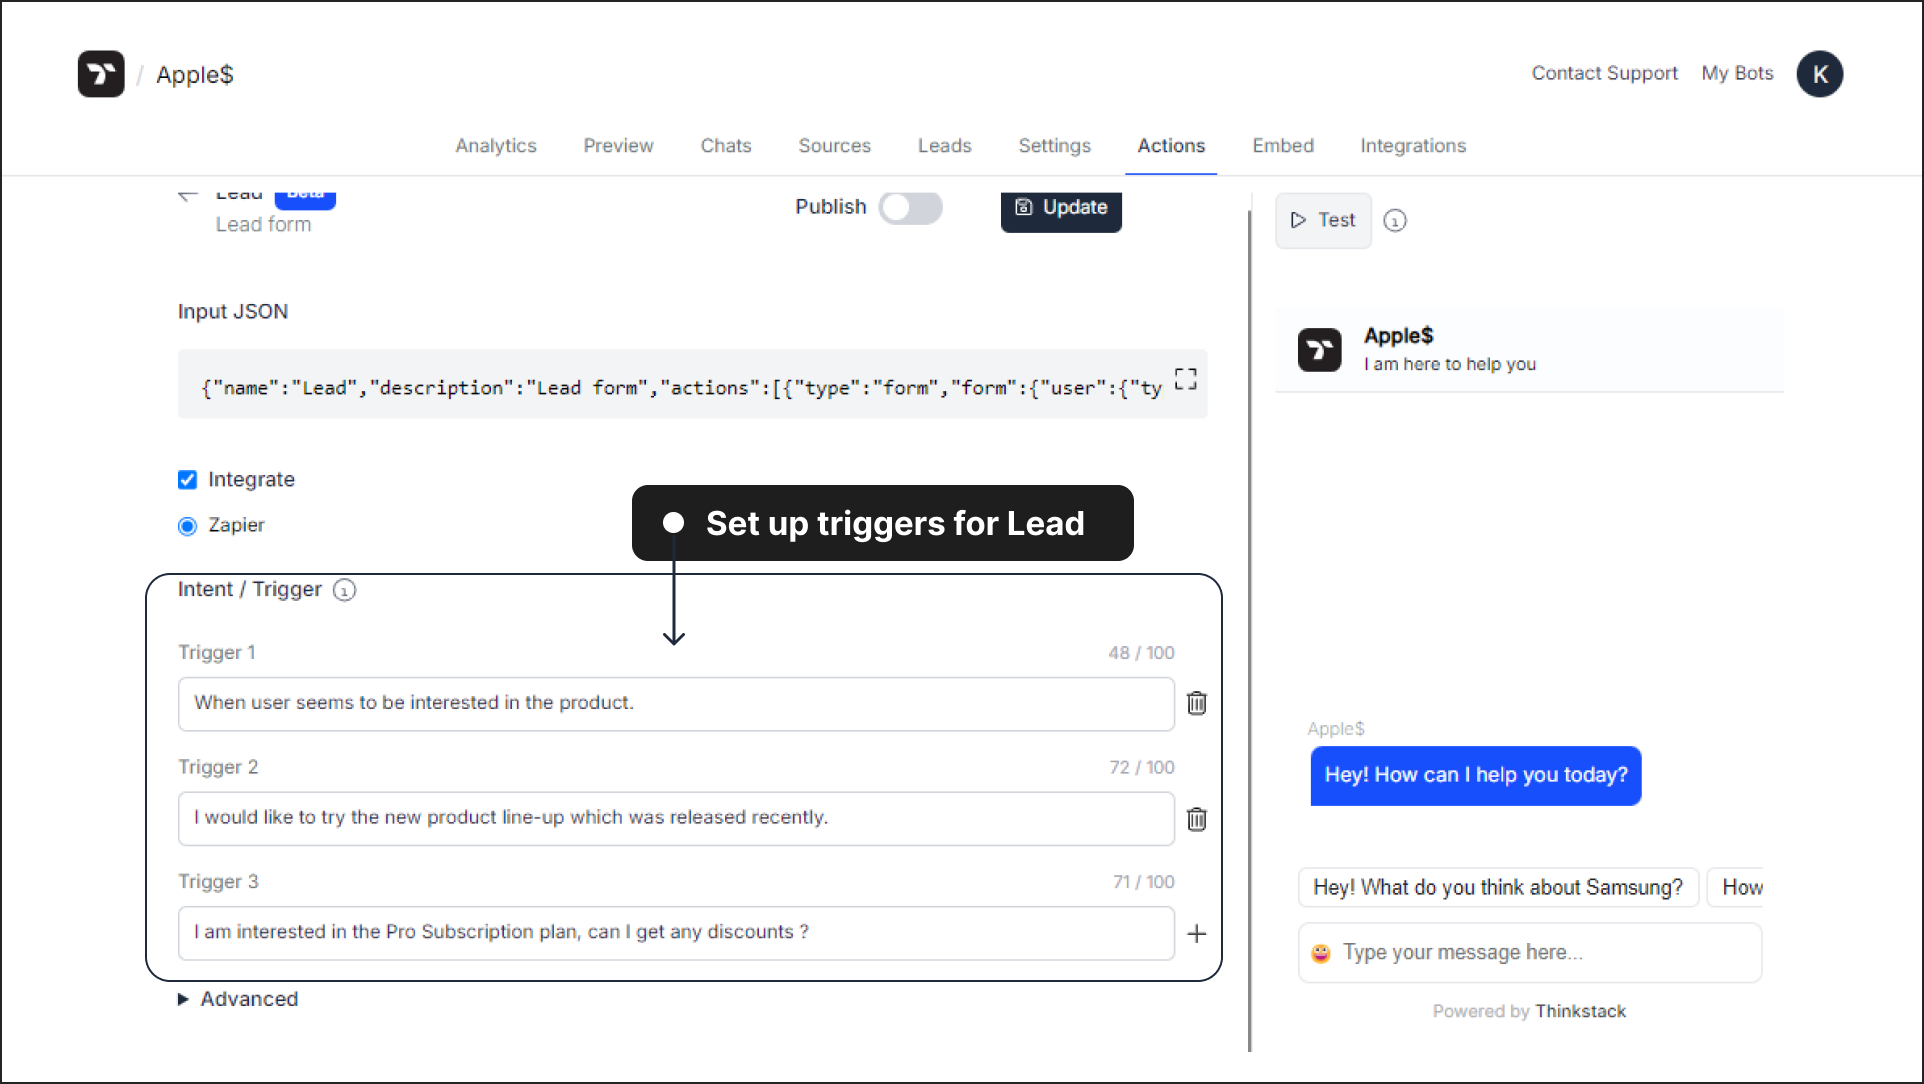 Note: Ensure the triggers you set are not the same as those used for Human-Handoff. If similar triggers are used, the chatbot will perform Human-Handoff instead of the lead action.
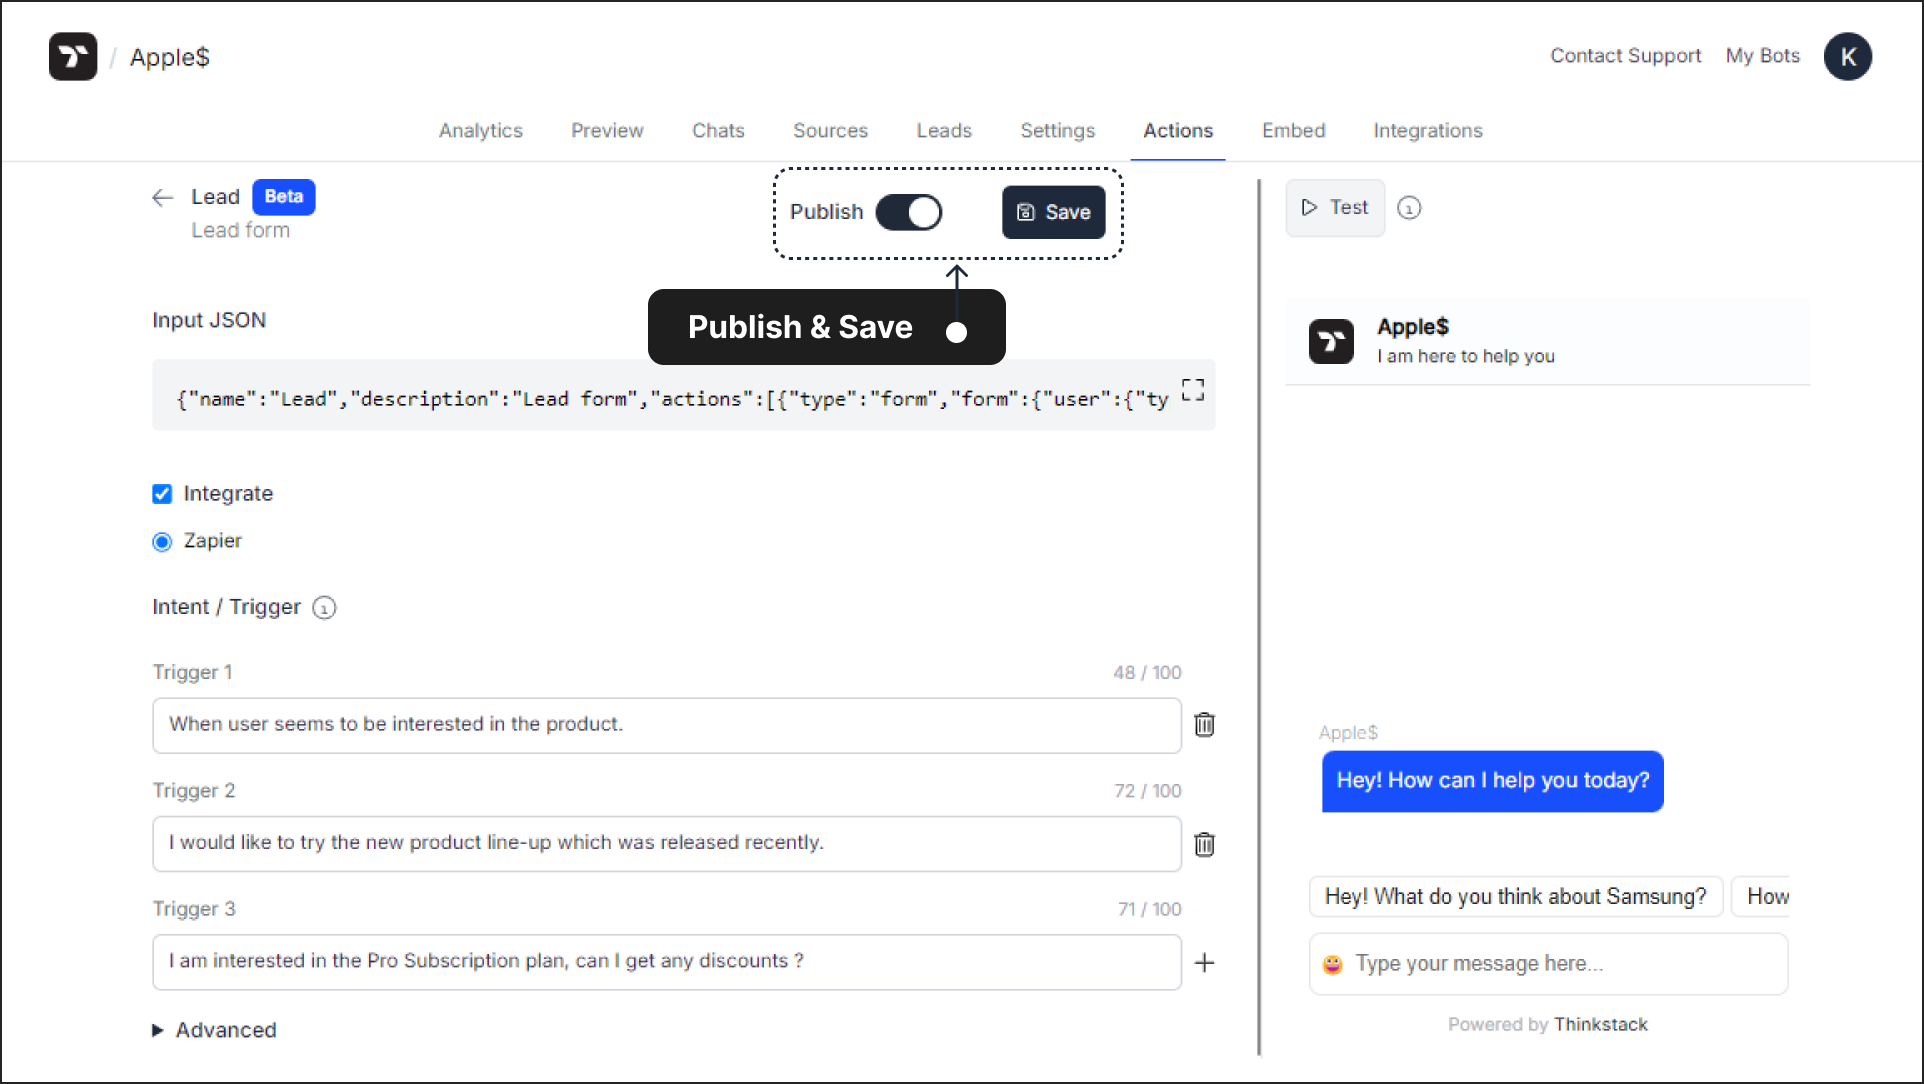
After setting the triggers, toggle the Publish button to activate the lead action. Click on 'Save' as this will save the changes/selection you have made so far with respect to the chatbot.
Advanced Settings#
If you want to initiate the action by adding it as a suggestion you can easily do so.
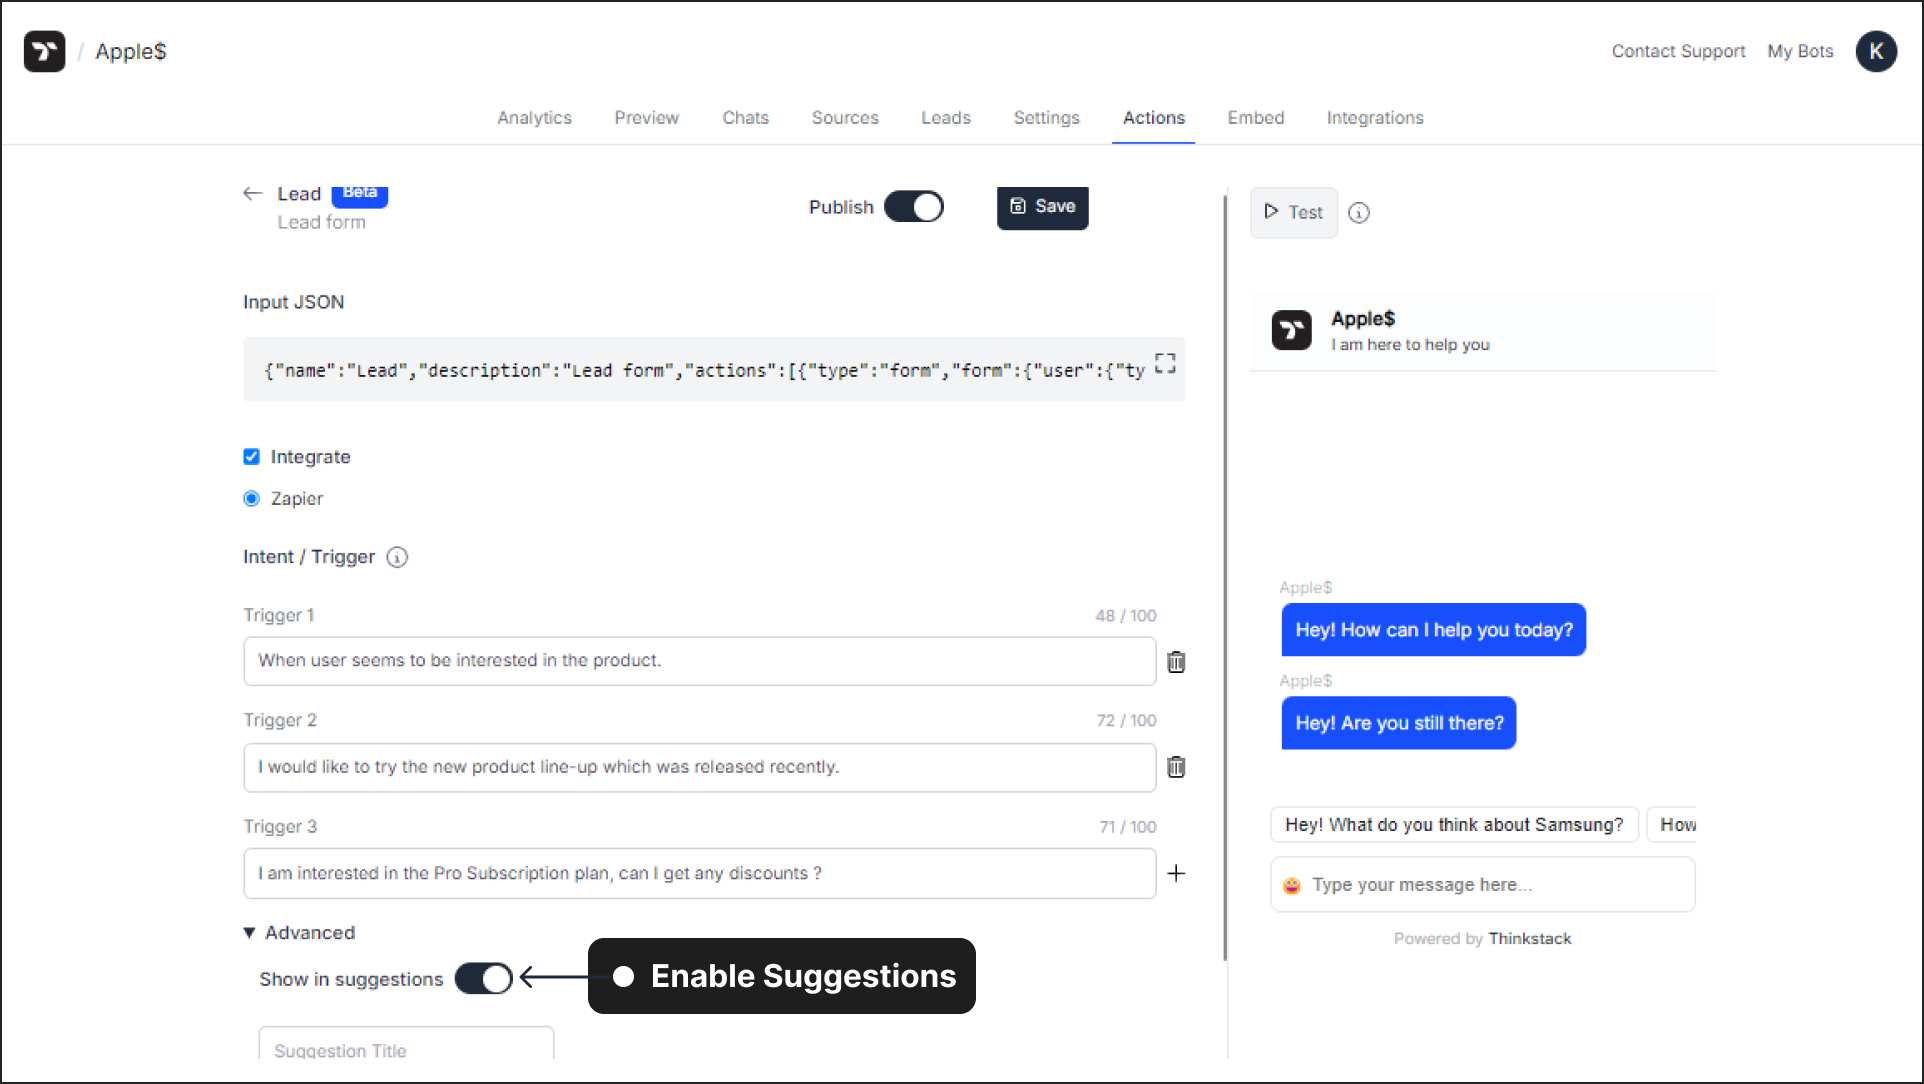
Open the Advanced dropdown and toggle 'Show in Suggestions.
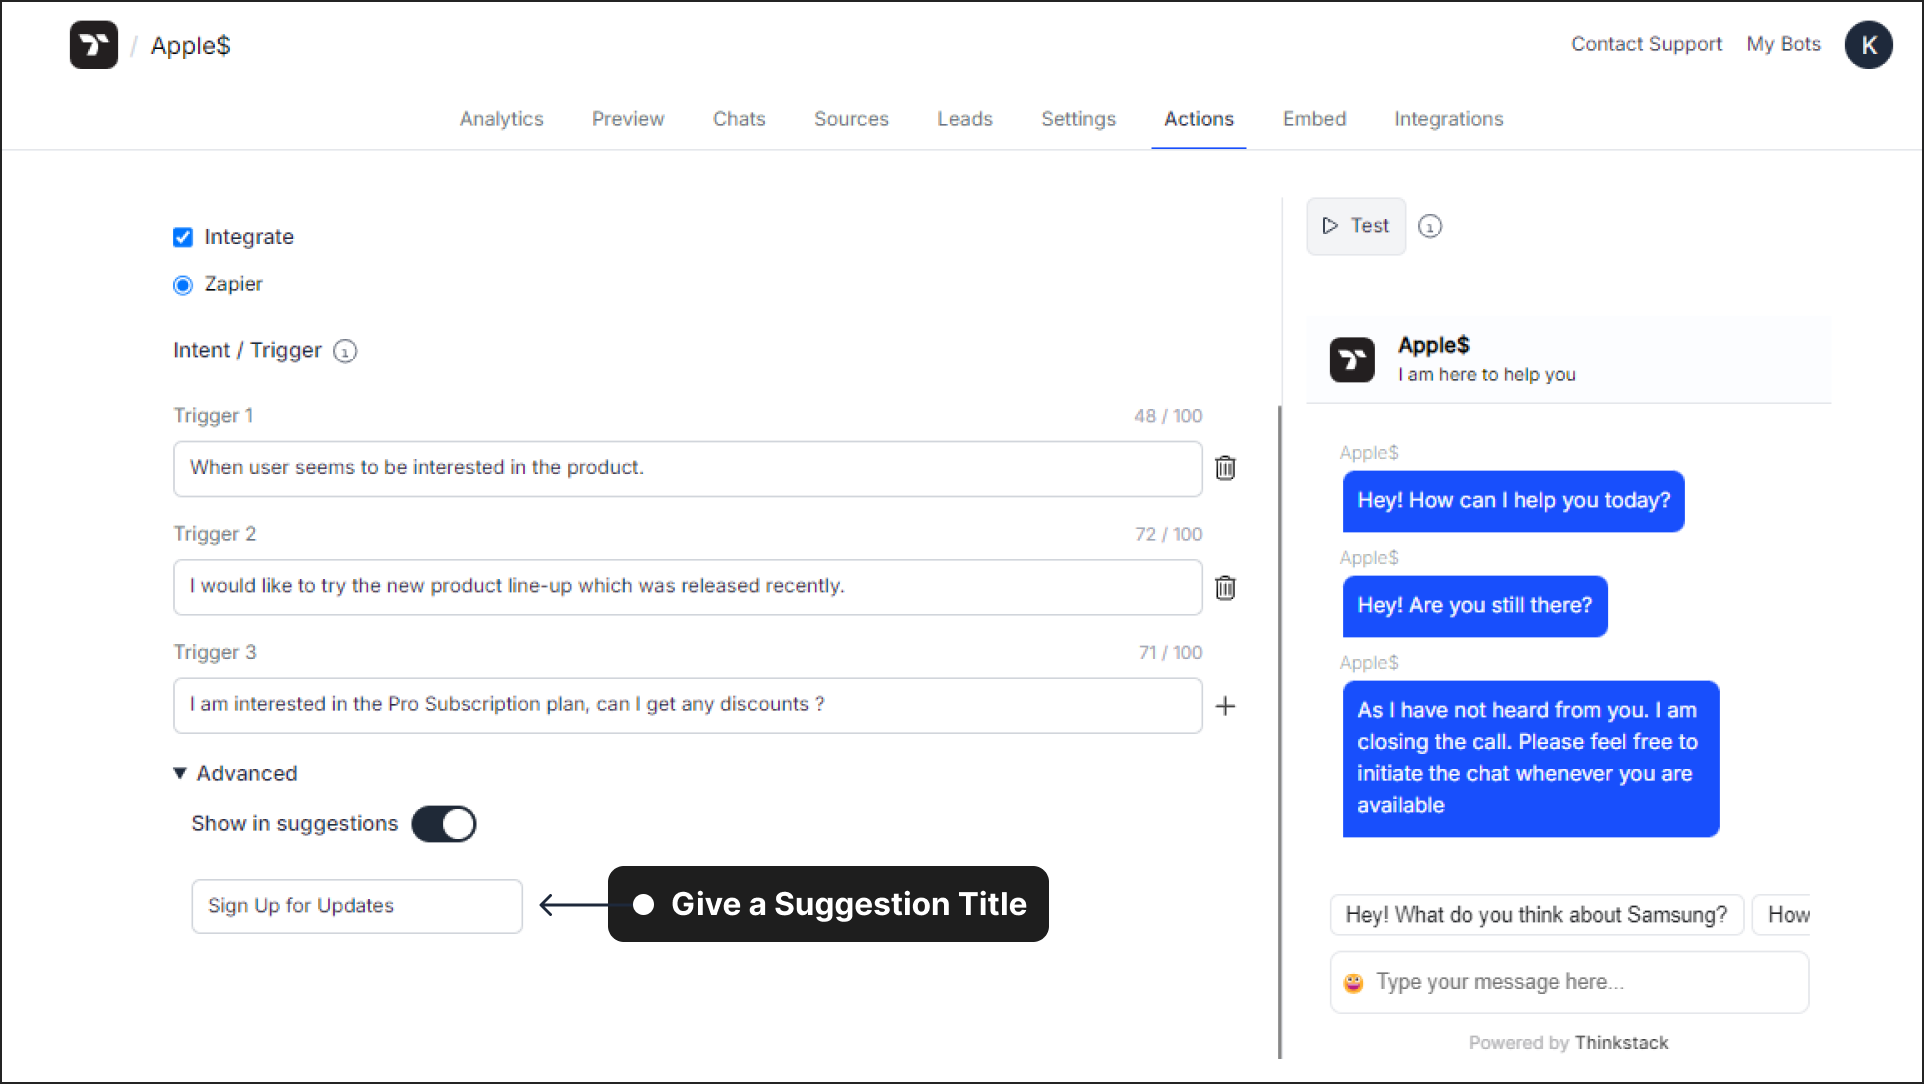
Provide a Suggestion Title. When users click on it, the lead action will be triggered.
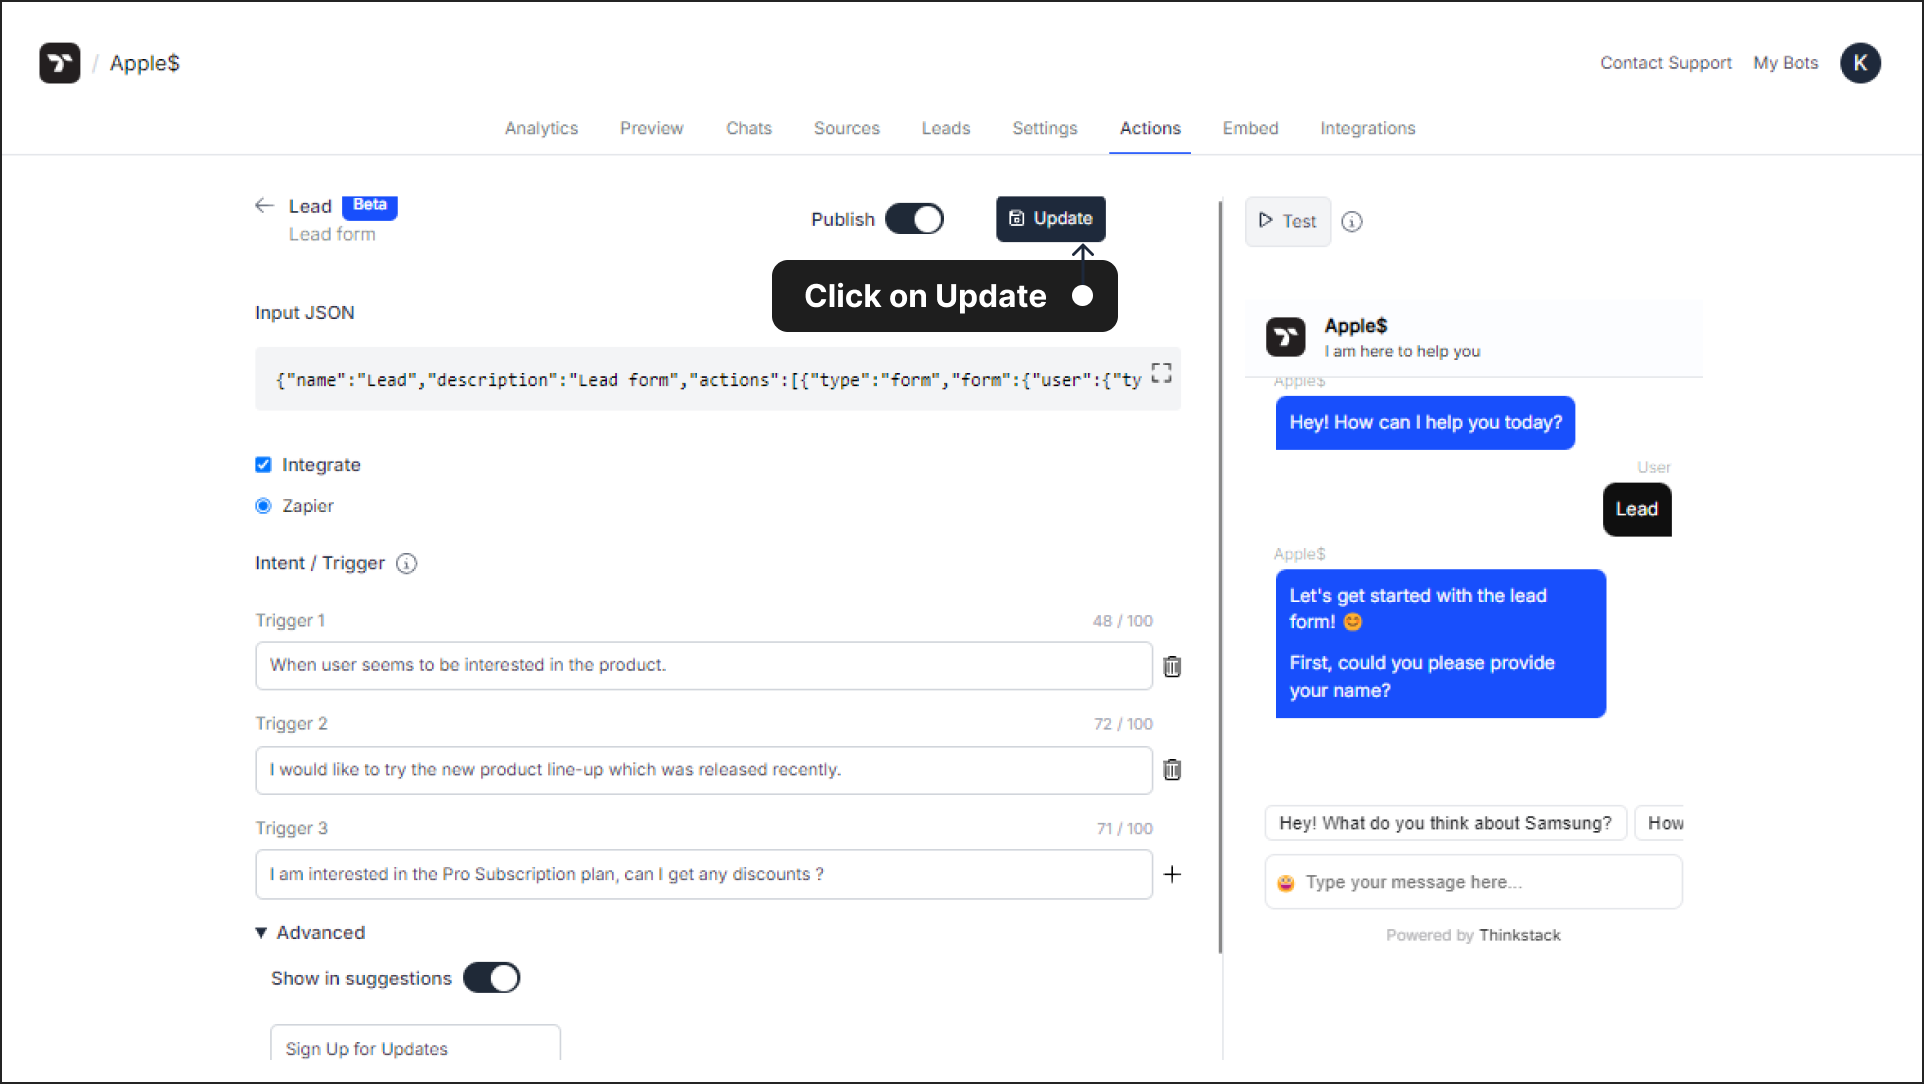
Click on 'Update' to apply the new changes to your chatbot.
Test the action#
Use the Test feature to verify that the chatbot is requesting the fields as configured in the
.jsonfile.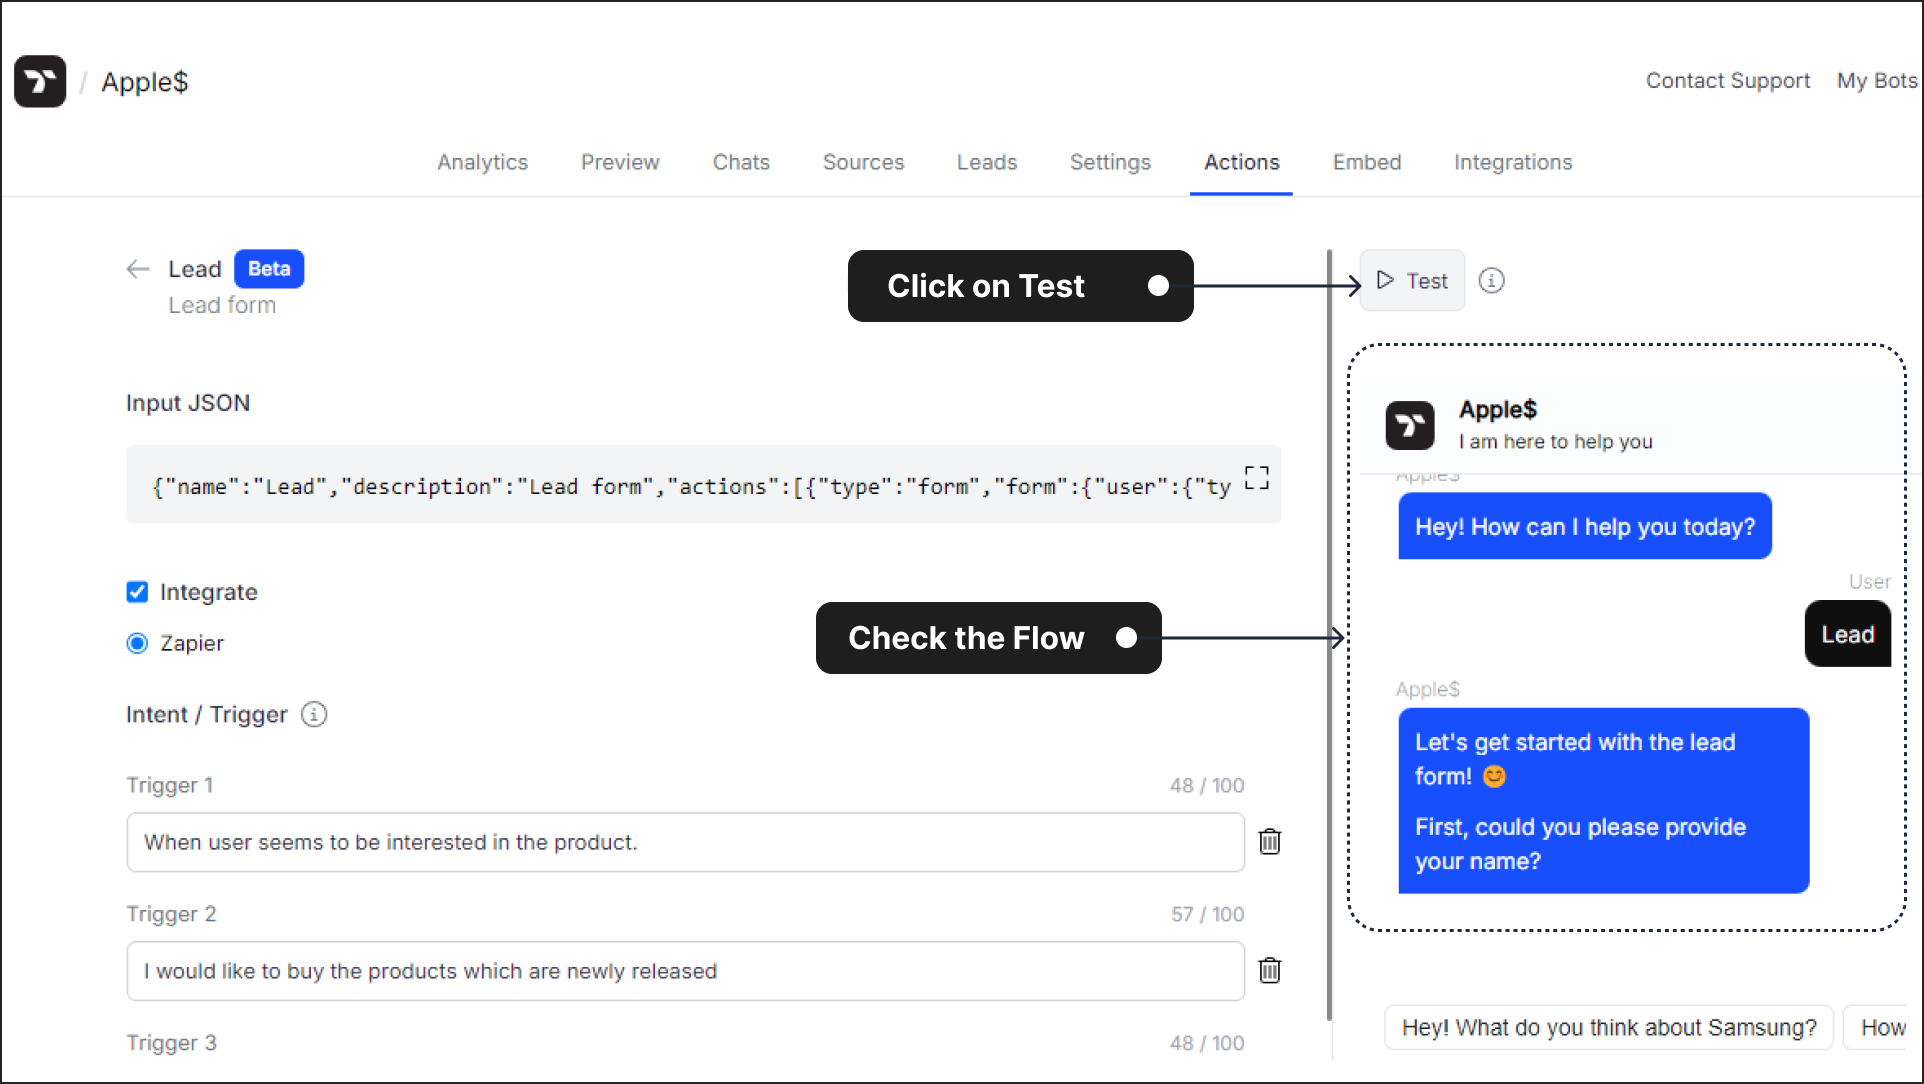
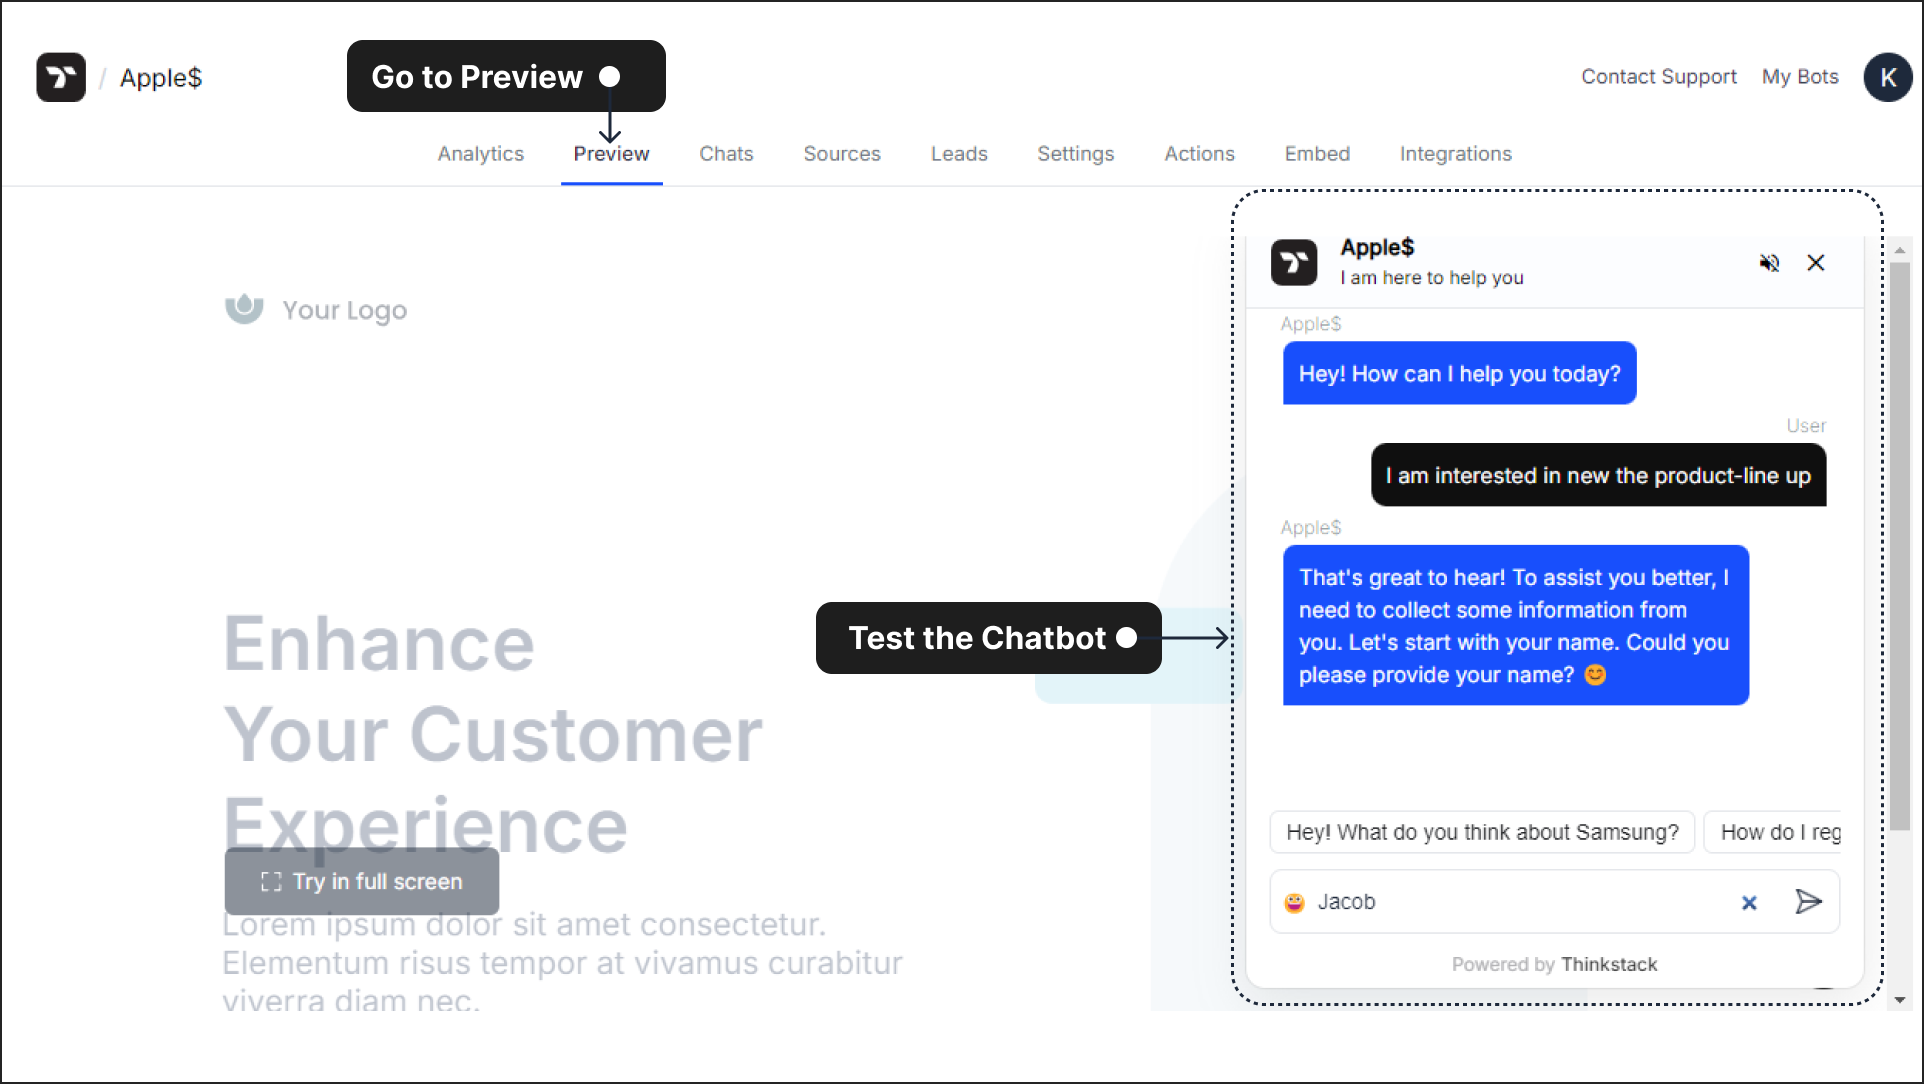
You can also test it in the Preview section to check if the chatbot correctly identifies user interest and initiates the lead action.
View the Leads#
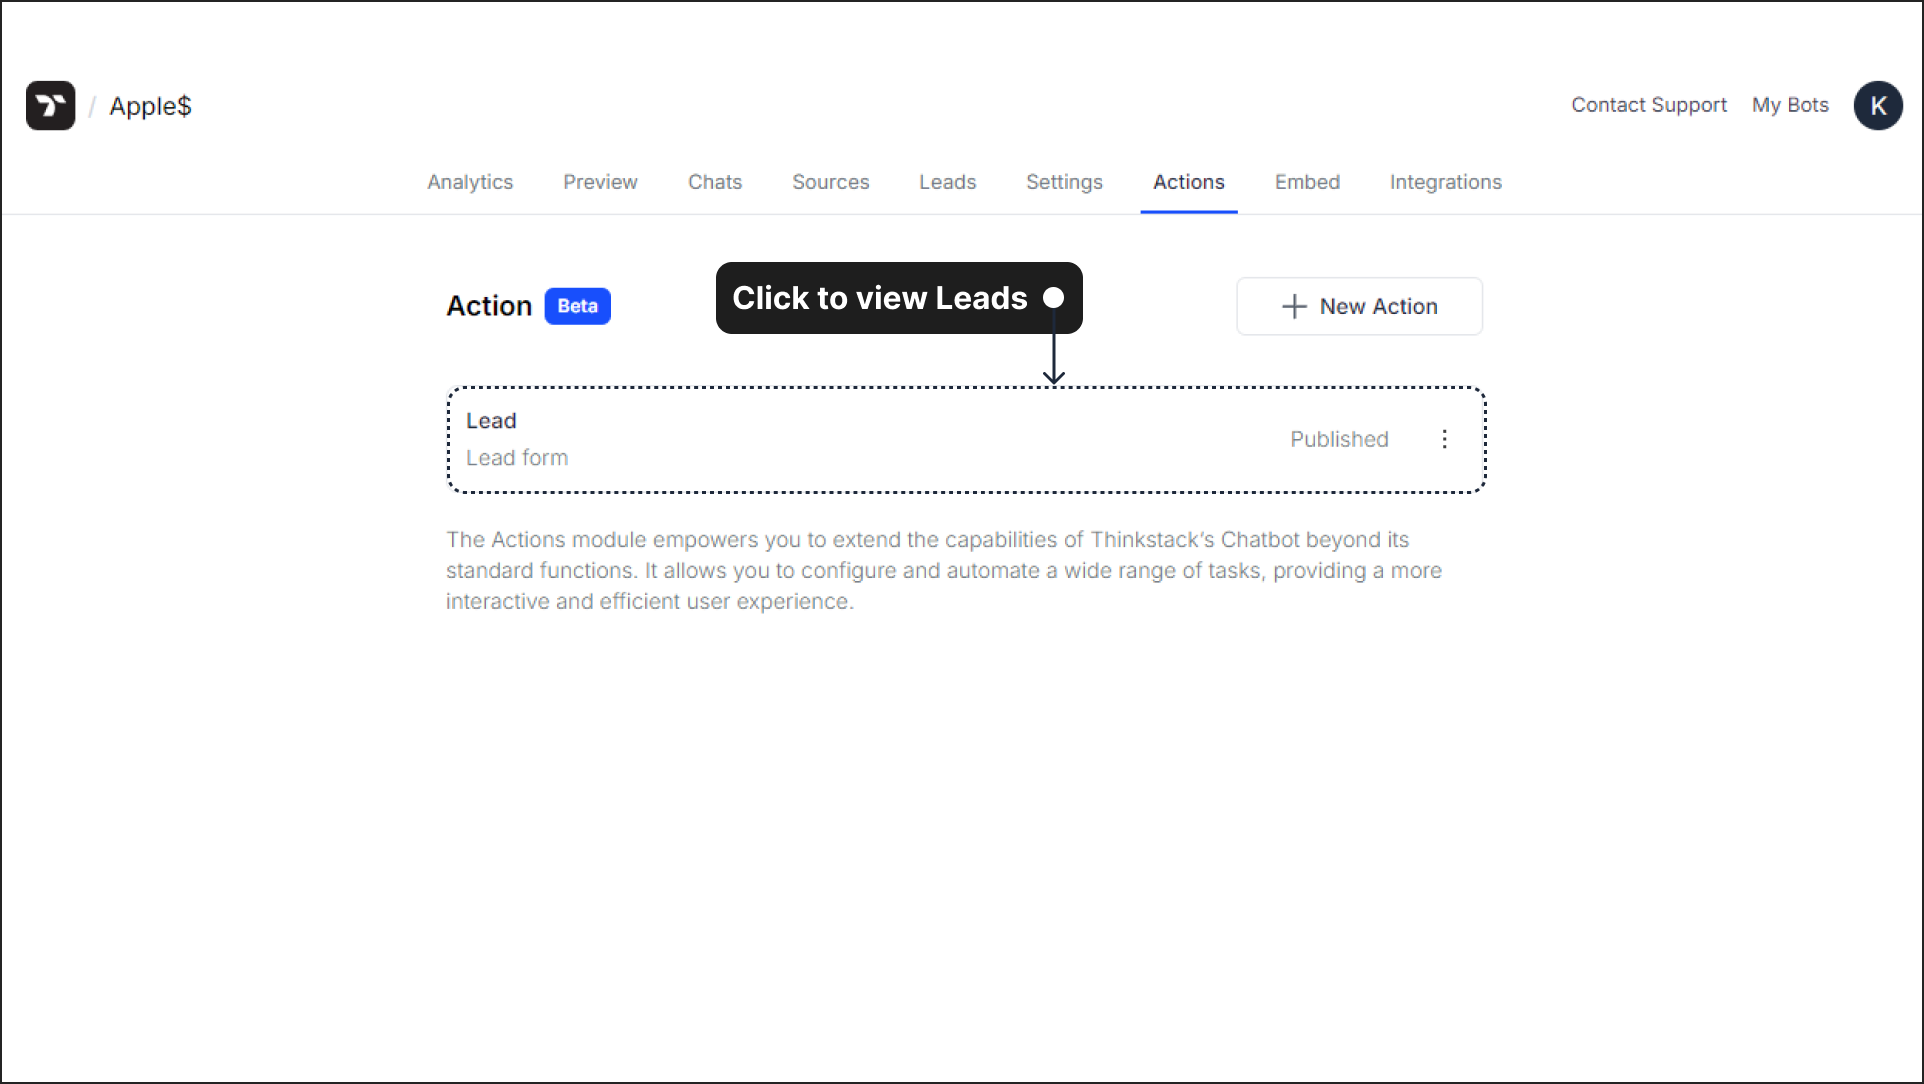
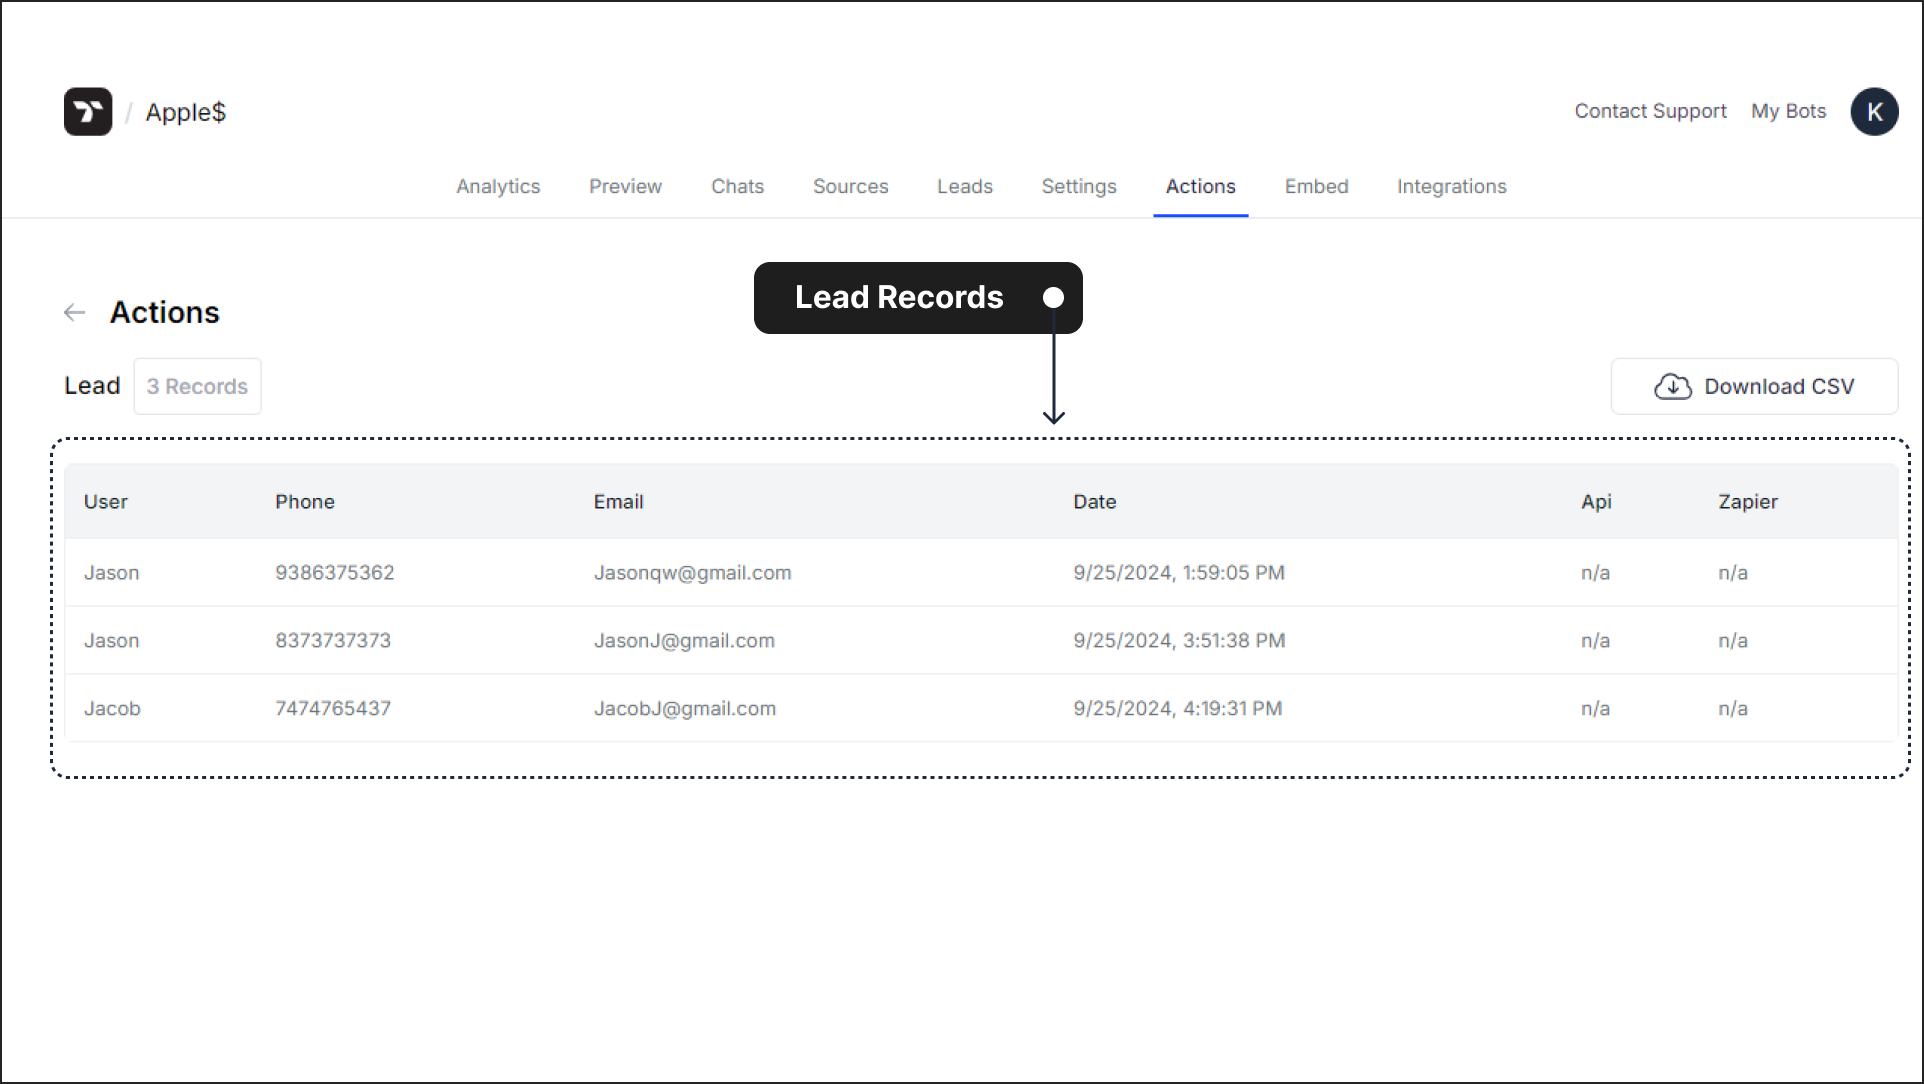
Once the chatbot successfully collects the lead, the details can be viewed by clicking on the Lead list in the Action section.
That's a wrap🎉, you have set up an intent-driven Lead Action that will automatically collect lead information when the chatbot detects user interest.