Build your AI chatbot: Quick guide
A beginner-friendly guide to building an AI chatbot and embedding it into your website or app with ease.
Create your chatbot
1. Login to your Thinkstack account.
2. Enter the Chatbot Name, Brand Name, and Brand Info. Click Create Chabot.
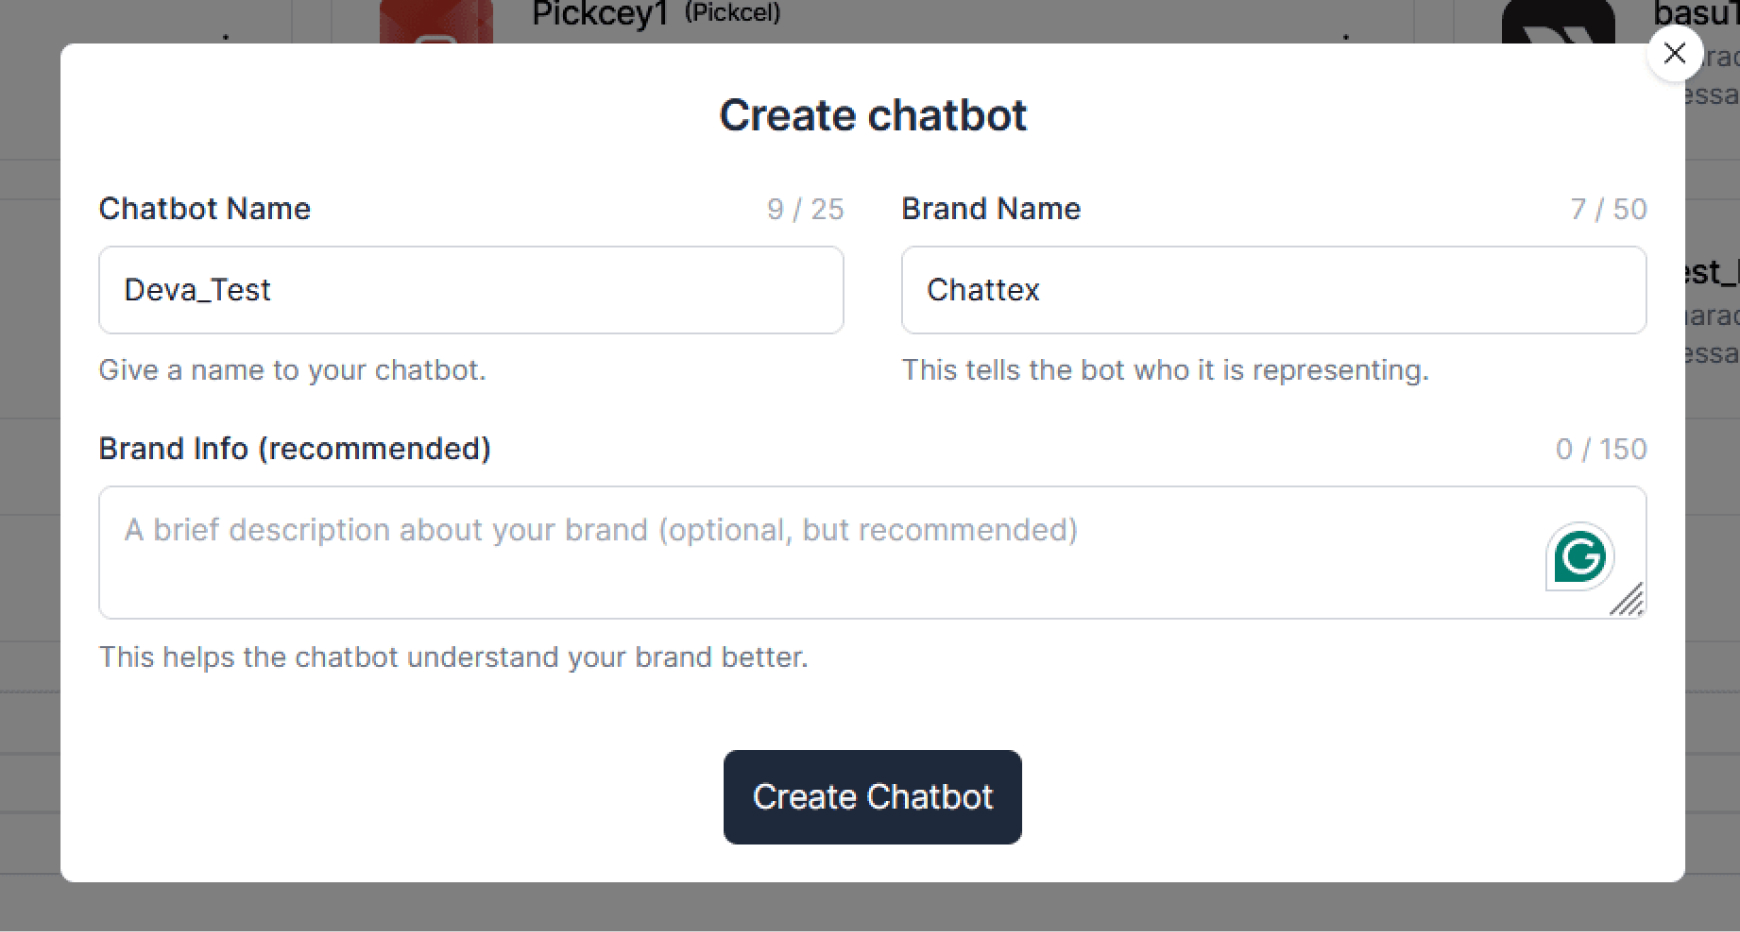
3. Your chatbot is now created.
Train your chatbot
To ensure that your chatbot answers the user's queries appropriately, you must train it with a specific knowledge base:
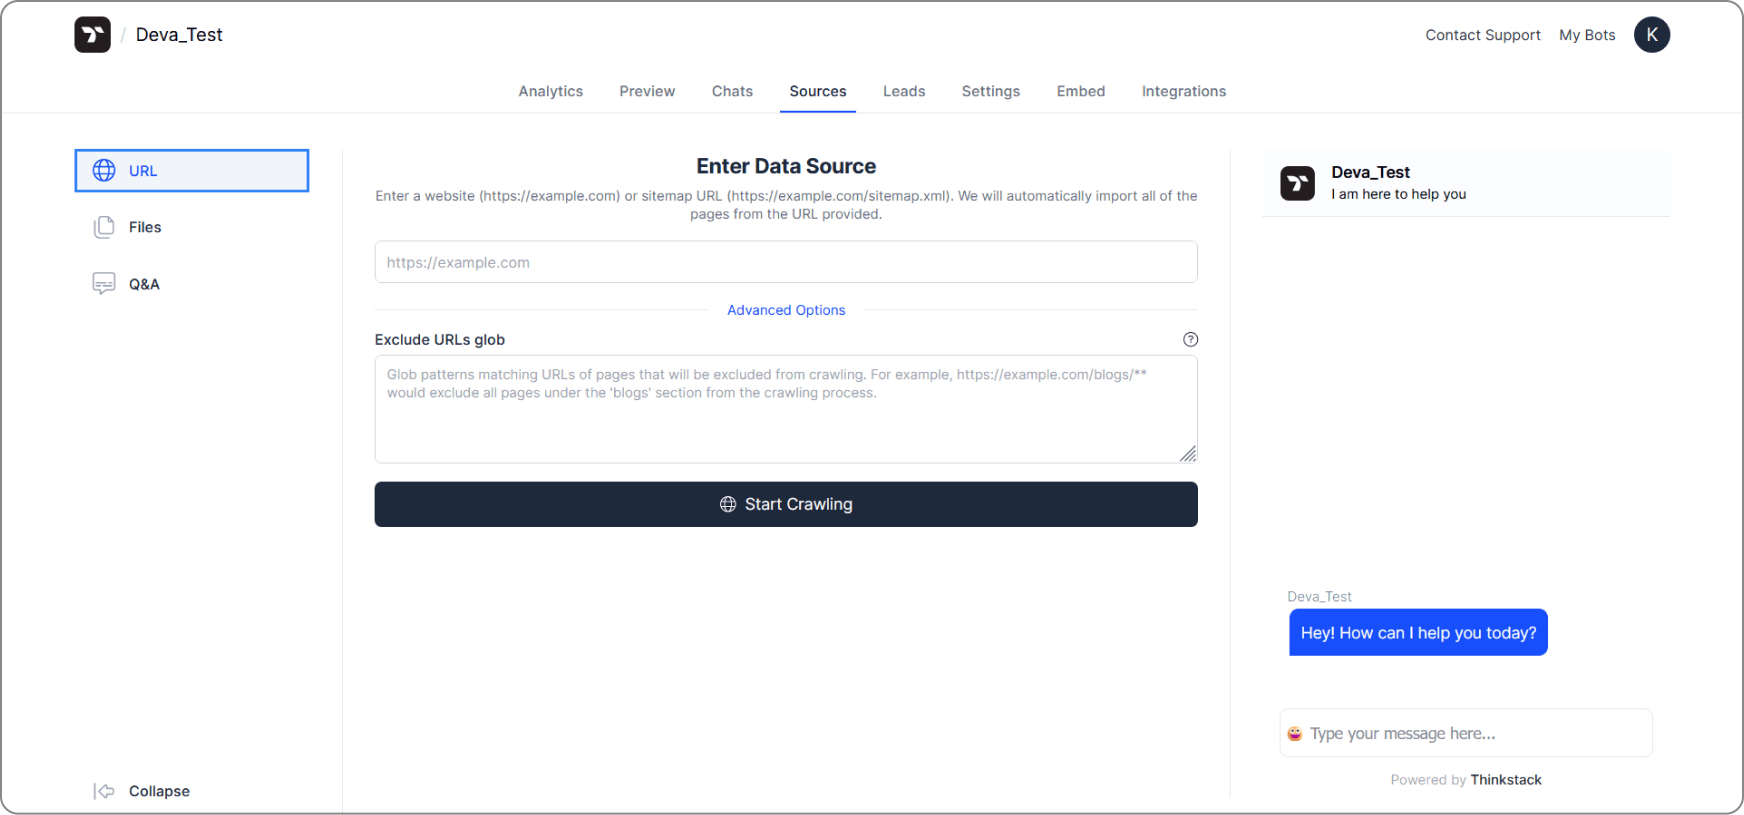
URL as a source
Add an external URL as a source of data for your chatbot to train on its content.
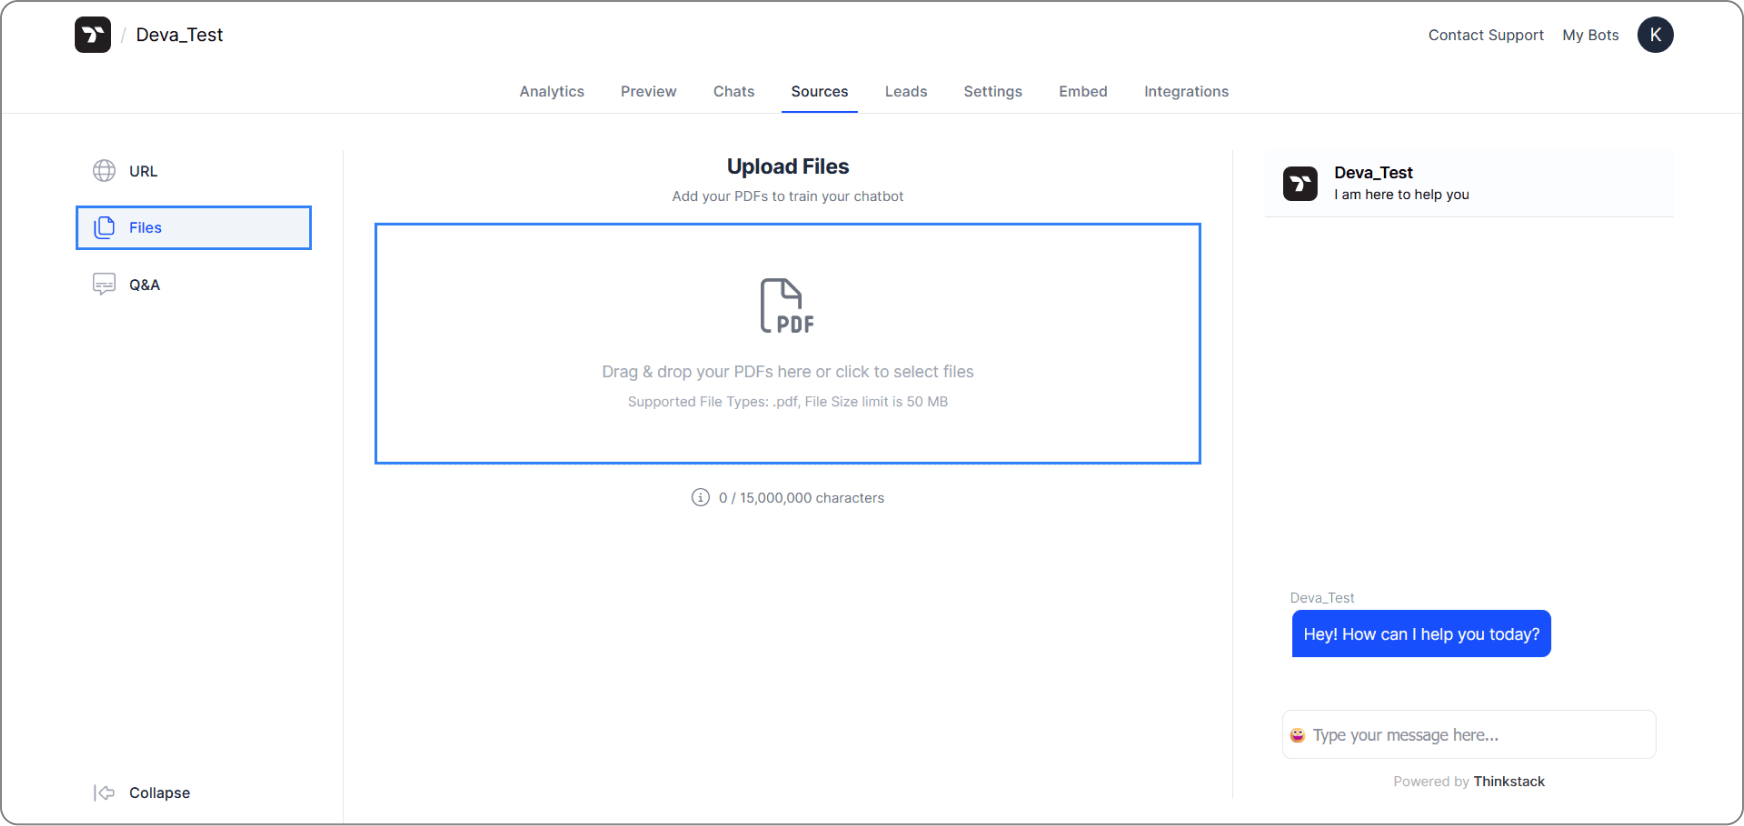
Files as a source
Upload an external PDF file to the given field to train your chatbot on its content.
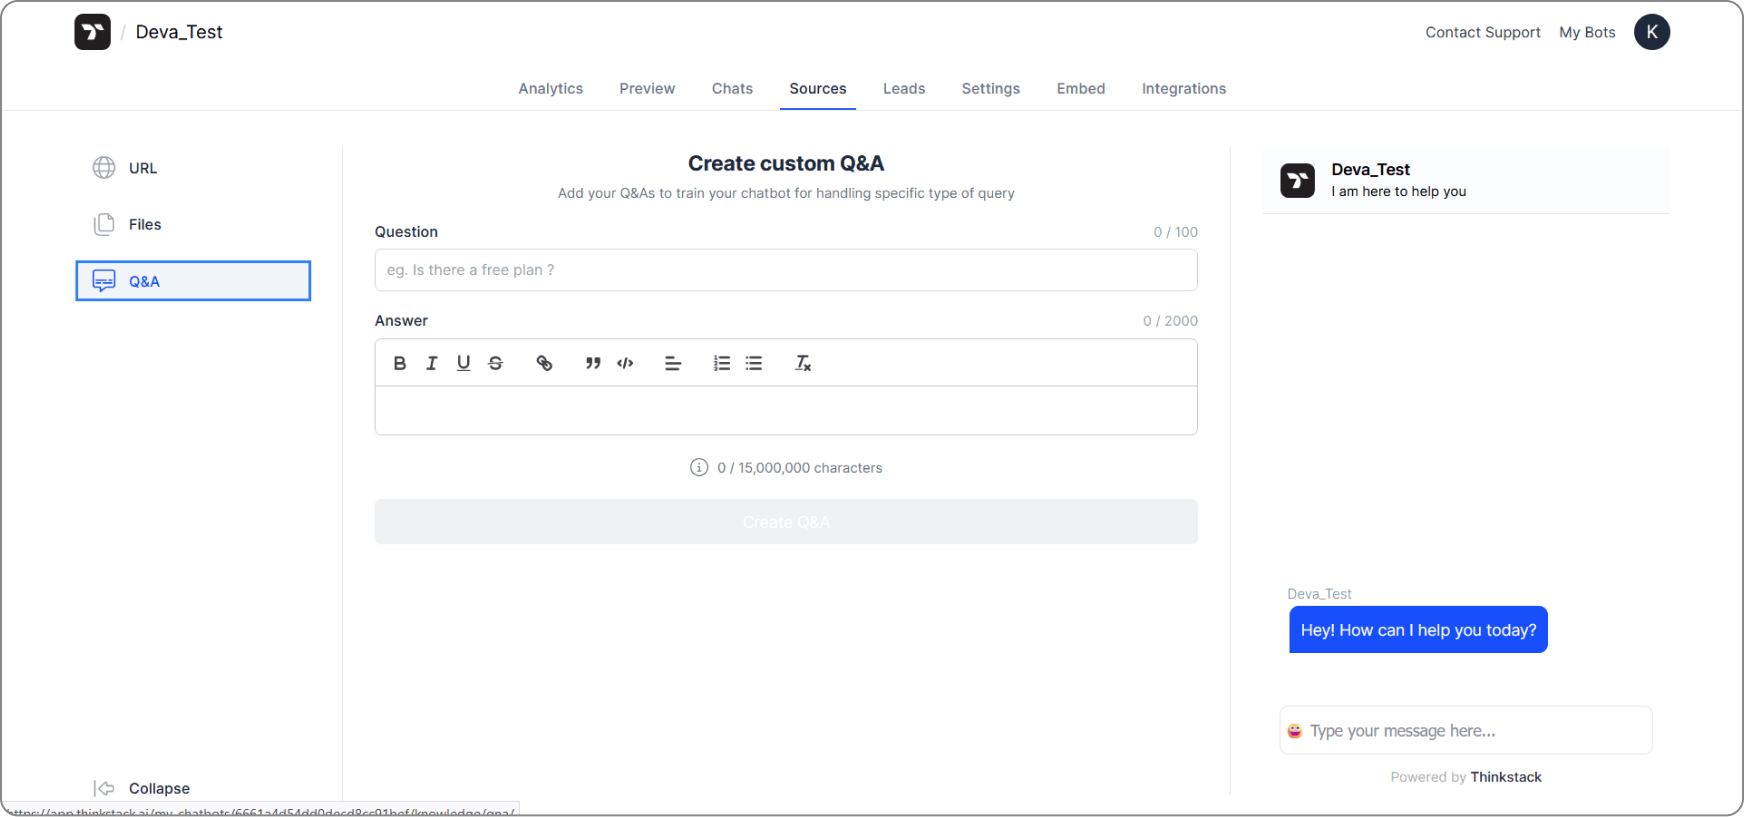
Q&A as a source
Add a custom query in the form of a Q&A in the fields provided to train your chatbot to answer specific types of queries.
Customize your chatbot
Your chatbot can be customized to deliver a more personal experience to your users. You can change its appearance, add welcome messages, enable leads tracking and much more.
To customize your chatbot, go to Settings within the console.
General
Under Settings, click on General. You can customize the chatbot's Name, the chatbot Subheading, or the Message Input Placeholder.
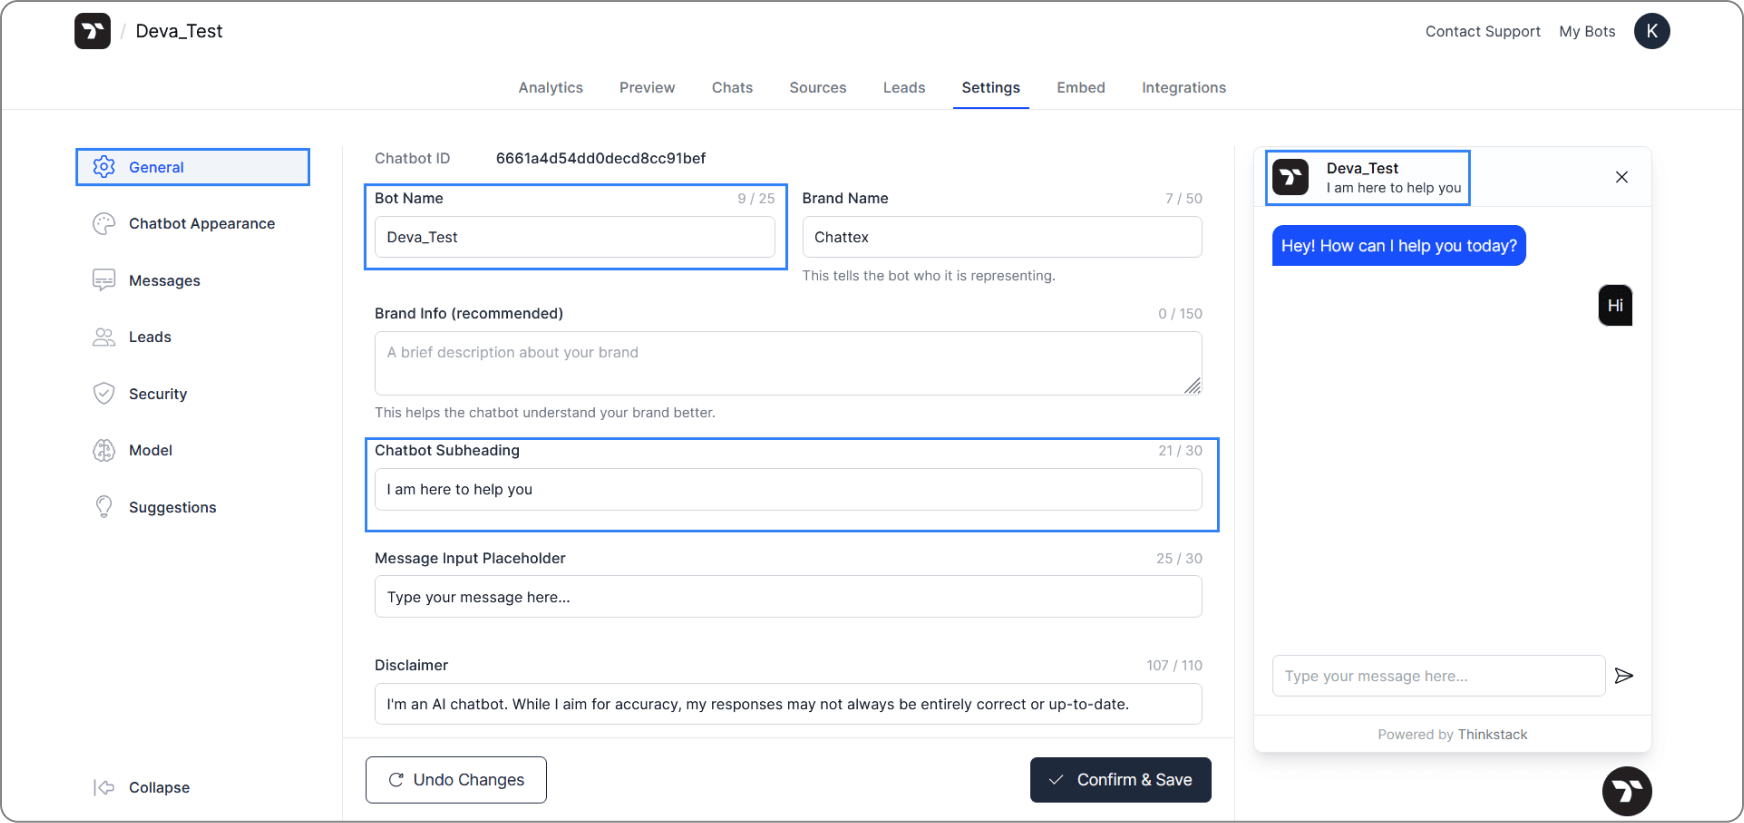
Ensure that you click Confirm & Save to save the changes made.
Chatbot Appearance
Under Settings, click on Chatbot Appearance. Here, you can customize your bot to include a Bot Logo, a background colour for the Header and the colour of your user's
Text Messages
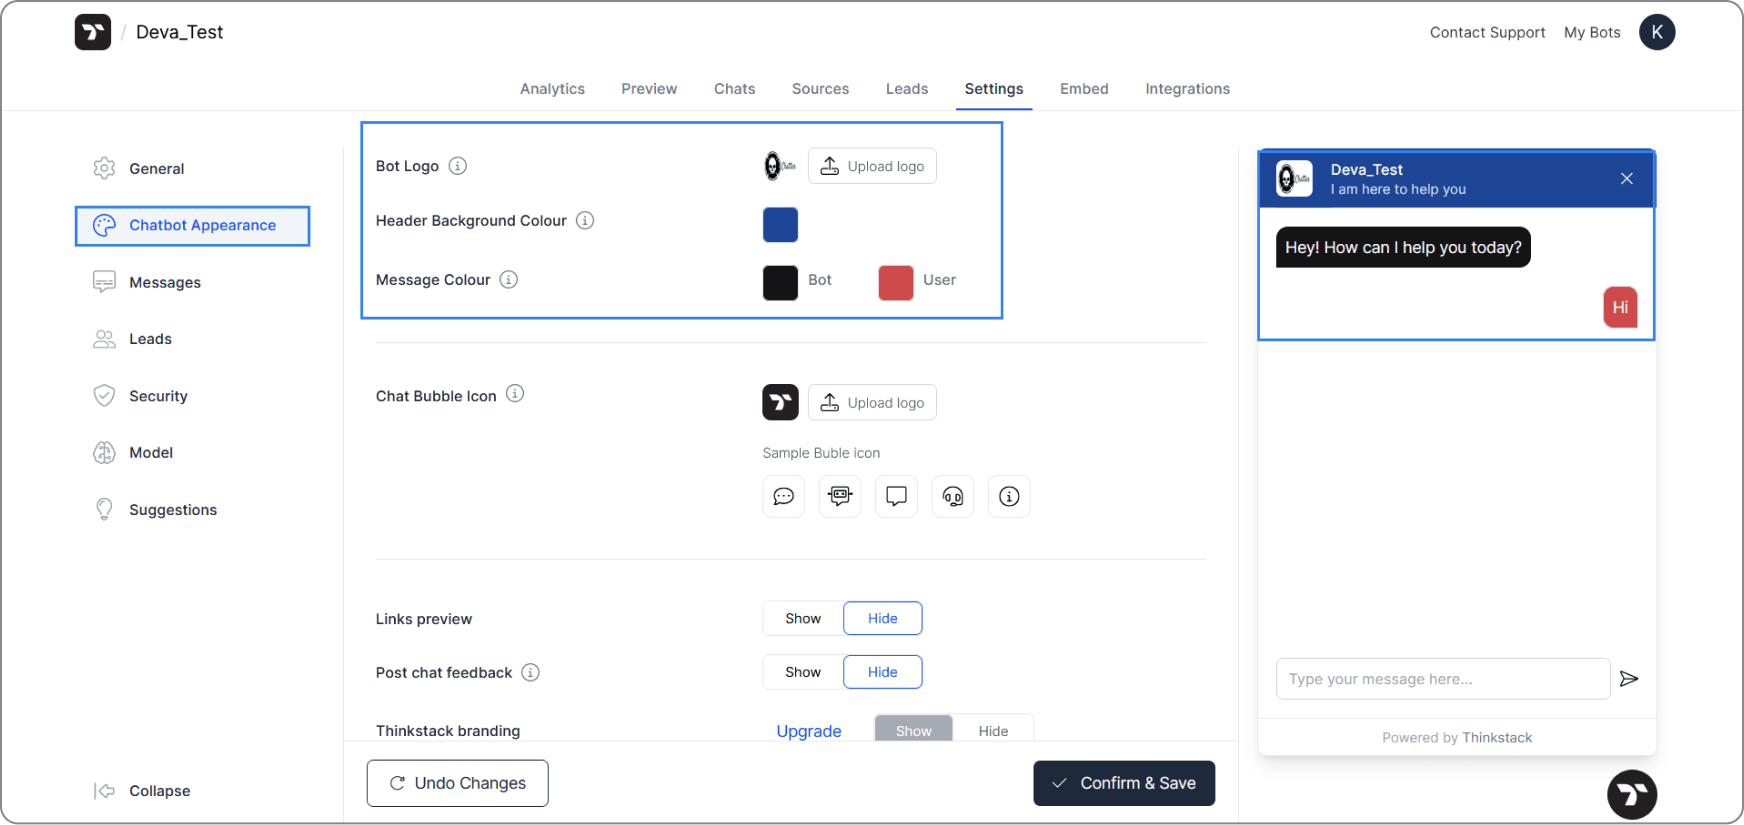
Ensure that you click Confirm & Save to save the changes made.
Messages
Under Settings, click on Messages. Here, you can customize your bot's Welcome Message, Inactivity Message and other messages geared towards prompting your user and understanding their queries better
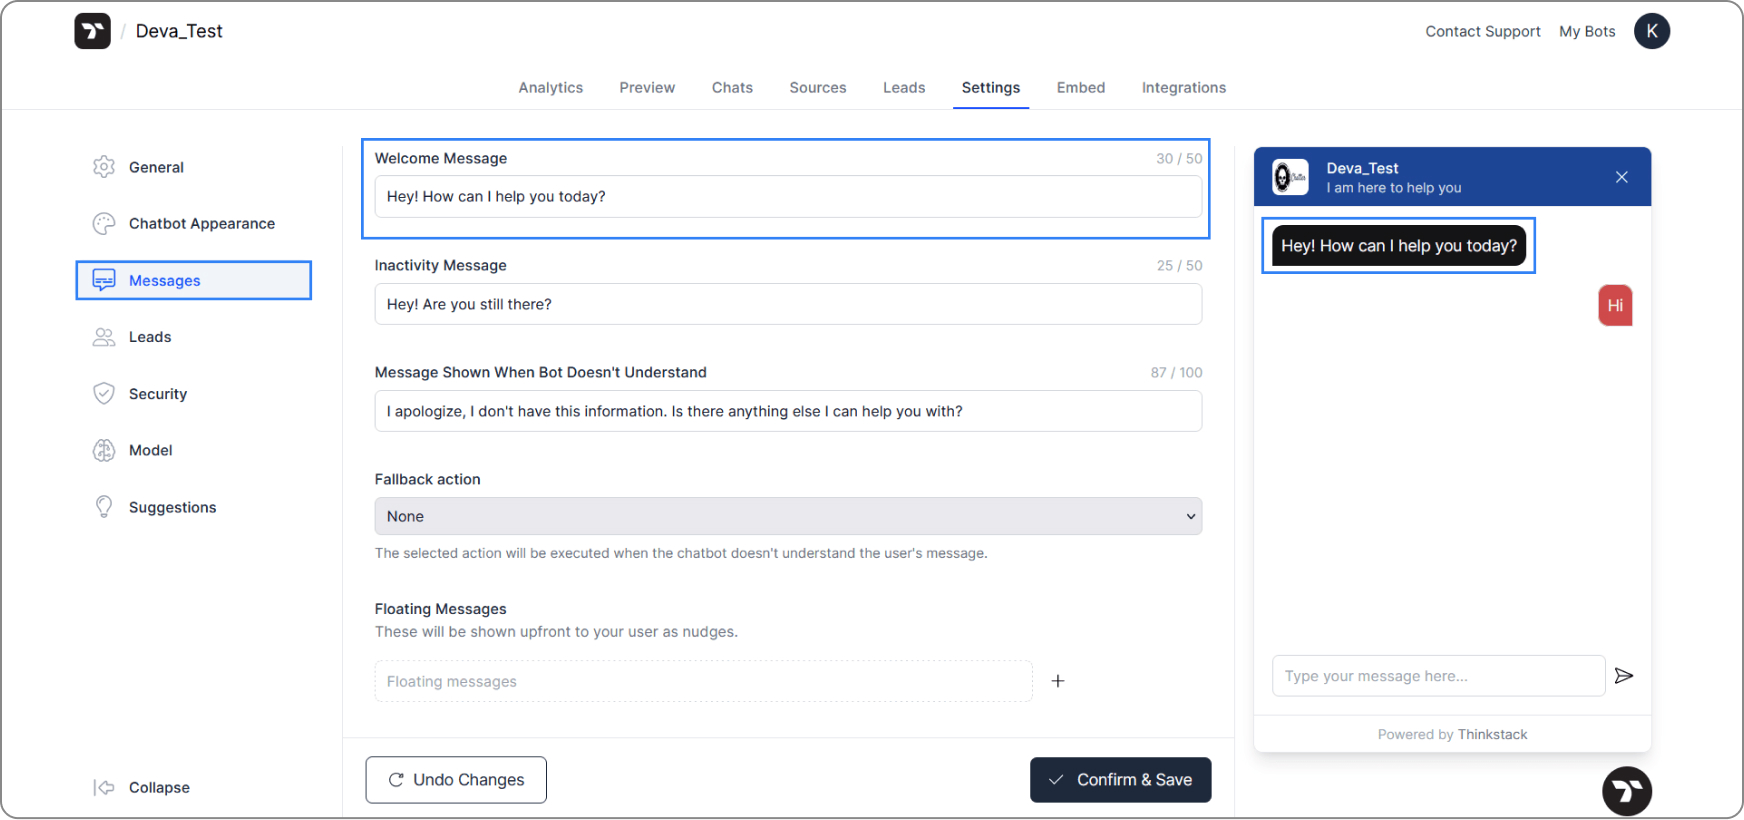
Ensure that you click Confirm & Save to save the changes made.
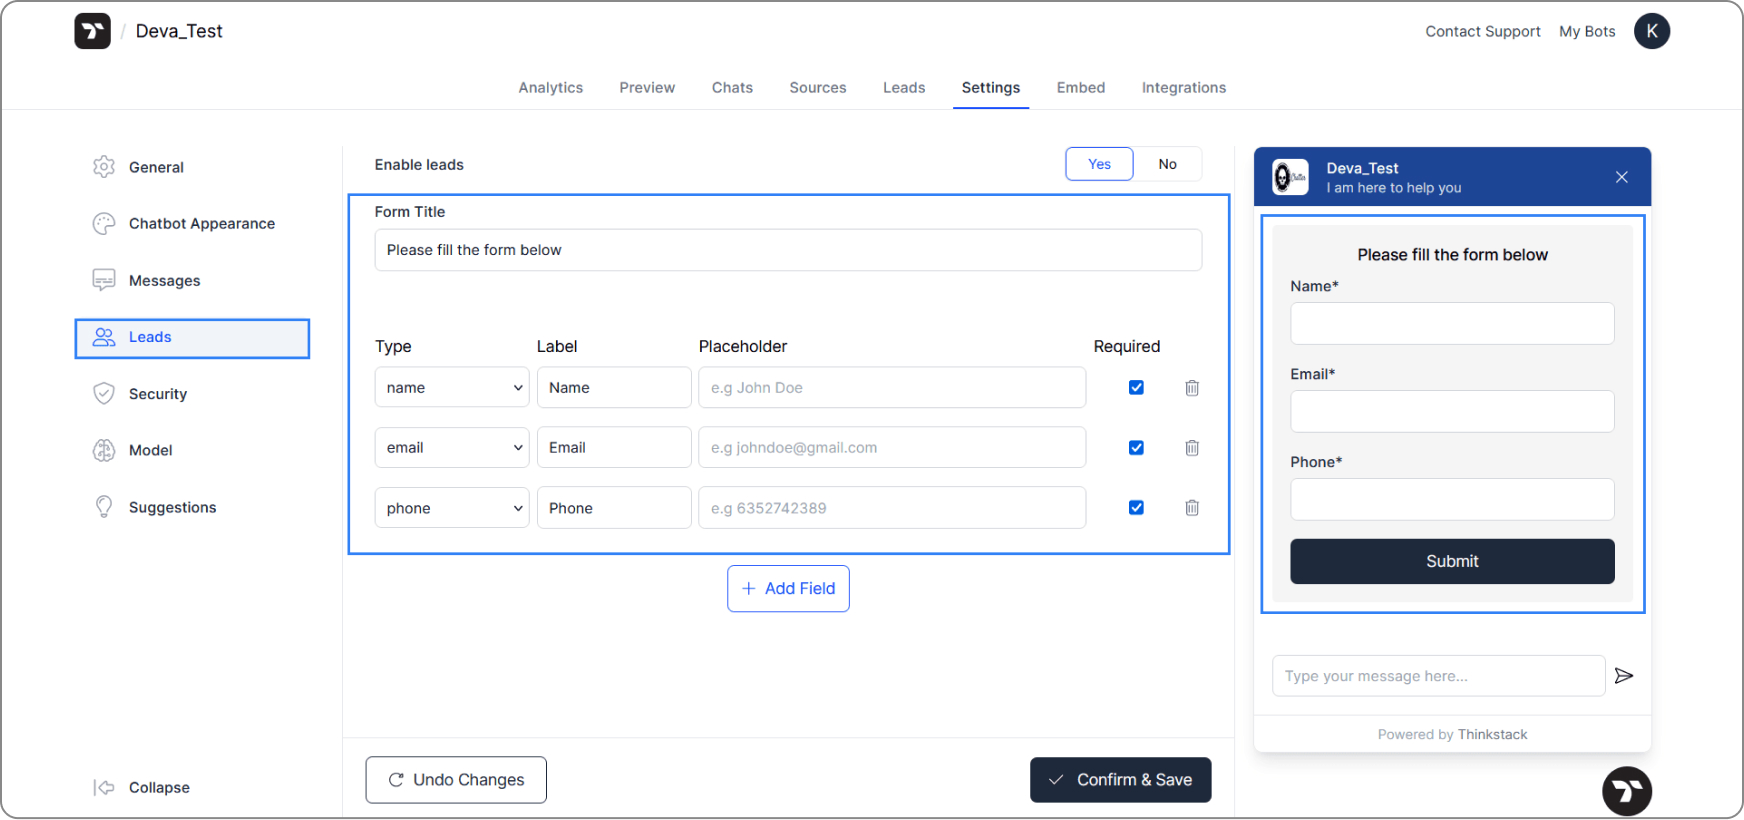
Leads
Under Settings Settings, click on Leads. Here, you can enable your chatbot to acquire leads of your users, such as Name, Email ID, and other contact information.
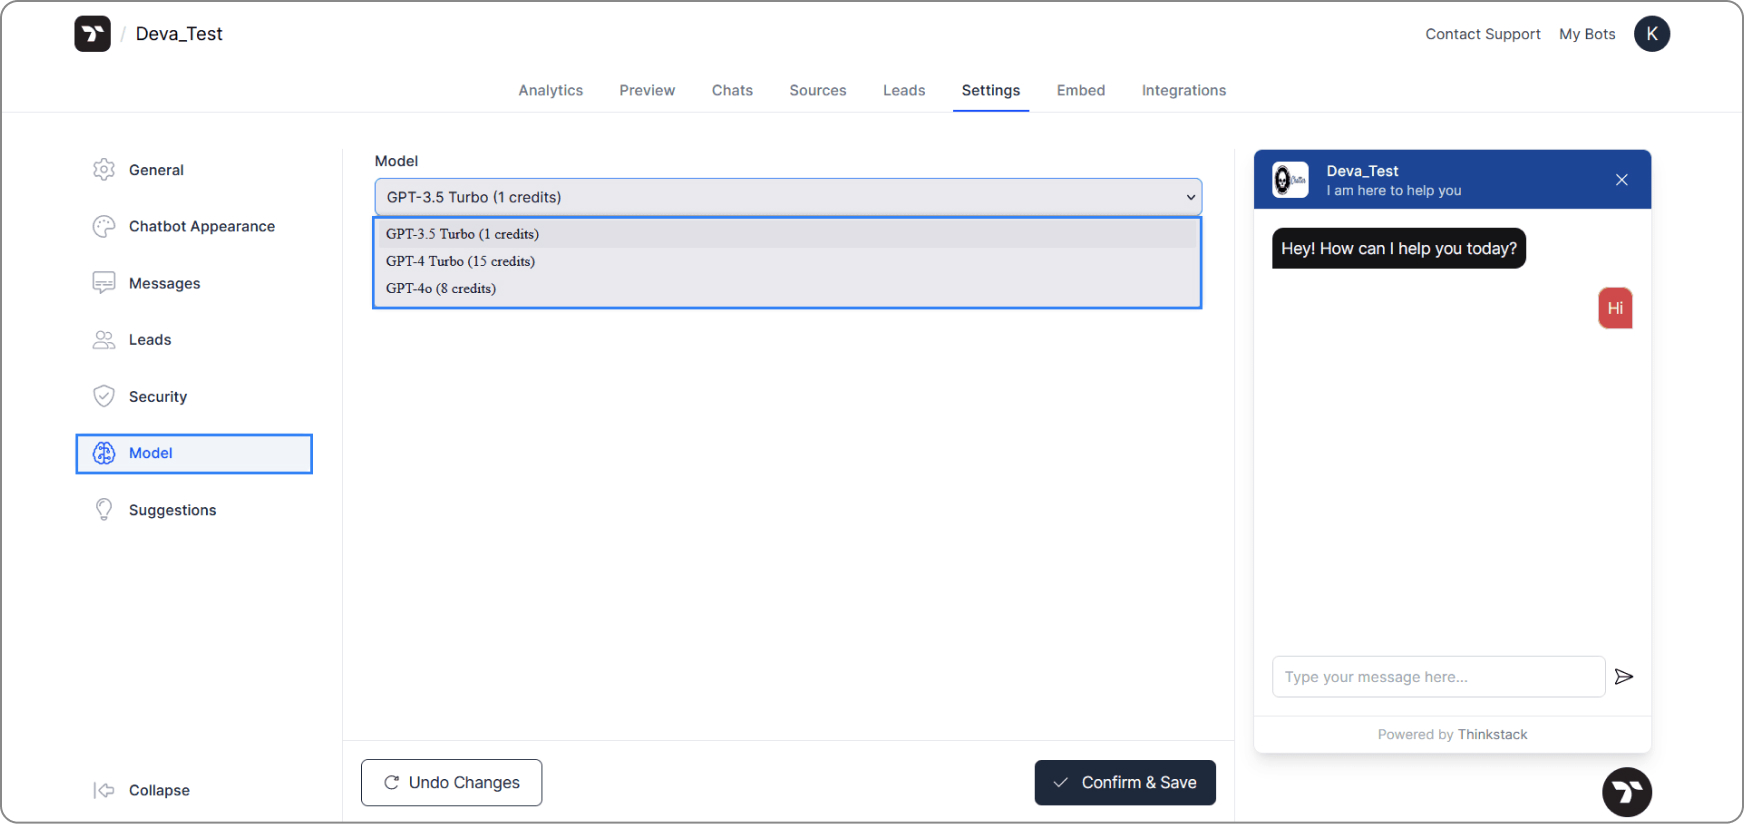
Model
Under Settings, click on Model. Here, you can choose which GPT model you want your chatbot to run on. GPT-4 Turbo may take longer to generate responses & consume 15 message credits, compared to 1 message credit for GPT-3.5 Turbo.
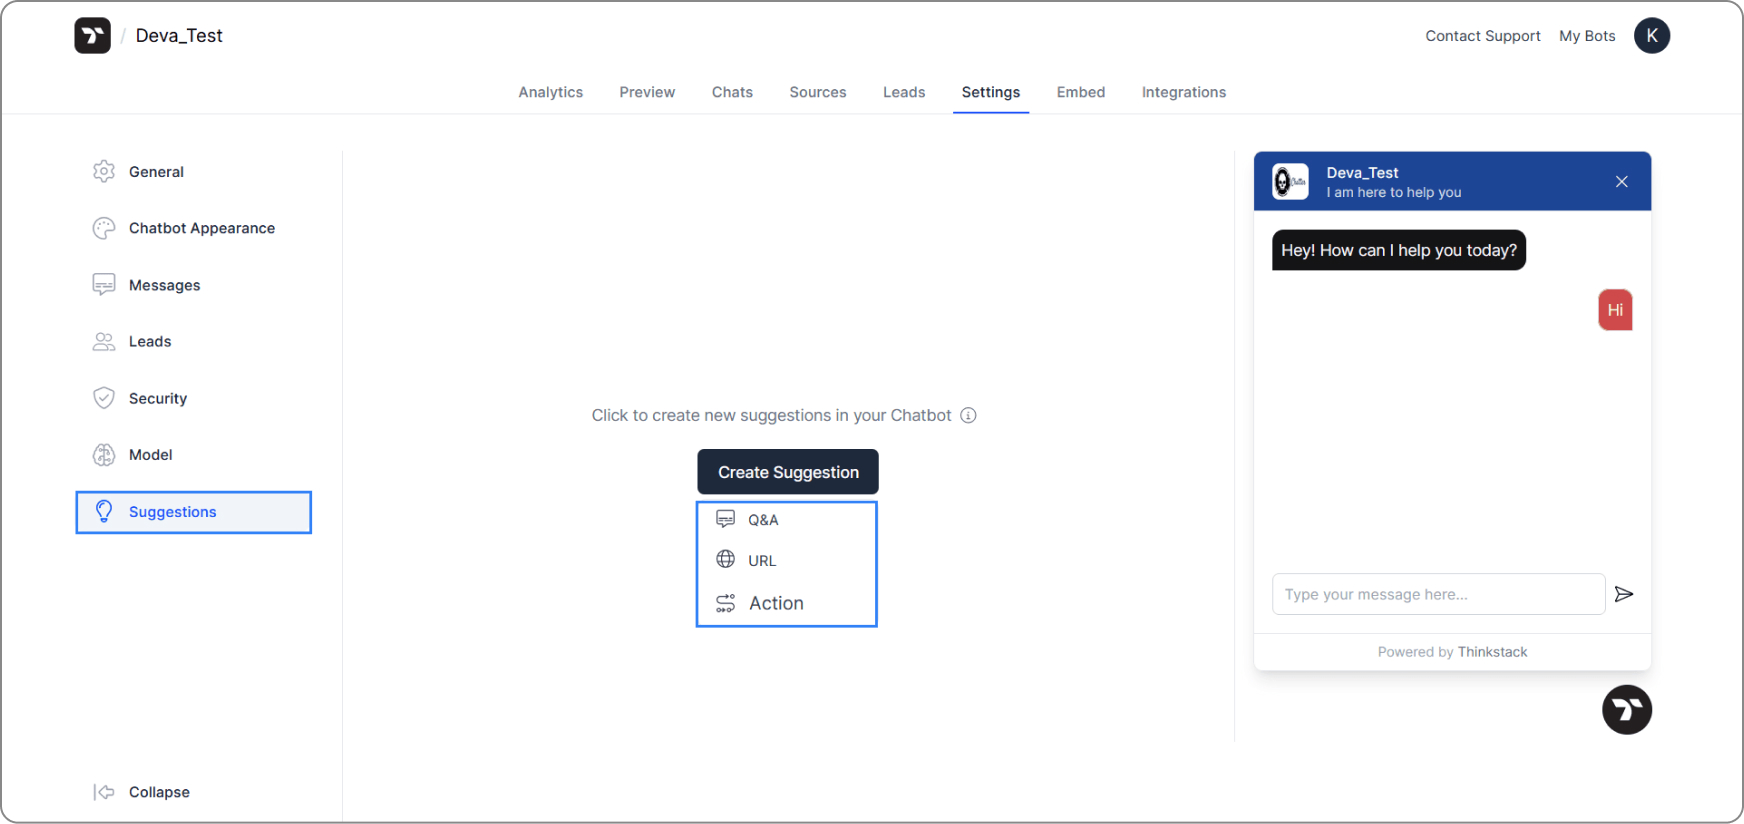
Suggestions
Under Settings, click on Suggestions. Suggestion settings allow you to design intuitive conversation flows within your chatbot. You can do this by creating either Q&A style prompts, URL prompts, or Action based prompts for your user.
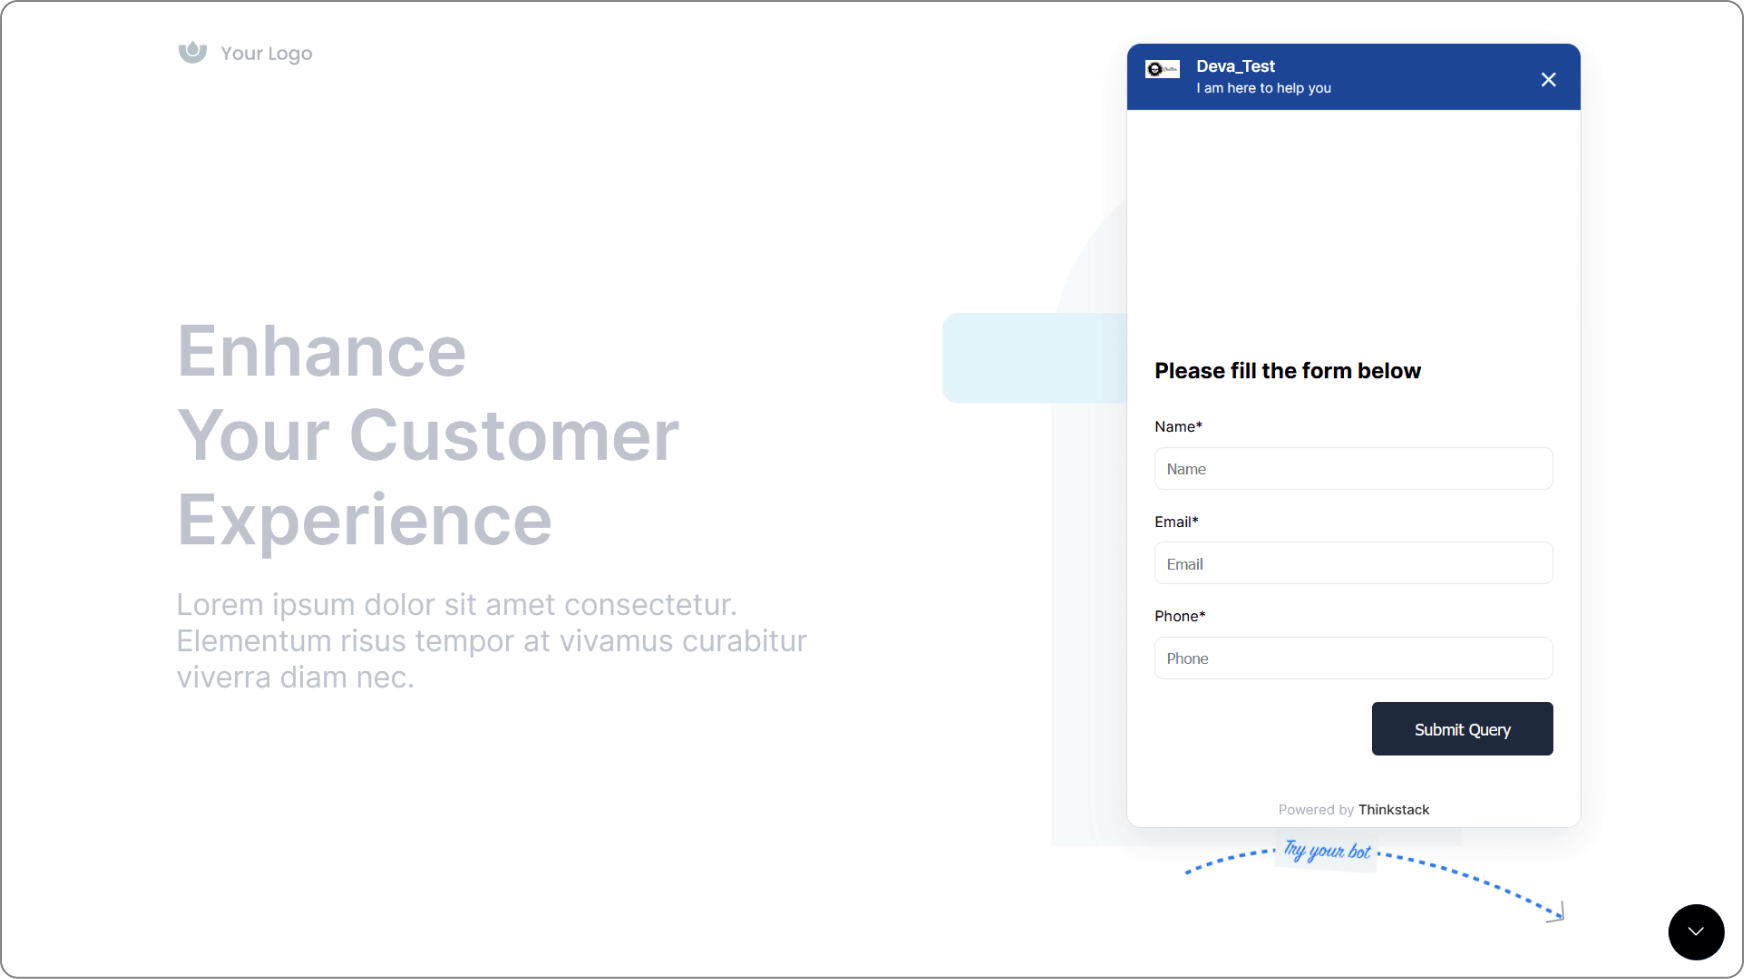
Test your chatbot
To test all the saved changes you can preview your chatbot under Preview in the chatbot's toolbar
Note:Ensure that your chatbot is trained to answer the question(s) you're posting, and that the answer can be found on all the files and/or links you've uploaded.
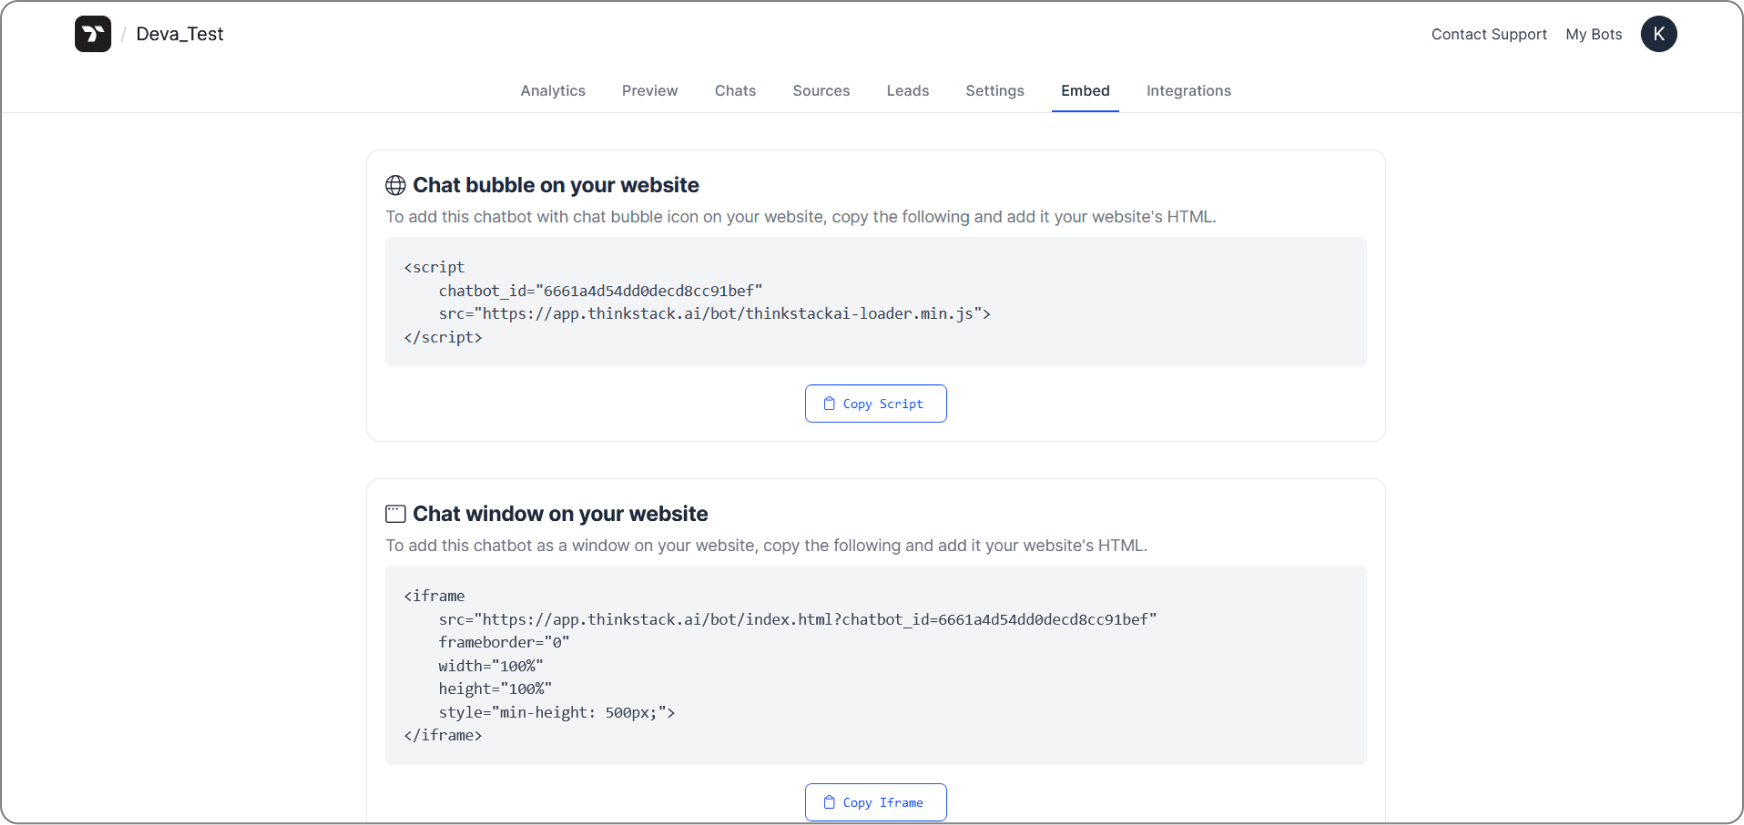
Embed on your website
In your chatbot's toolbar, click on Embed. Here, you can copy the script(s) and add it to your website's HTML to add the chatbot as a chat bubble or as a chat window. You can also add the chatbot to your mobile apps.