Build Your AI Chatbot: Quick Guide
This guide offers a quick, beginner-friendly approach to creating an AI chatbot, covering the basics to help you set up and embed it into your website or app effortlessly.
Create your chatbot#
1) Login to your Thinkstack account.
2) Enter the Chatbot Name. Click Create Chabot.

Your chatbot🤖 is now created 🎉
Train your chatbot#
To ensure that your chatbot answers the user's queries appropriately, you must train it with a specific knowledge base:
URL as a source#
Add an external URL to provide a data source for training your chatbot.
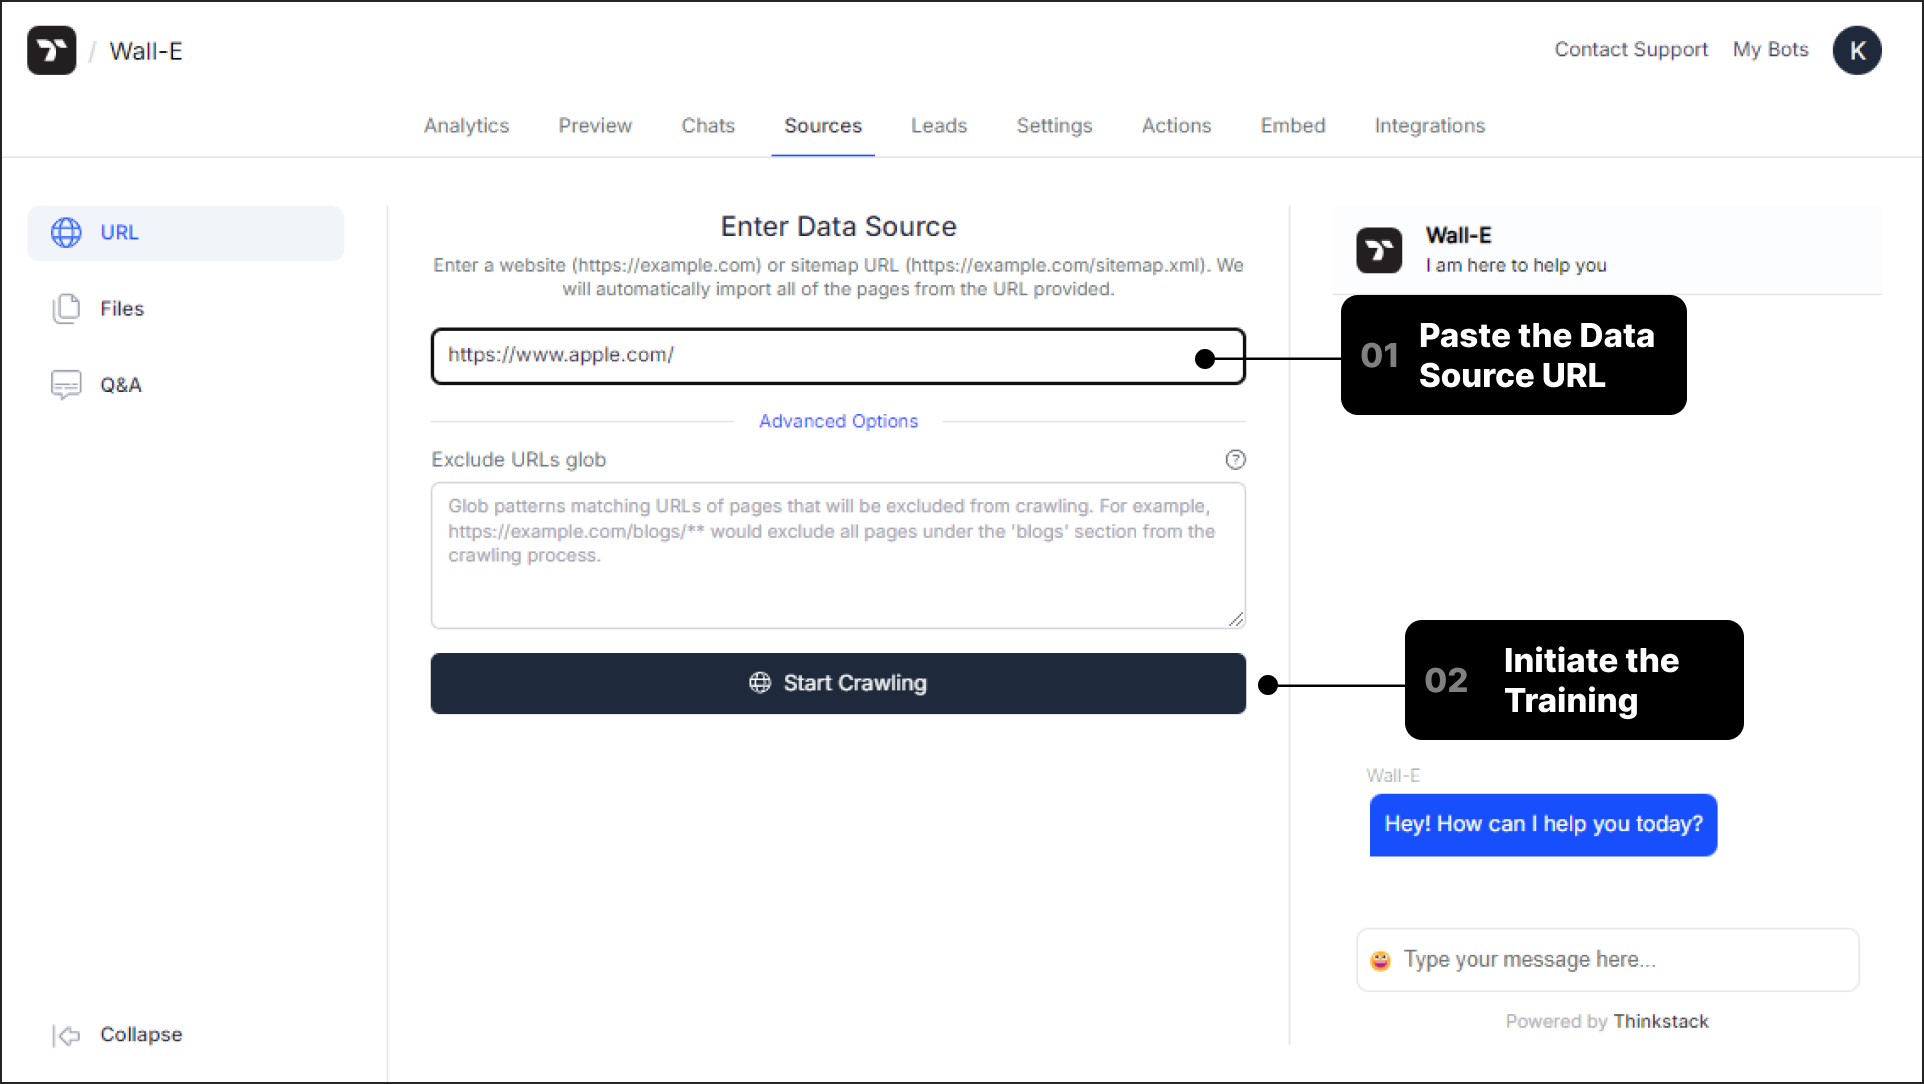
For detailed steps on how to train your chatbot using URLs, refer to the section: Training Your Chatbot Using URLs.
Files as a source#
Upload an external PDF file to the designated field to train your chatbot with its content. Files such as support documents, product knowledge bases, or notes can serve as valuable data sources for training.
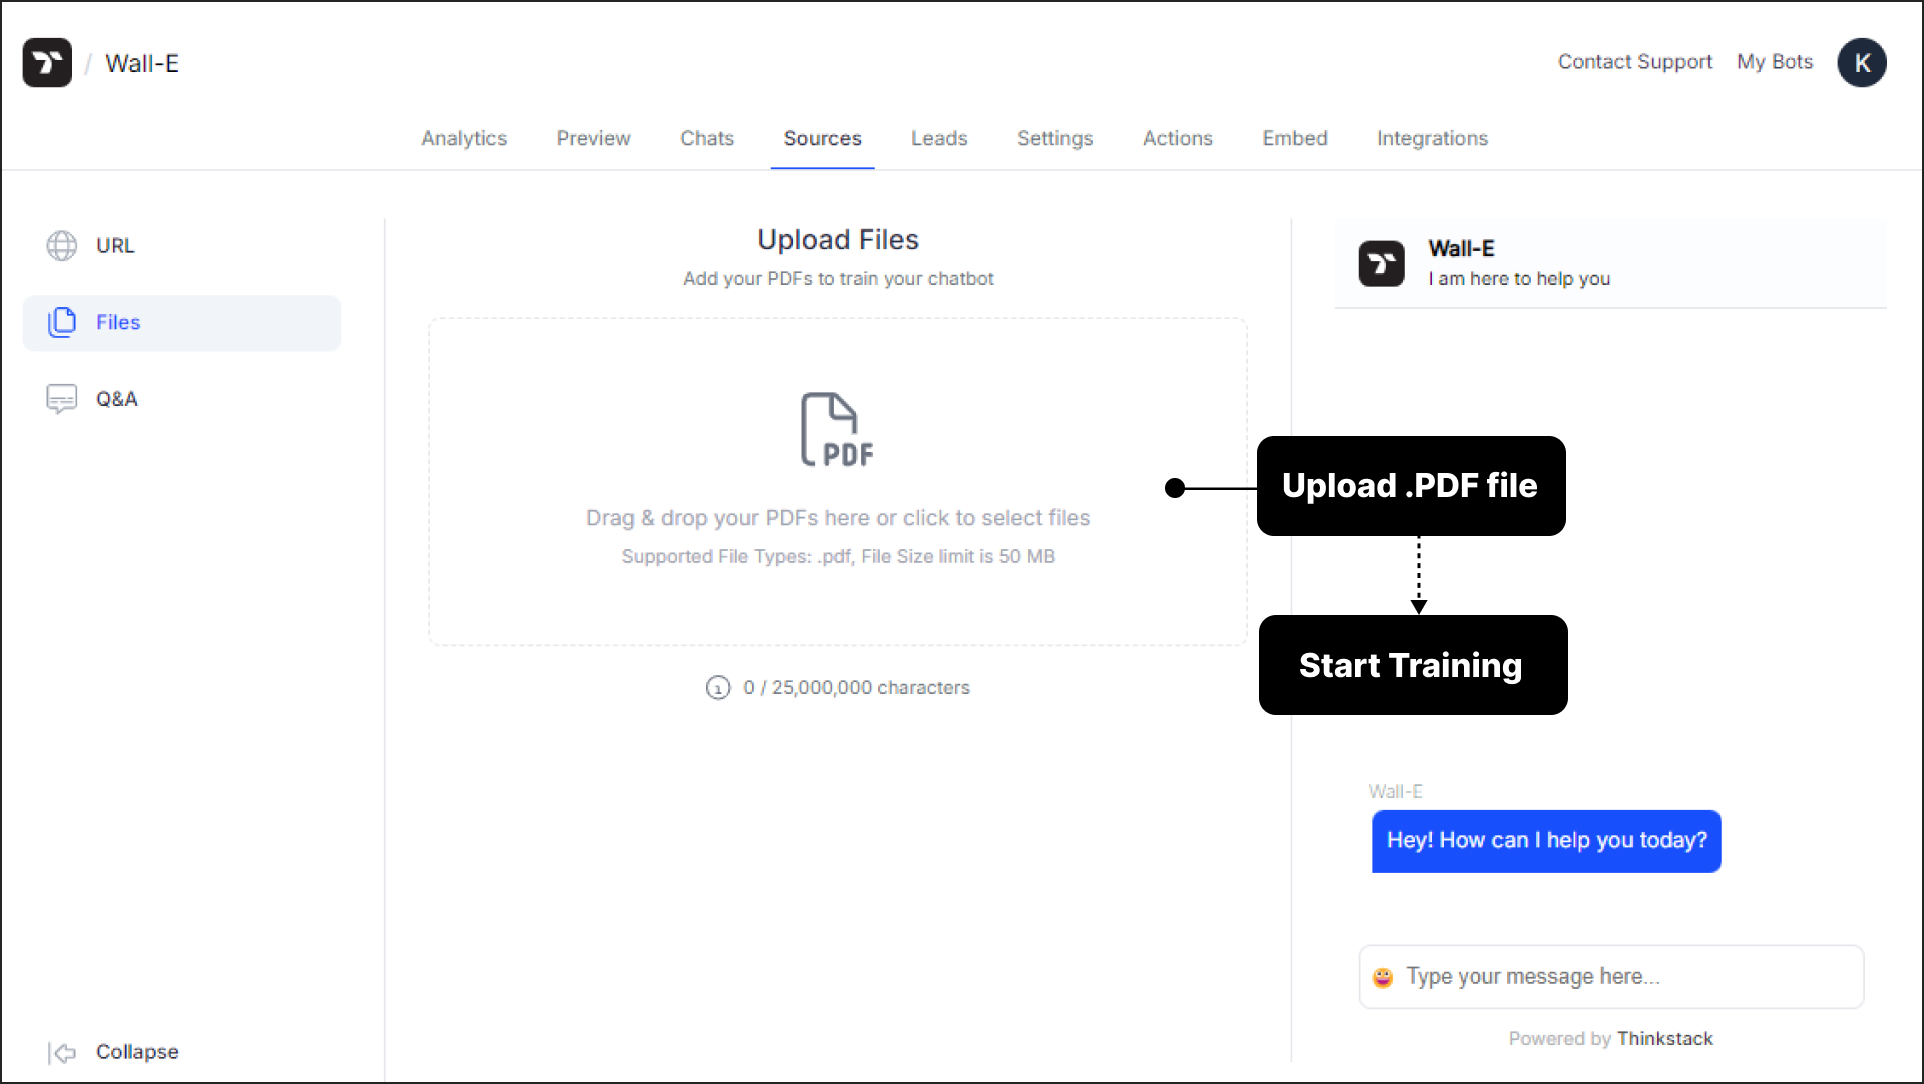
For detailed steps on how to train your chatbot using files, refer to the section: Training Your Chatbot Using Files
Q&A as a source#
Add a custom query in the form of a Q&A in the fields provided to train your chatbot to answer specific types of queries.
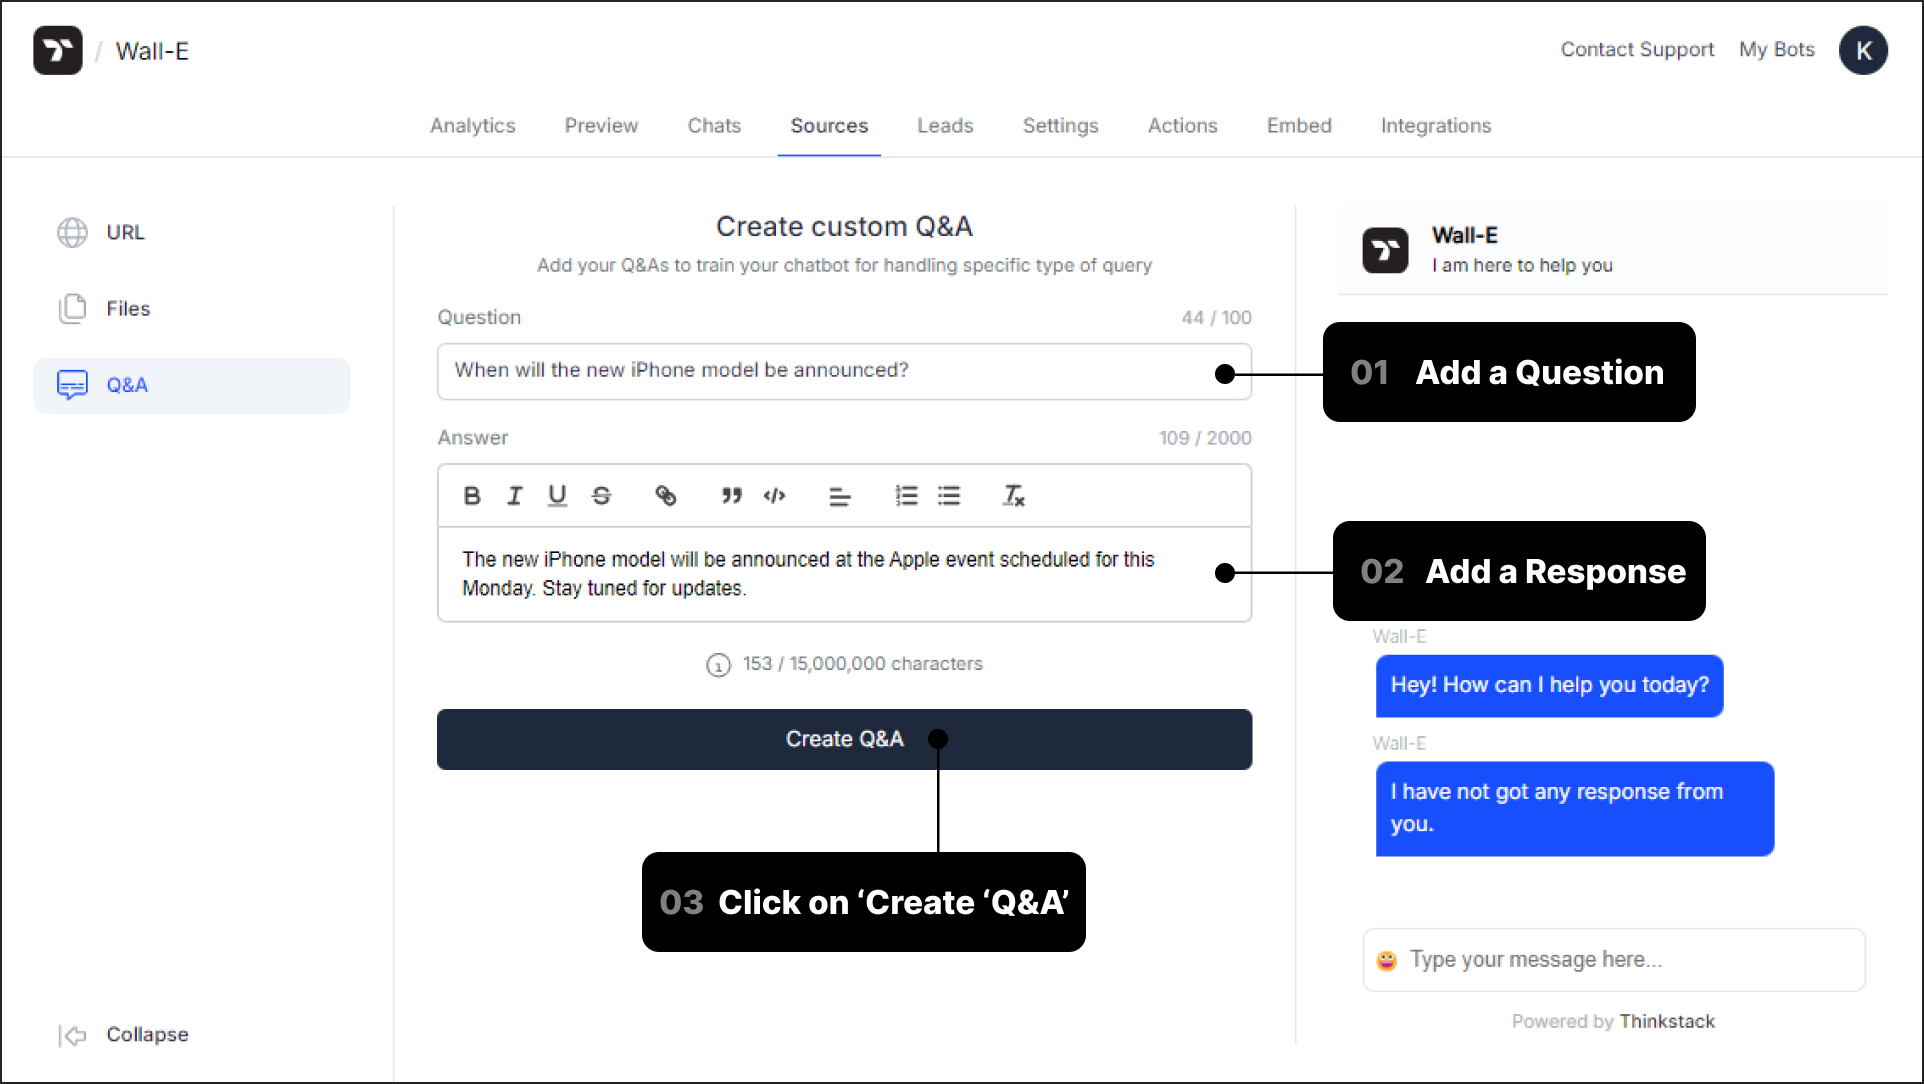
For detailed steps on how to train your chatbot using Q&A, refer to the section: Training Your Chatbot Using Q&A
Customize your chatbot#
Your chatbot can be customized to deliver a more personal experience to your users. You can change its appearance, add welcome messages, enable leads tracking and much more.
To customize your chatbot, go to Settings within the console.
General#
Under Settings, click on General. You can customize the chatbot's Name, the chatbot Subheading, or the Message Input Placeholder.
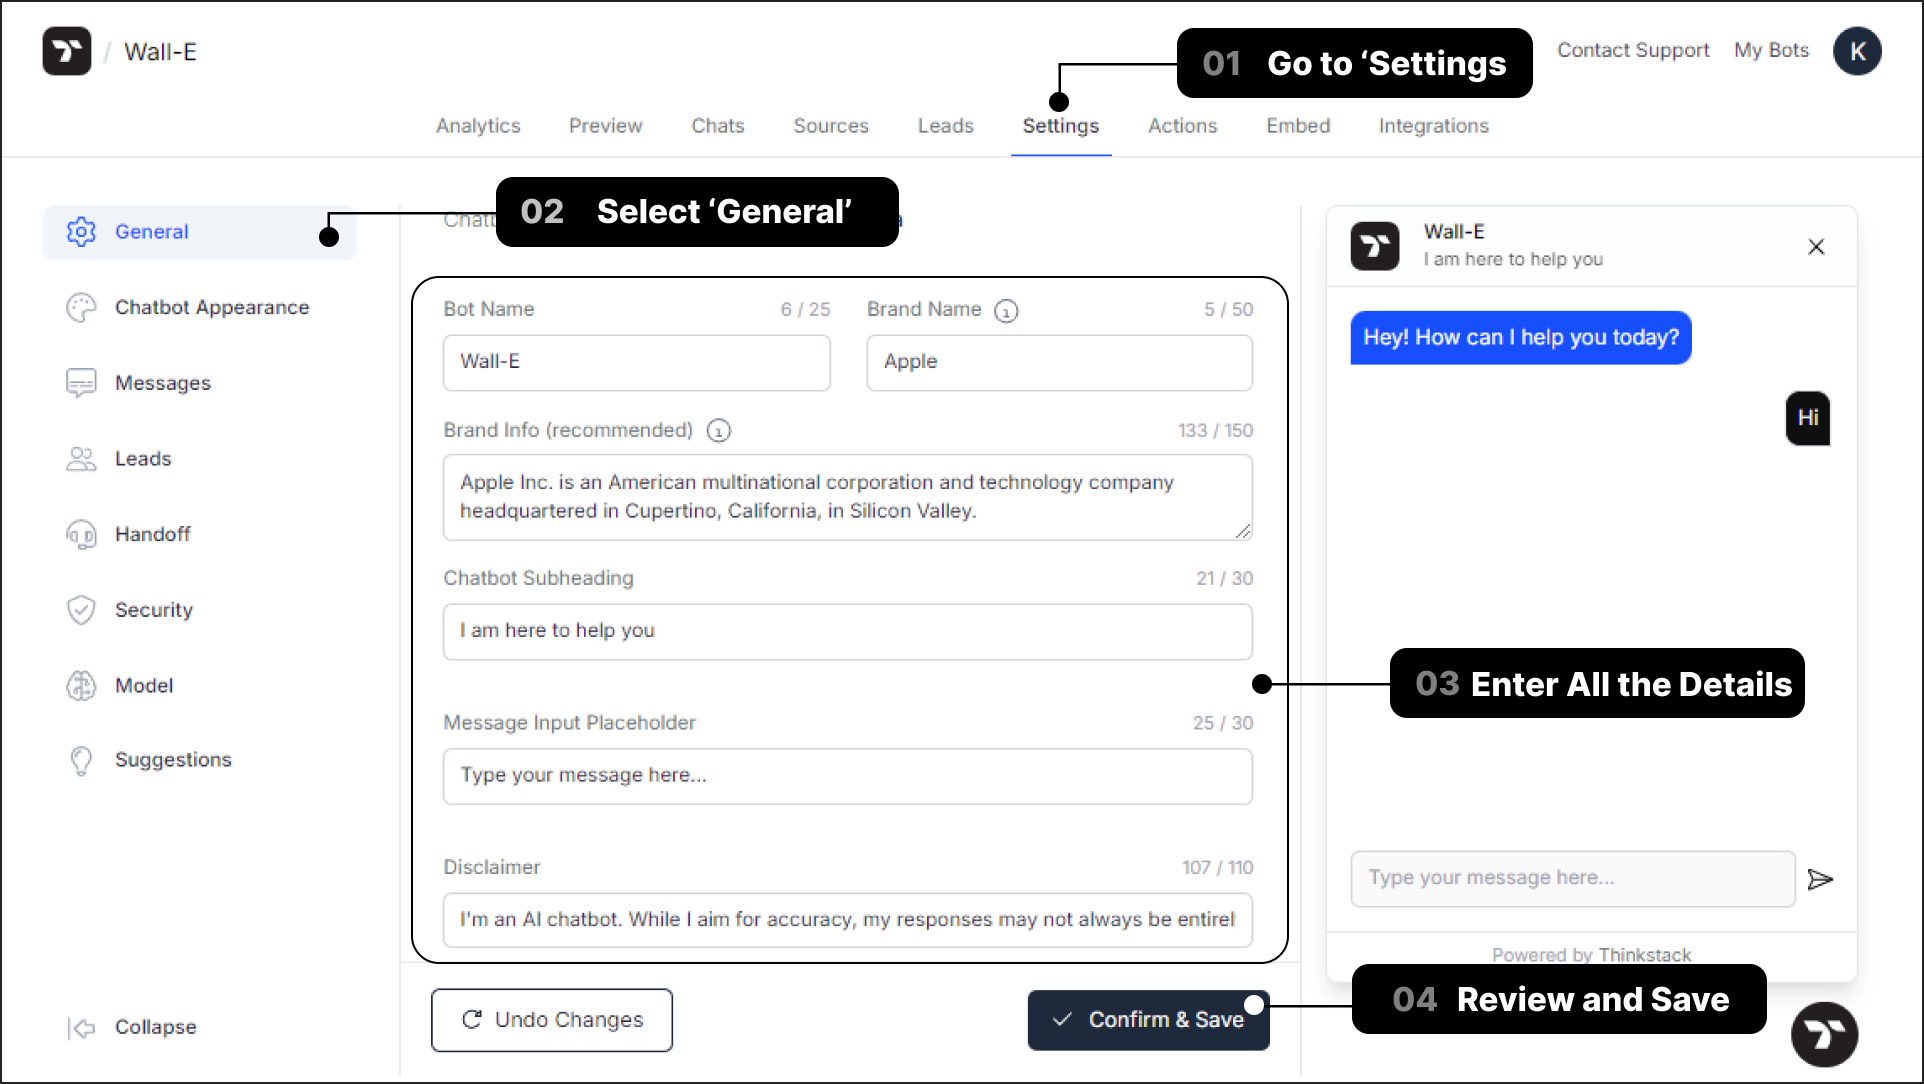
Ensure that you click Confirm & Save to save the changes made.
Chatbot Appearance#
Under Settings, click on Chatbot Appearance. Here, you can customize the appearance of your chatbot by adding a Bot Logo, selecting a background color for the header, and choosing the color of the chat bubbles used by both the bot and the user.
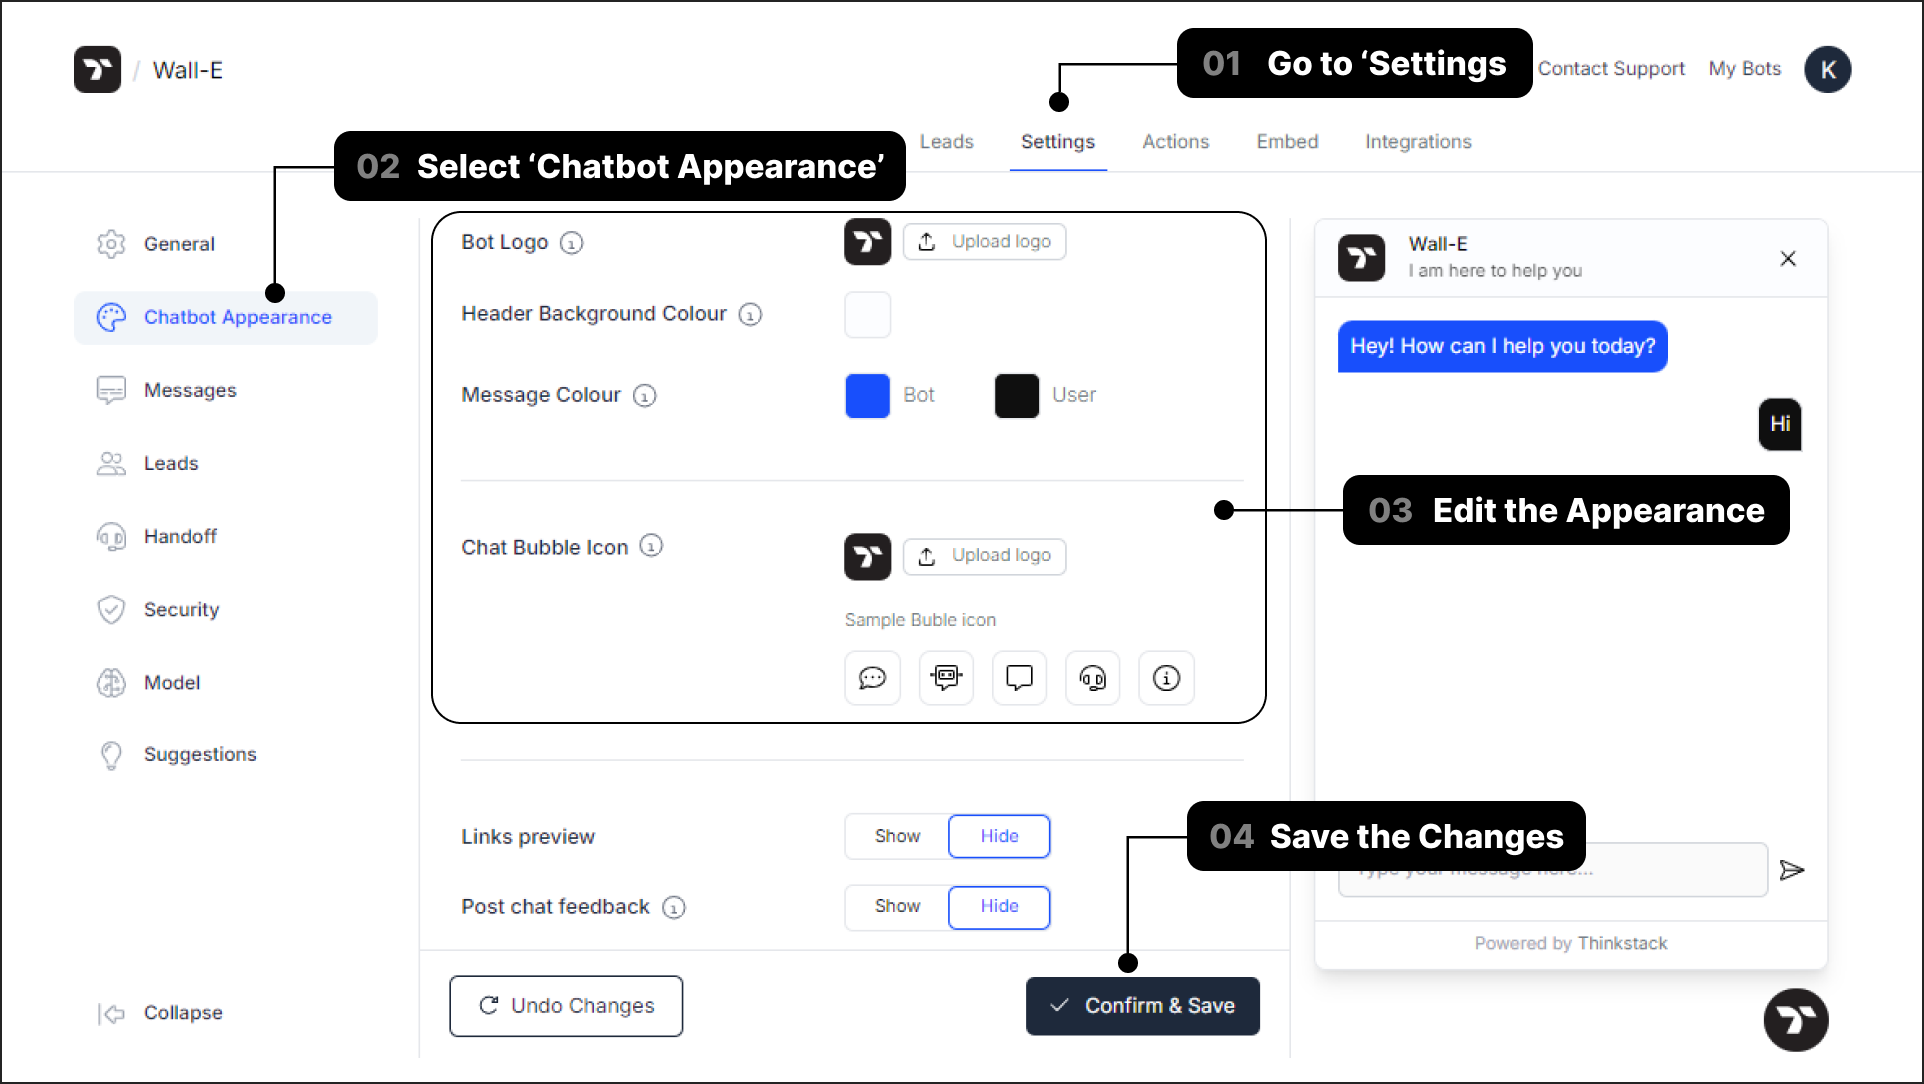
For detailed steps on how to customize your chatbot appearance, refer to the section: Customizing Chatbot Appearance
Messages#
Under Settings, click on Messages. Here, you can customize your bot's Welcome Message, Inactivity Message and other messages geared towards prompting your user and understanding their queries better
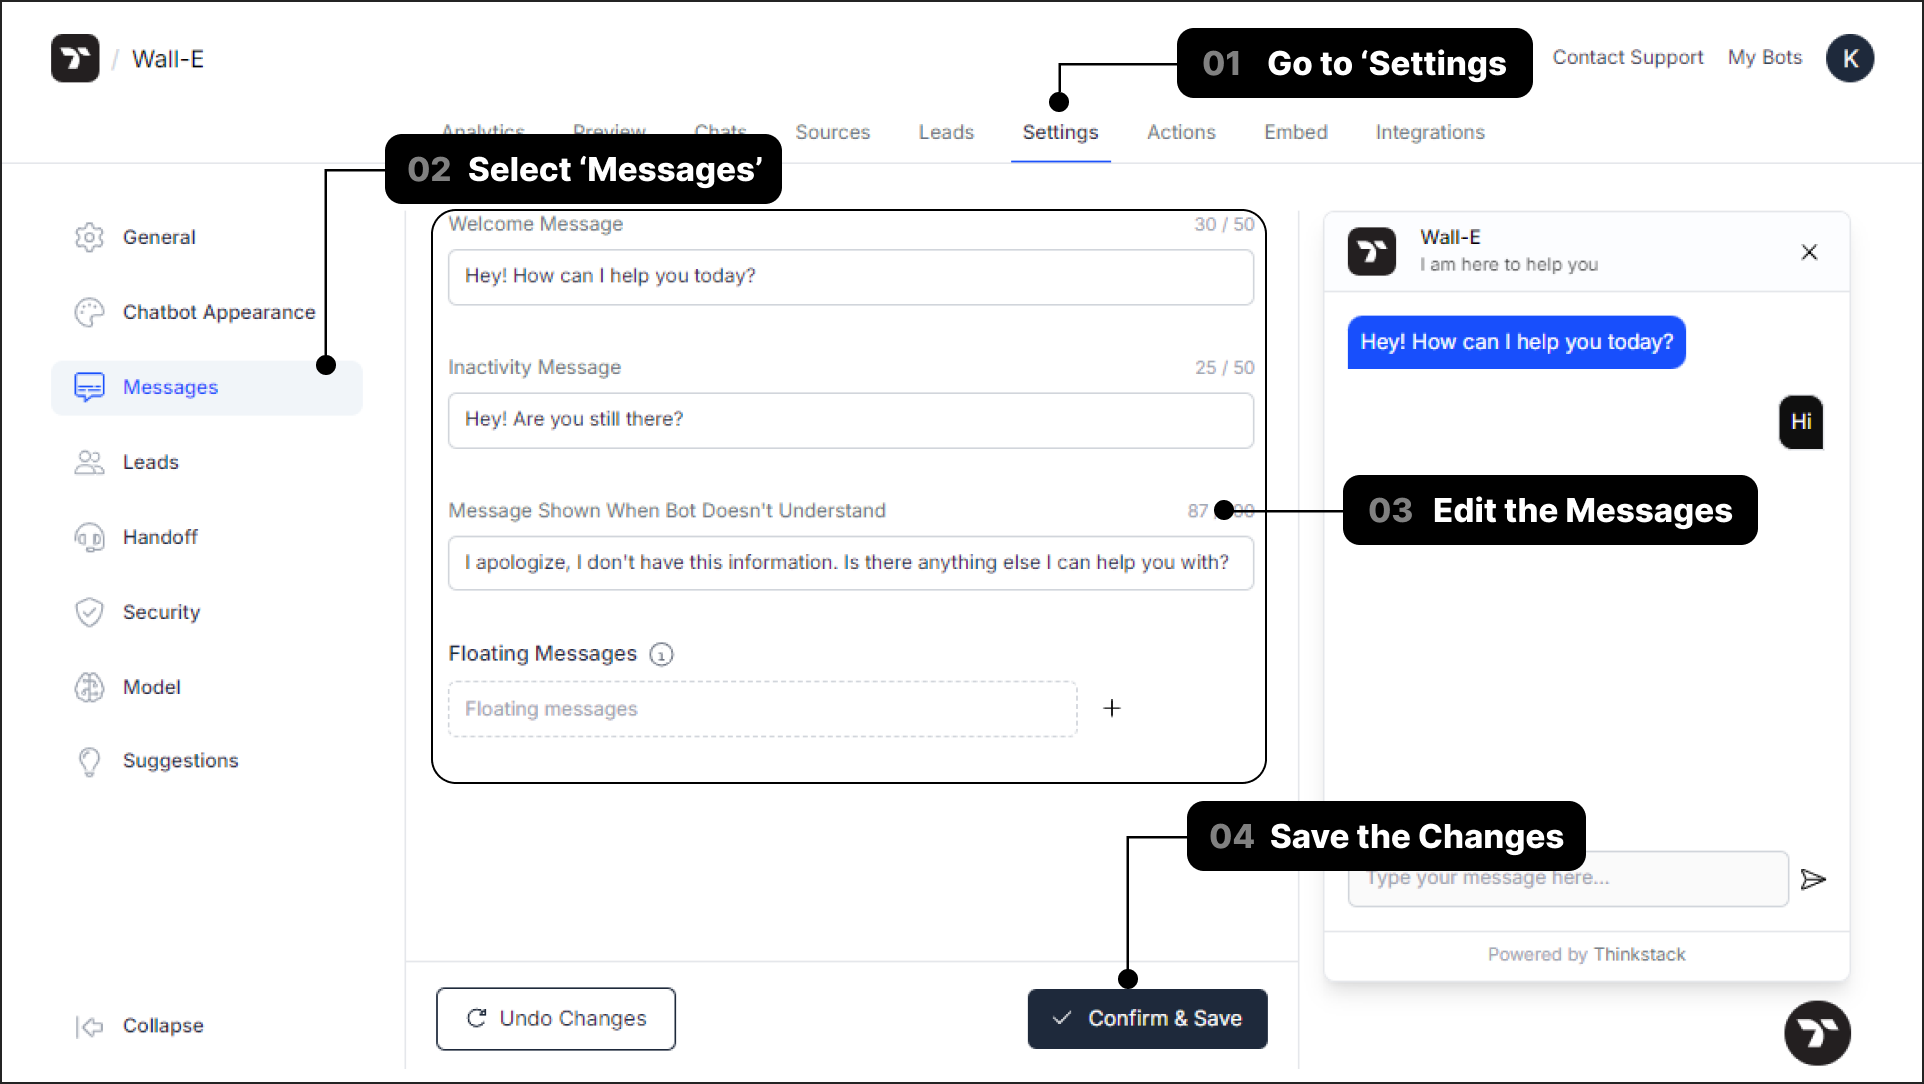
For detailed steps on how to set these messages, refer to the section: Configuring Static Messages
Leads#
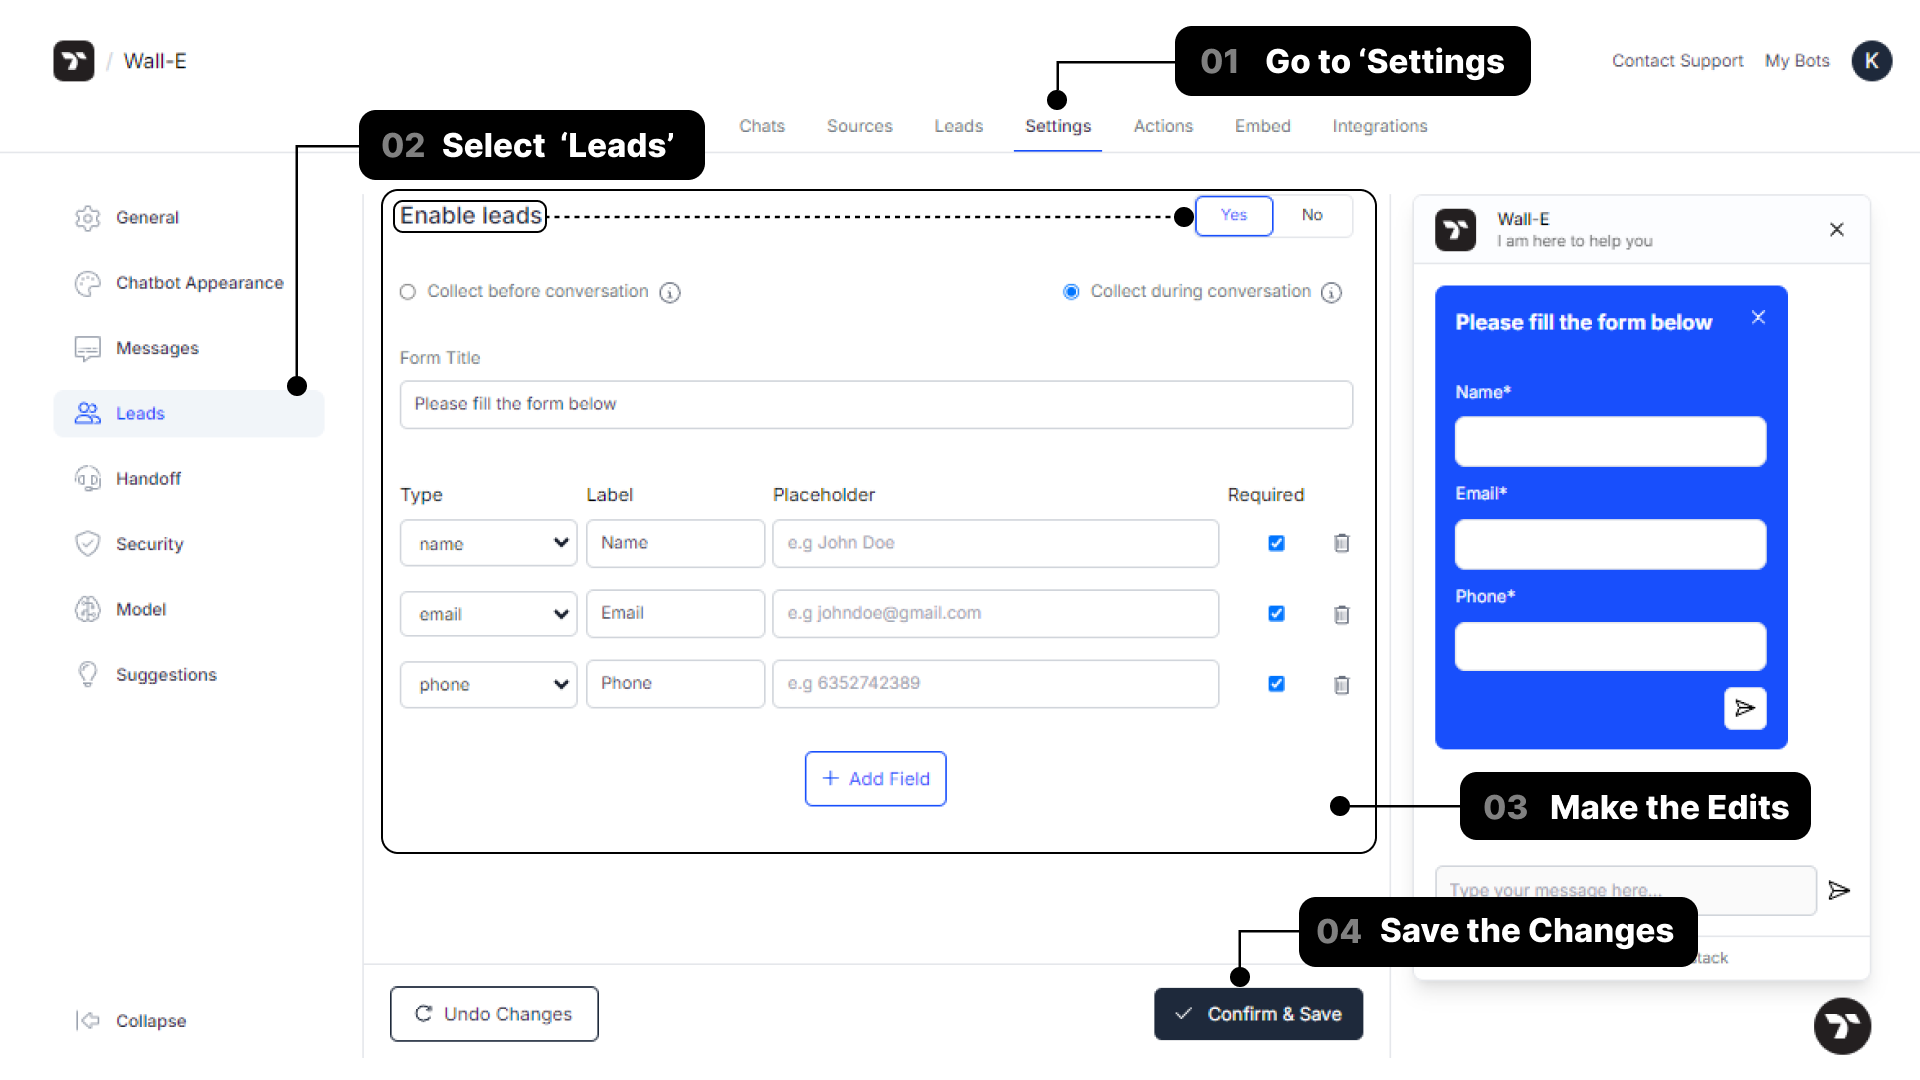
Under Settings Settings, click on Leads. Here, you can enable your chatbot to acquire leads of your users, such as Name, Email ID, and other contact information.
Model#
Under Settings, navigate to the Model section to select the GPT model you want your chatbot to use.
The dropdown menu provides several options, including:
• GPT-5: OpenAI’s most advanced model for complex conversations, deep reasoning, and nuanced responses, consuming 8 credits per response.
• GPT-5 Mini: A faster, lower-cost GPT-5 variant that still delivers detailed answers, consuming 2 credits per response.
• GPT-5 Nano: The quickest and most cost-efficient GPT-5 option, suited for short replies, simple Q&A, and lightweight tasks, consuming 1 credit per response.
• GPT-4 Turbo: A high-performance GPT-4 variant optimized for long, detailed responses and large-scale conversations, consuming 15 credits per response.
• GPT-4o: OpenAI’s “omni” GPT-4 model, balancing strong reasoning and text generation with good speed, consuming 8 credits per response.
• GPT-4.1 Nano: The default model for new chatbots on Thinkstack: lightweight, responsive, and efficient for everyday interactions, consuming 1 credit per response.
• GPT-4o Mini: A compact “omni” GPT-4 variant offering balanced performance for mixed queries at a low cost, consuming 1 credit per response.
After selecting your preferred model, click Confirm & Save to apply the changes.

You can understand more about the AI models here: Models
Suggestions#
Under Settings, click on Suggestions. Suggestion settings allow you to design intuitive conversation flows within your chatbot. You can do this by creating either Q&A style prompts or get URL responses to users.
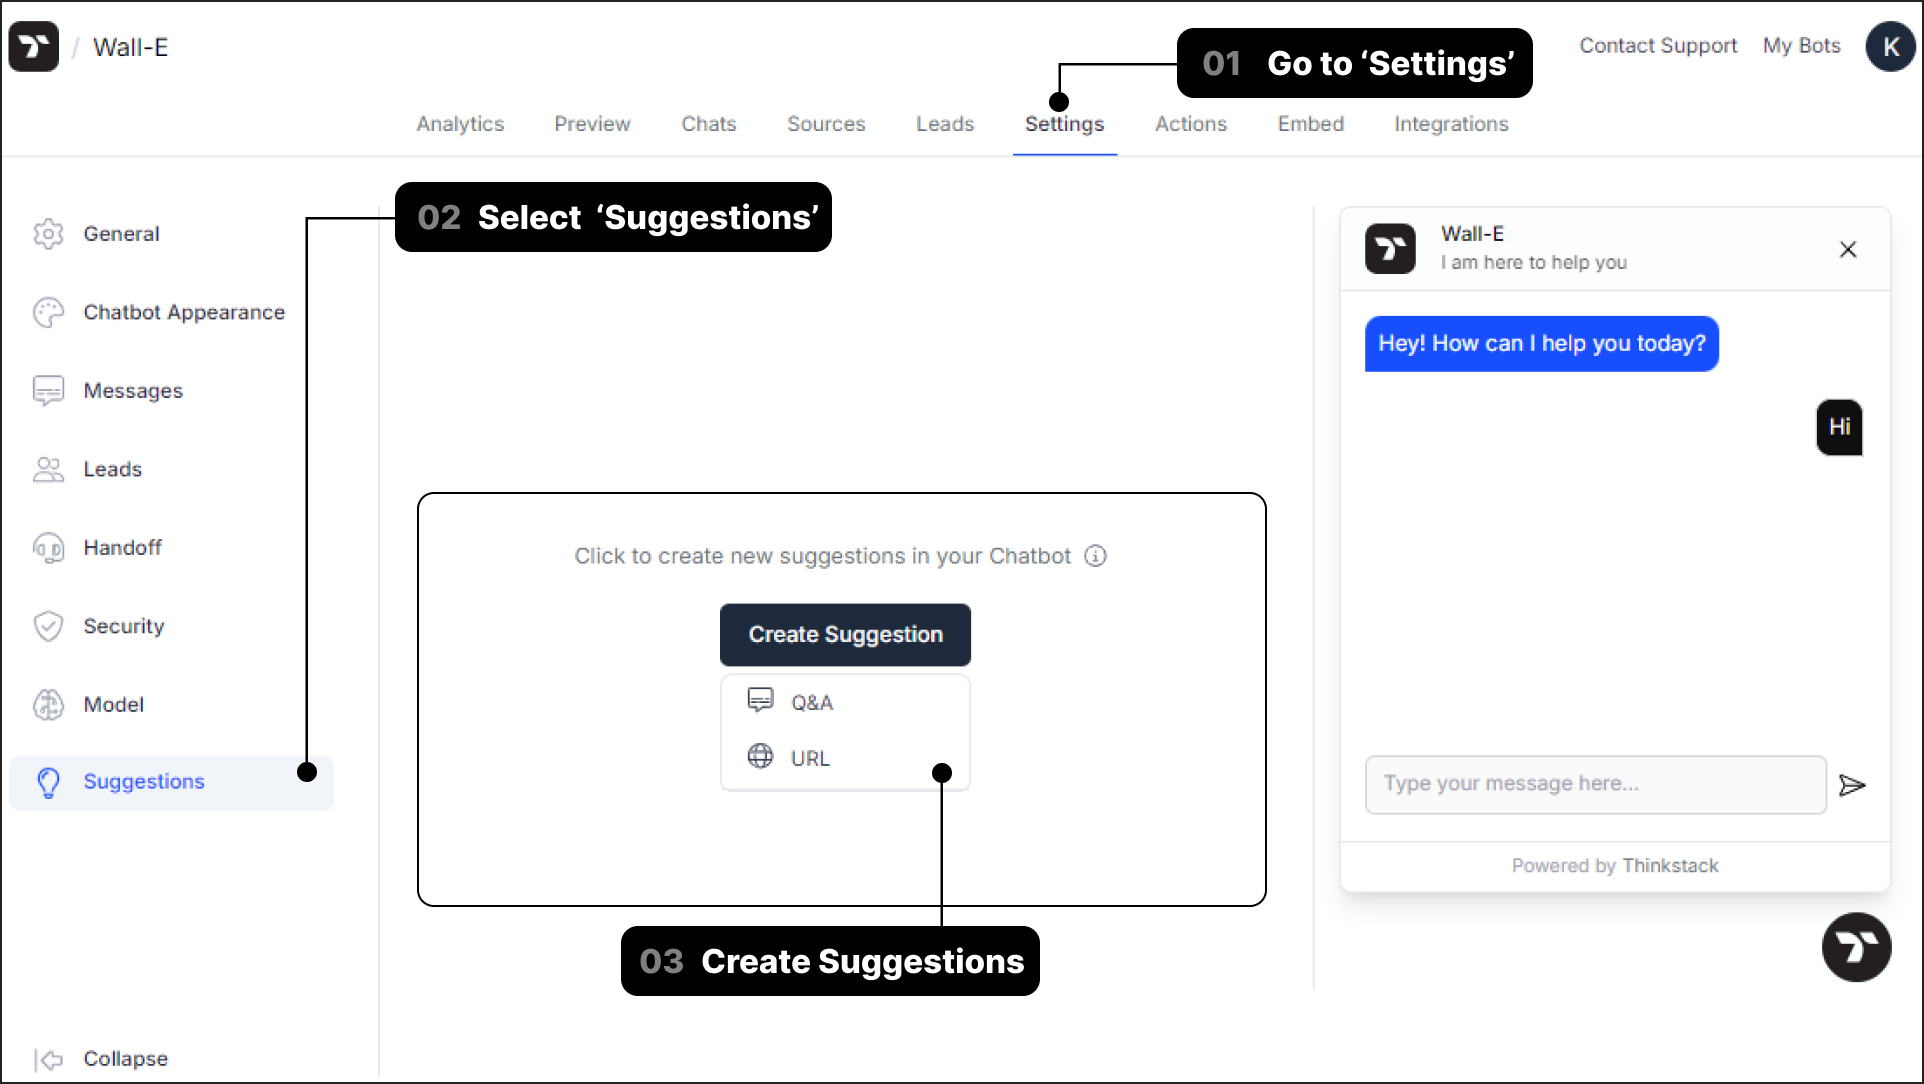
You can understand more about the Suggestions here: Suggestions
Test your chatbot#
To test all the saved changes you can preview your chatbot under Preview in the chatbot's navigation bar.
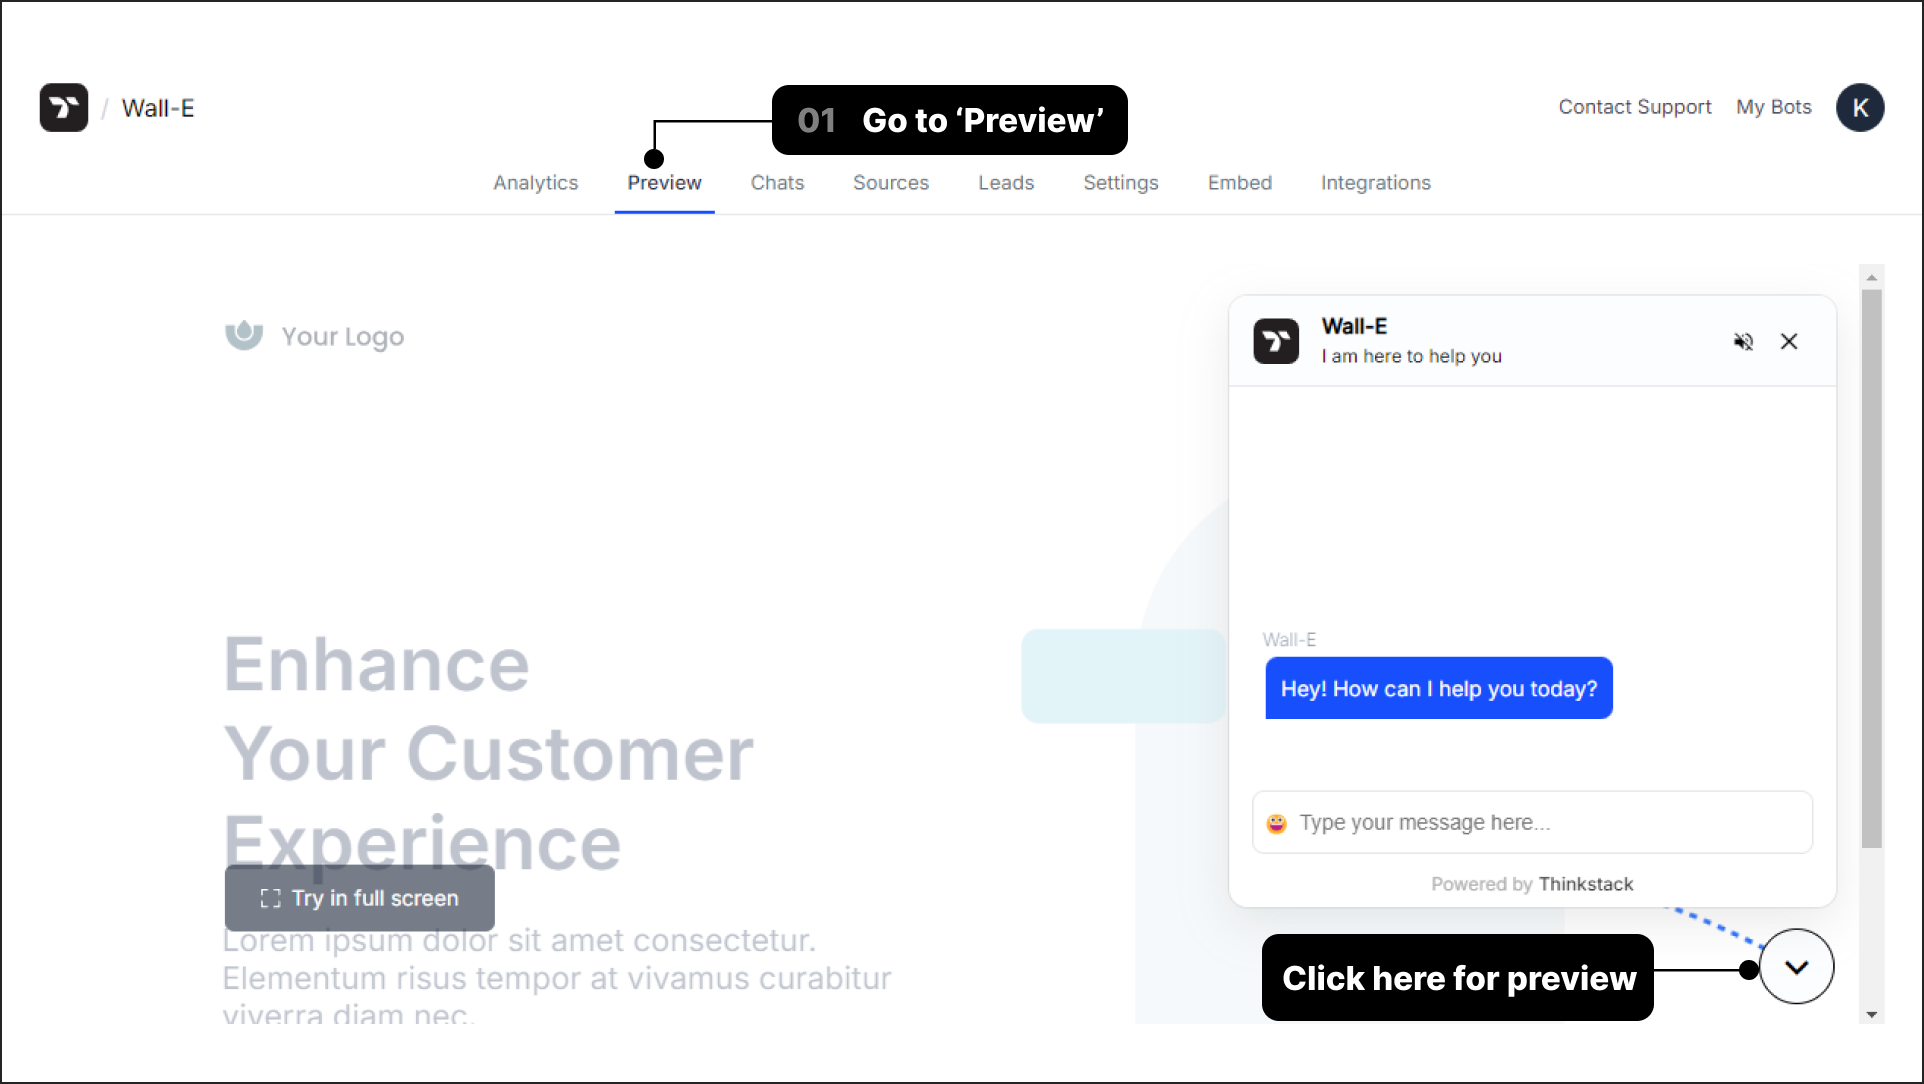
Note:Ensure that your chatbot is trained to answer the question(s) you're posting, and that the answer can be found on all the files and/or links you've uploaded.
Embed on your website#
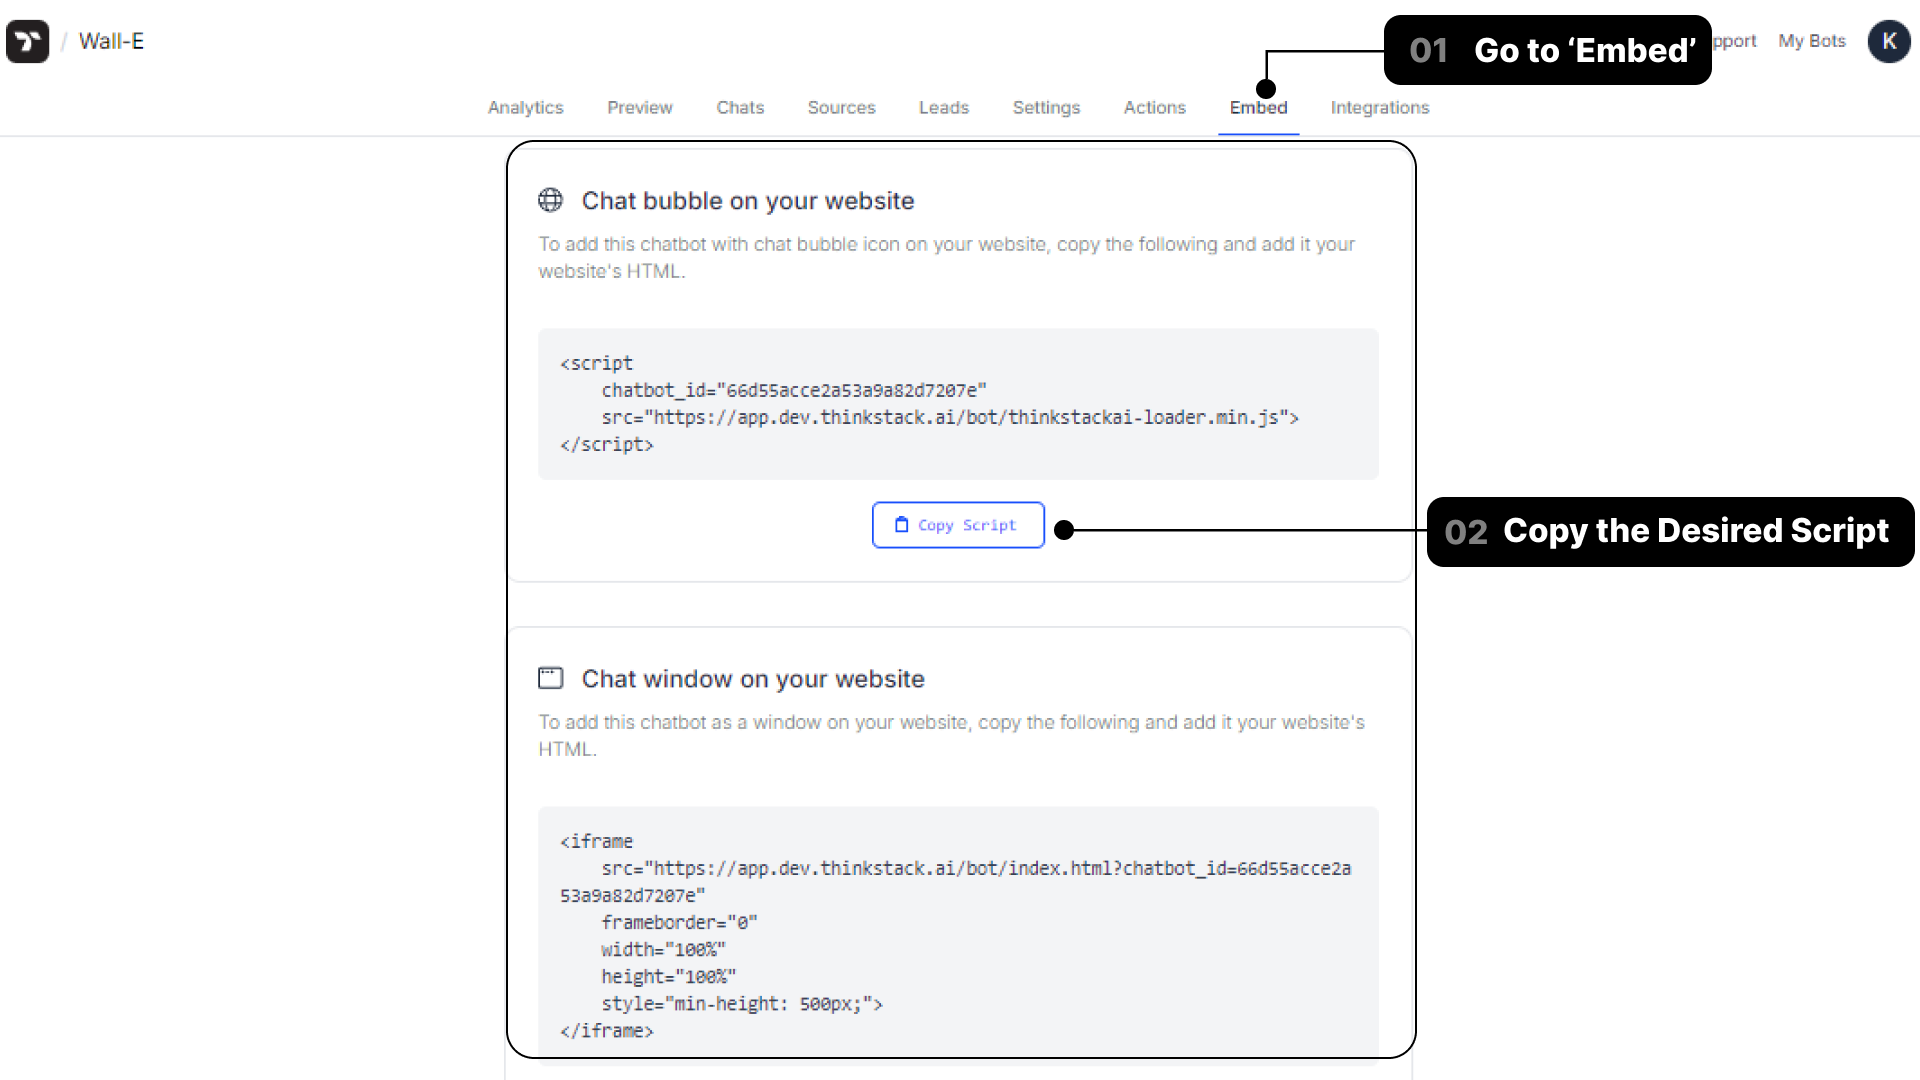
In your chatbot's navigation bar, click on Embed. Here, you can copy the script(s) and add it to your website's HTML to add the chatbot as a chat bubble or as a chat window. You can also add the chatbot to your mobile apps.
Delete your chatbot#
To delete a chatbot, click on the three-dot menu next to the chatbot you want to delete. In the confirmation window that appears, type the chatbot's name to confirm and click "Delete Chatbot."

warning
Deleting a chatbot is permanent and will remove all associated training data, chat history, and files from your Thinkstack account. Proceed with caution⚠️.
Delete your Thinkstack account
To delete your Thinkstack account, click on your profile icon, go to My Account, and then click the bin icon next to “Change Password.” In the confirmation screen, type your account name and click Delete Account. You will receive a verification code on your registered email. Enter the code to complete the deletion.
warning
Deleting your account is permanent. It will erase all your chatbots, training data, credits, knowledge files. This action cannot be undone⚠️. If you have an active subscription, you must cancel it first. The deletion process will not proceed otherwise.