Mapping Custom Domain
In this guide, we’ll show you how to map your custom domain to the Thinkstack platform, add DNS records, and secure your domain with an SSL certificate. You’ll also learn how to customize your domain with your brand identity, such as your logo and brand name, to create a personalized experience for your Customer.
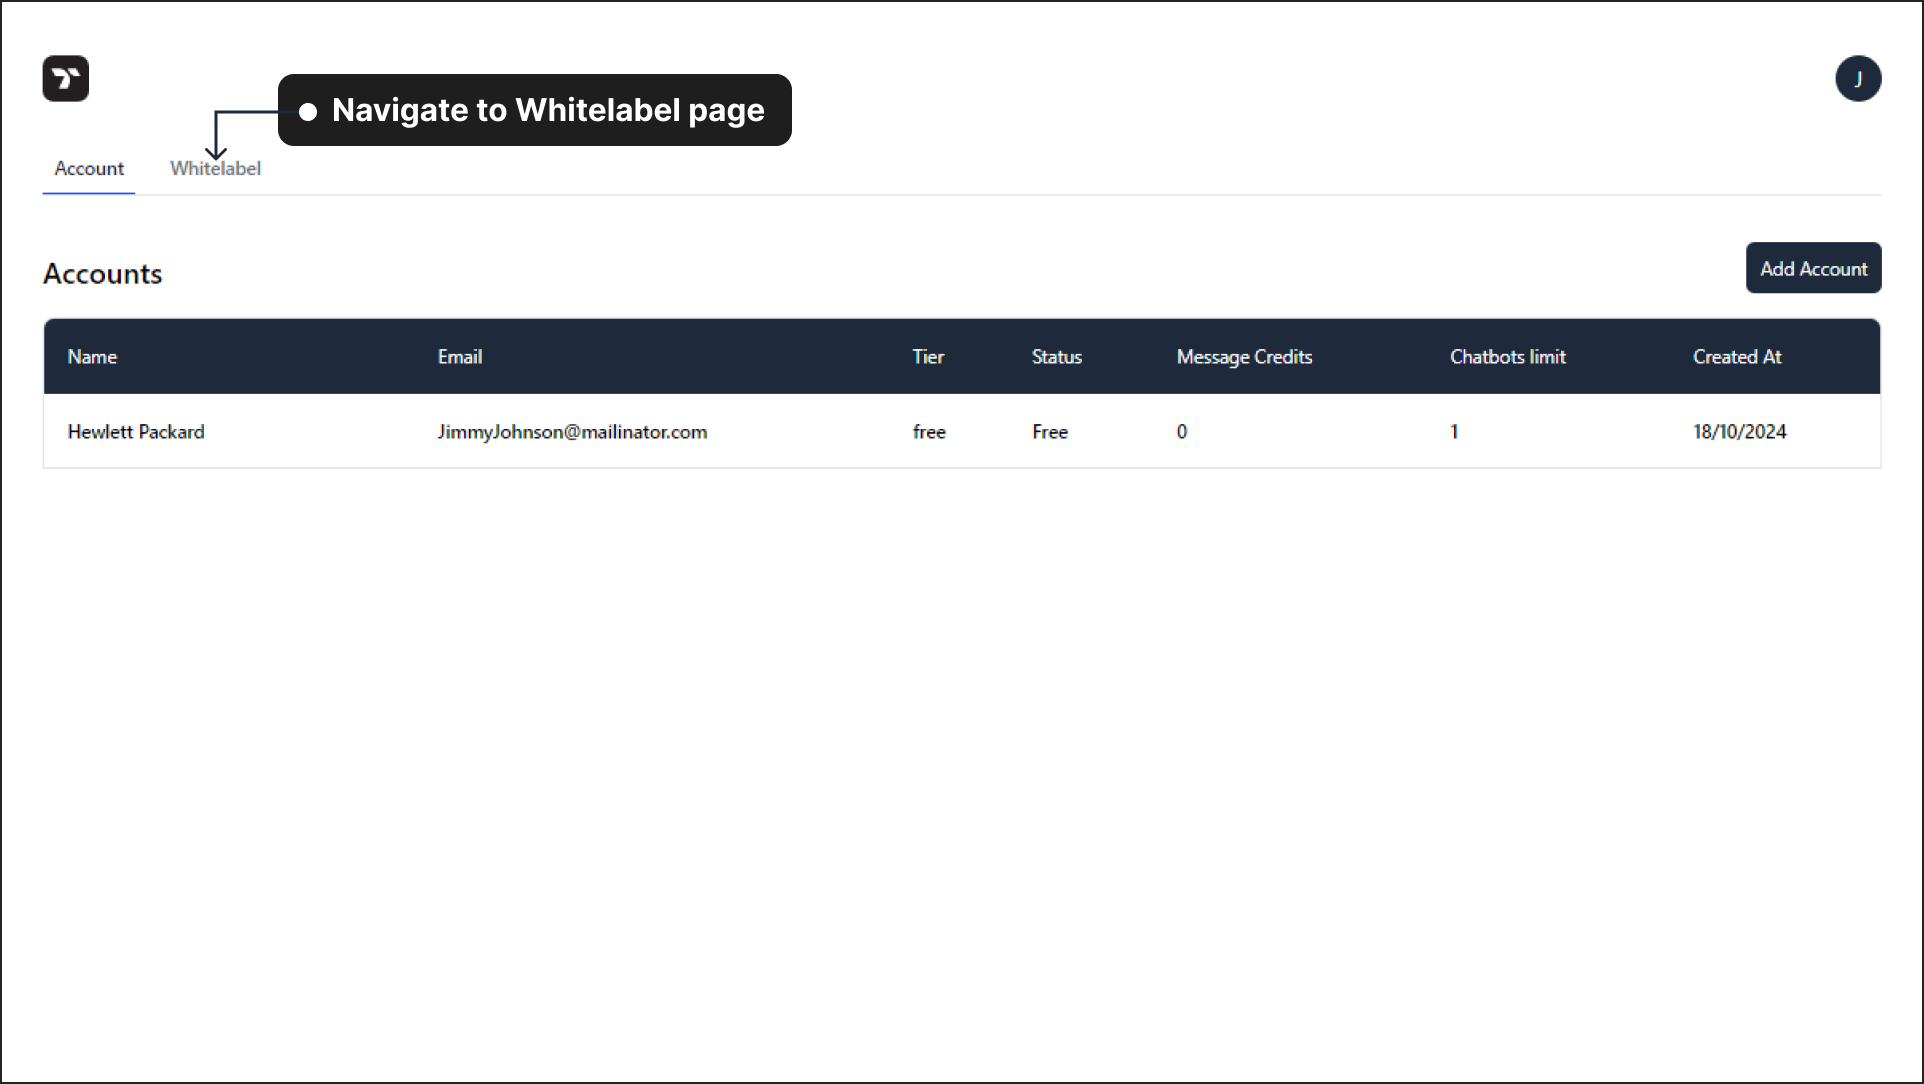
Login to your Thinkstack Partner Portal and Navigate to Whitelabel section.
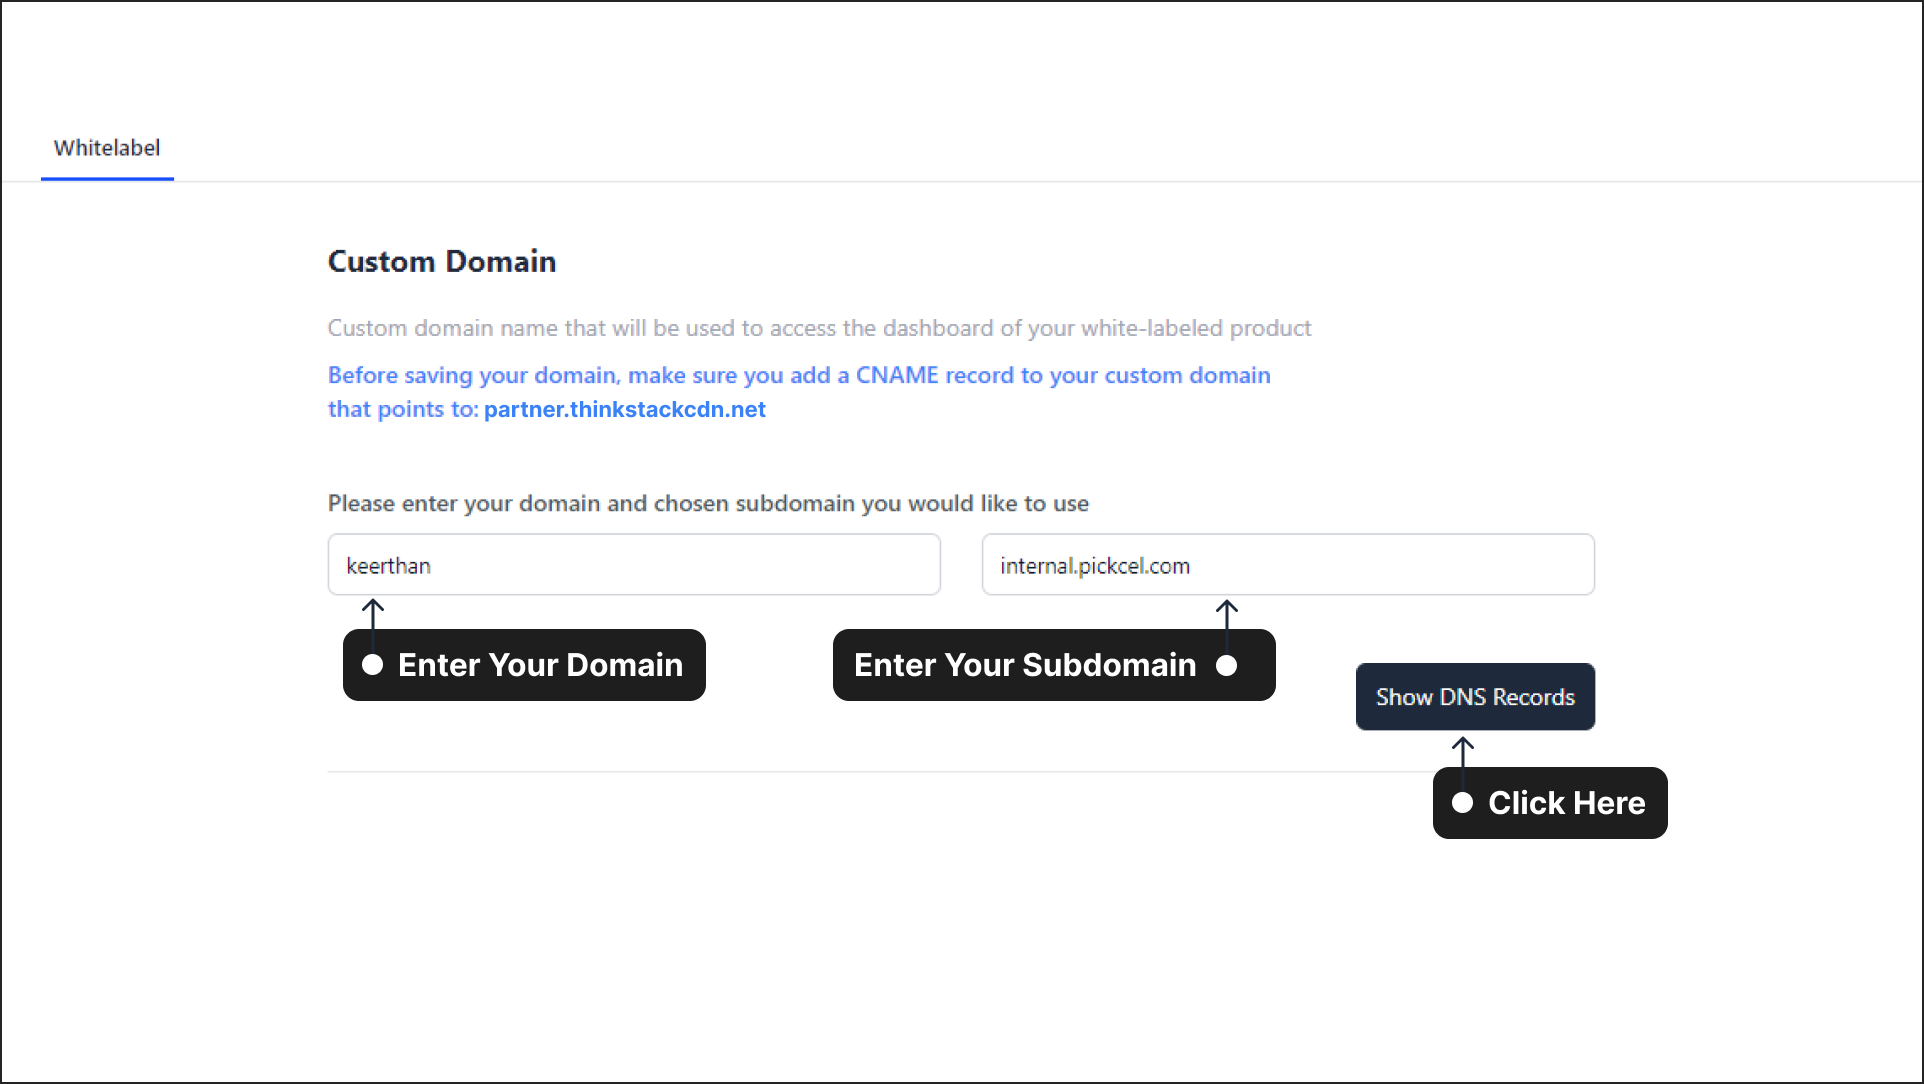
Under Custom Domain, enter your domain in the first field and your subdomain in the second field. Now, click on 'Show DNS Records'. After clicking Show DNS Records,the system will display the CNAME record details. This includes the Type, Name, and Value fields. In the Name field, you'll see the subdomain you entered (e.g., "app"), and in the Value field, the corresponding custom domain (e.g., keerthan.internal.pickcel.com)
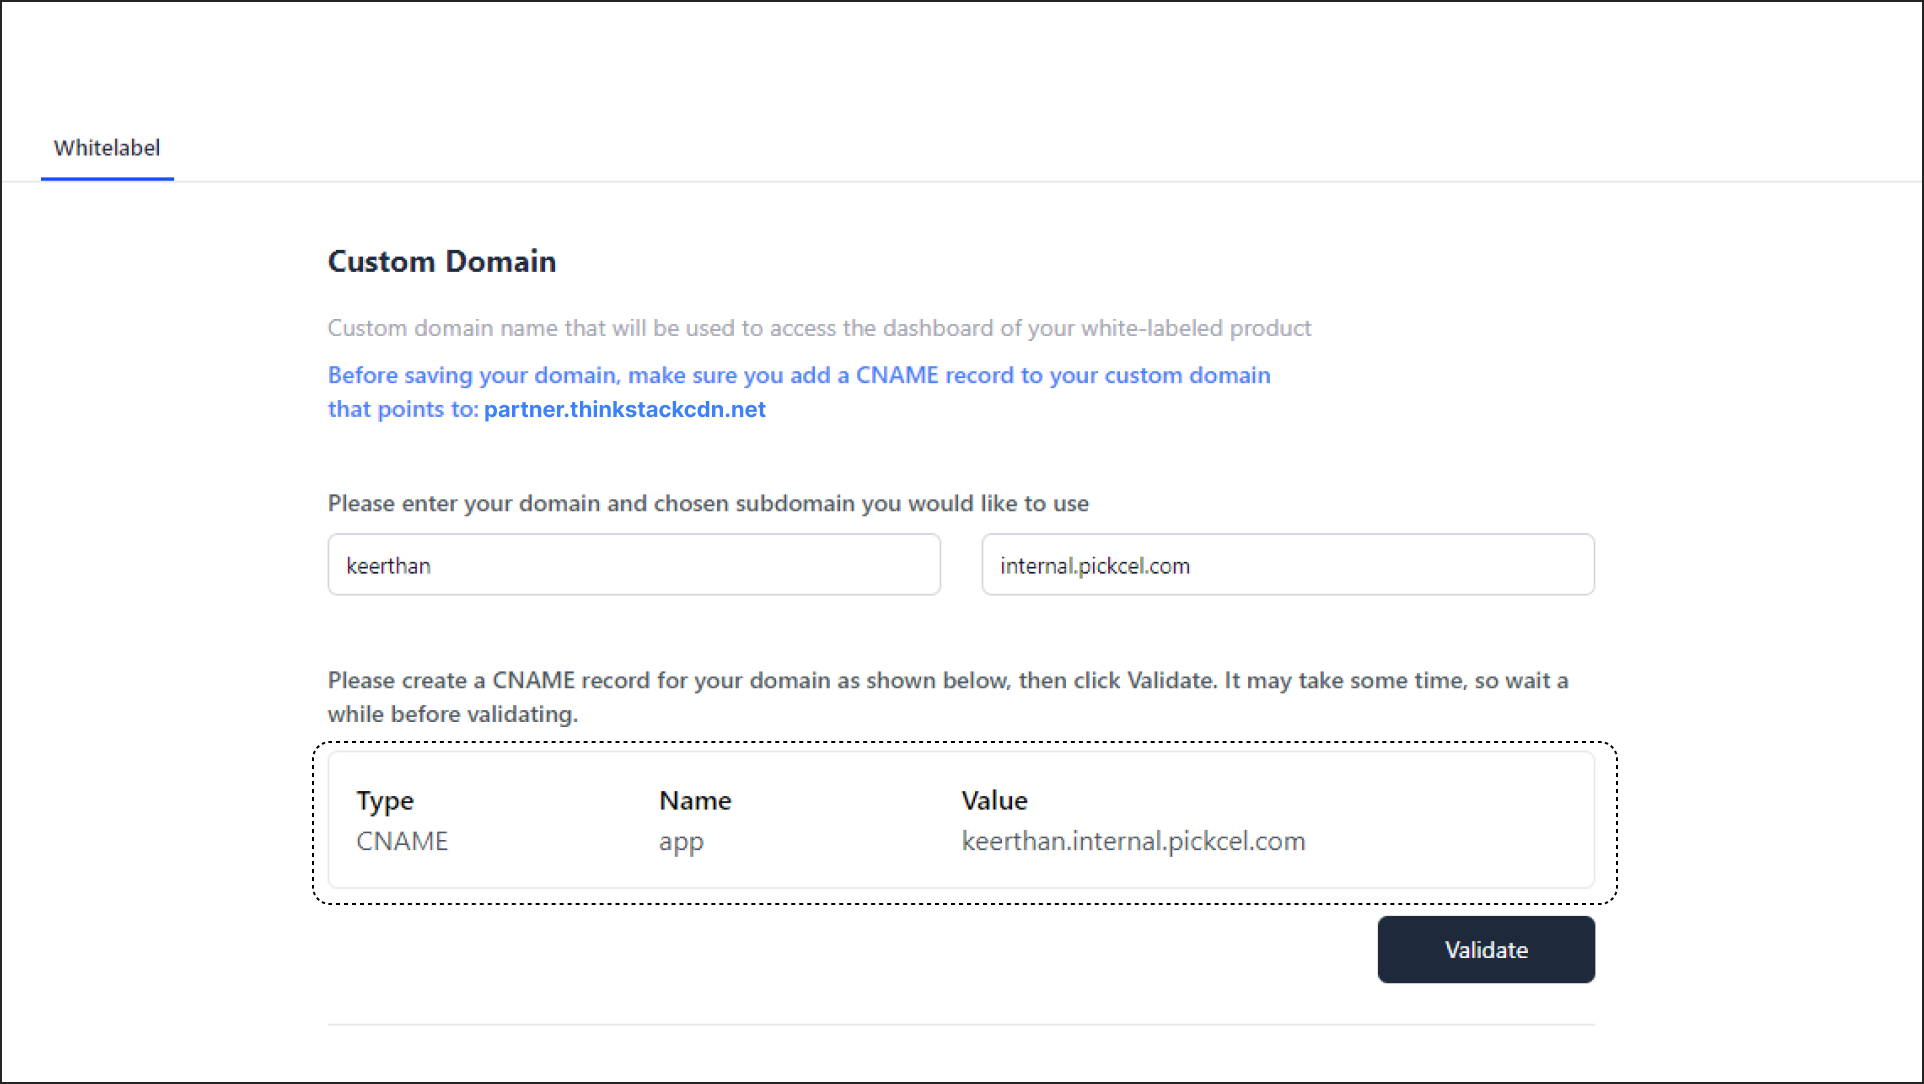
After entering your custom domain and subdomain in the Thinkstack Partner Portal and getting the DNS records, the next step is to add a CNAME record through your domain registrar (such as GoDaddy, Cloudflare, or any service where your domain is registered). Log in to your domain registrar account and go to the DNS management section
Here, you will need to create a new CNAME record.
➡️For the Name/Host field: enter the subdomain you used (e.g., "internal" if your domain is internal.pickcel.com).
➡️In the Value/Points to field: enterpartner.thinkstackcdn.net.
Leave the TTL as the default value and save the record.After adding the CNAME record in your domain registrar, return to your Thinkstack Partner Portal. Click the Validate button next to the CNAME details to begin the domain validation process.
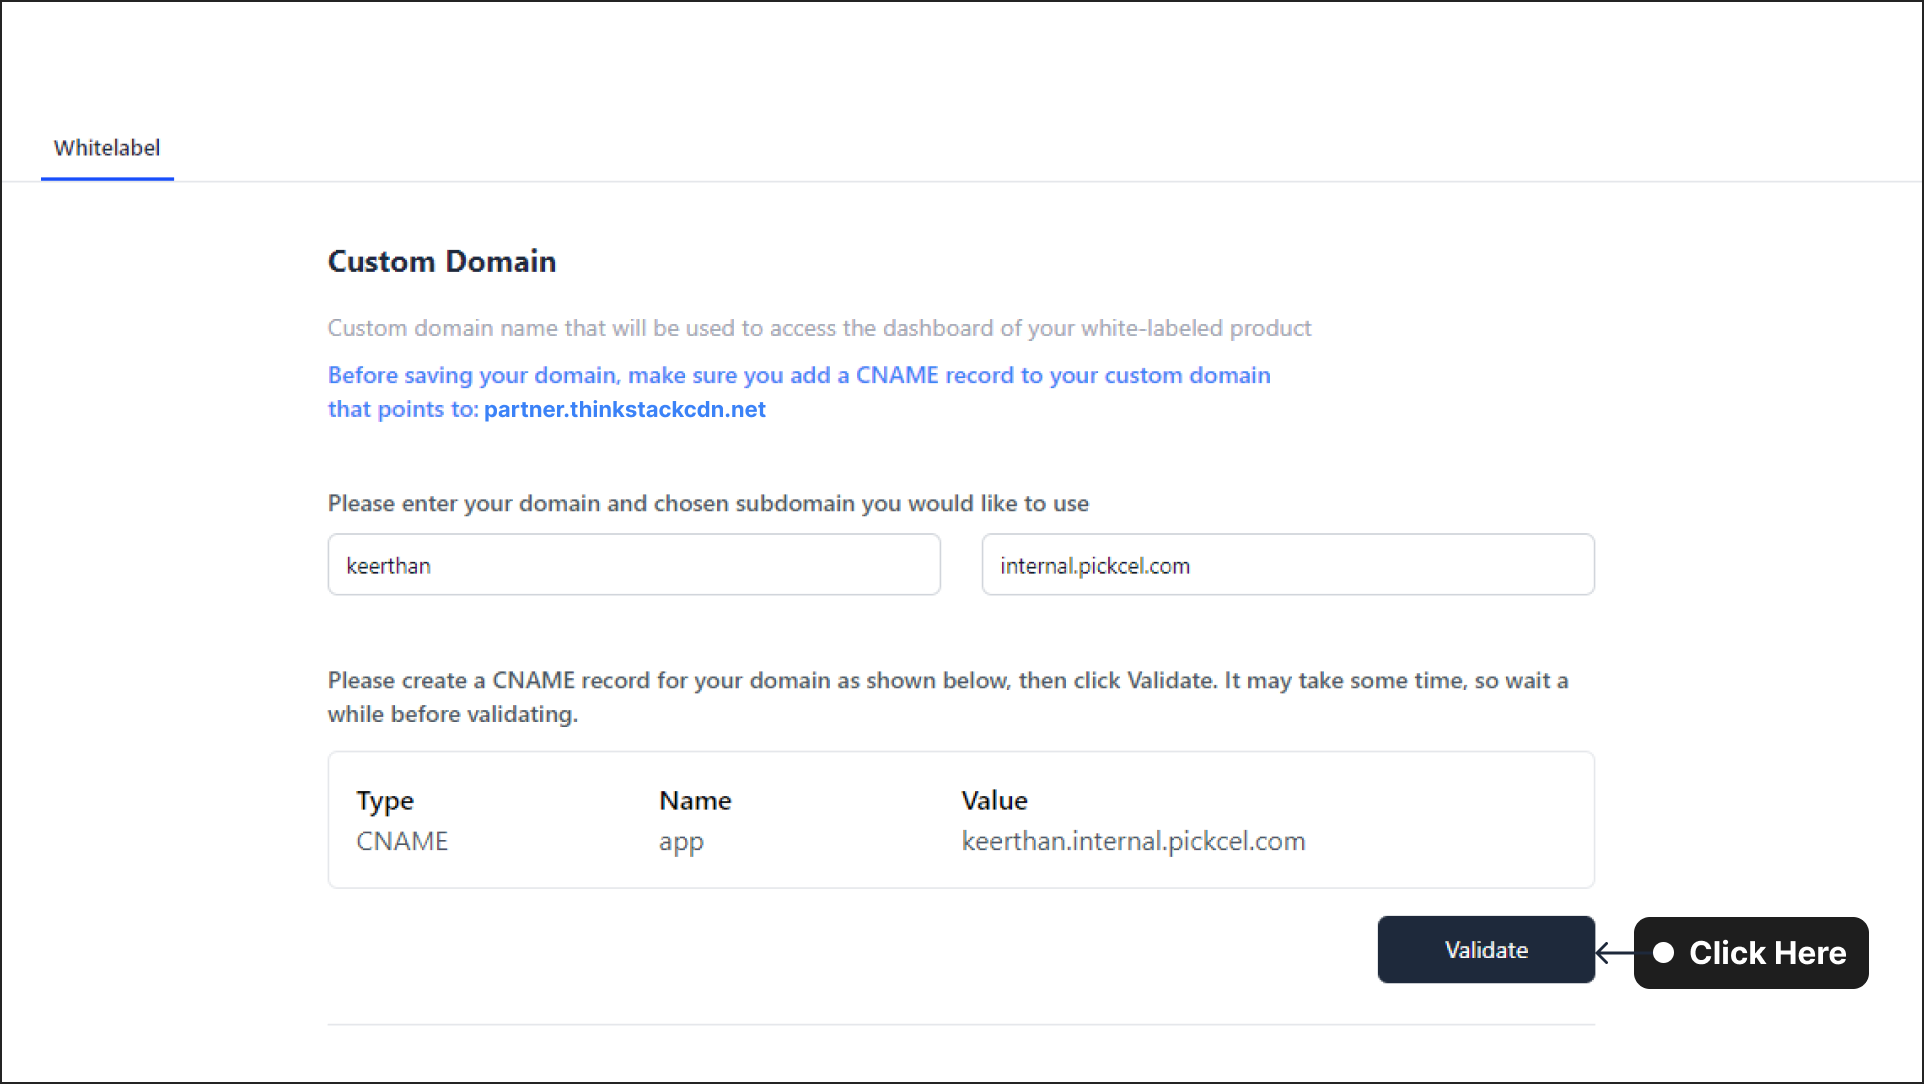 Note: This process may take a few minutes as the DNS changes need time to propagate.
After clicking Validate in the Thinkstack portal, you will be provided with the TXT records in the Validation Records section.
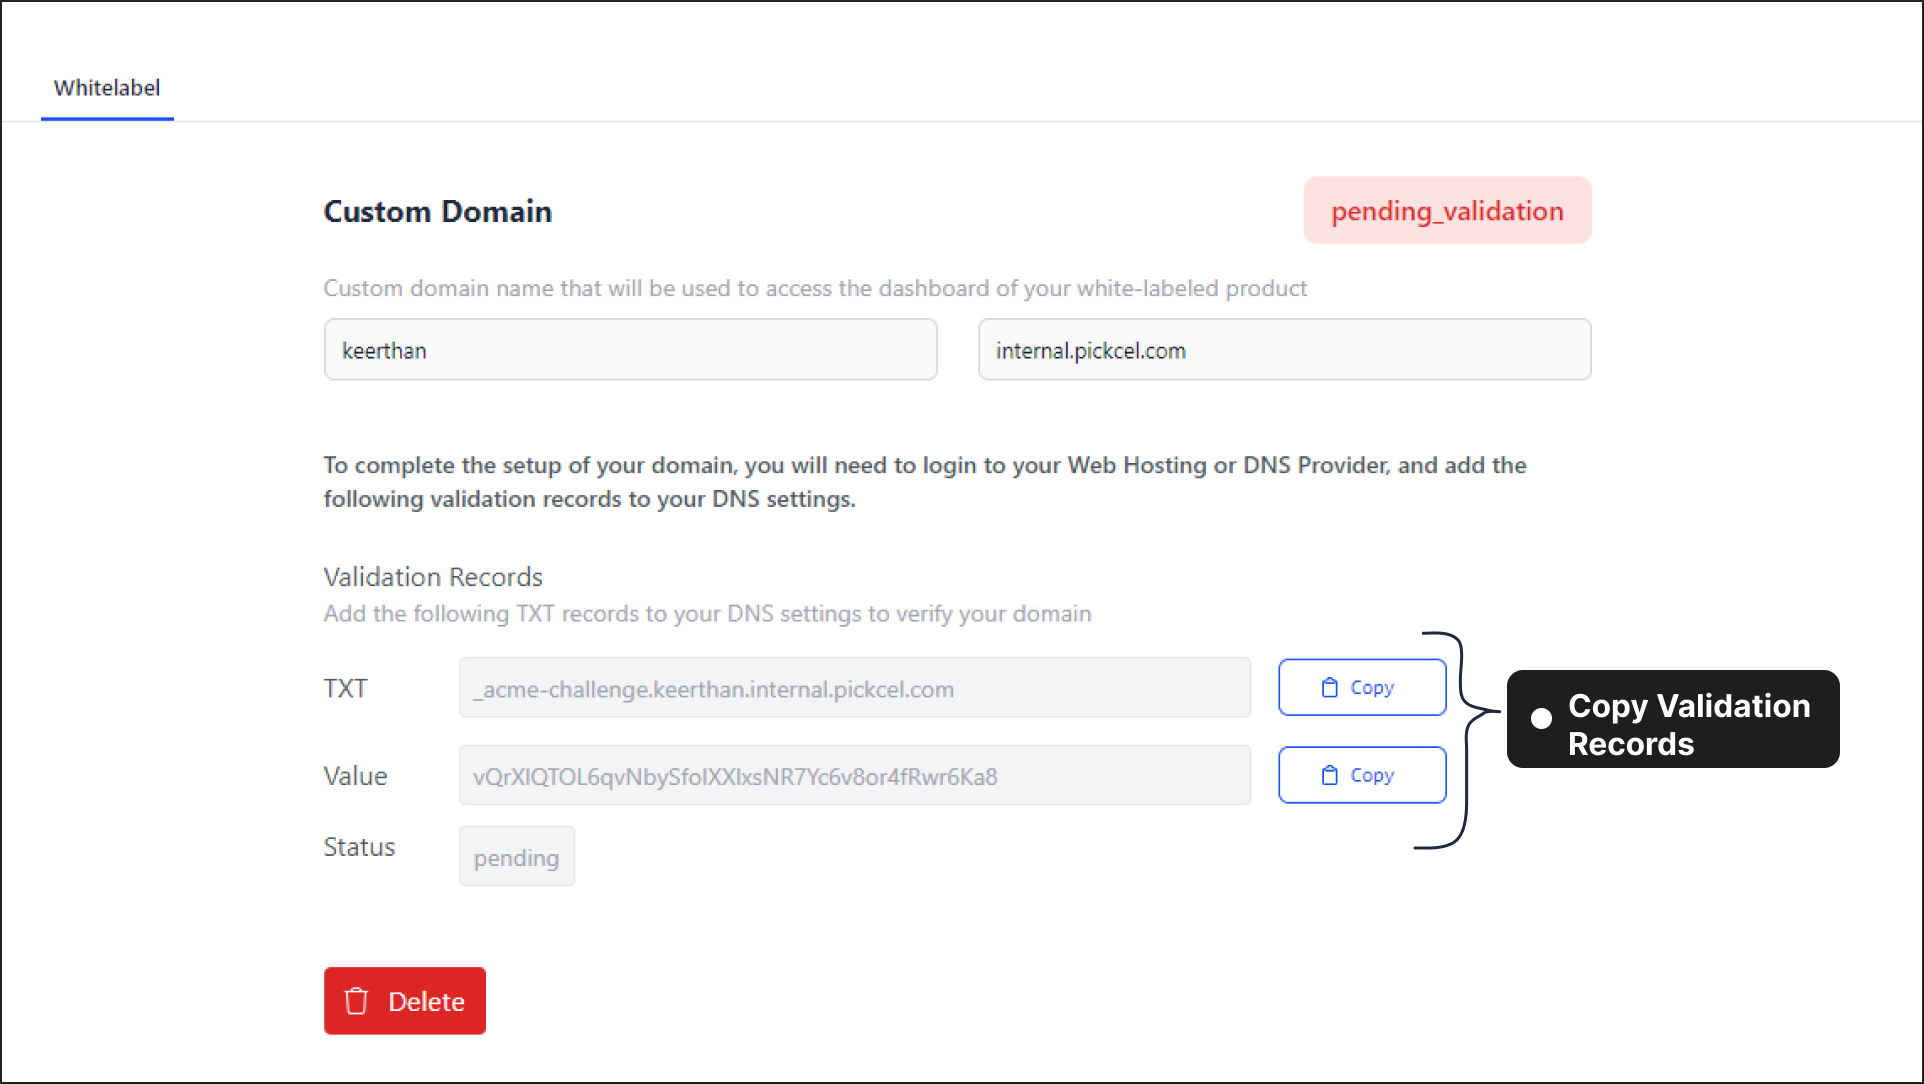 ➡️Copy the TXT records and navigate to your domain registrar’s DNS management settings. In the DNS entries, add the provided TXT record to verify domain ownership. This step is crucial for issuing the SSL certificate for your custom domain. Once the TXT record is added, allow a few minutes for the changes to propagate.
As soon as the TXT record is validated, the SSL certificate will be automatically issued and deployed to secure your domain. Once this process is complete, you will see the status of your domain change to active in the Thinkstack portal, indicating that your domain is now secured with SSL and accessible via HTTPS.
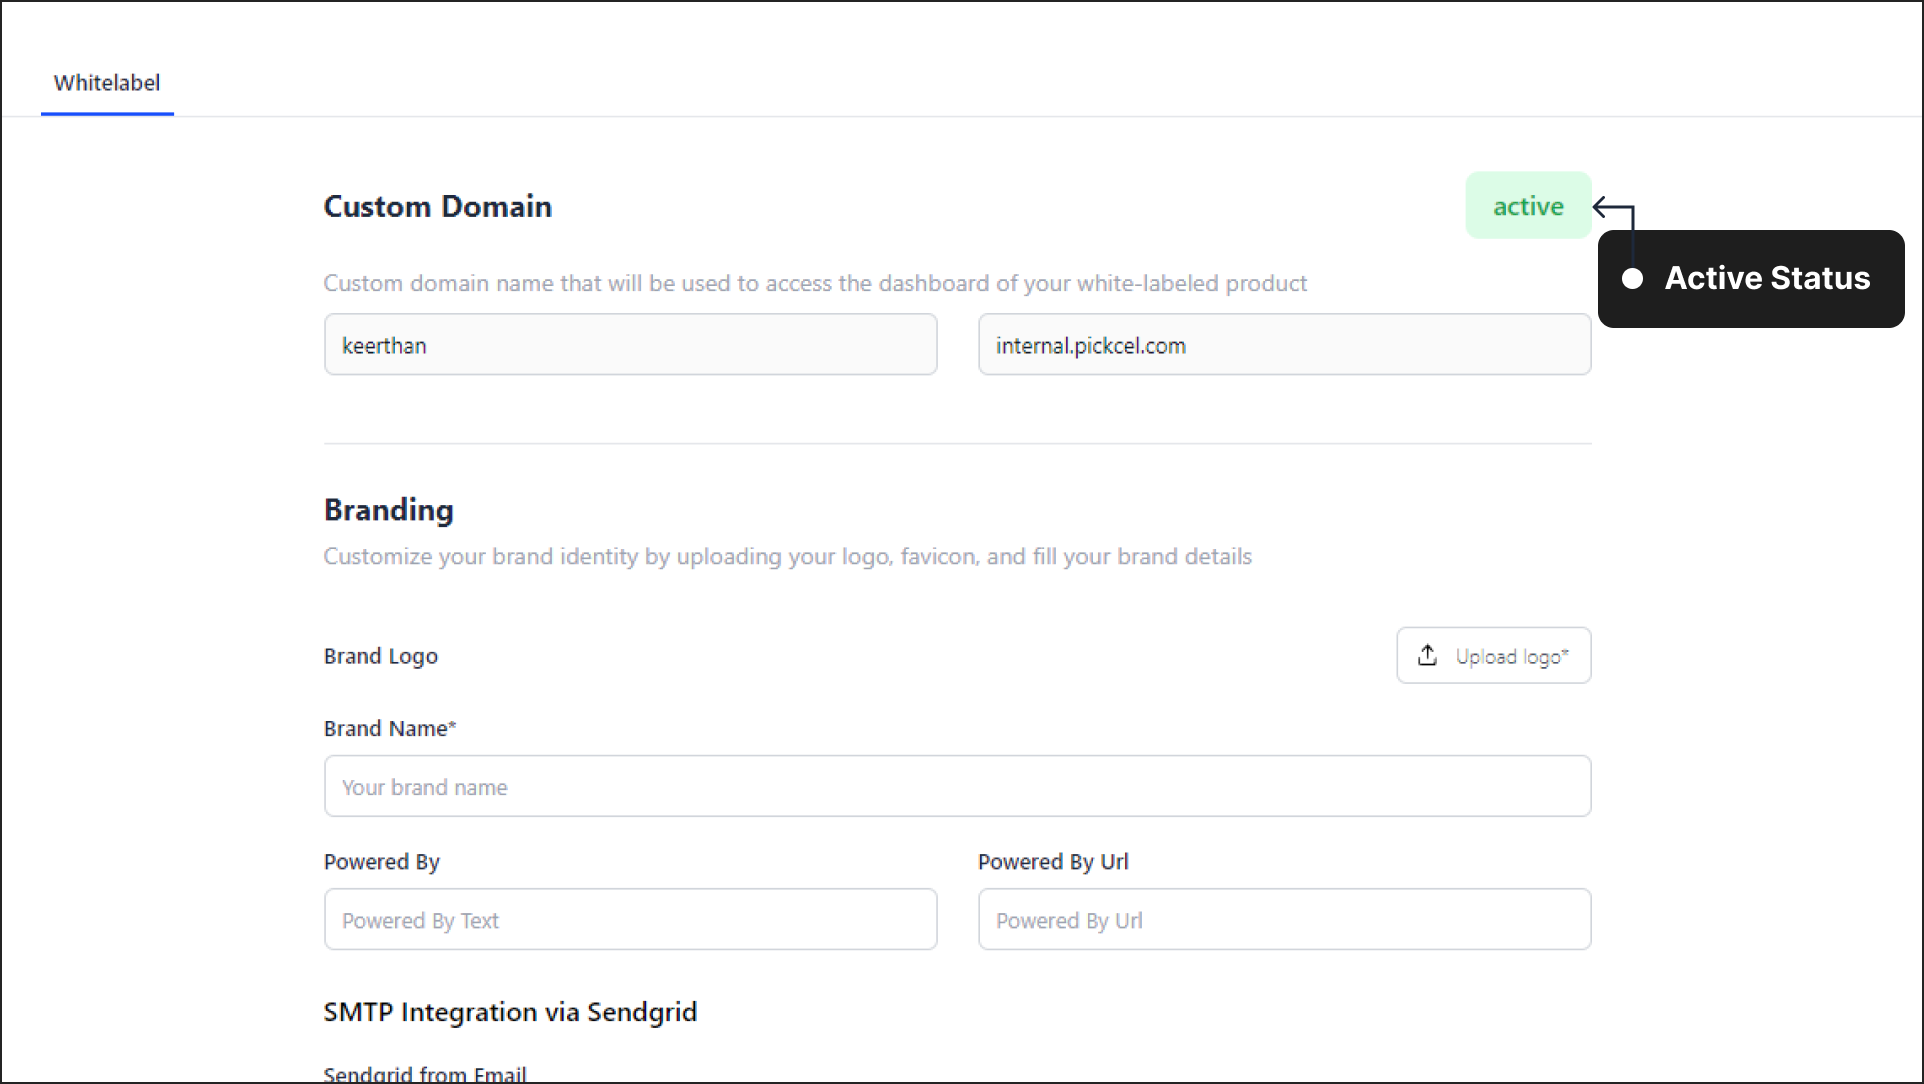
Add the details about your Brand.#
Let's customize your domain with your brand identity by following these steps:
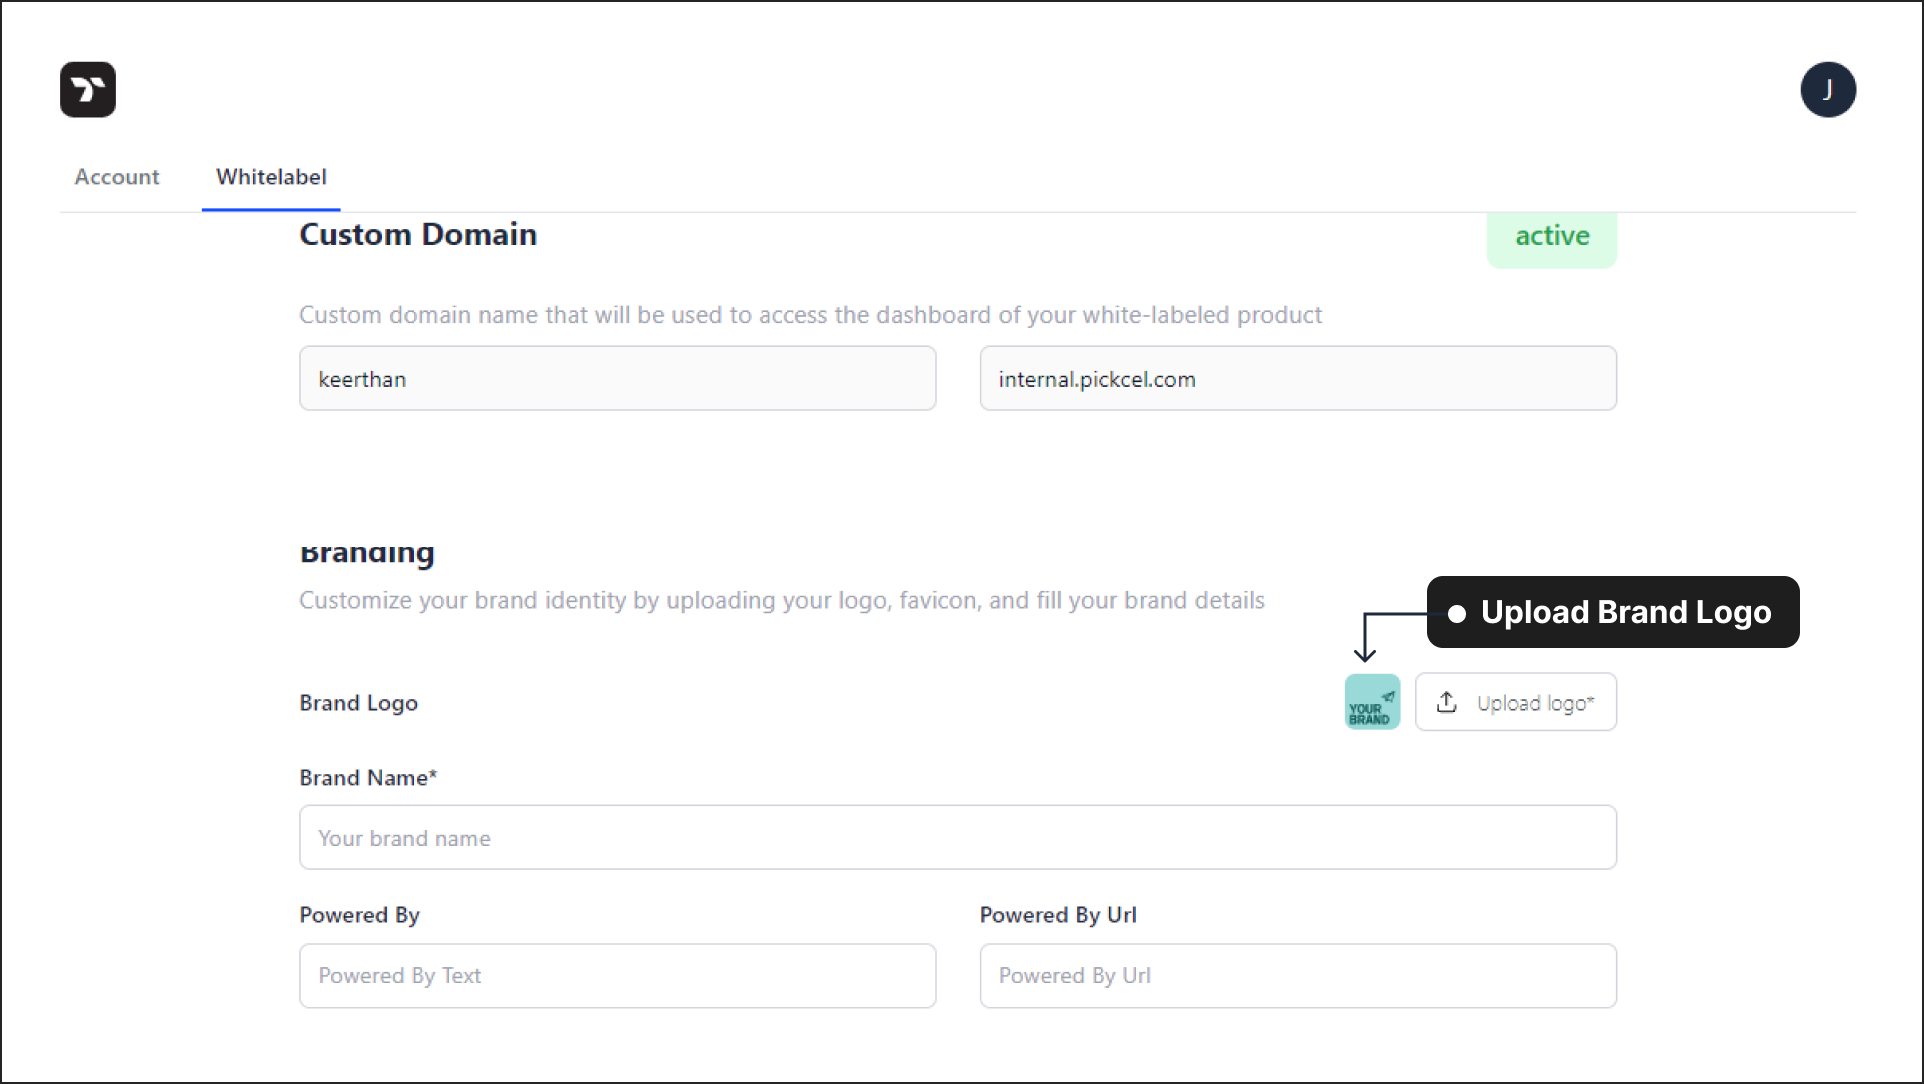
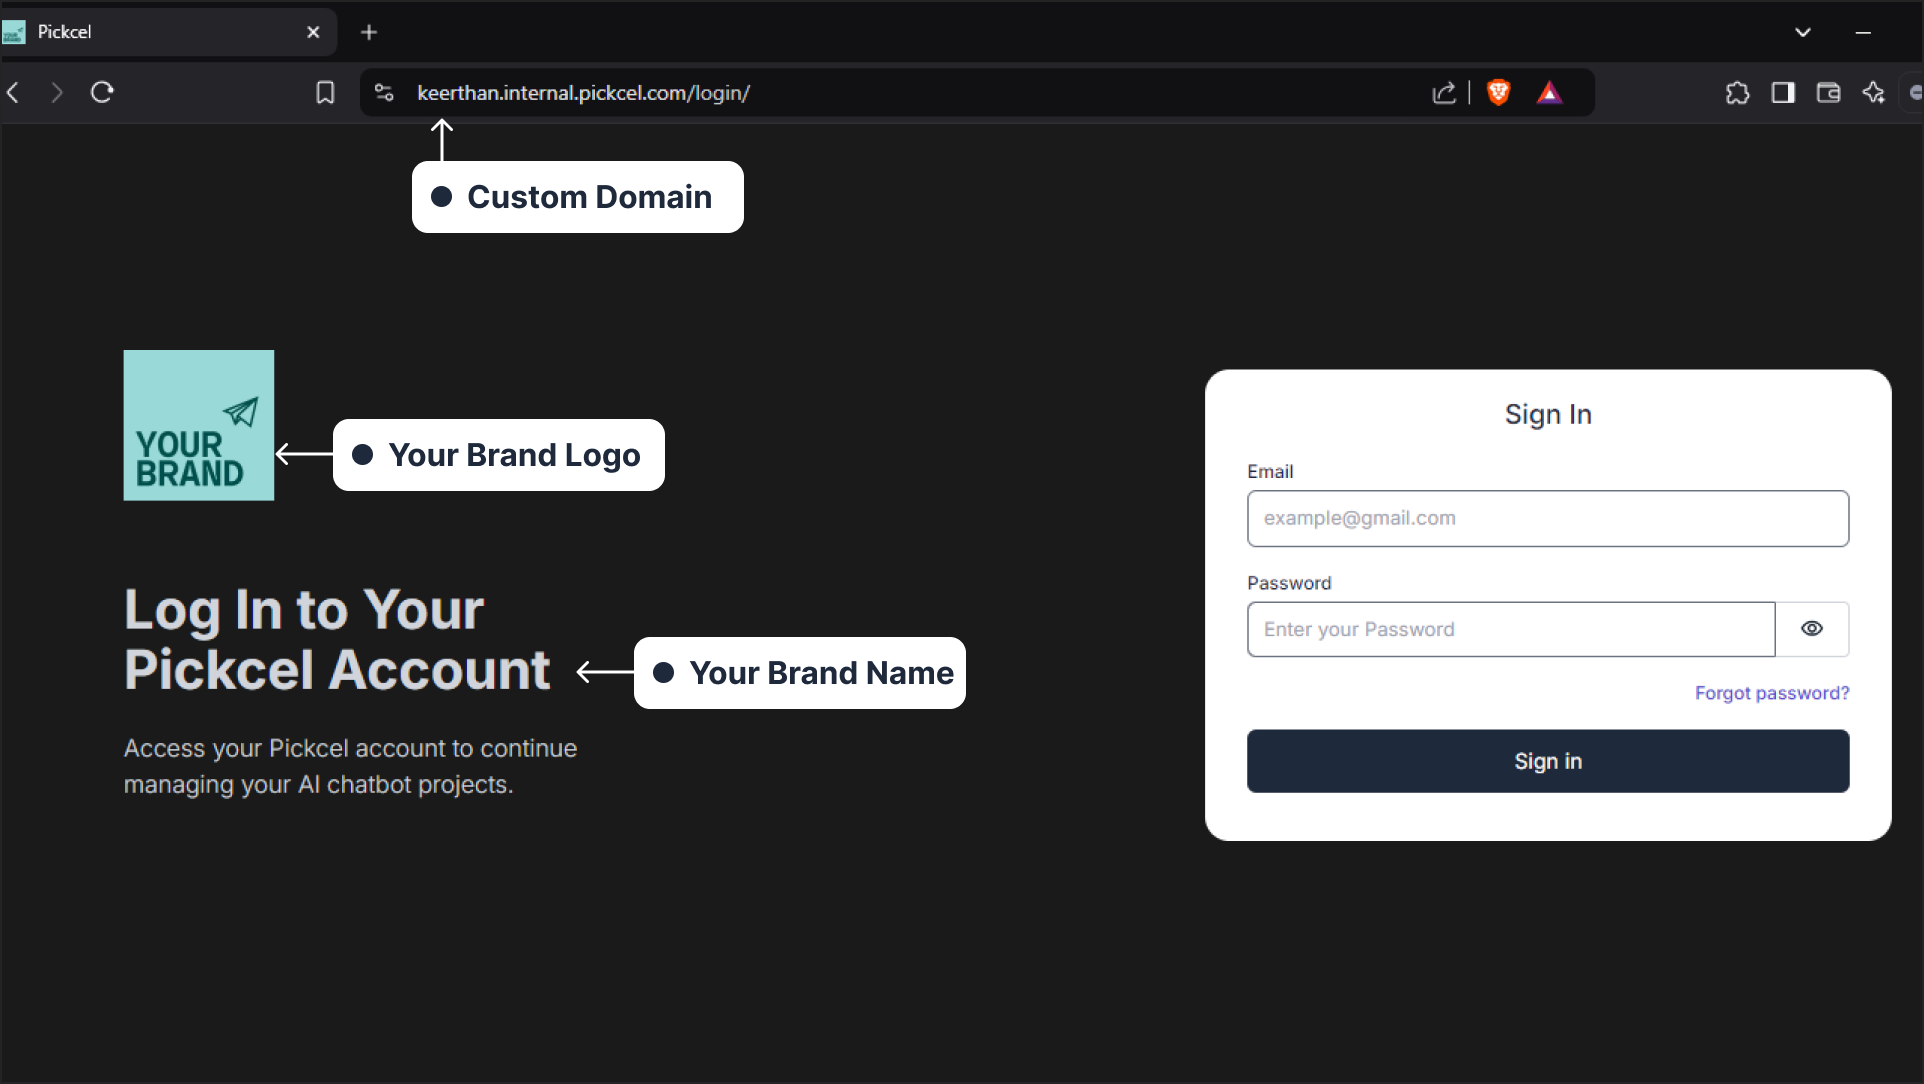
First, click the Upload Logo button, select your brand's logo file from your computer, and upload it.
Next, in the Brand Name field, type the name of your brand (e.g., "Pickcel").
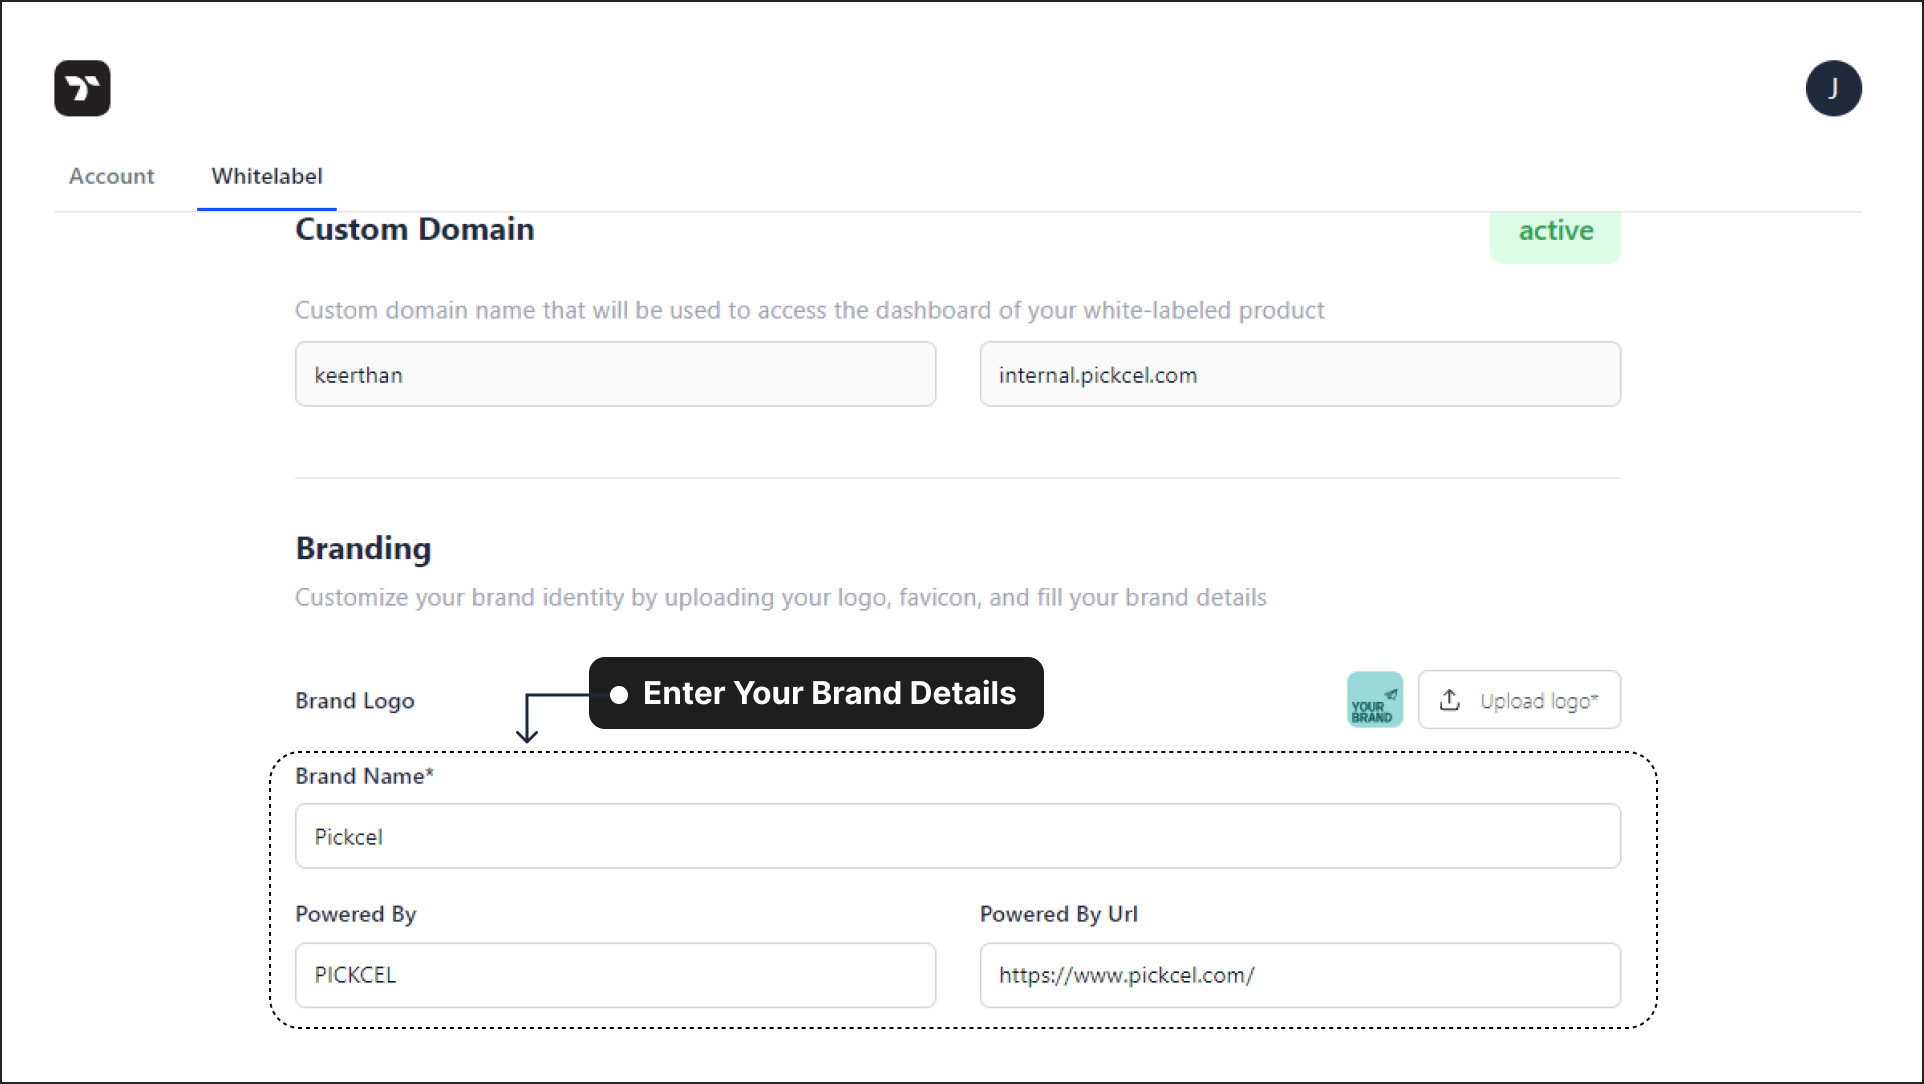
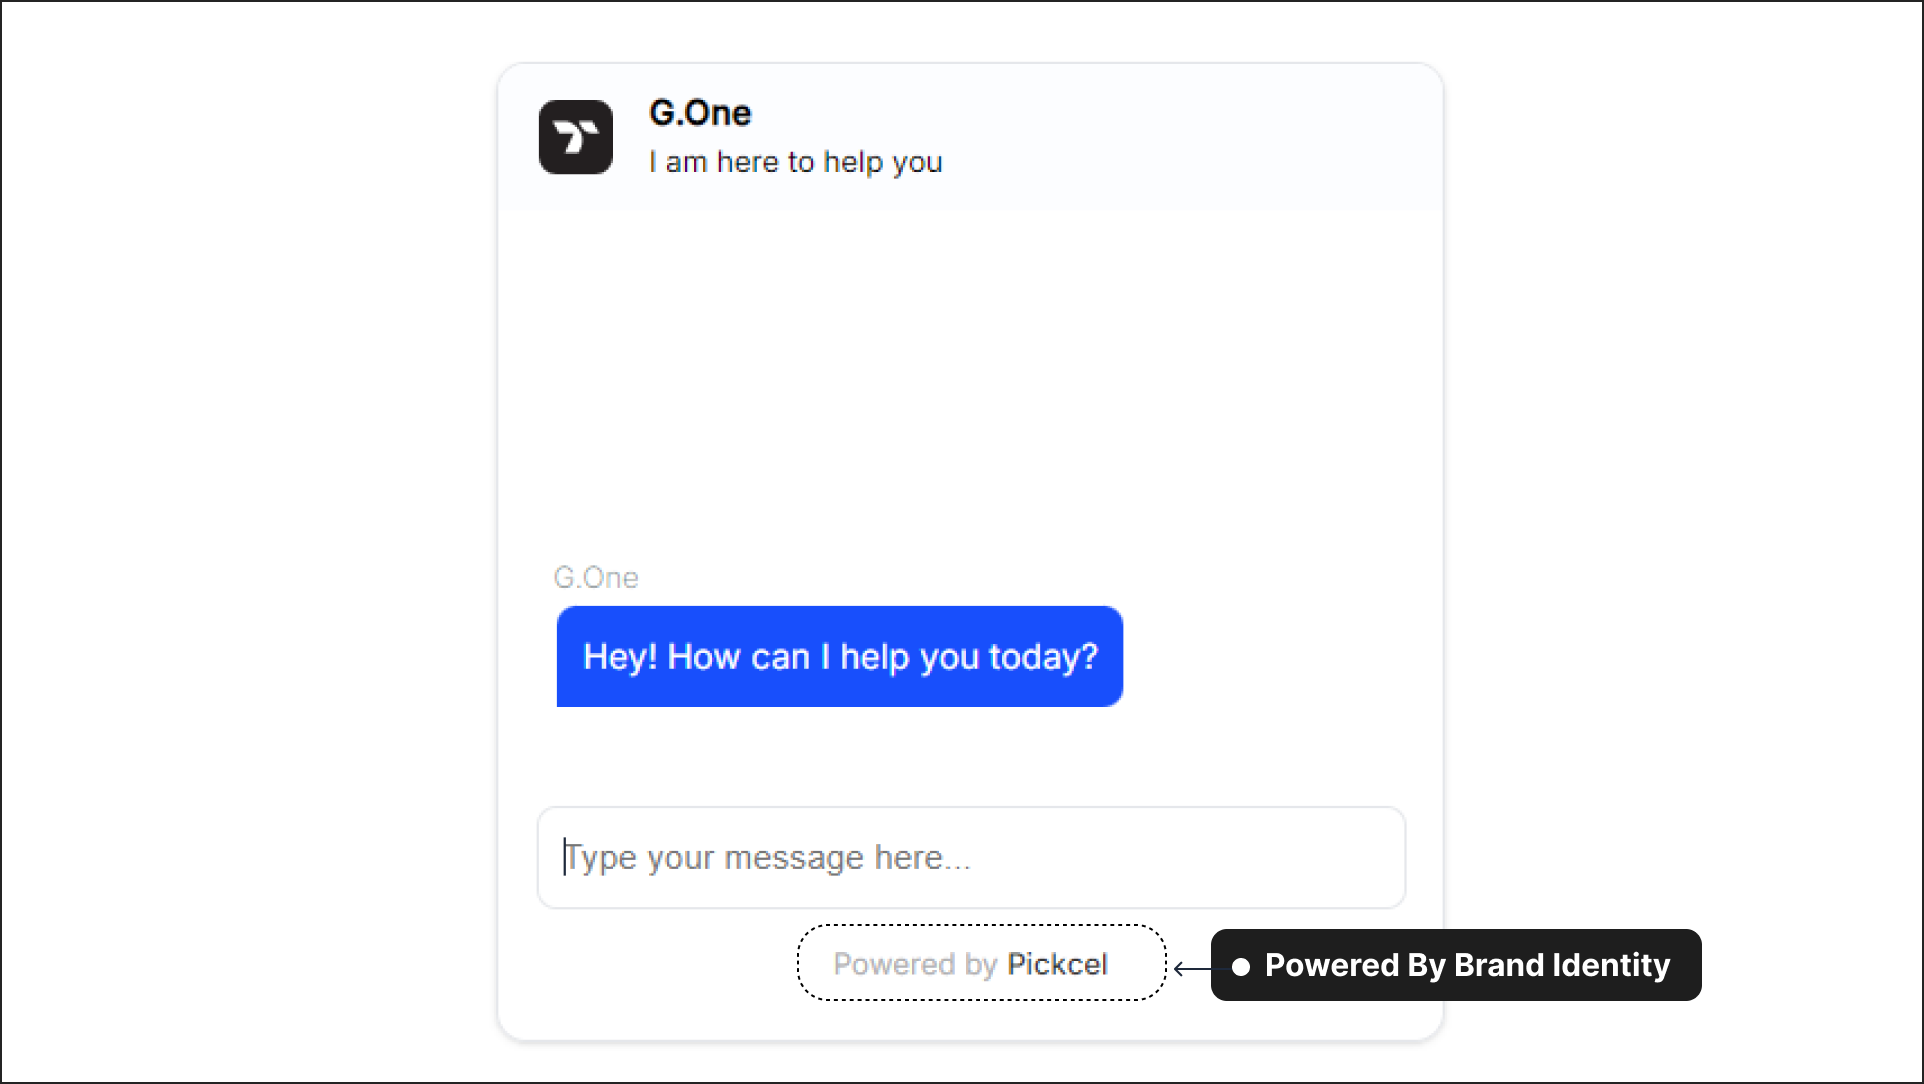
In the Powered By field, which will appear in the footer of the chatbots created by your Customer, enter the name of your brand. In the Powered By URL field, provide the relevant URL that directs users to your brand's homepage or any desired page.
➡️ Finally, after reviewing all the details, click Save to apply the changes to your branding.
Here's the screenshot which shows, how the Powered By footer looks:
🌐 Once you complete all these steps, you should be able to see your custom domain displayed like this:
That's a wrap! 🎉 You have successfully mapped your custom domain to Thinkstack and are now ready to start creating and managing accounts for your Customer.