Training Your Chatbot Using Zapier
Prerequisites:
- You must be logged in to your Thinkstack account and have already created a chatbot.
- You must have an account with Zapier.
Select the chatbot for which you want to train and follow these steps:
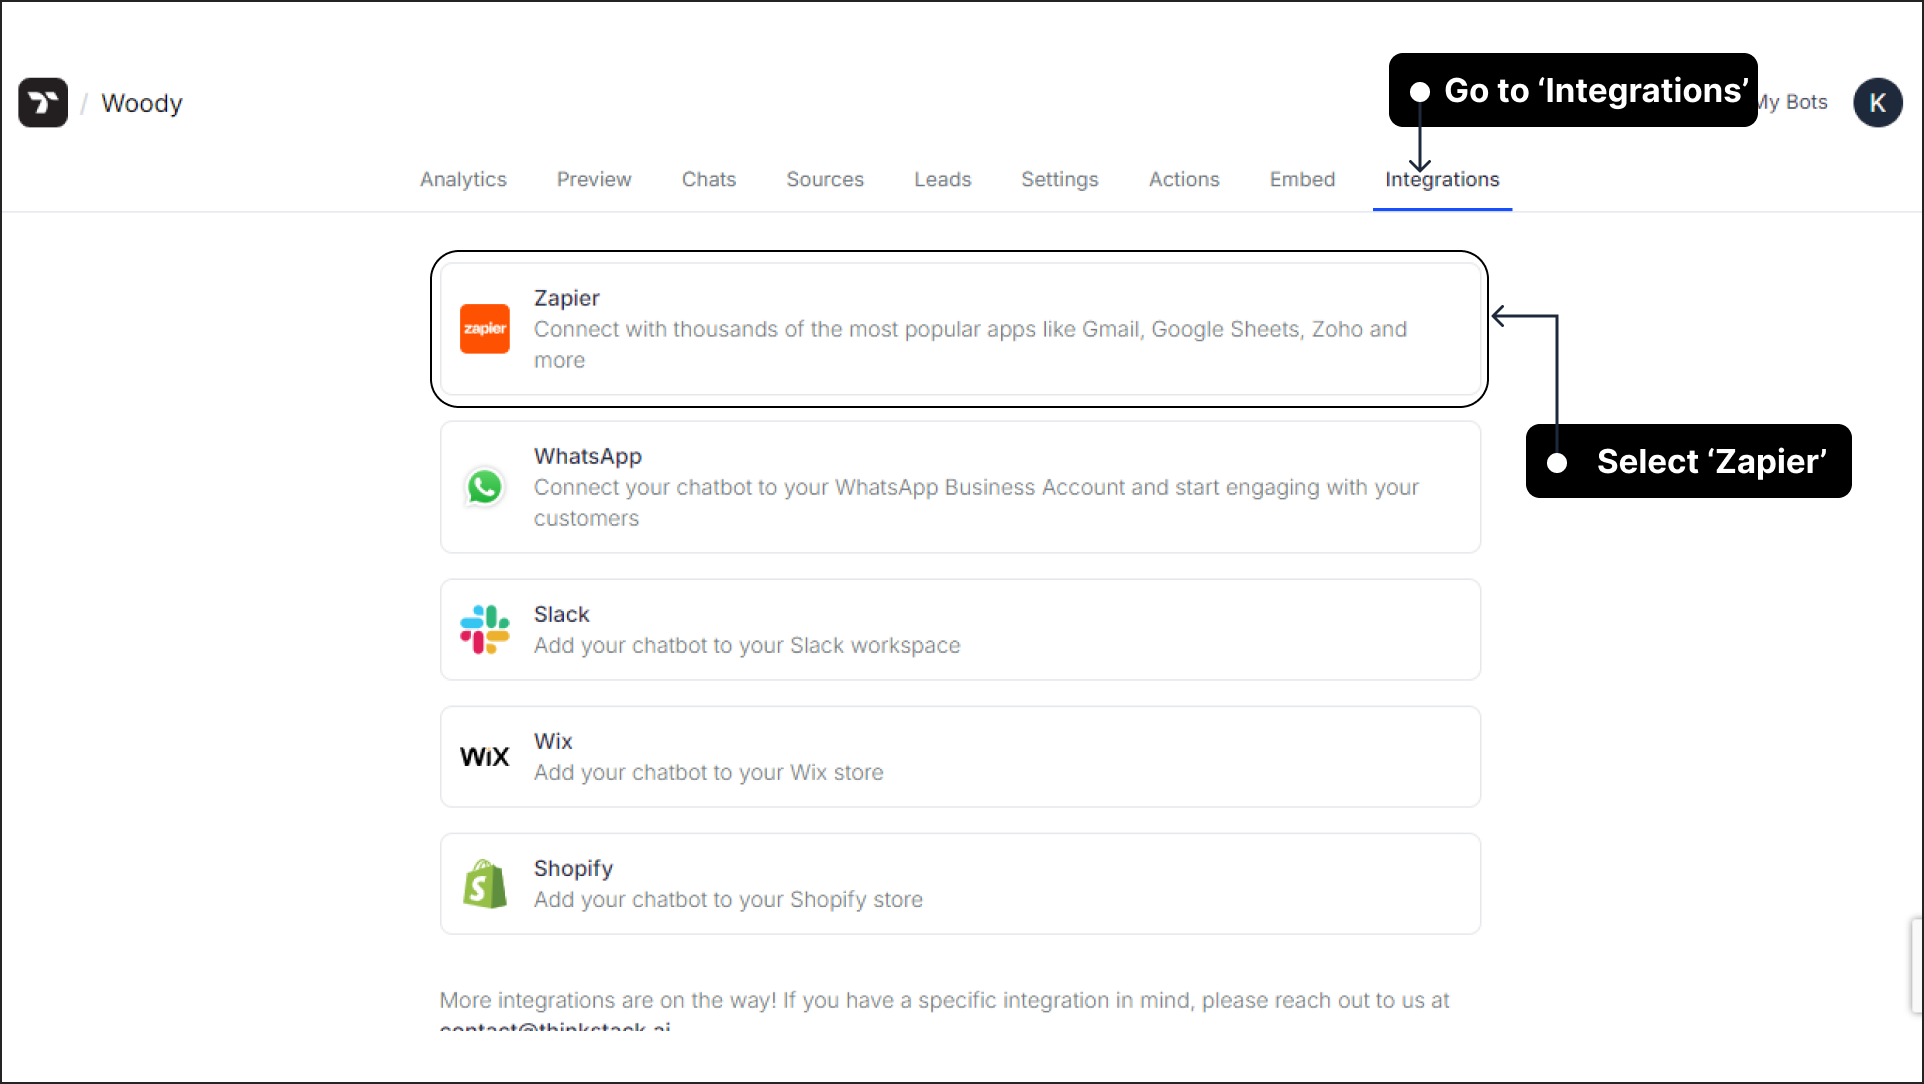
Go to the 'Integrations' section in the top naigation bar and select Zapier.
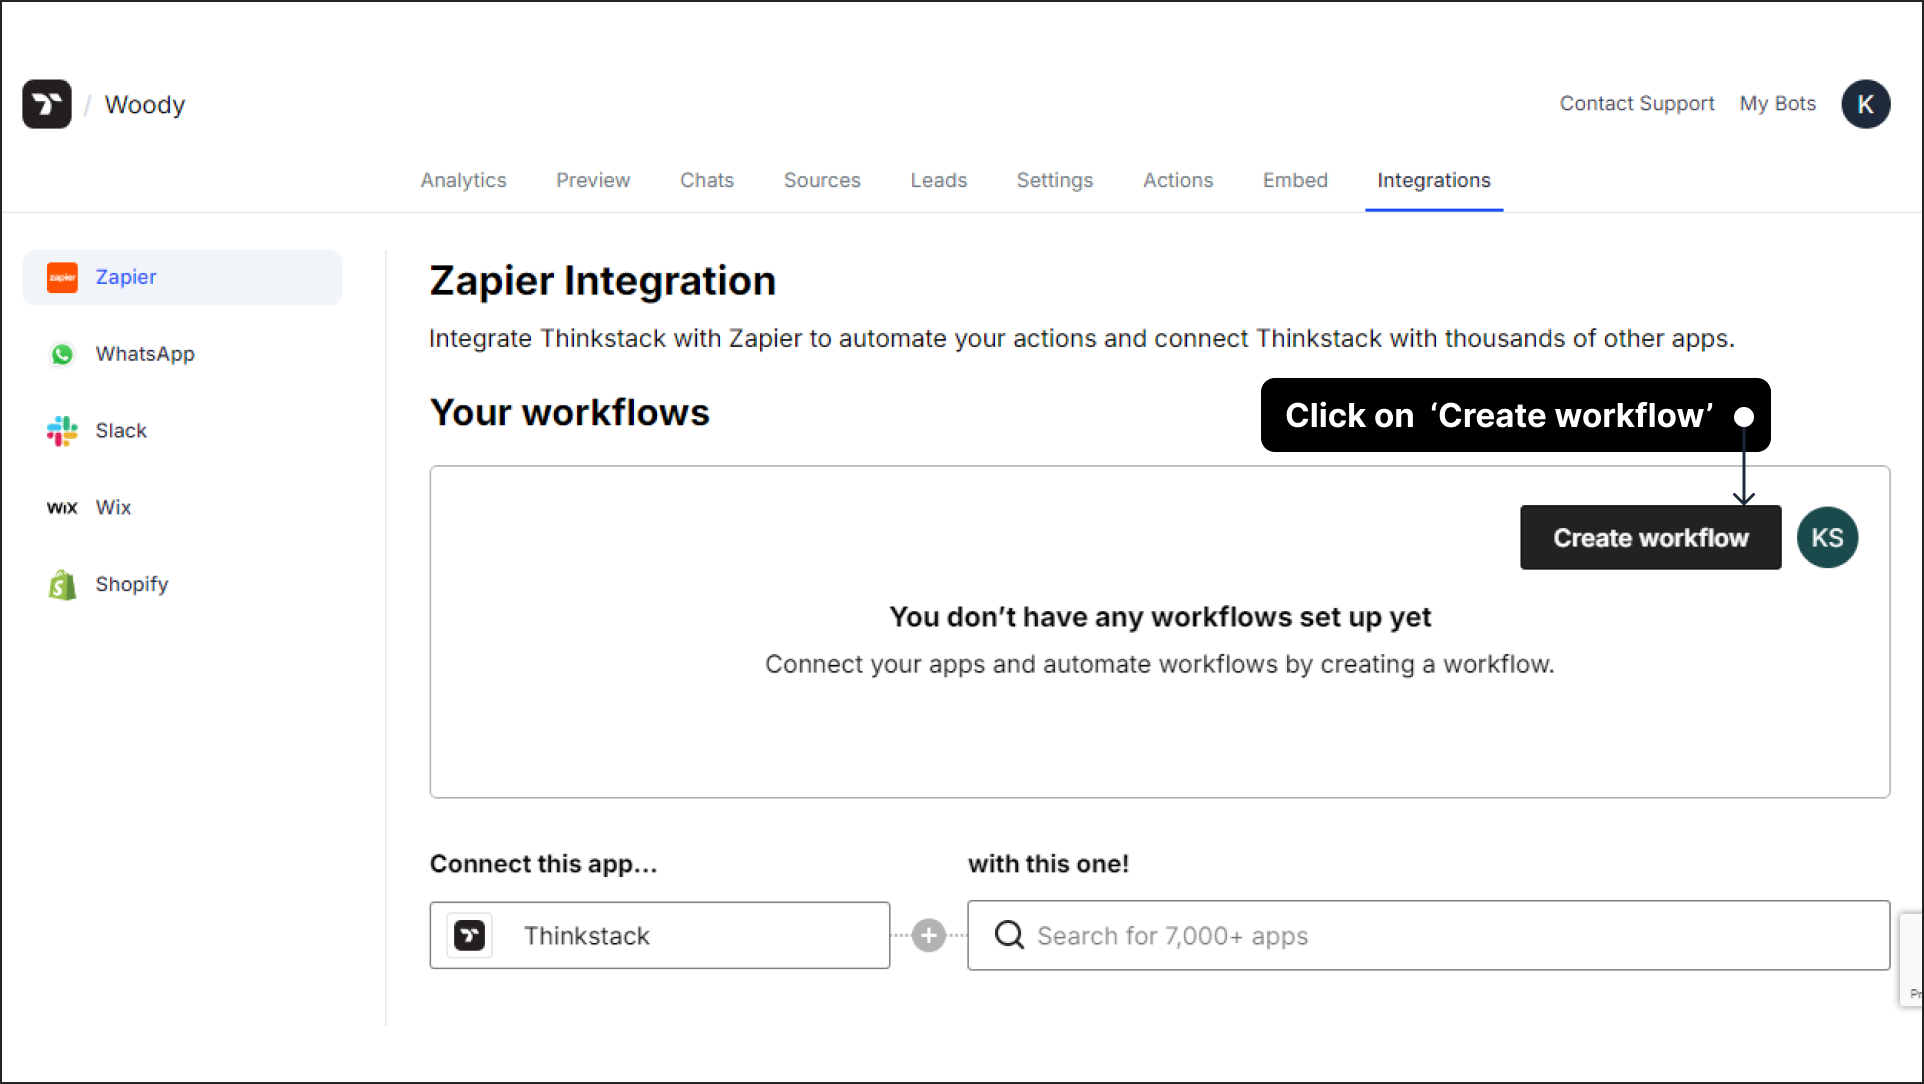
Under 'Your Workflows', log in to Zapier using your credentials. Once logged in successfully, click on 'Create Workflow'.

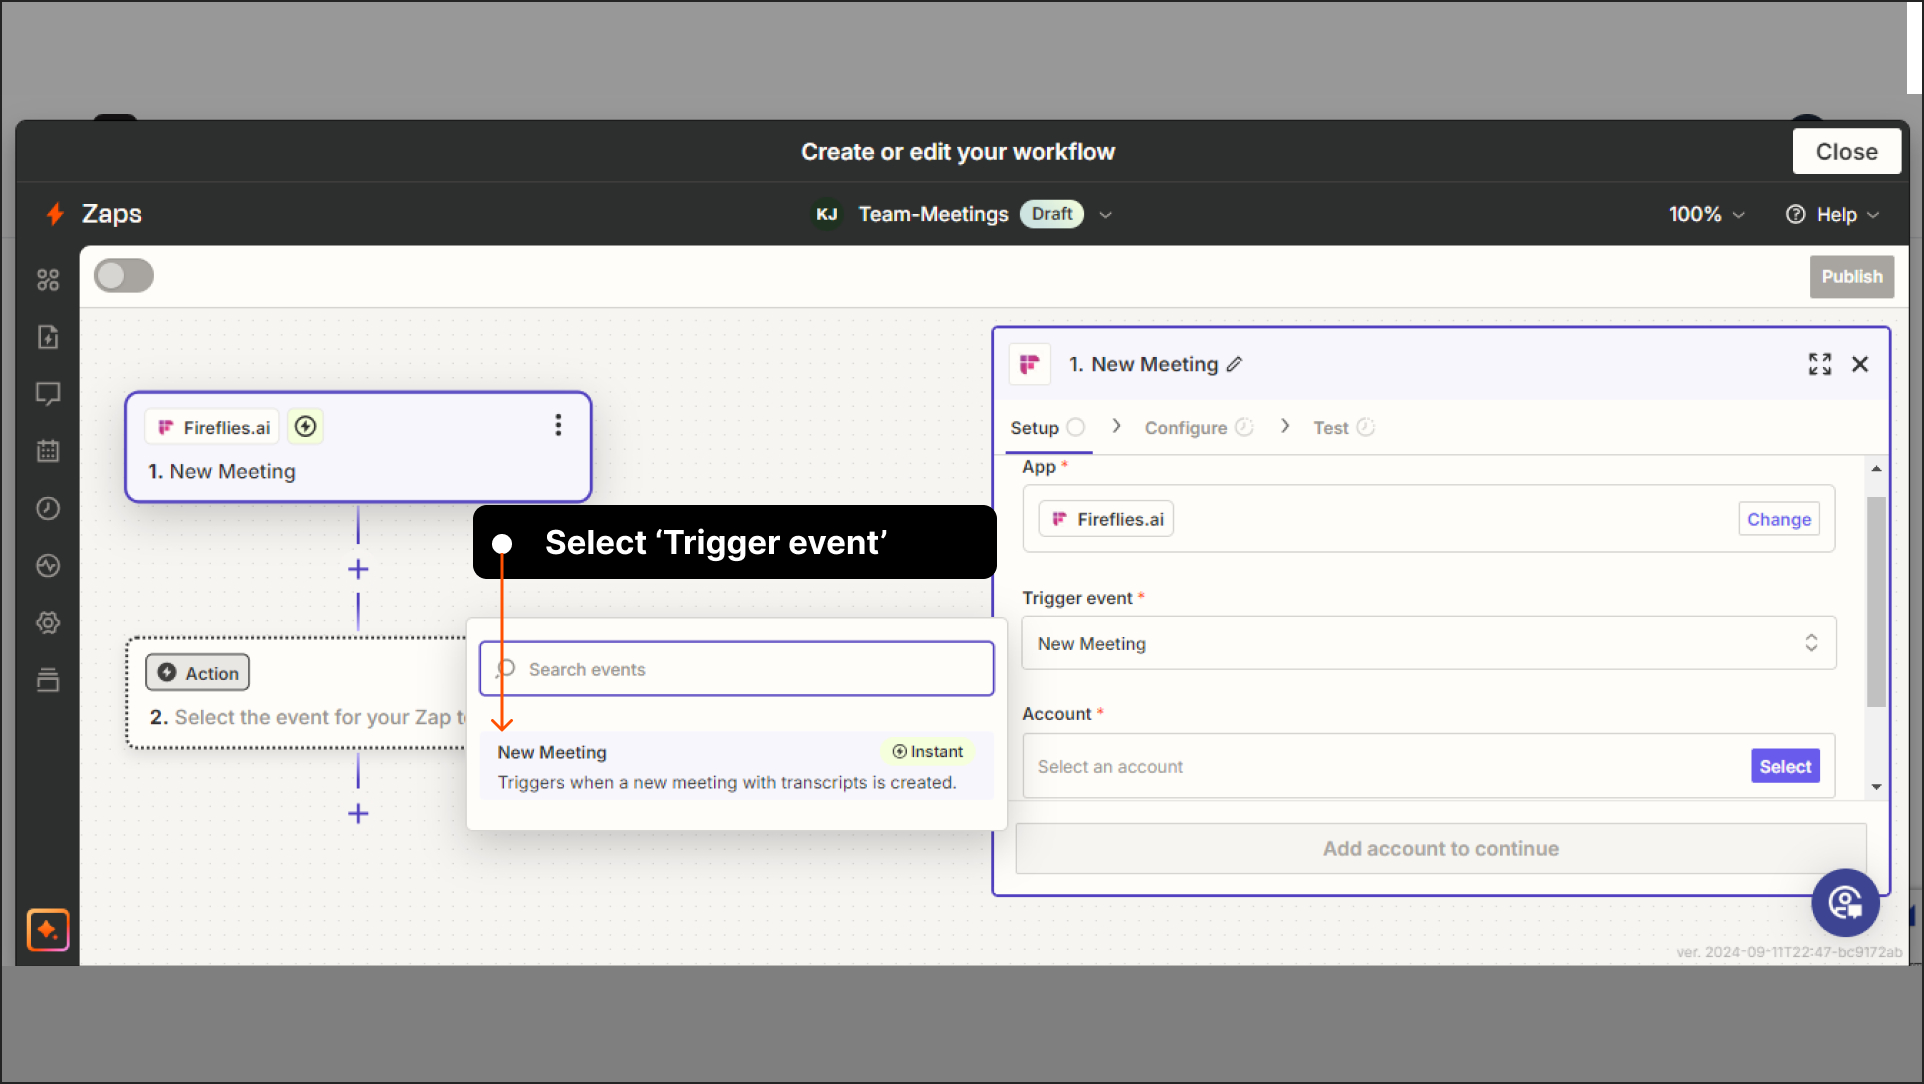
The Zapier workflow creation window opens. Give a name to your Zap. Start by setting up a Trigger, which is the event that starts your Zap.
Click on 'Trigger'.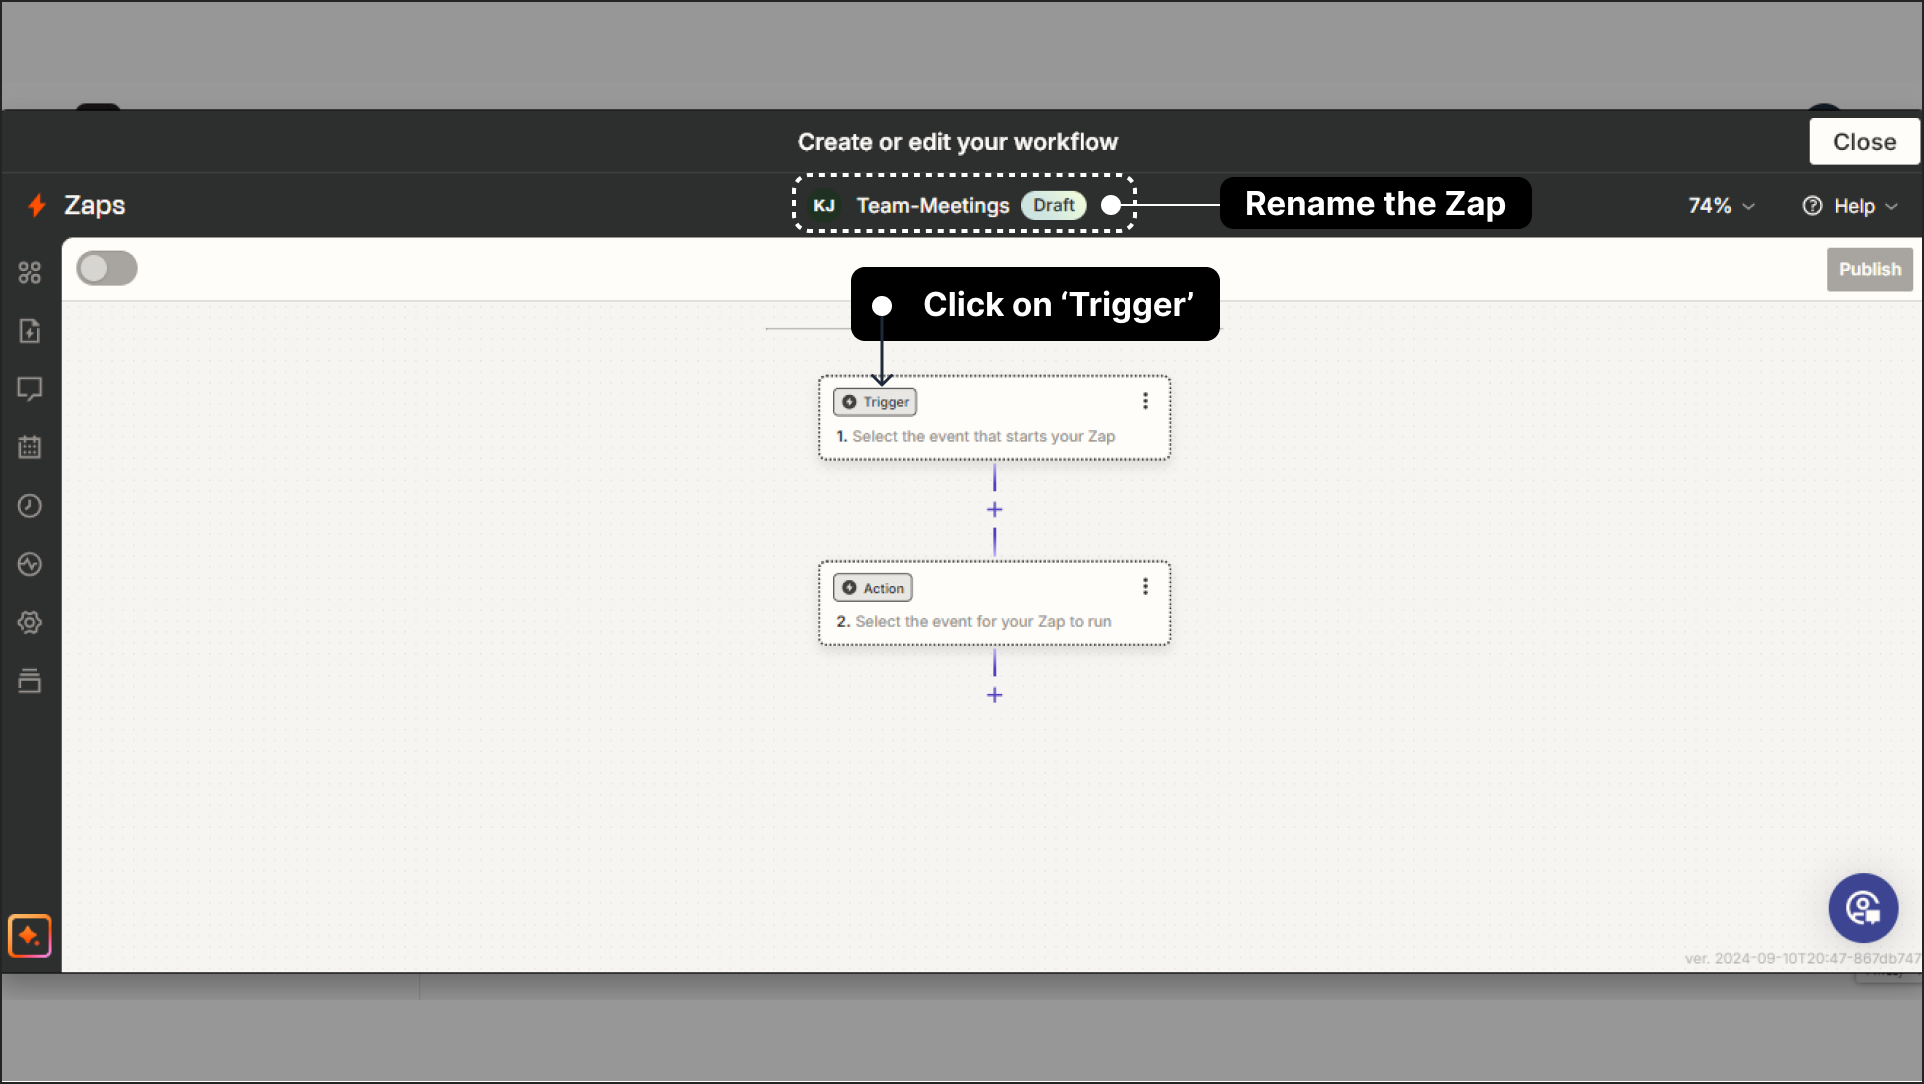
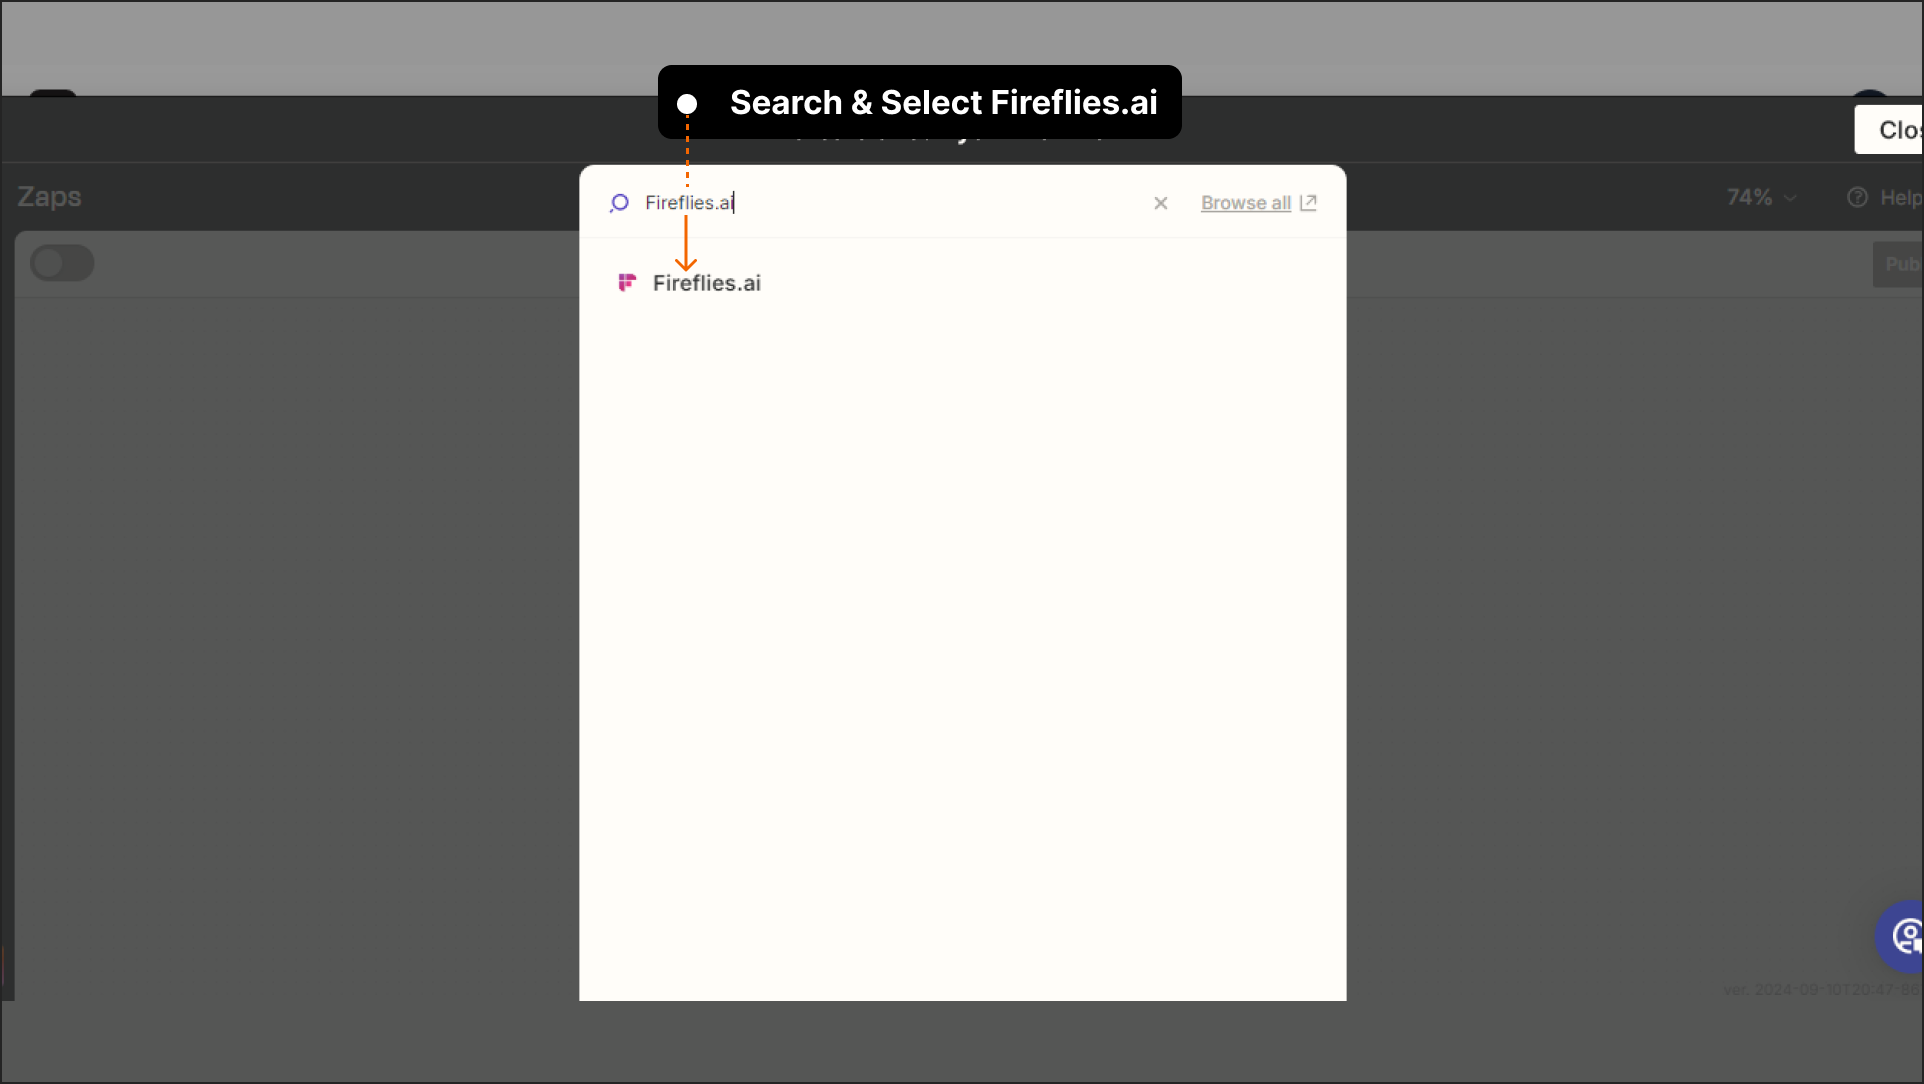
Search for the Fireflies.ai app, and select it.
Select the Trigger event; in this case it will be 'New Meeting'.
Add your Fireflies.ai account to the Zapier using the Fireflies.ai API key and your registered Email ID respectively.
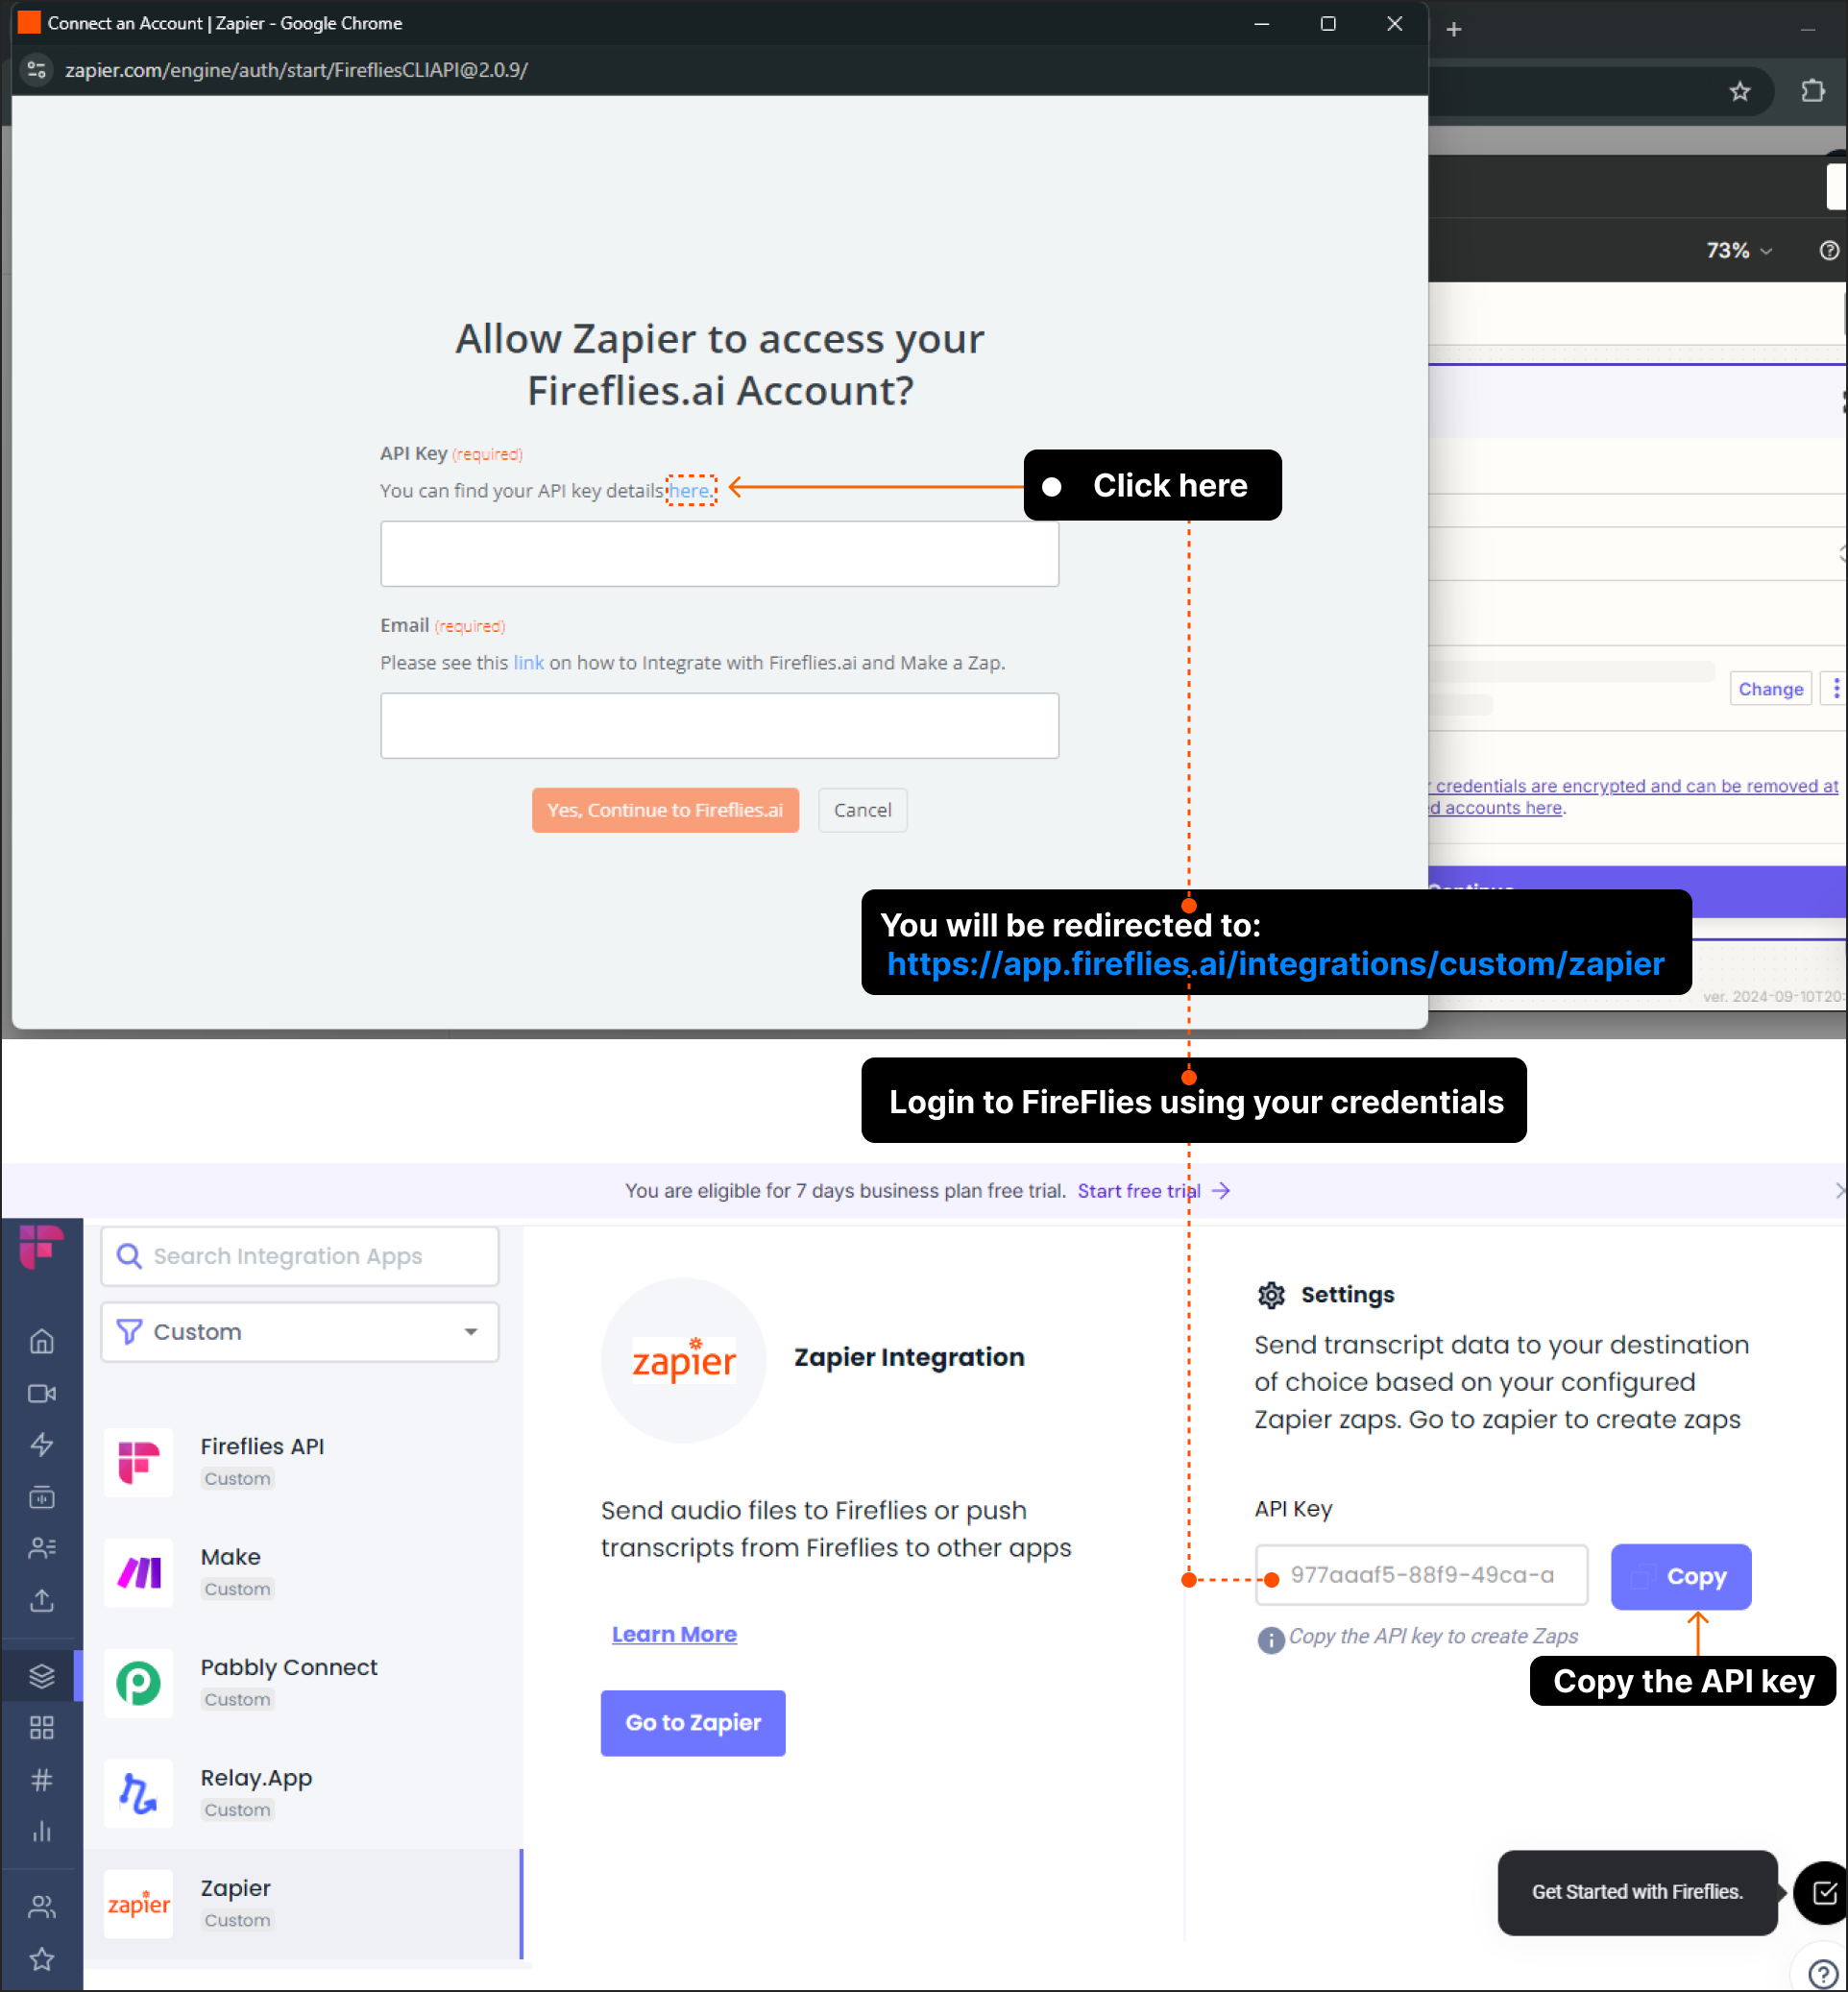
You just have to click on the respective fields as shown in the image above and copy paste the API key where it was prompted..
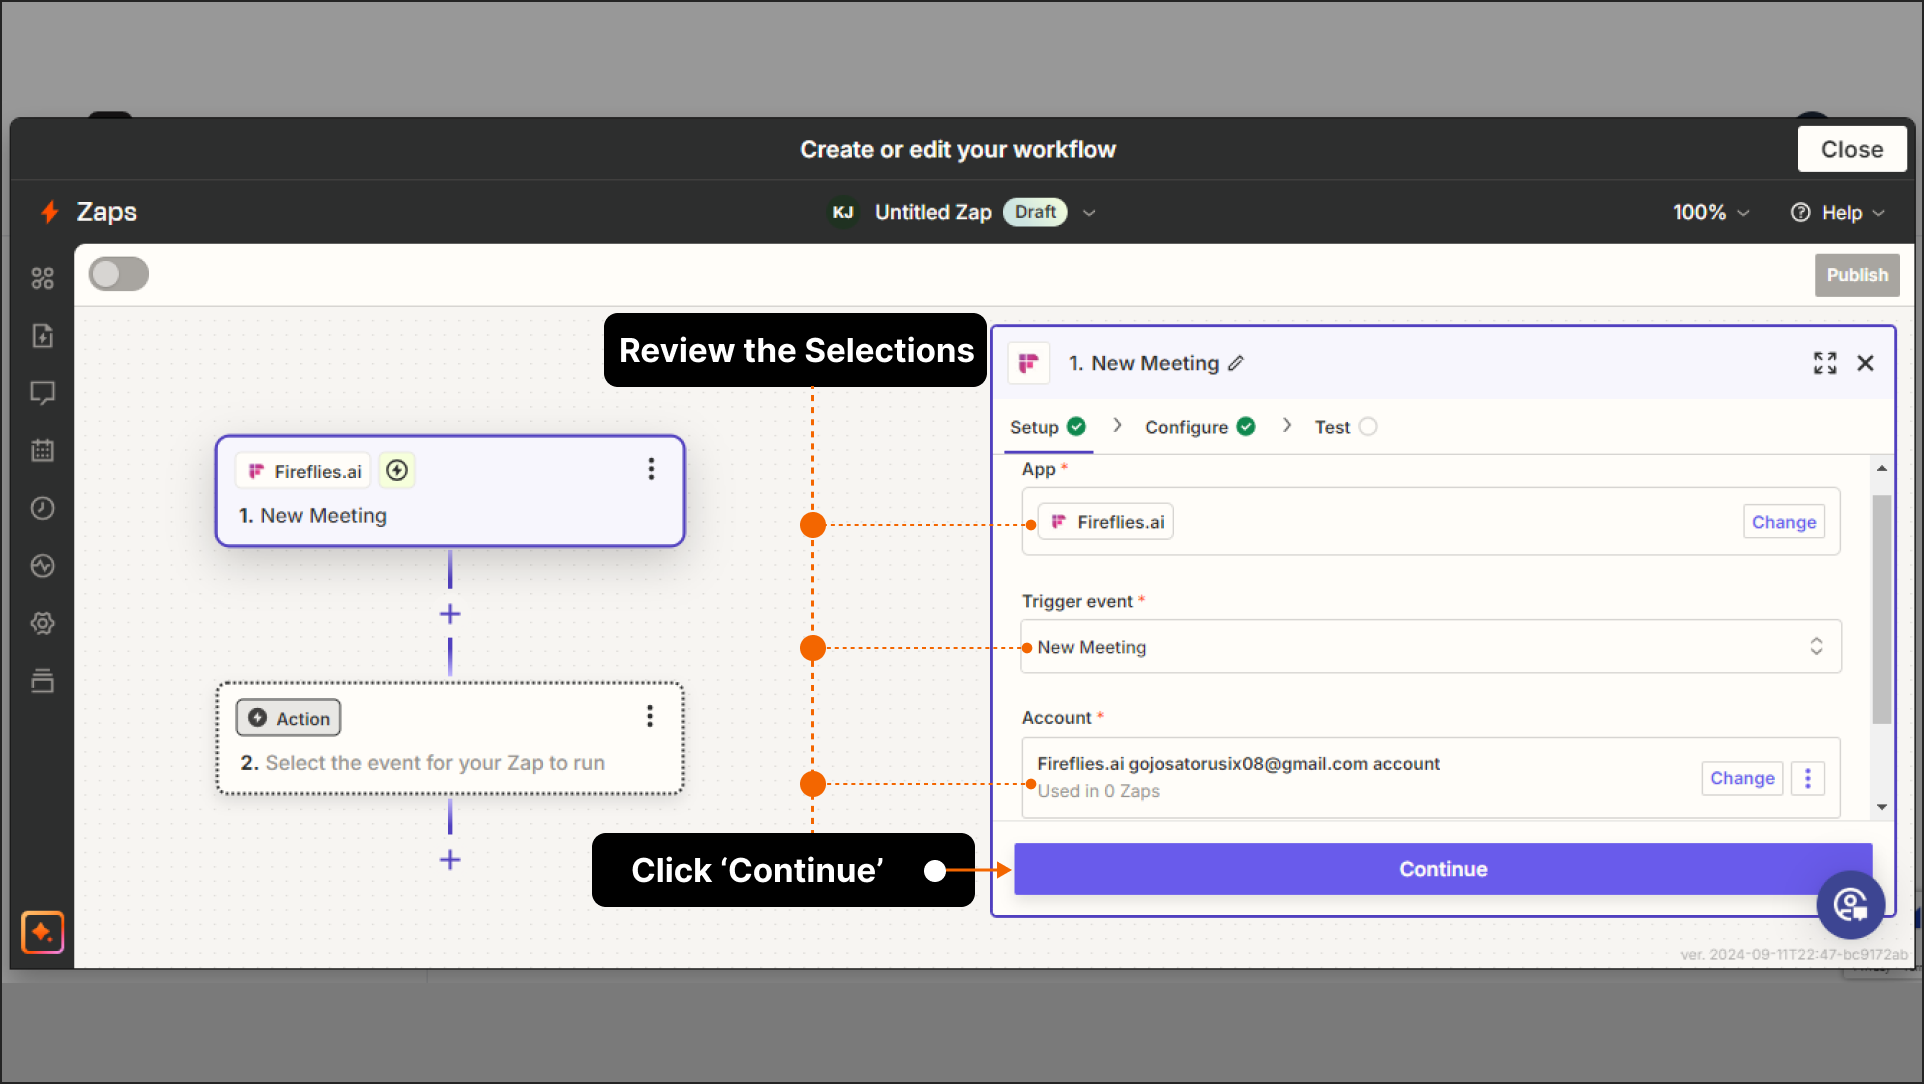
Once your Fireflies account is successfully added, review all the selections and click Continue.
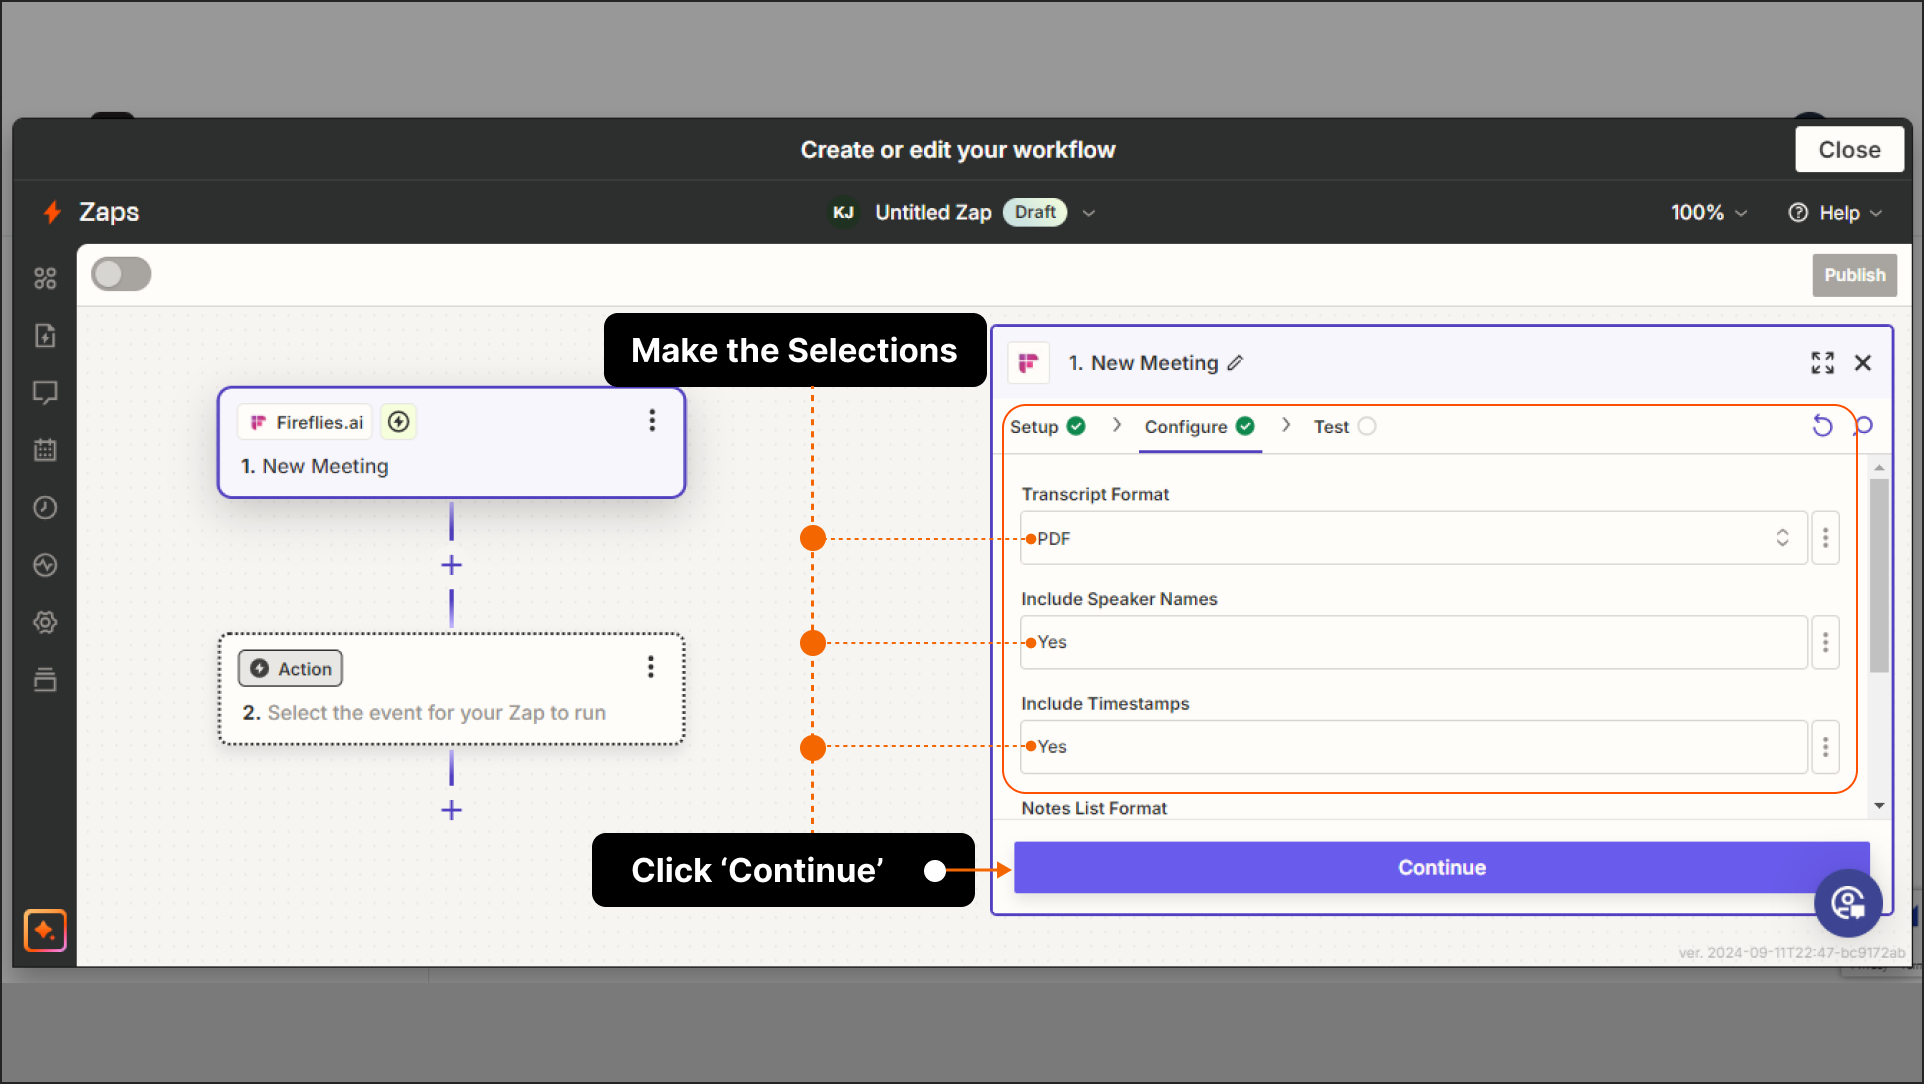
In the Configure section, select your preferred Transcript Format and make other choices like including Speaker Names and Timestamps based on your needs. Once you've made your selections, click 'Continue'.
In the Test section, click on 'Test trigger' to ensure everything is set up correctly and then click 'Continue'
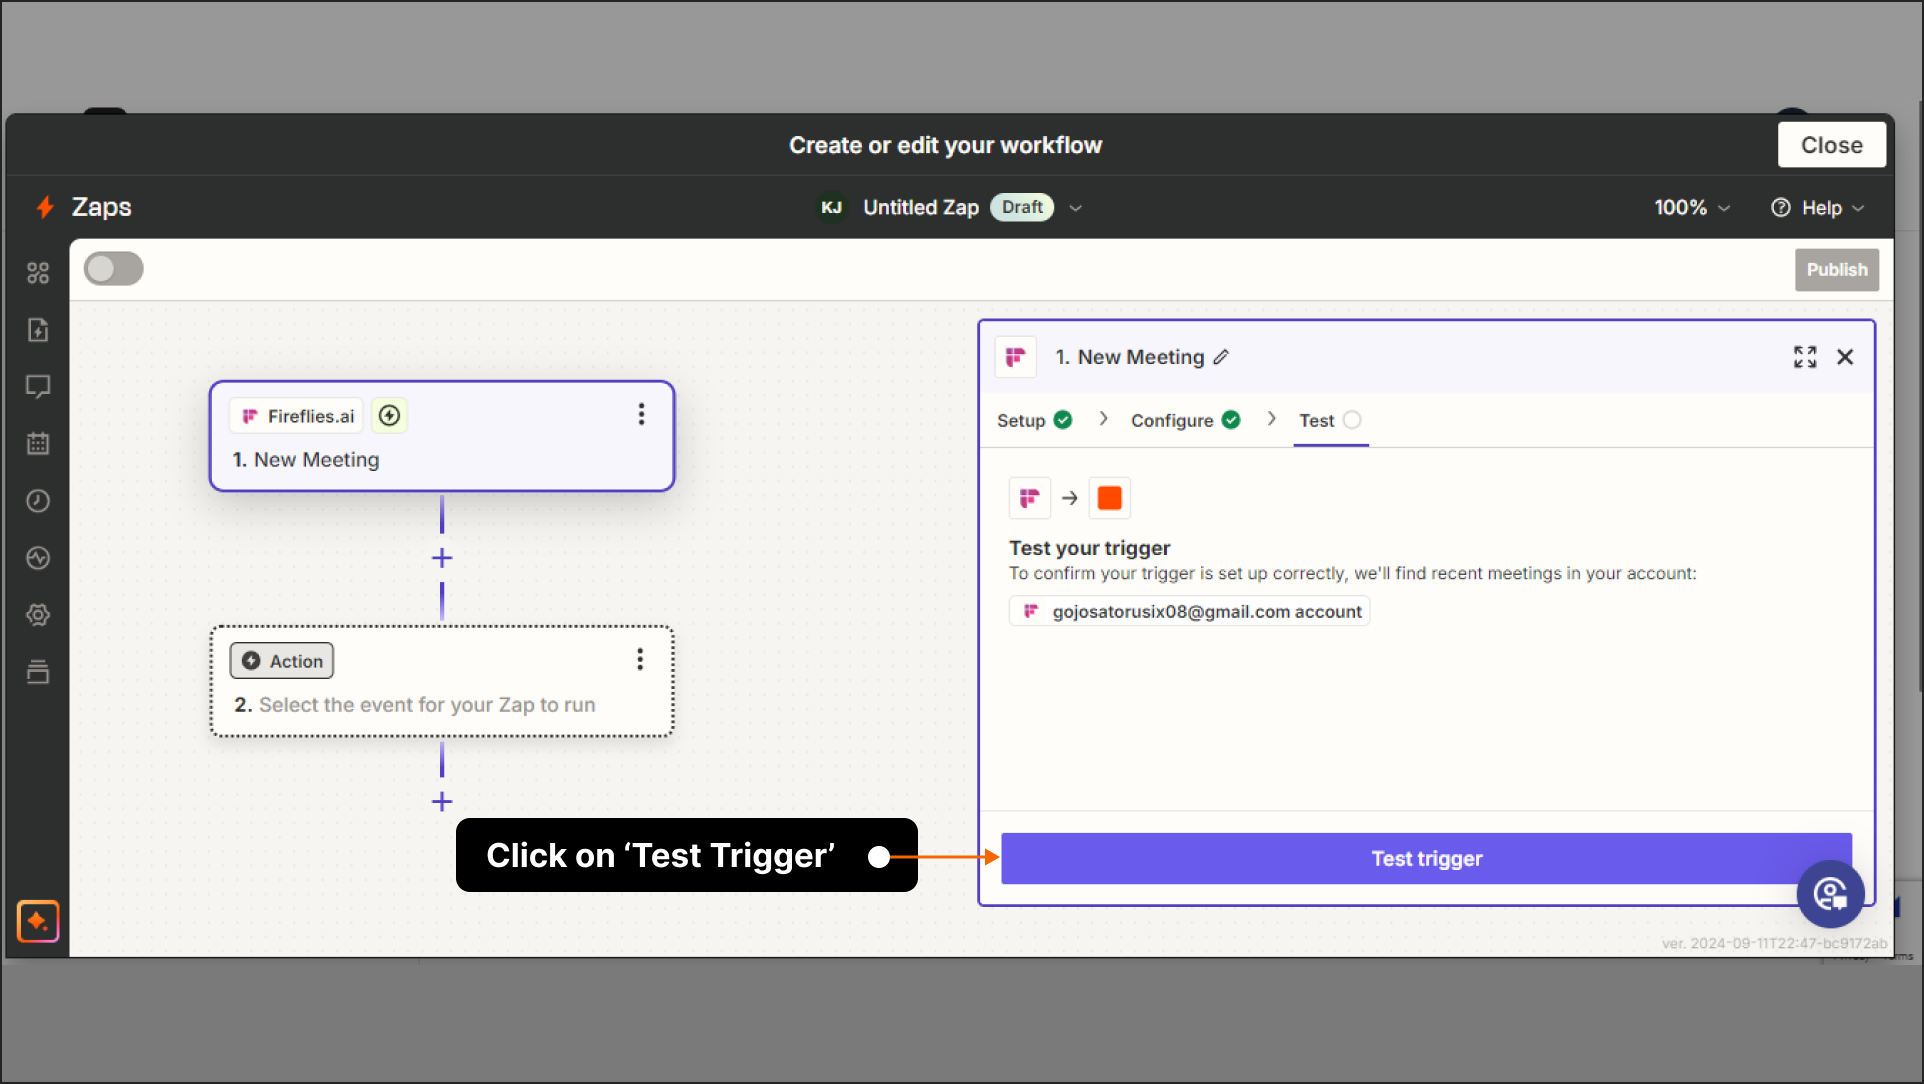
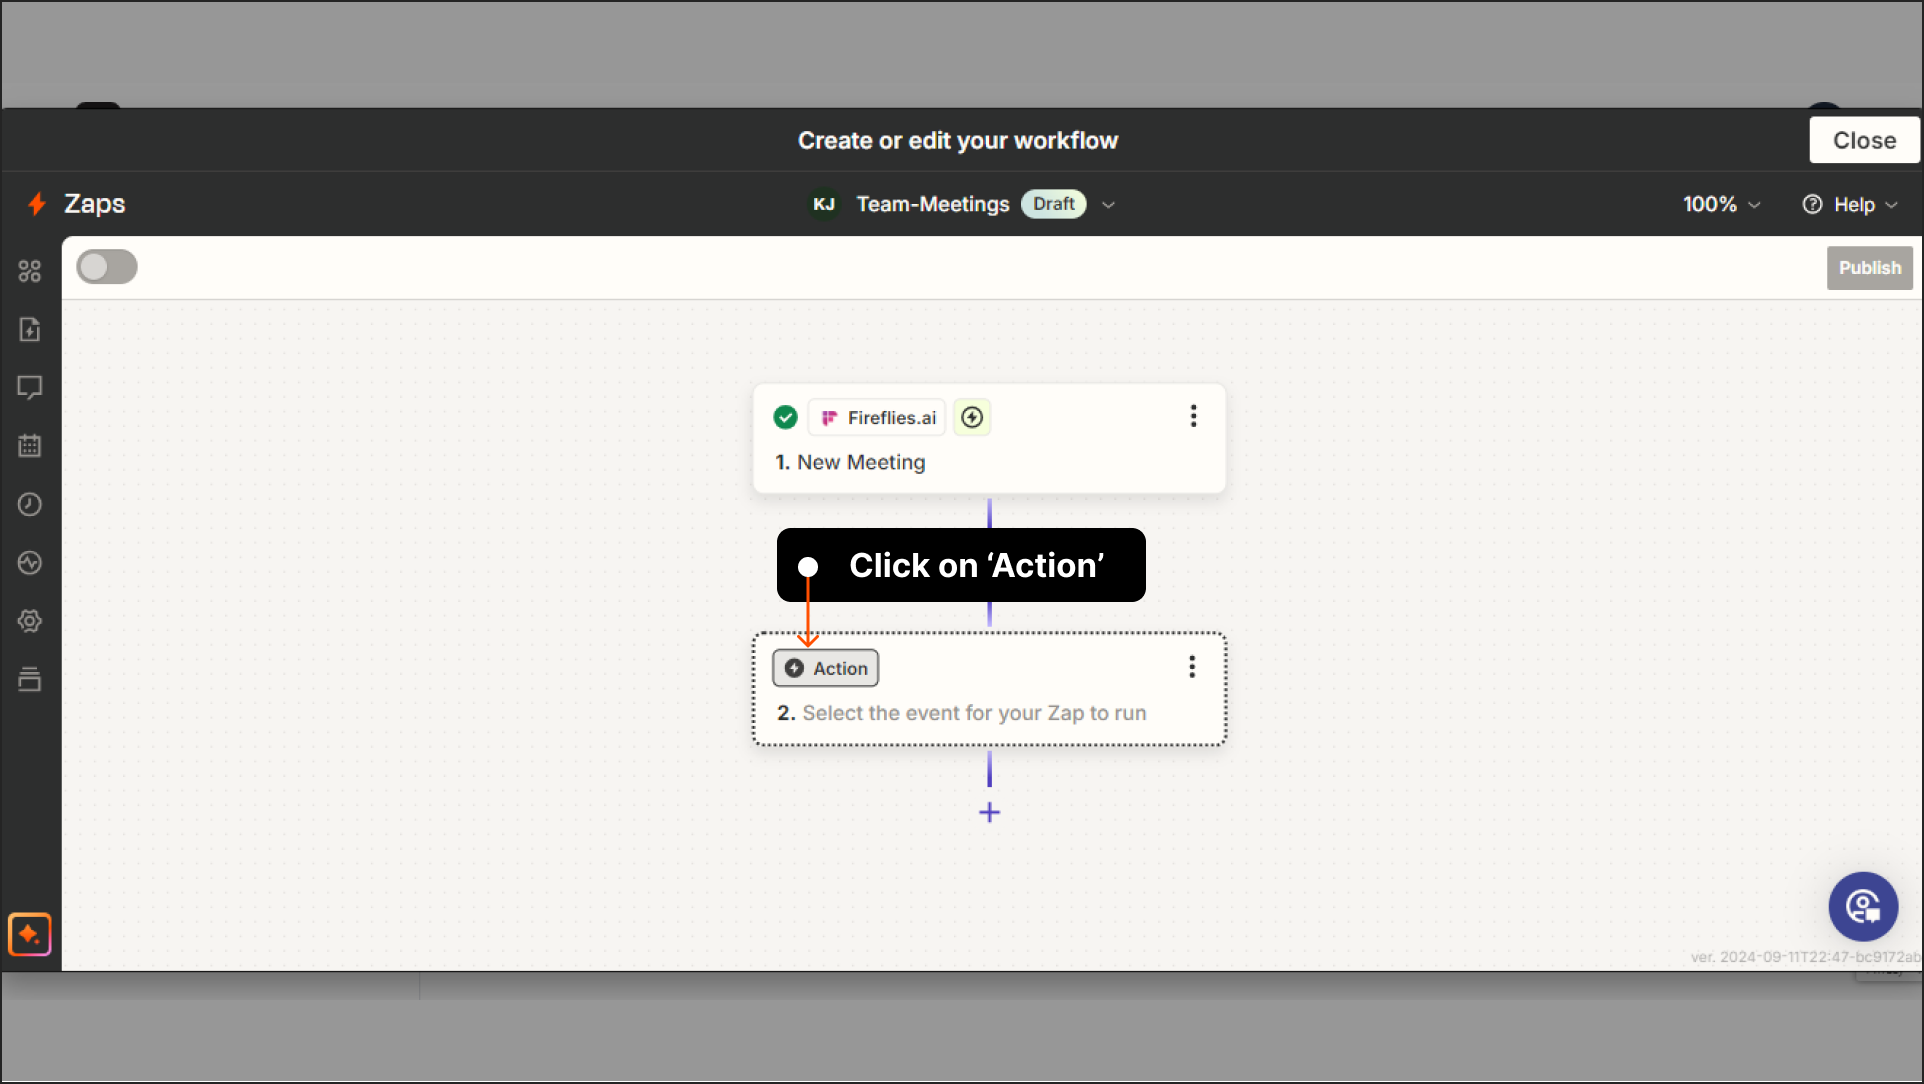
✅You have now completed the process of setting up the trigger in Zapier. Next, you'll need to set up the action.
Click on 'Action'.
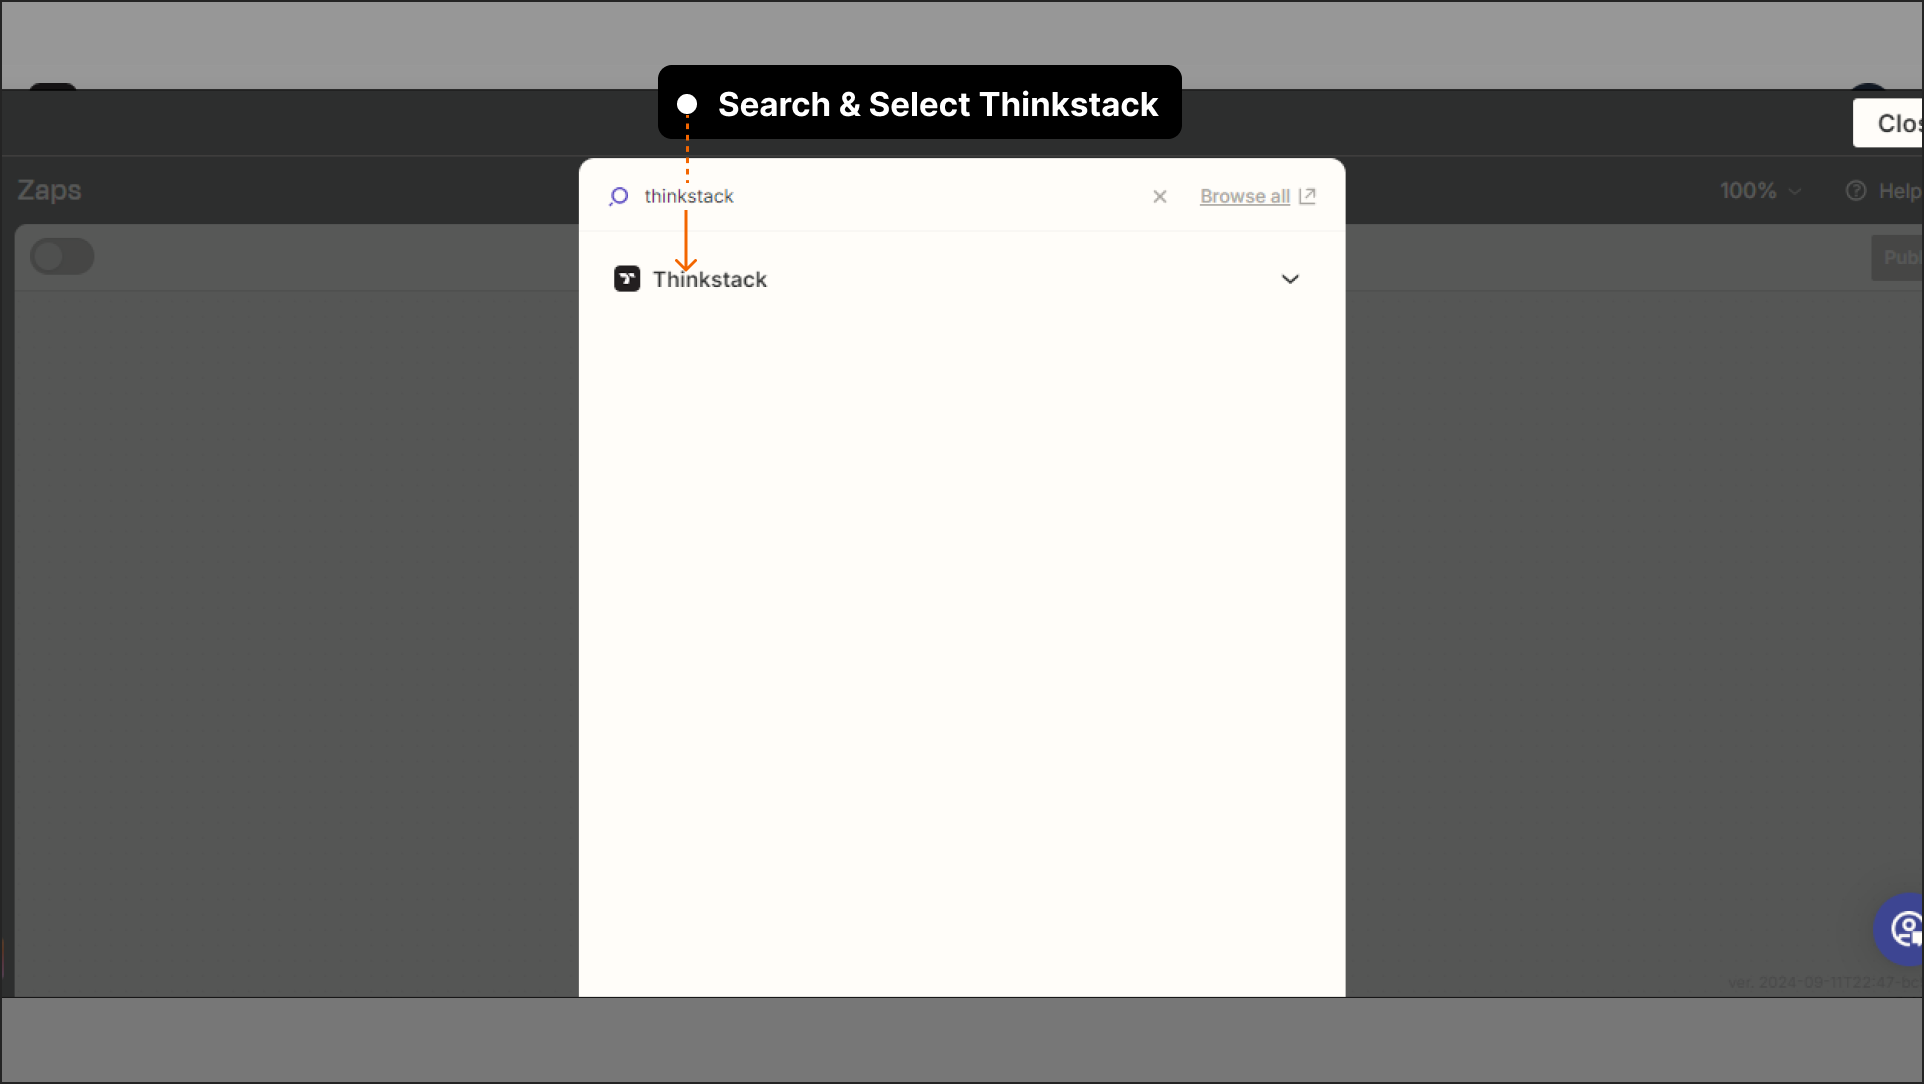
 Search for the Thinkstack app, and select it.
Select the Action event; in this case it will be 'Train Chatbot'.

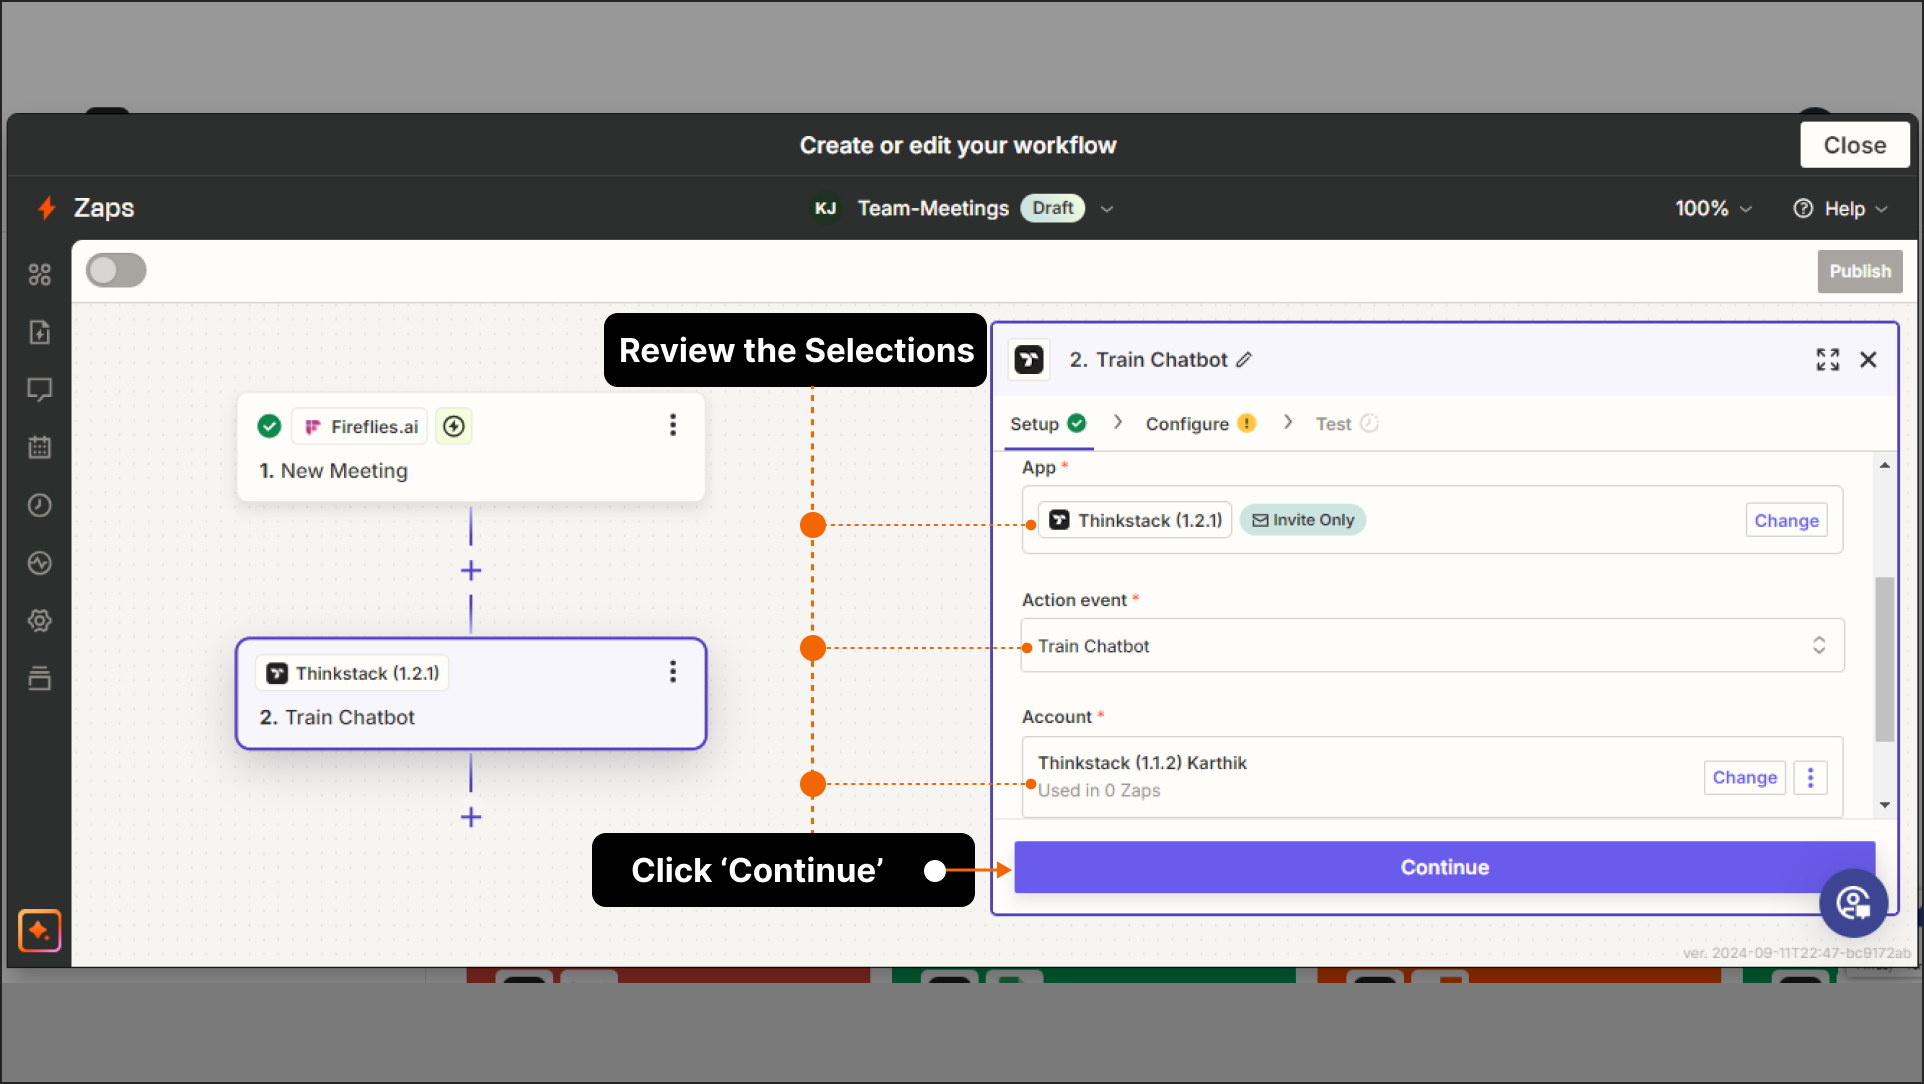
Add your Thinkstack account to the Zapier using the Thinkstack API key.
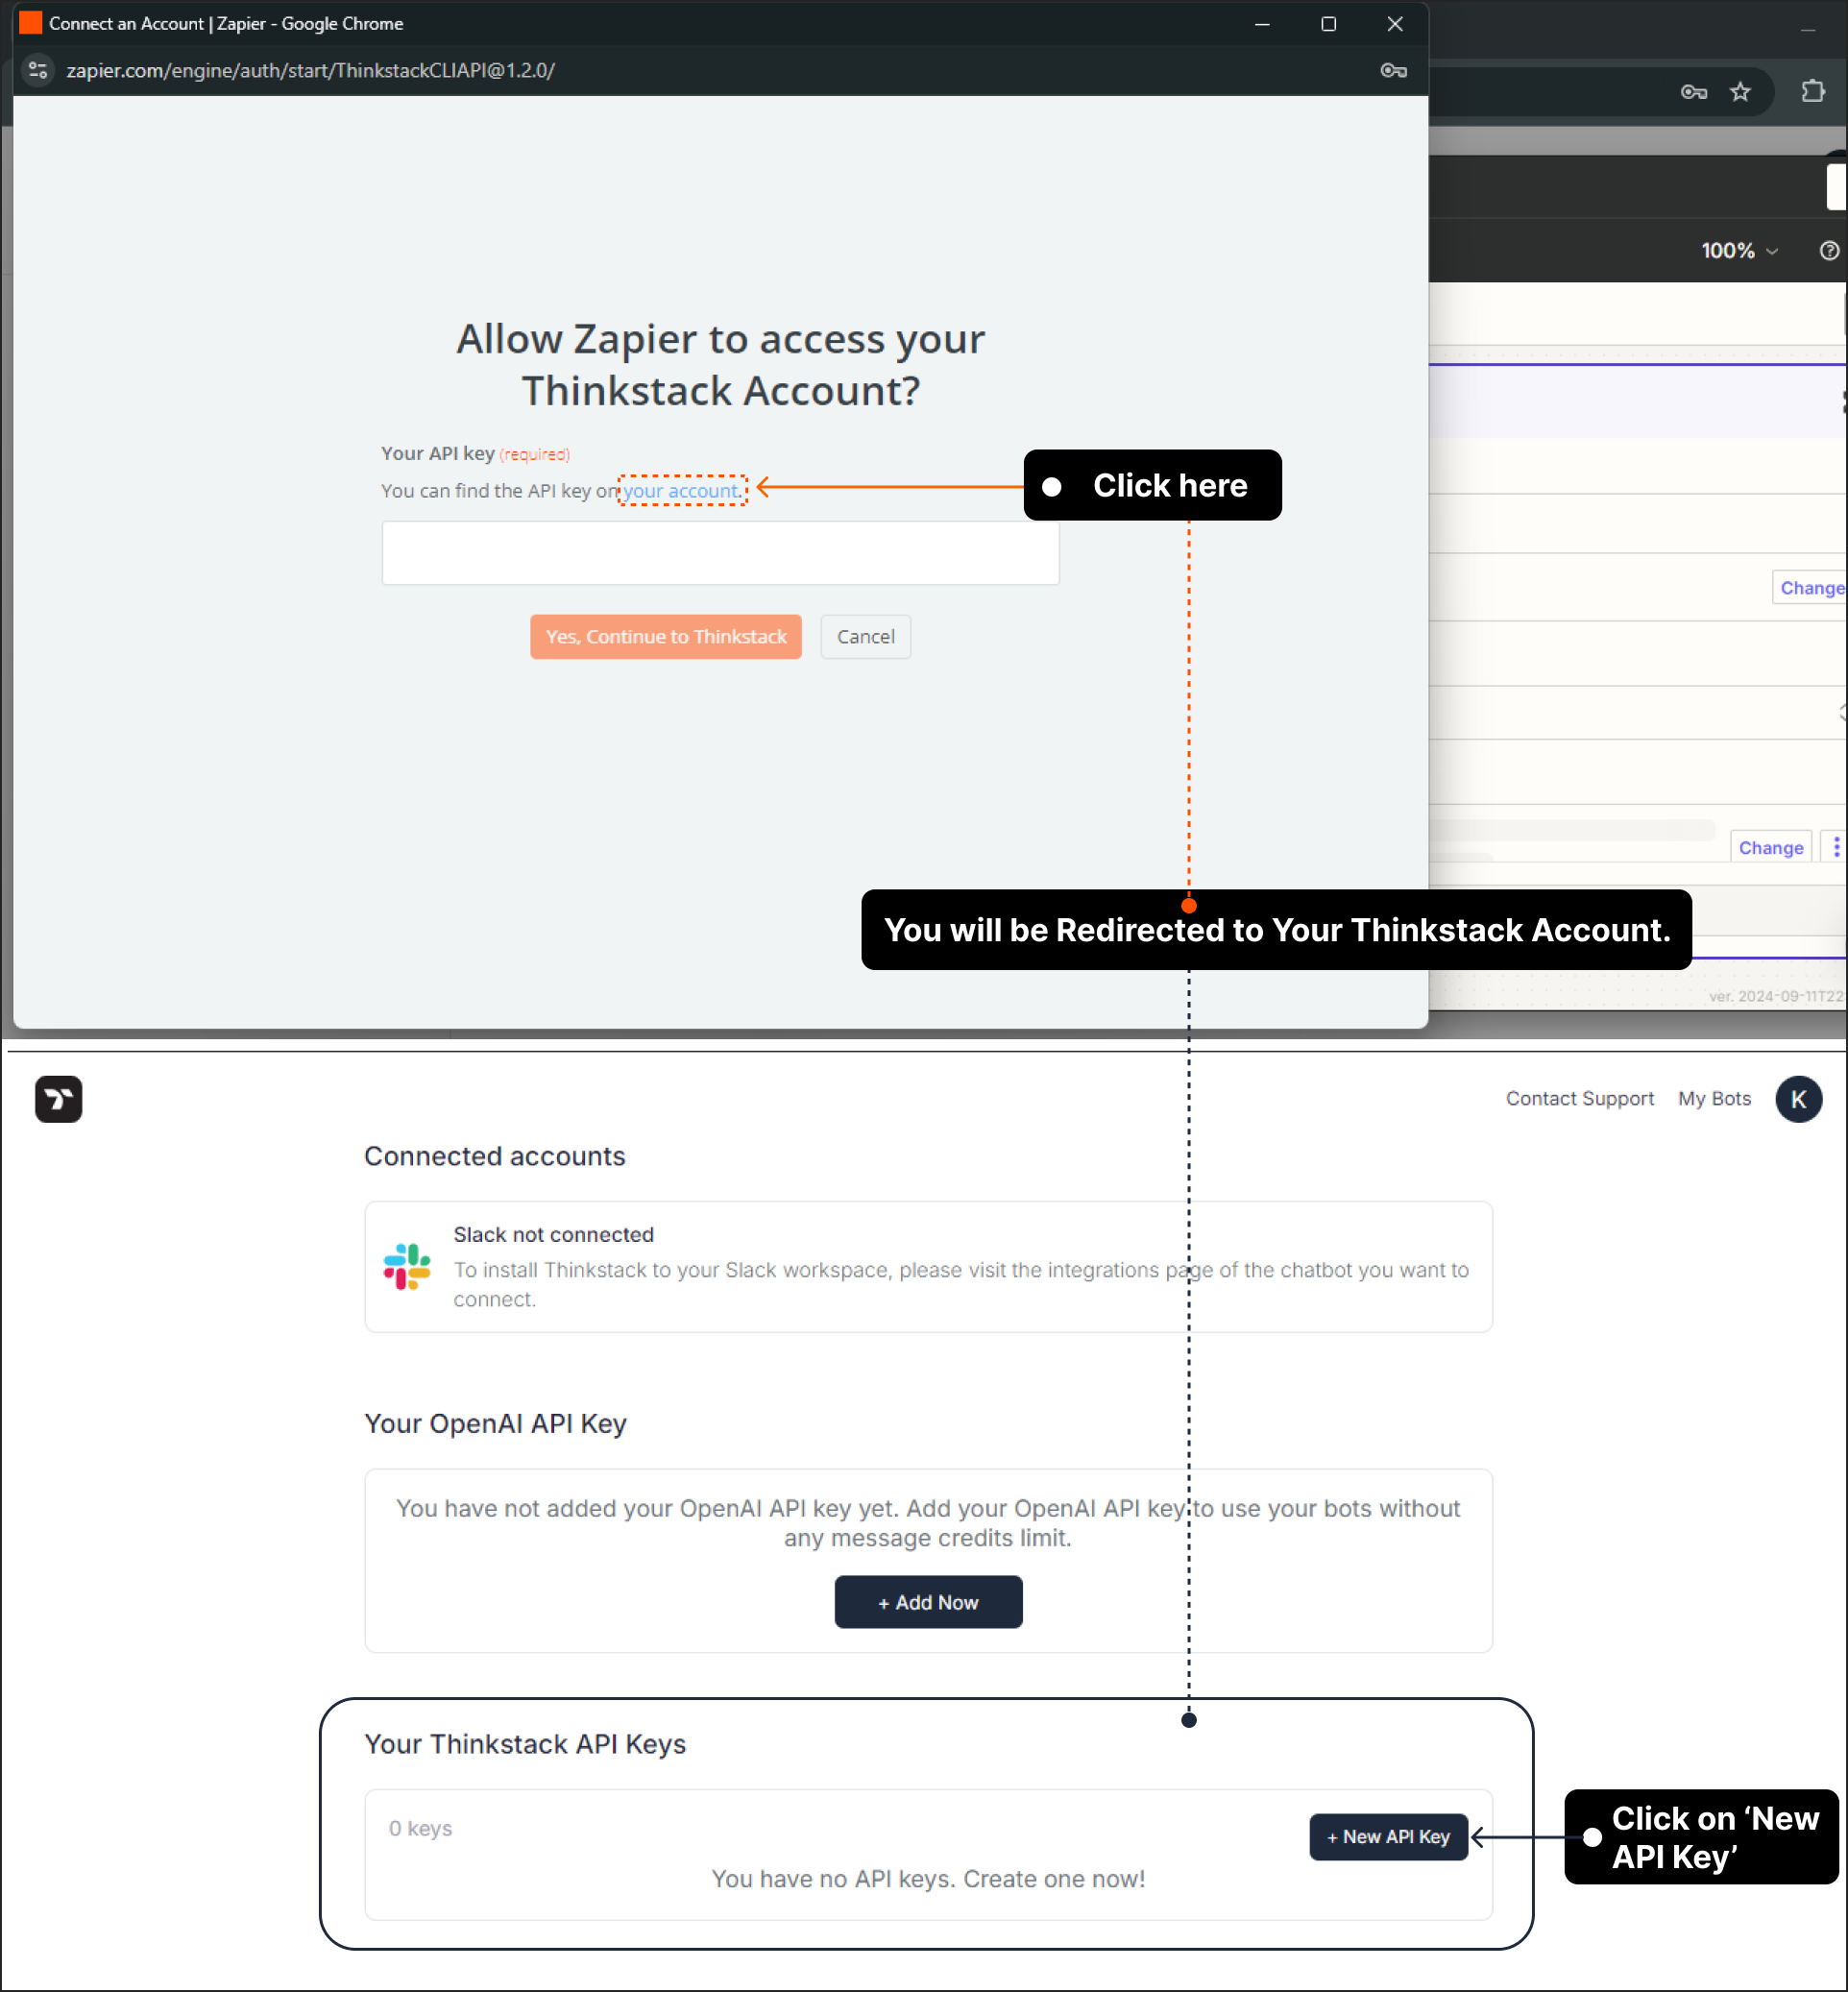
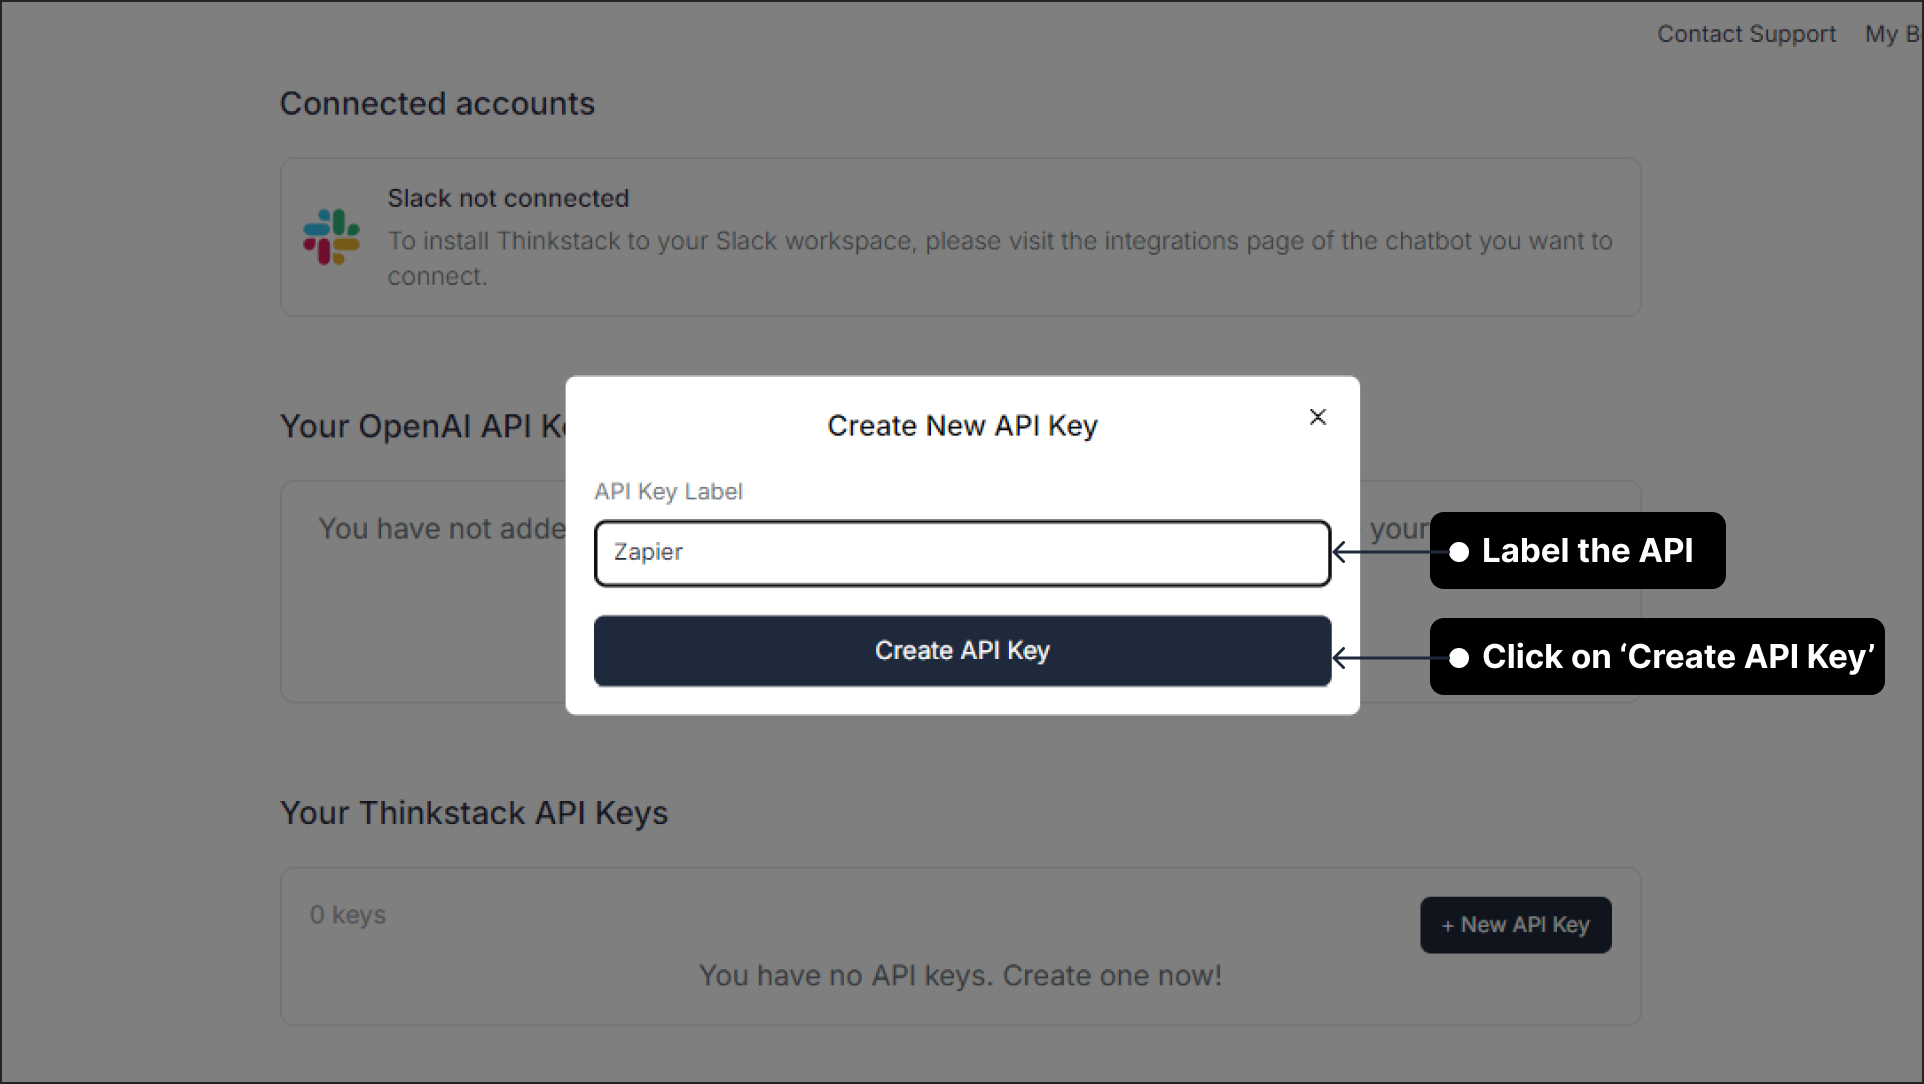
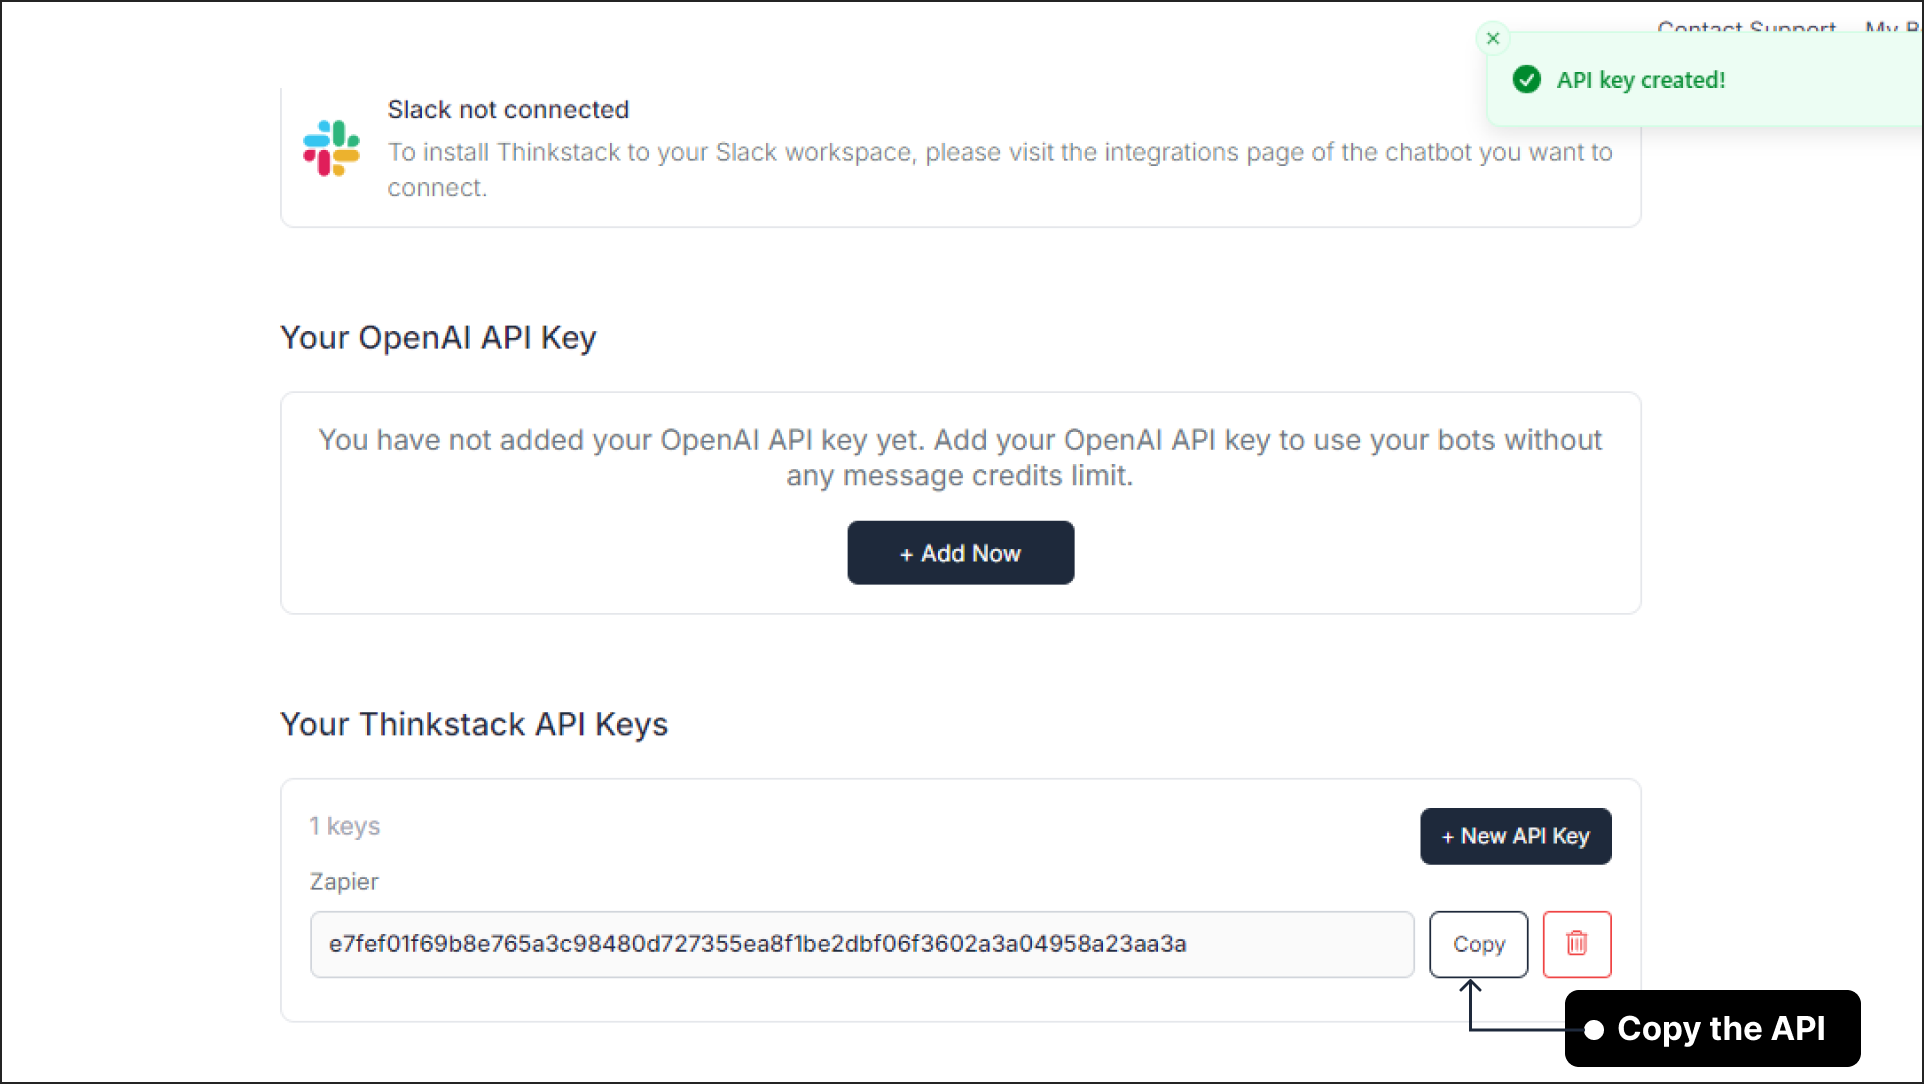
Create an API key in Thinkstack by navigating to 'Your Thinkstack API keys'. Click 'New API key', assign a label/name, and then click 'Create API key'.
Copy the API key and paste it into the Zapier window page where it was prompted.
Once your Thinkstack account is successfully added, review all the selections and click Continue.
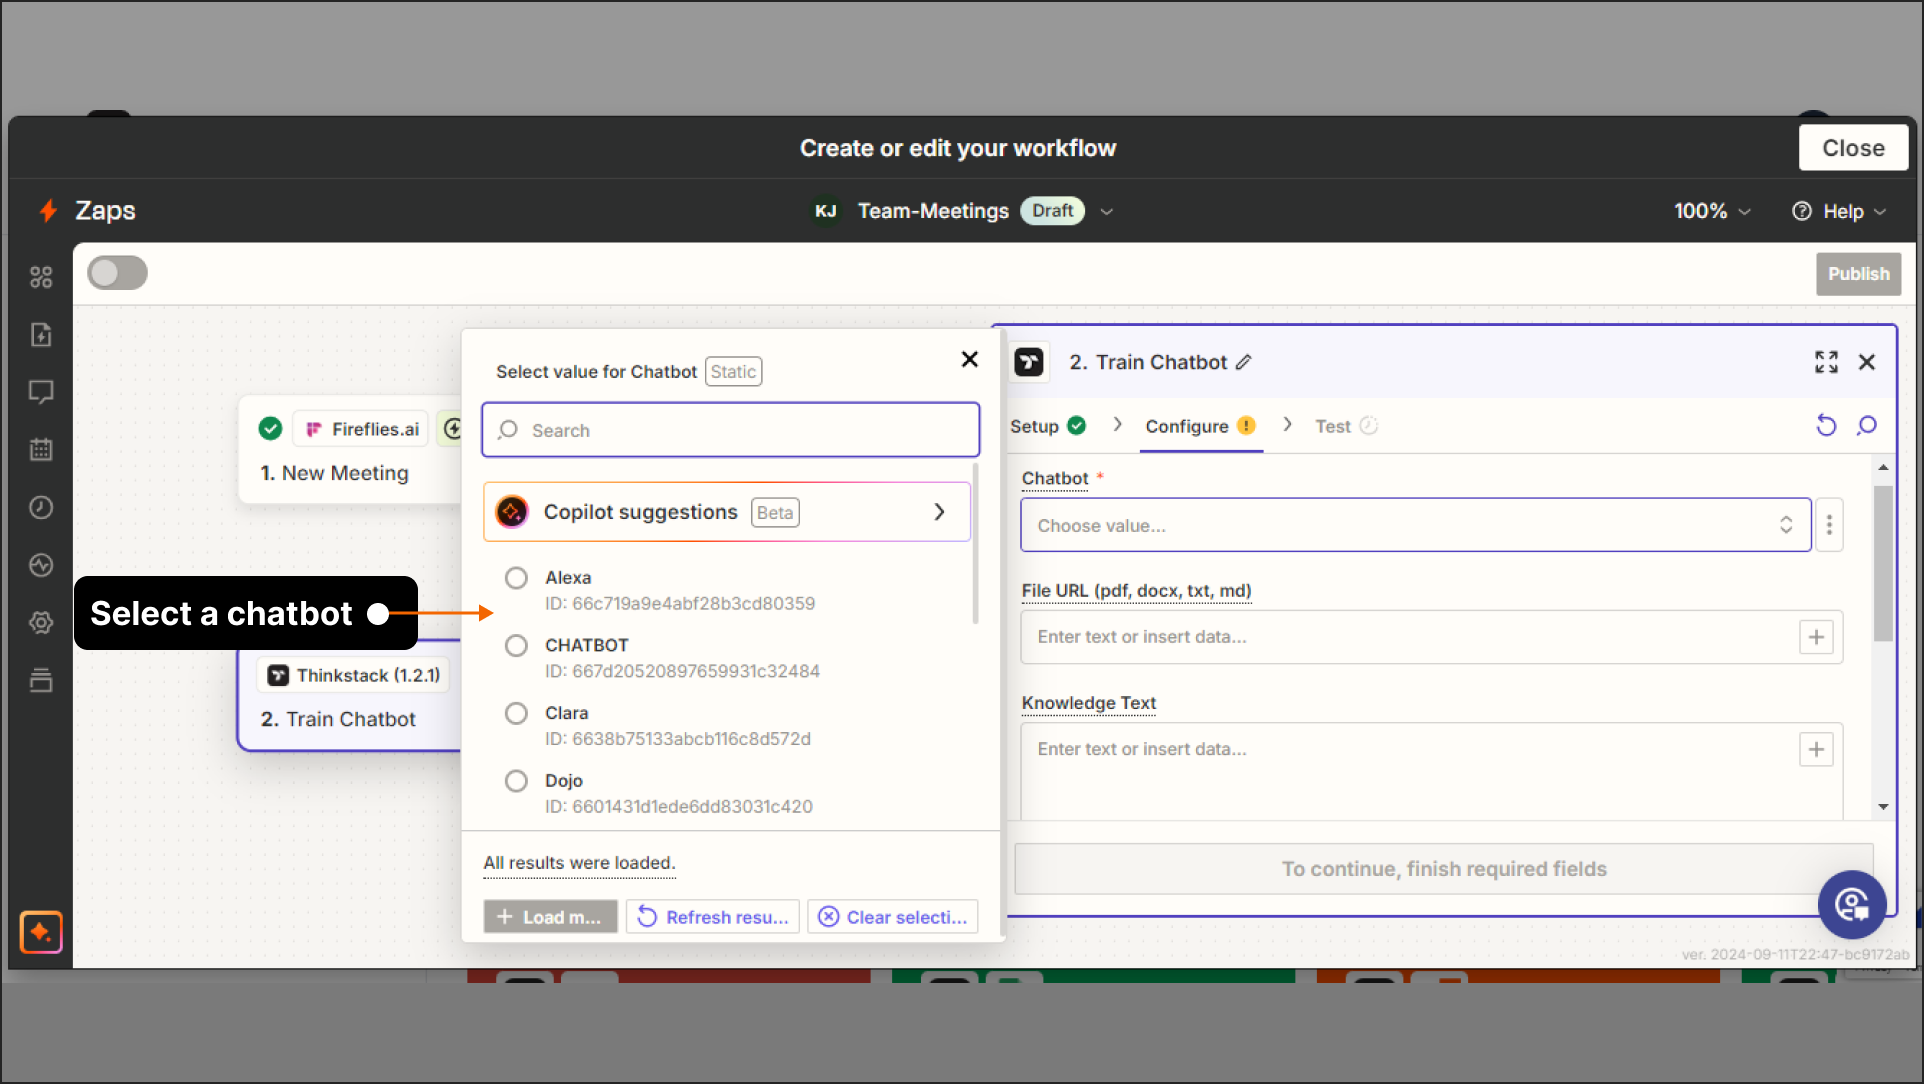
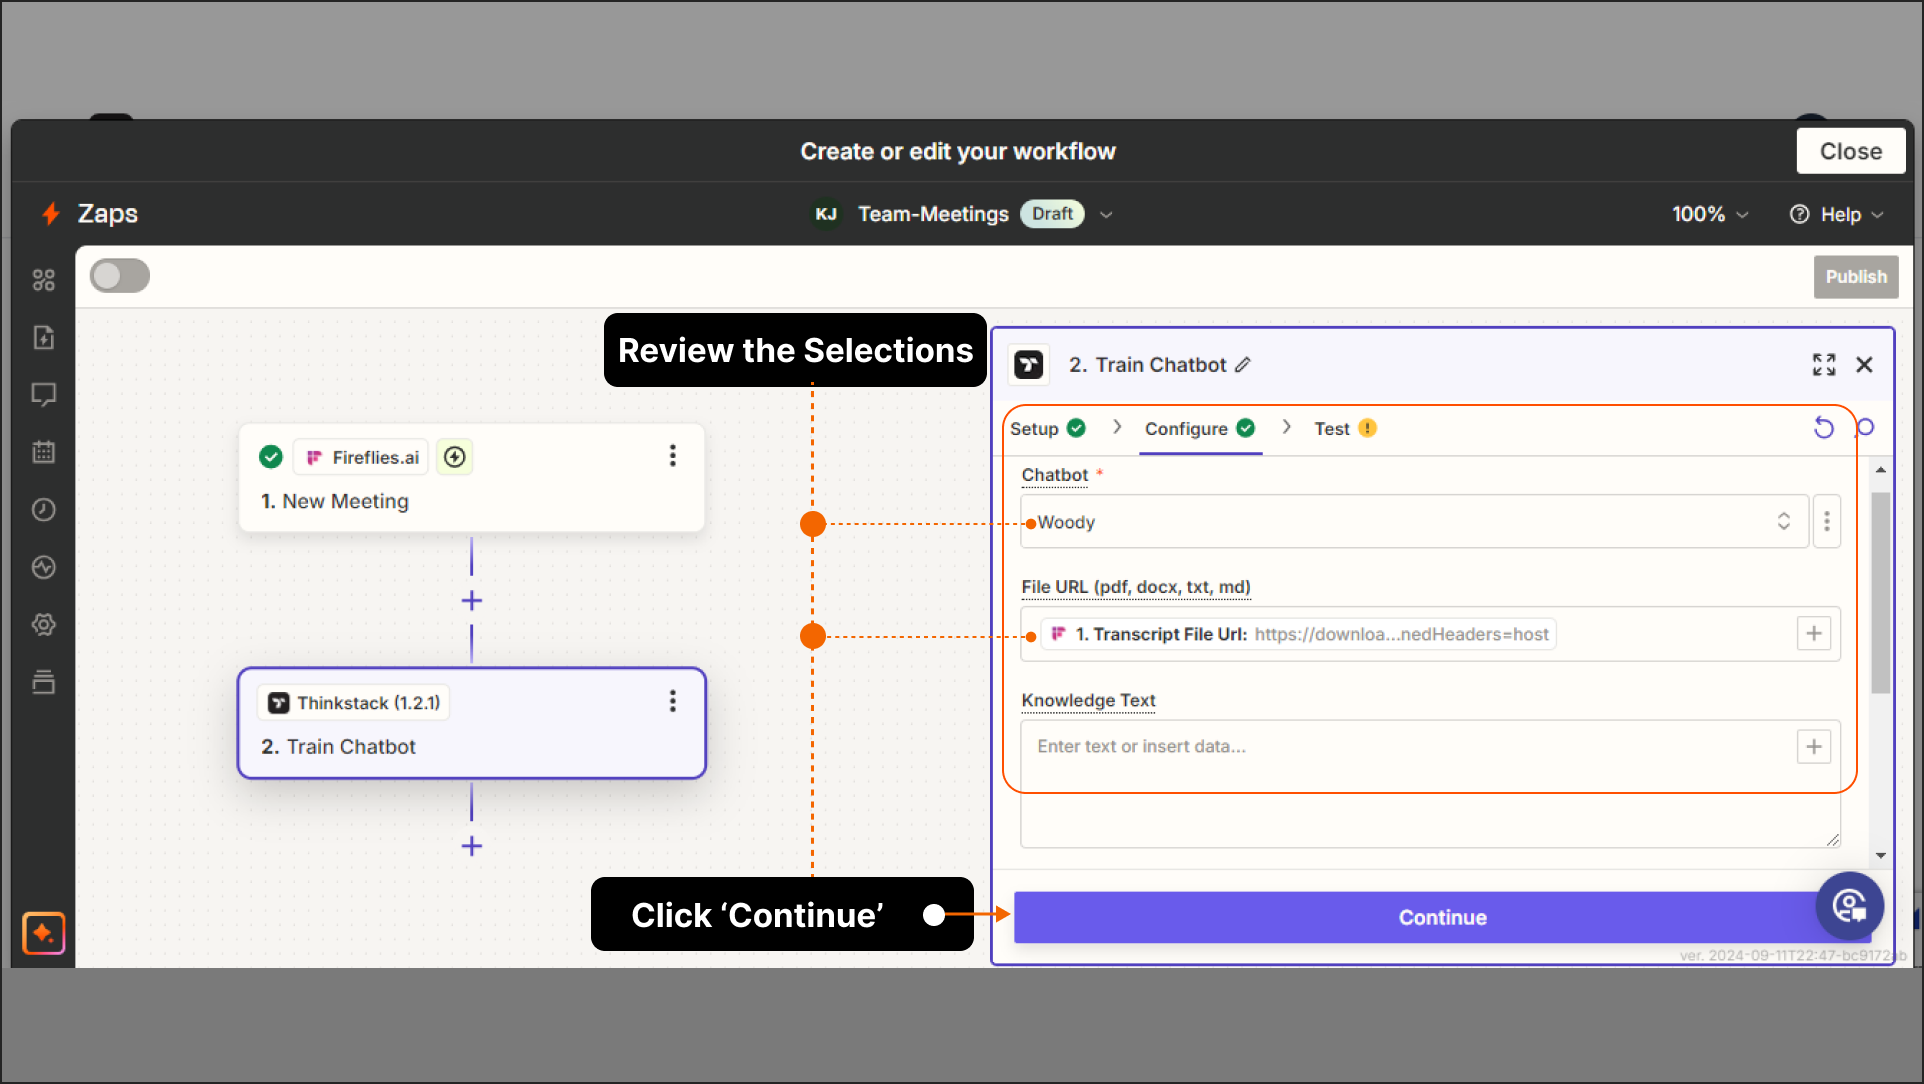
In the configure section, Select the chatbot for which you want to provide the transcriptions as a data source for training.
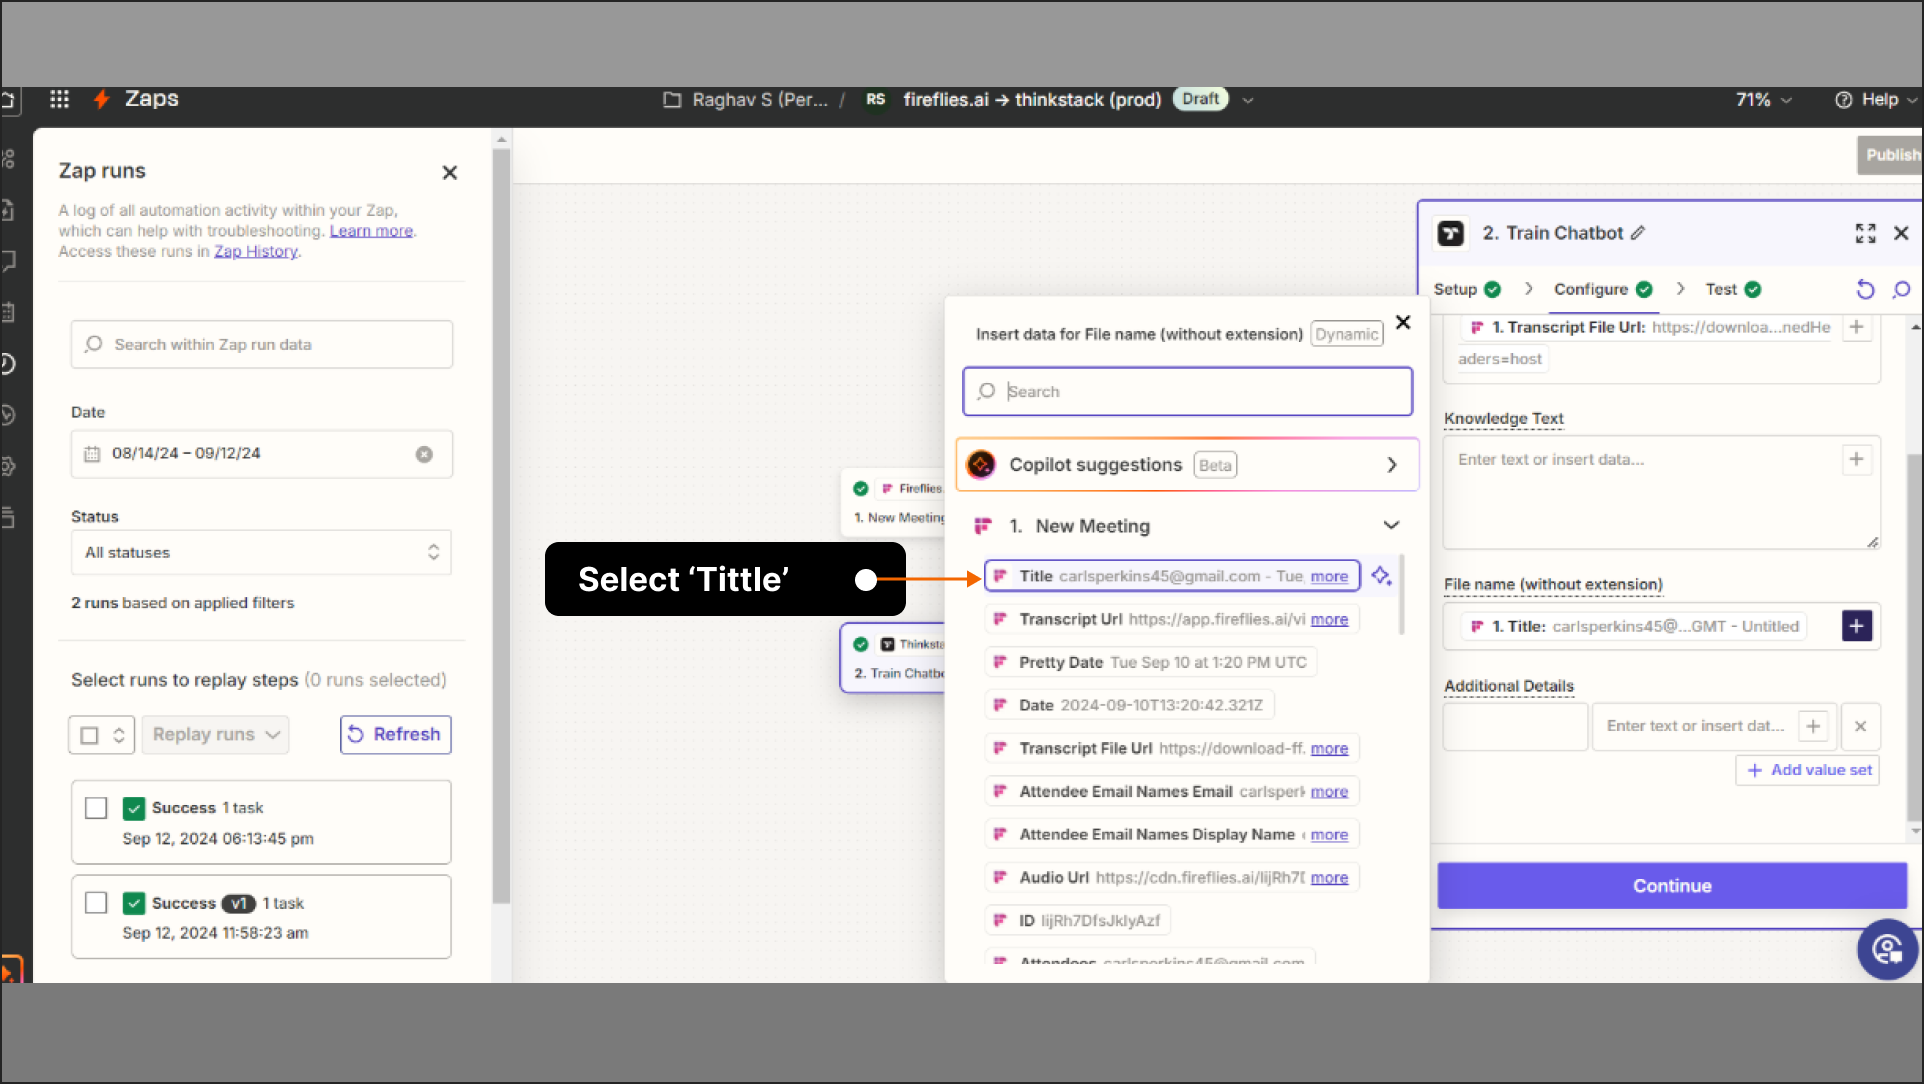
Select Transcript File URL to provide a link to a file that the chatbot will use for training.
 * Note: you have to choose Transcript File Url, NOT Transcript URL.
Under File Name, select Title so that the meeting name is reflected. This allows you to specify the name of the file displayed in Thinkstack. If left blank, a random name will be assigned.
Review all the selections and Click on Continue.
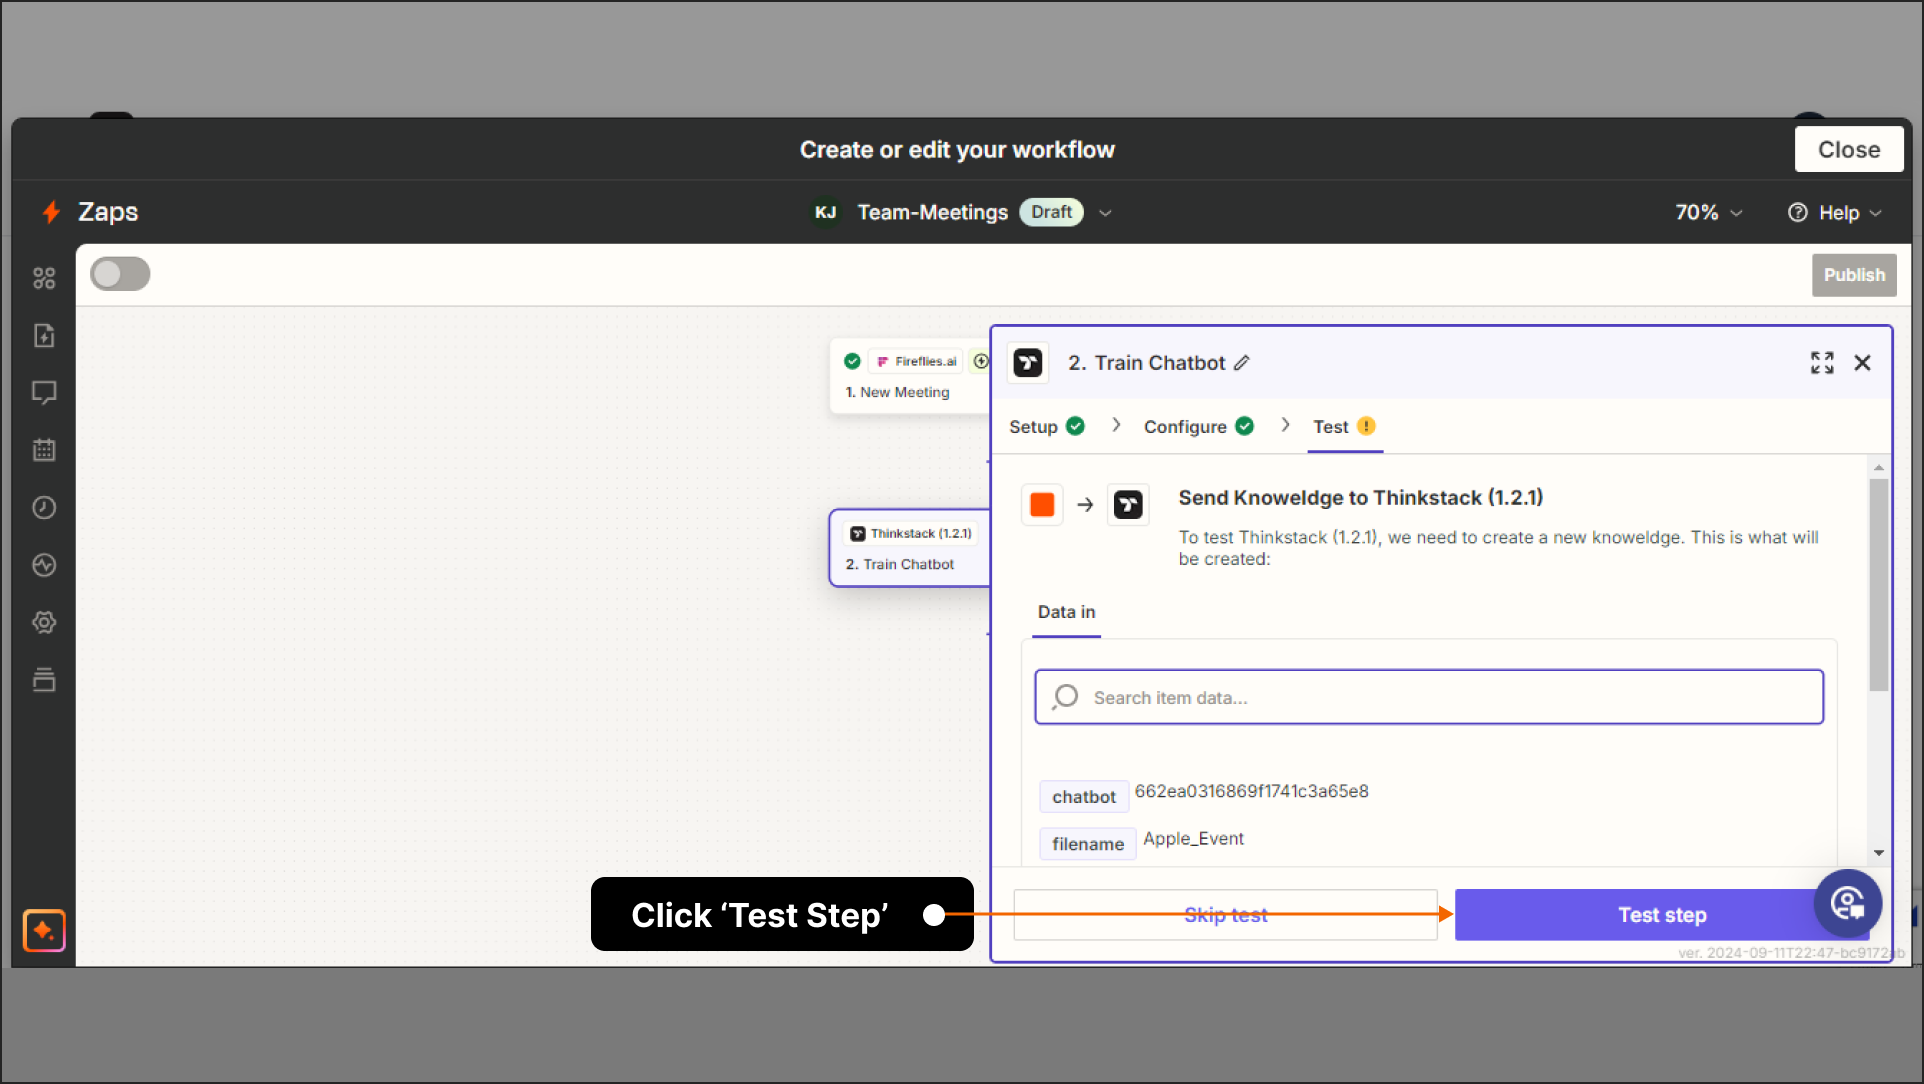
- In the test section, click on the 'Test step'
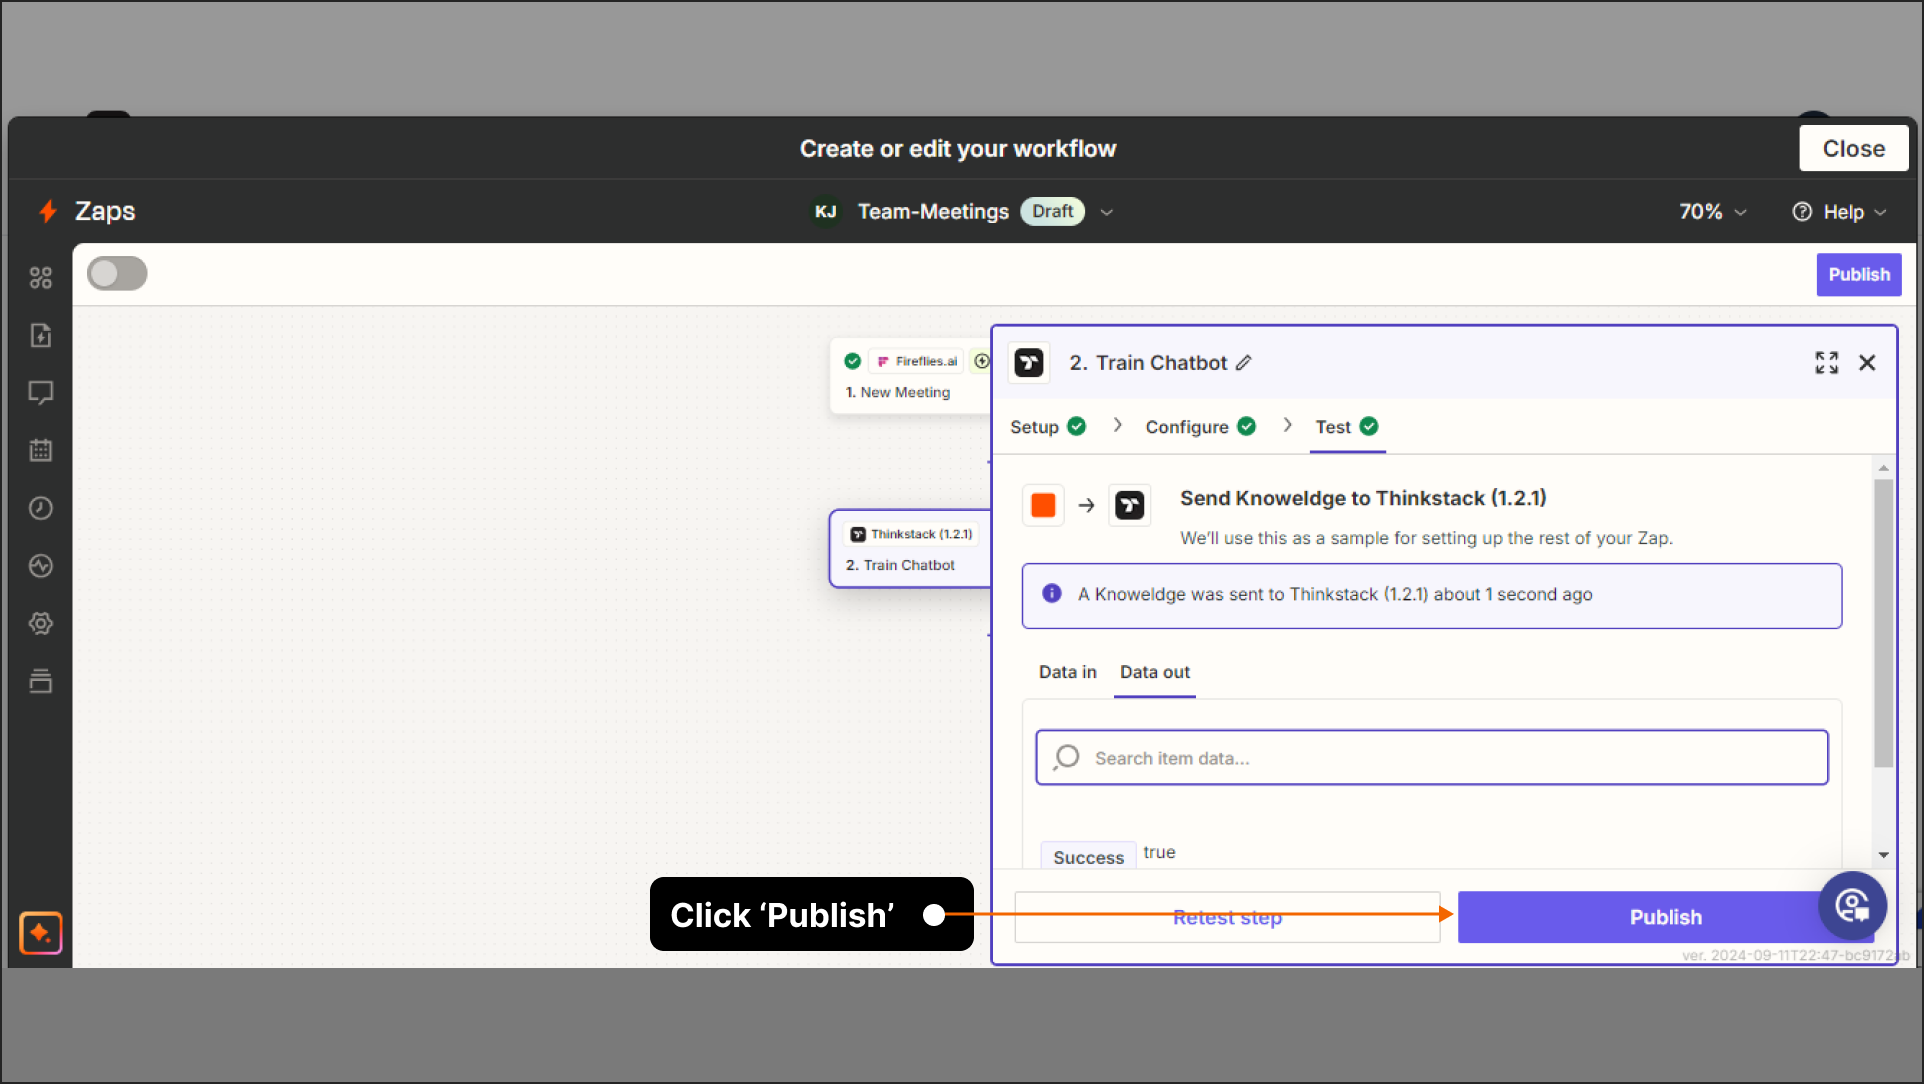
Once the test runs sucessfully, click on Publish.
You have successfully created a Zap. Your chatbot will now be trained with the meeting transcripts.
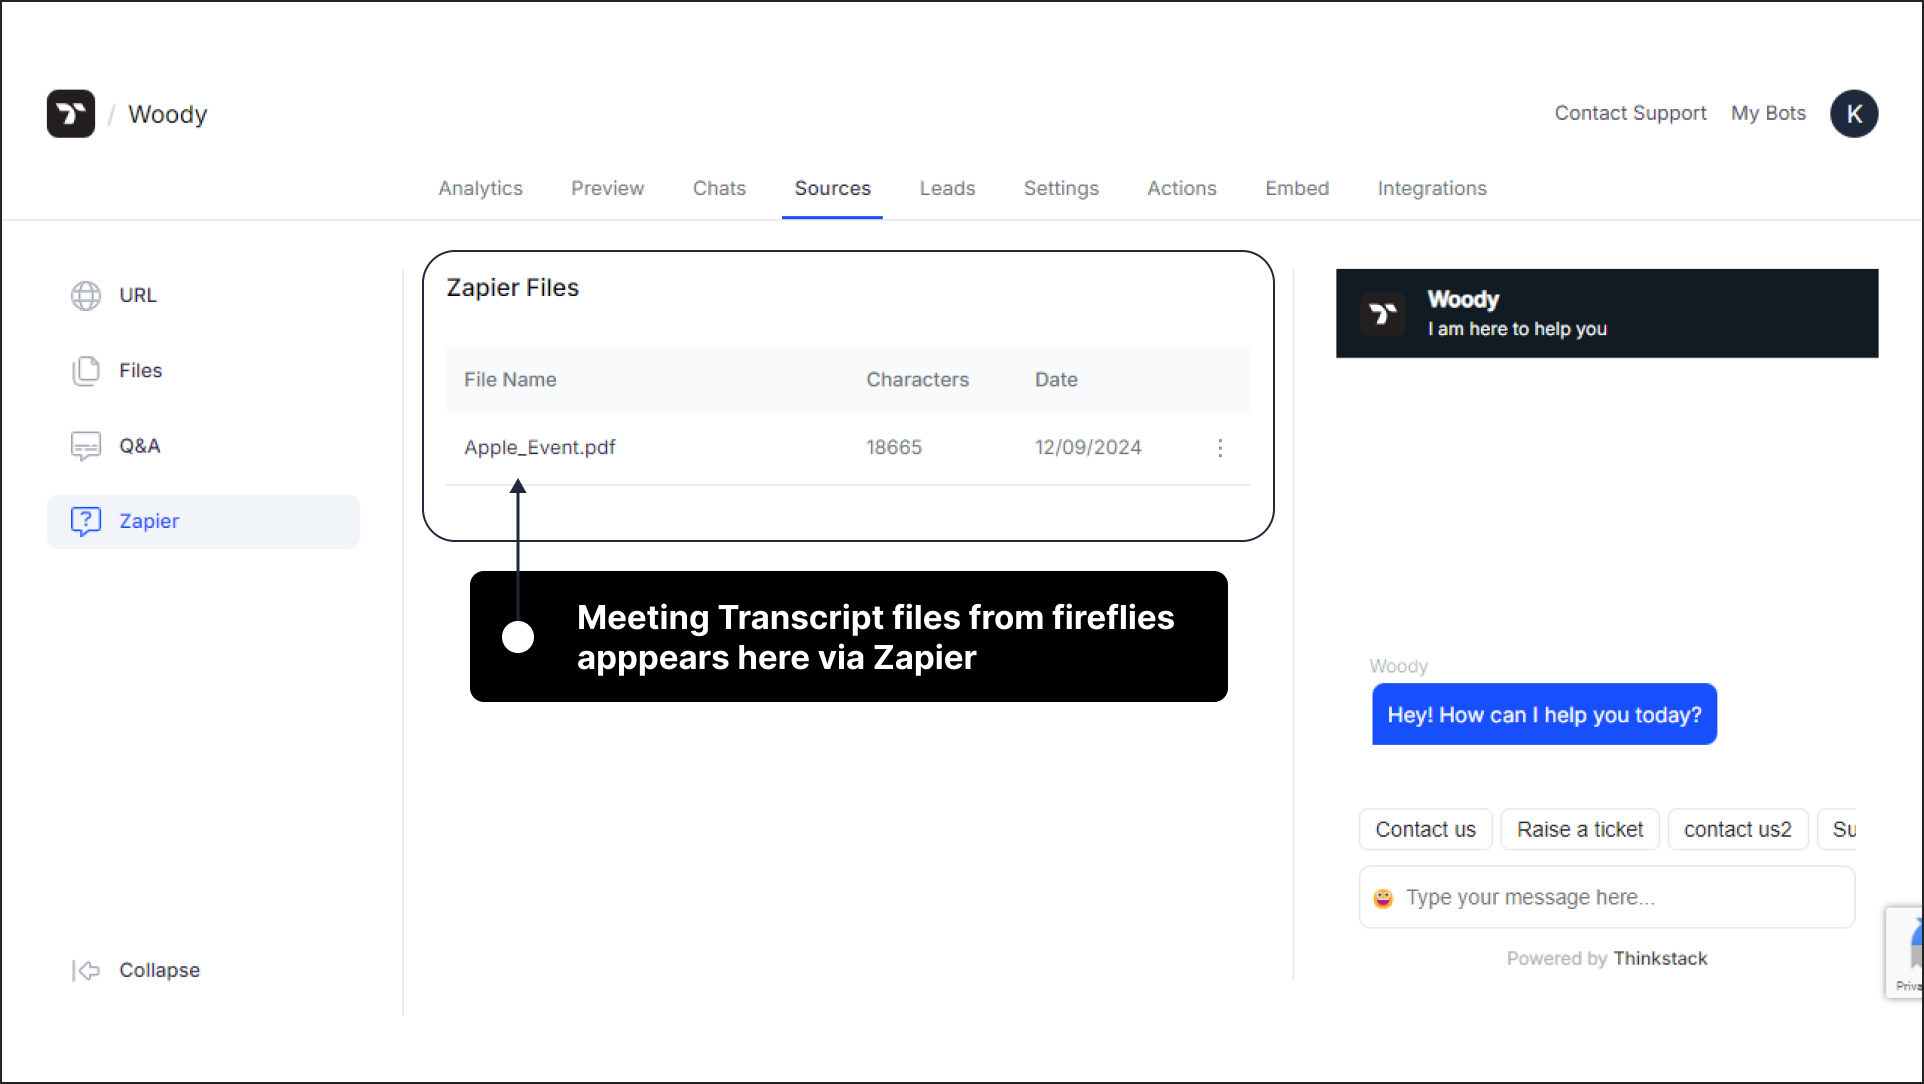
You can verify this by heading to the 'Sources' section of the chatbot and selecting 'Zapier'. There, you will see the meeting transcript file, which will be used as a data source for chatbot training
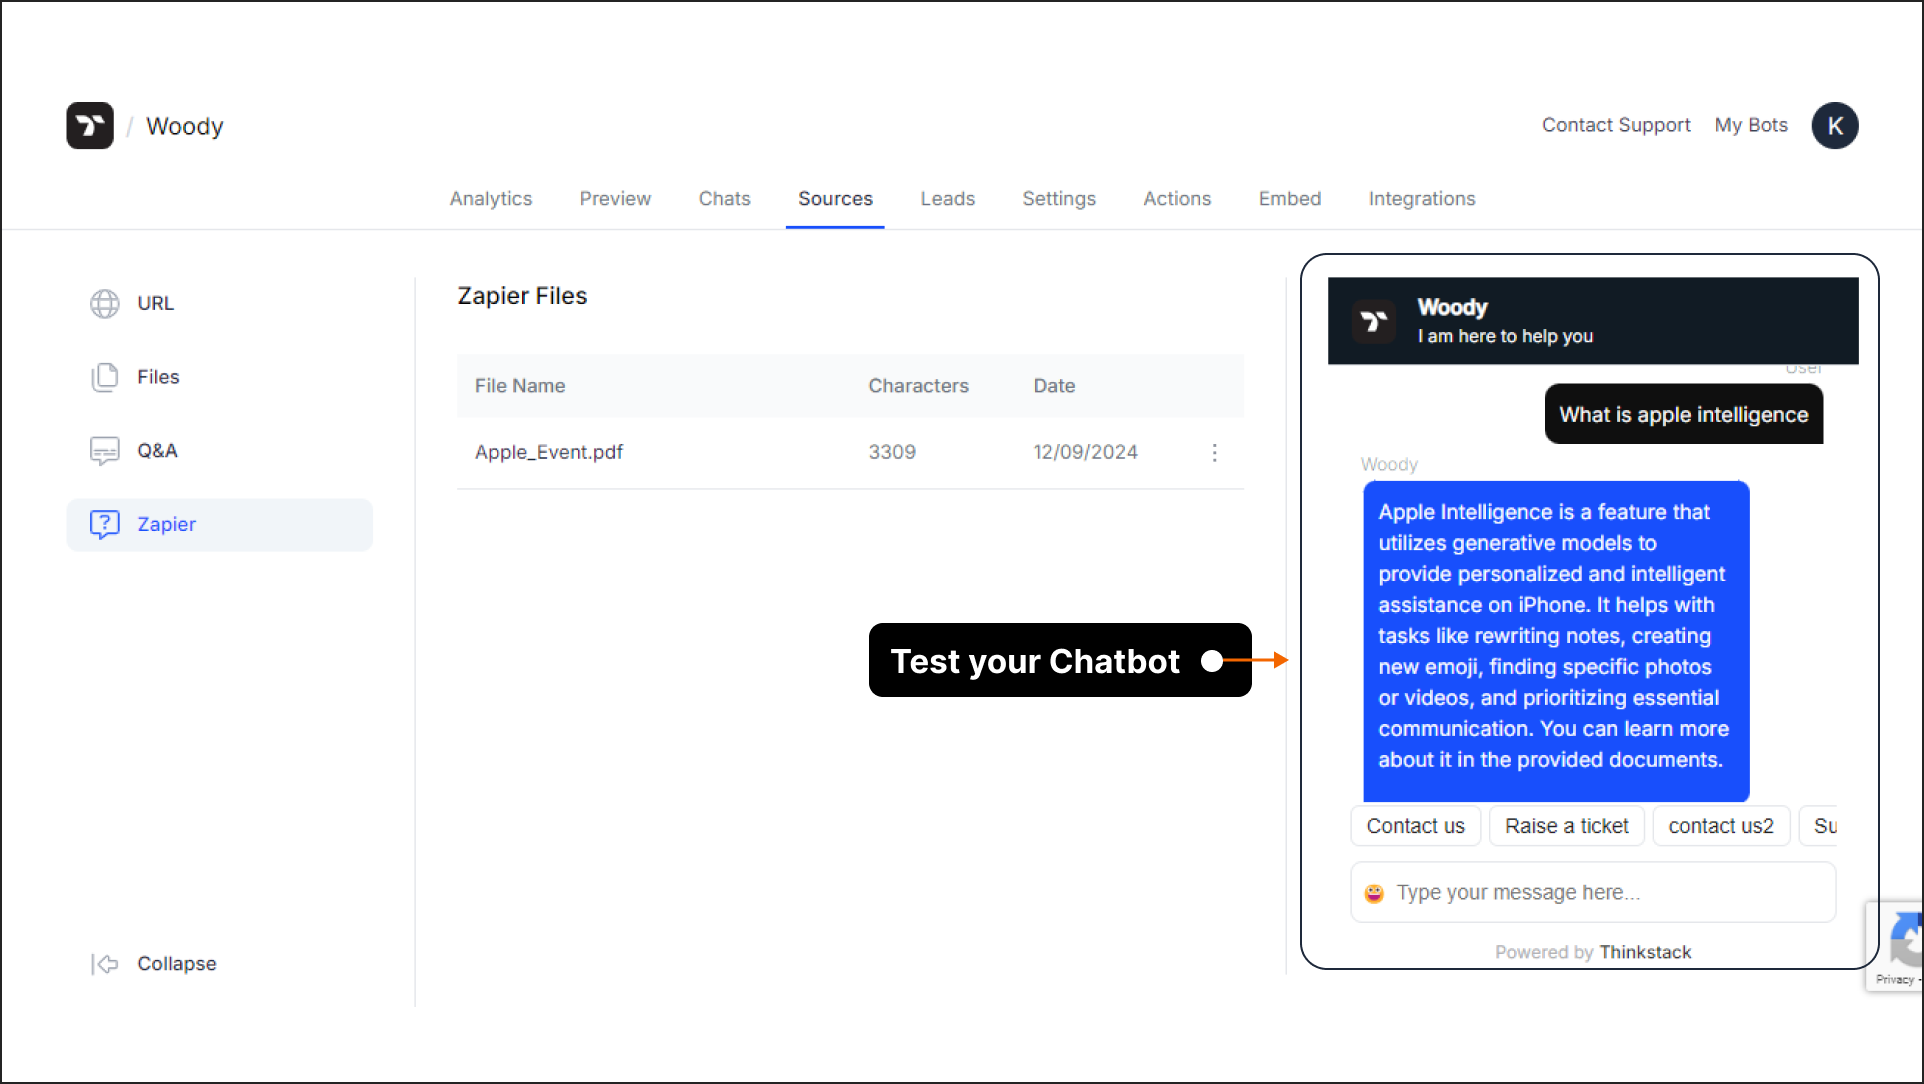
You can also test your chatbot by asking it questions related to the meeting.
That's a wrap! 🎉 You have successfully created a Zap that brings meeting transcript files from Fireflies.ai to train your chatbot.