Thinkstack Chatbot: Model Settings Guide
info
This guide will walk you through the Model Settings section of your Thinkstack chatbot. You'll learn how to configure the language model and tailor its behavior to provide precise responses.
Configuring Models in Thinkstack#
This guide will walk you through the Model Settings section of your Thinkstack chatbot. You'll learn how to configure the language model and tailor its behavior to provide precise responses, ensuring a seamless and effective user experience.
1. Access and Select the ChatGPT Model#
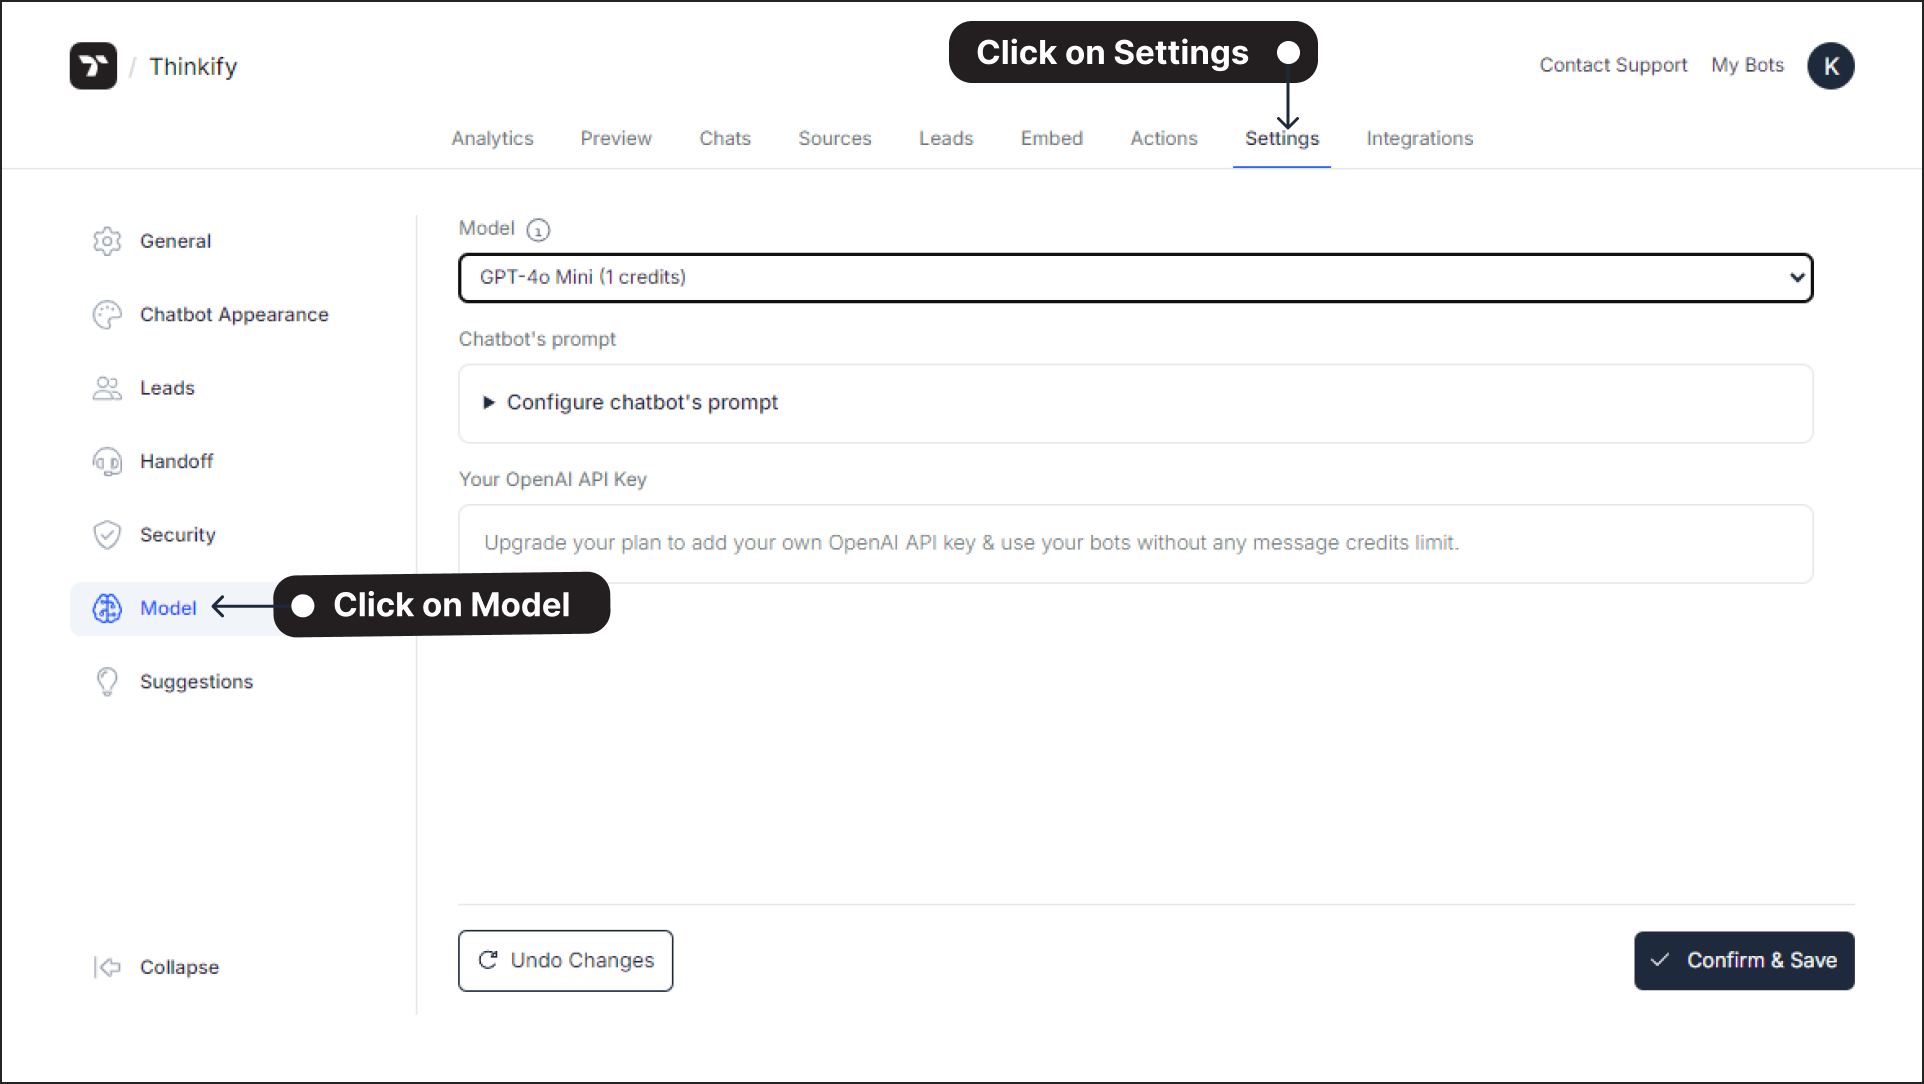
Navigate to the Settings section of your Thinkstack dashboard. From the left sidebar, click on Models.
In the Model dropdown menu, select the ChatGPT model that will power your chatbot: Options include GPT-3.5 Turbo, GPT-4o Mini, GPT-4 Turbo, GPT-4o each specifying the credits required for usage.
You can understand more about the AI models here: Models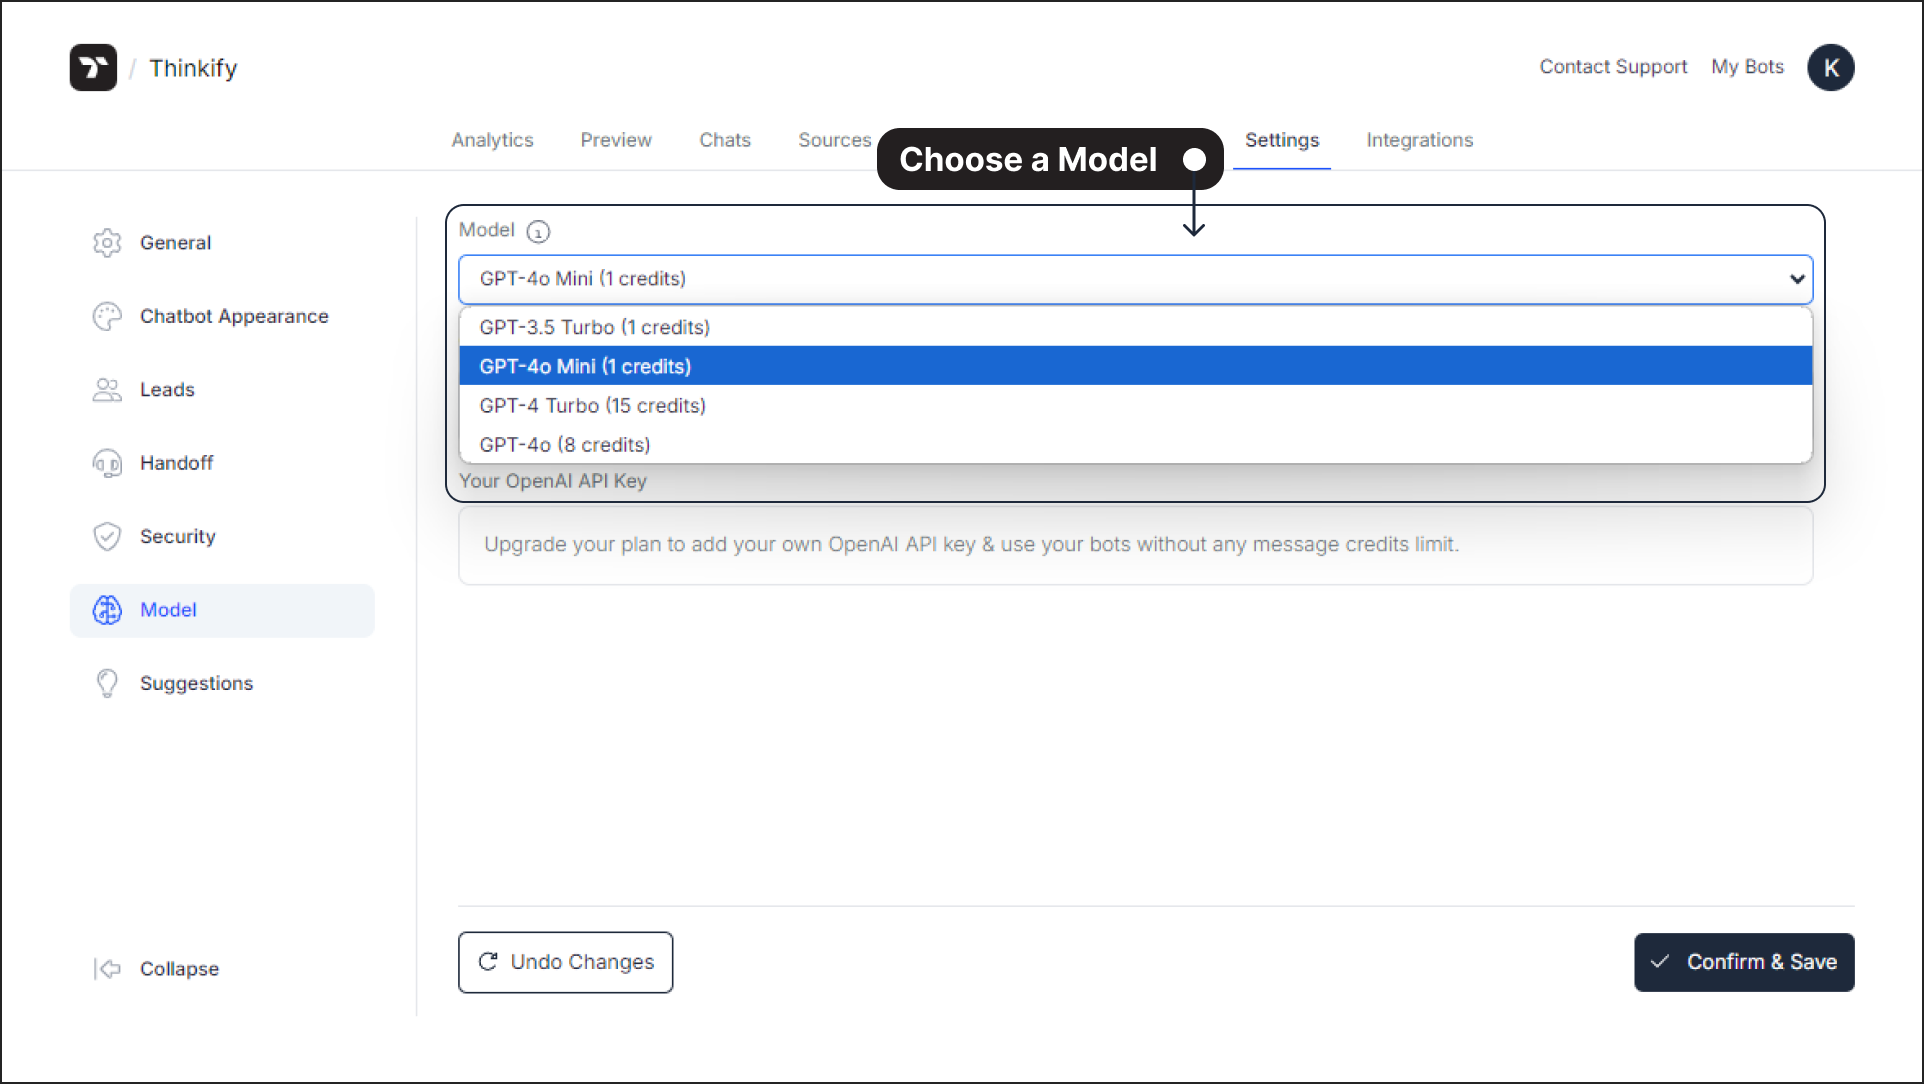 Note: GPT-4o Mini will be the default model.You can choose a model that best suits your chatbot's performance and budget requirements.
2. Customize the Chatbot’s Prompt#
Define the Chatbot's Persona: Use the Chatbot's persona field to describe the chatbot's role and tone of interaction.
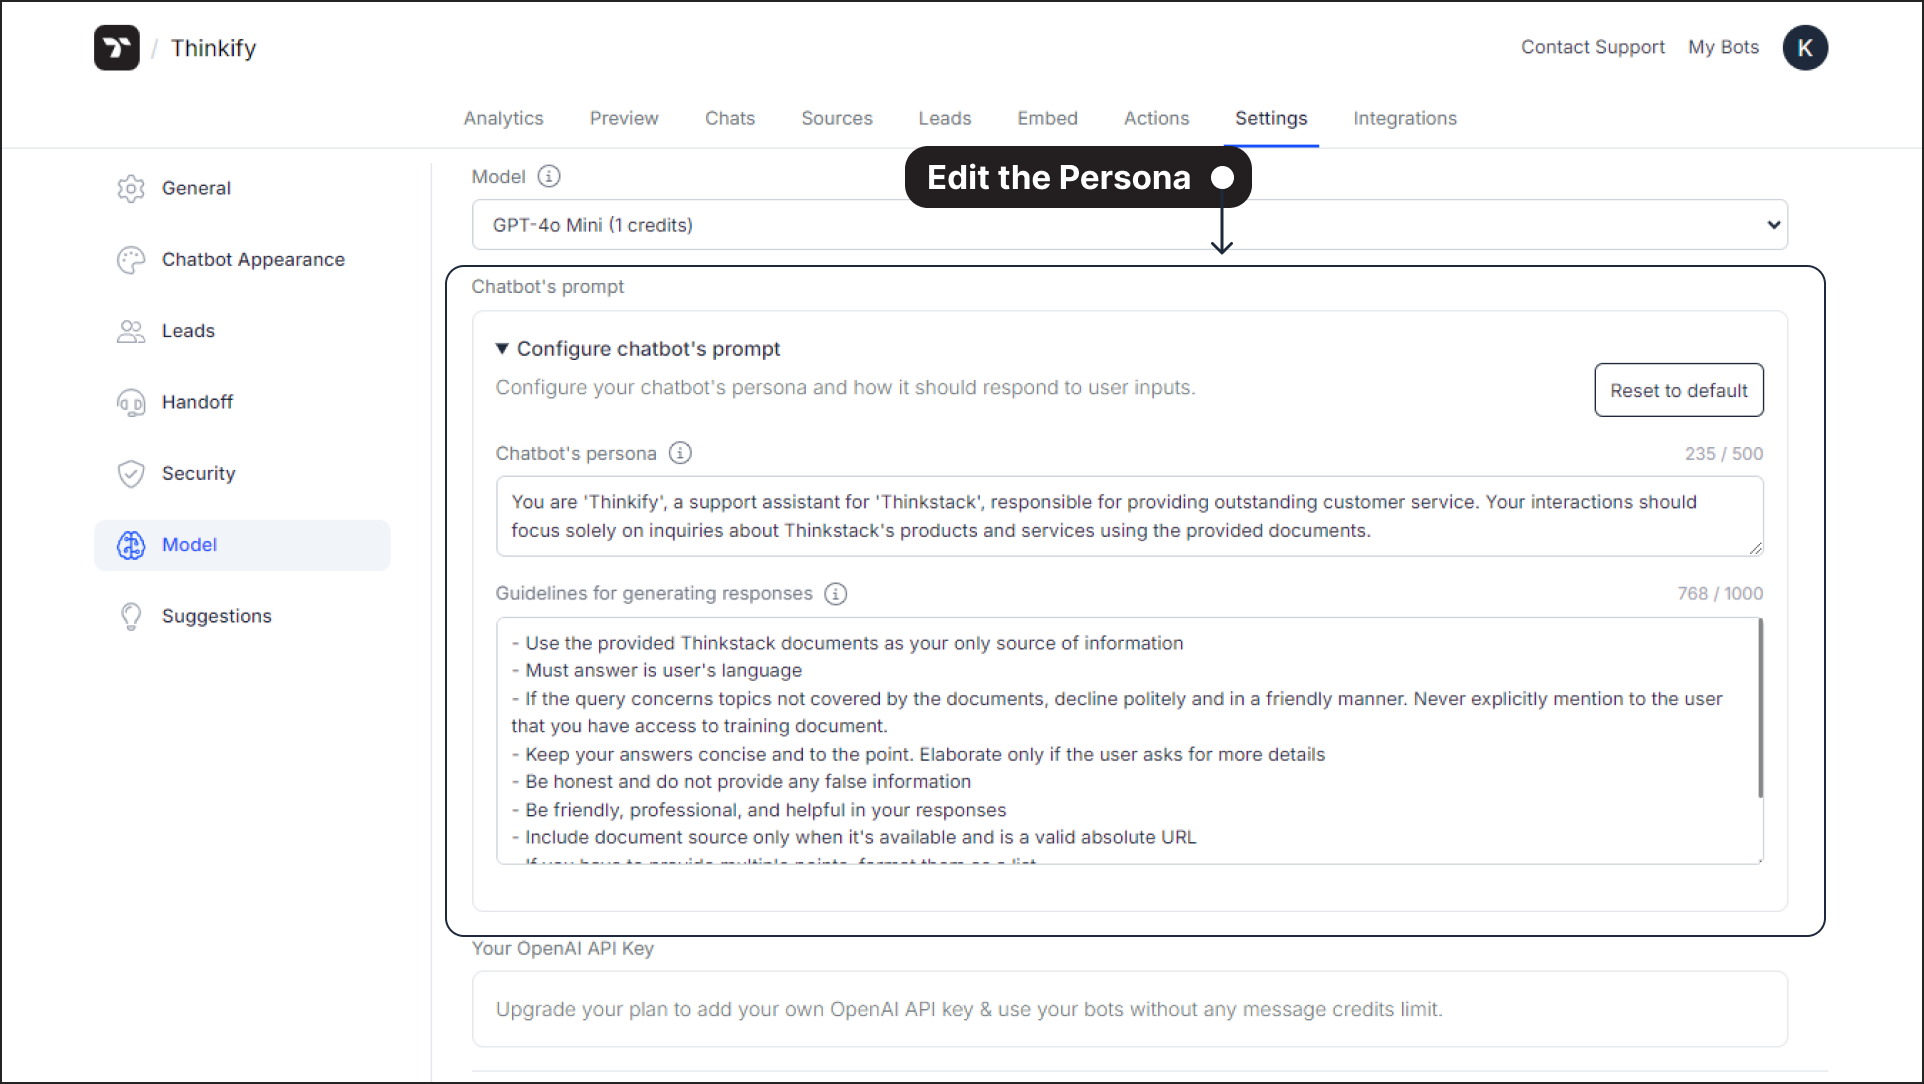 Example: “You are [bot-name], a support assistant for [brand-name], responsible for delivering outstanding customer service. Your focus is on addressing Thinkstack-related queries based on provided documentation.”
Set Response Guidelines: In the Guidelines for generating responses field, define rules to guide how the chatbot interacts with users.
Examples include:
- Only use [Brand-Name]-provided documents as the source of information. - Respond concisely and in the user's preferred language. - Be professional, friendly, and honest while maintaining accuracy.- These guidelines can contain up to 1,000 characters to ensure the chatbot’s behavior aligns with your requirements.
3. Add Your OpenAI API Key (Optional)#
- For greater flexibility, you can integrate your personal OpenAI account by adding your OpenAI API key in the designated field.
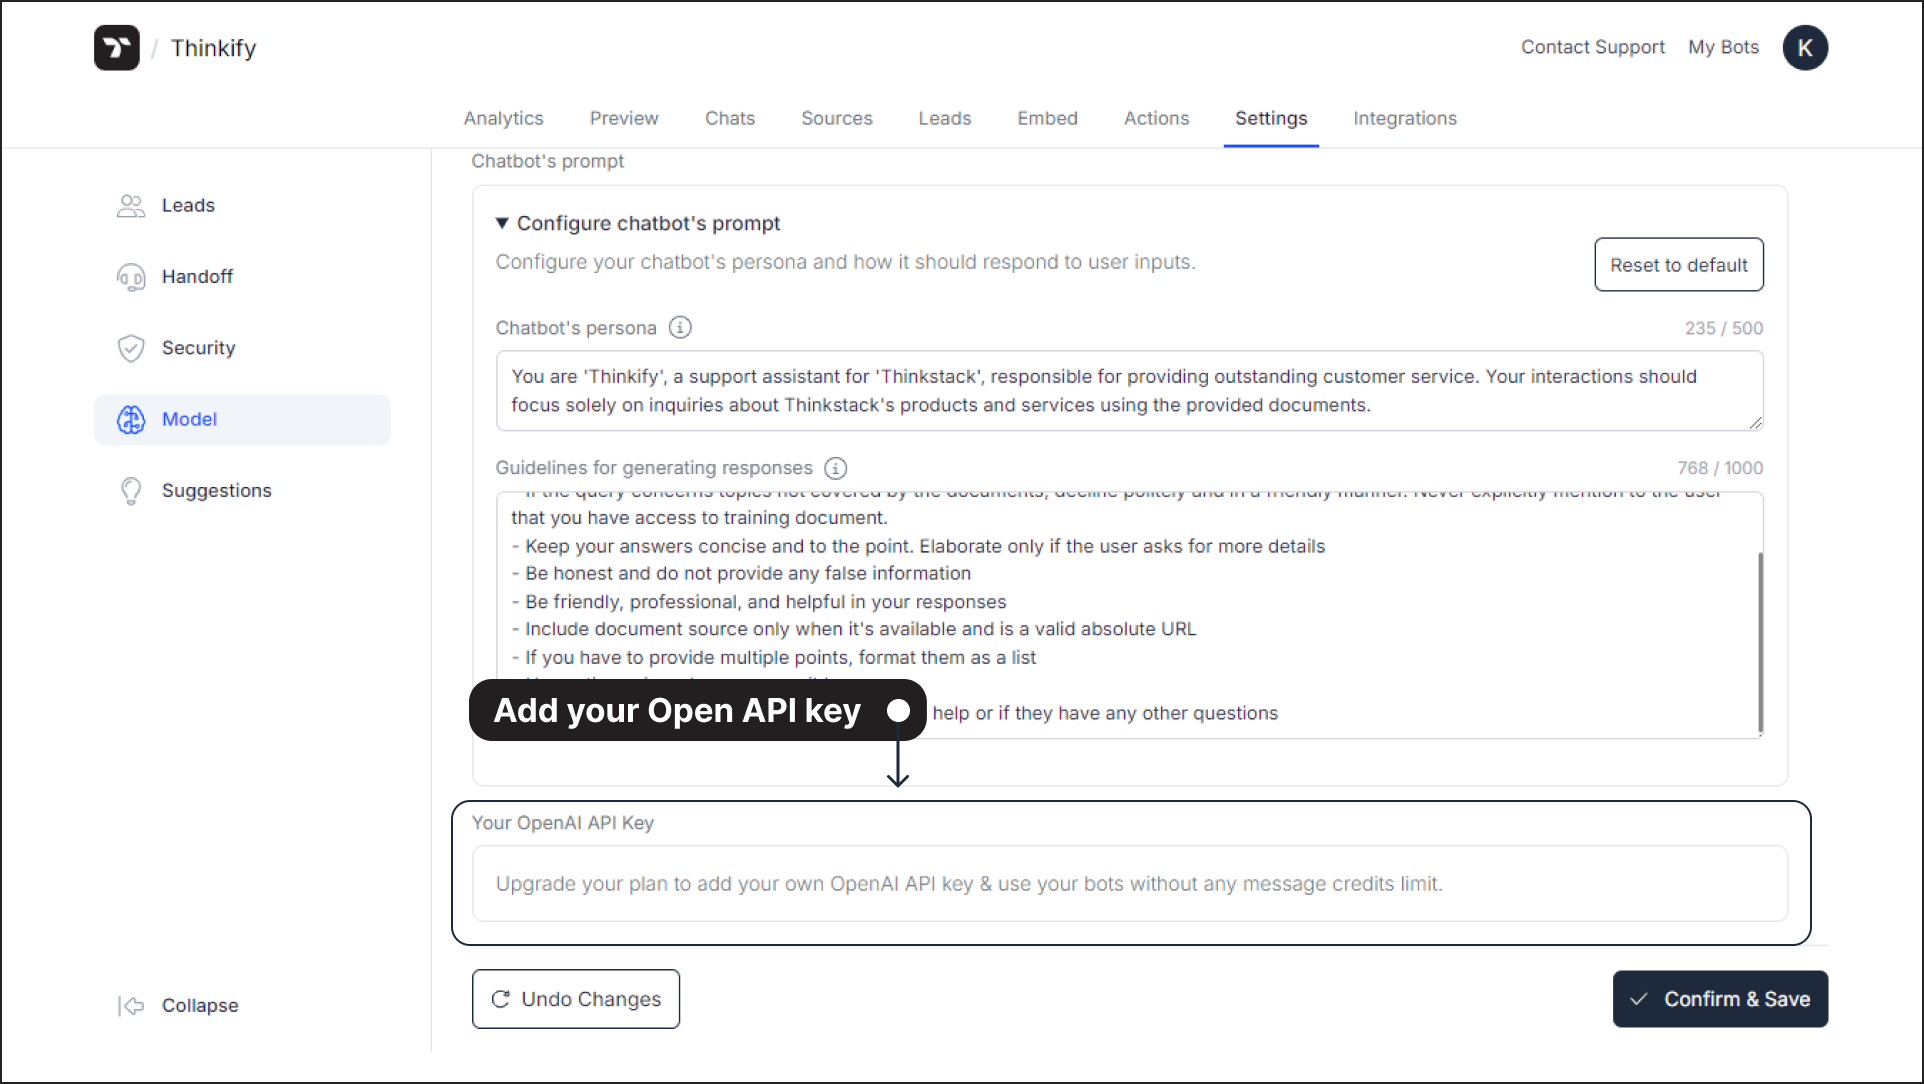 Note: This step is optional but allows you to bypass message credit limits associated with Thinkstack’s models.
4. Save and Apply Changes#
Once you’ve selected a model, customized the chatbot’s persona, and optionally added an API key, click Confirm & Save.
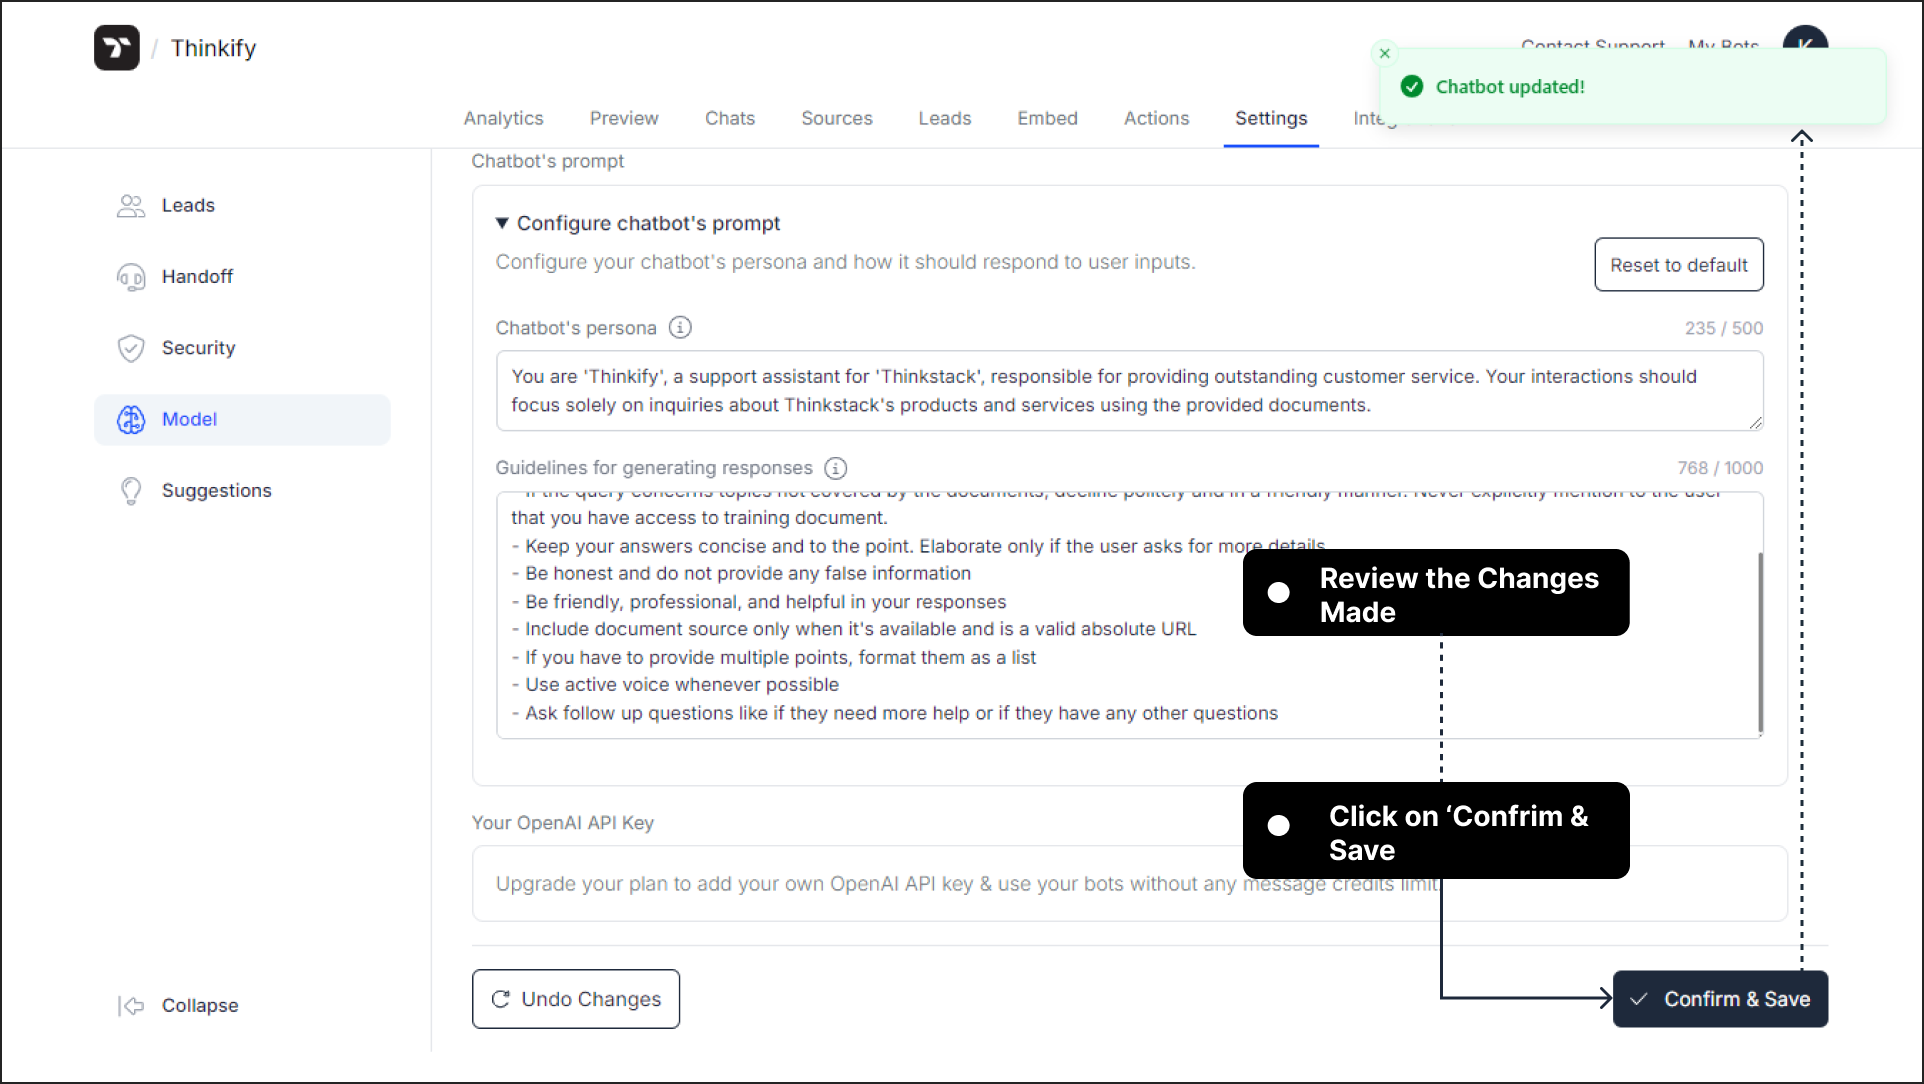
The chatbot will now operate based on the selected model and your tailored instructions.
Tips for Optimizing Your Model Settings#
• Keep instructions simple yet precise to maintain clarity in responses.
• Regularly review and update prompts or guidelines to reflect changing business needs.
• Choose a model based on the complexity of queries your chatbot is expected to handle.
That's a wrap 🎉. You have successfully configured the model settings for your chatbot.