Thinkstack Chatbot: Lead Settings Guide
info
This guide will walk you through the Lead Settings section of your Thinkstack chatbot. You'll learn how to configure each element to effectively collect details from potential customers and streamline your lead-generation process.
Steps to Configure Lead Settings#
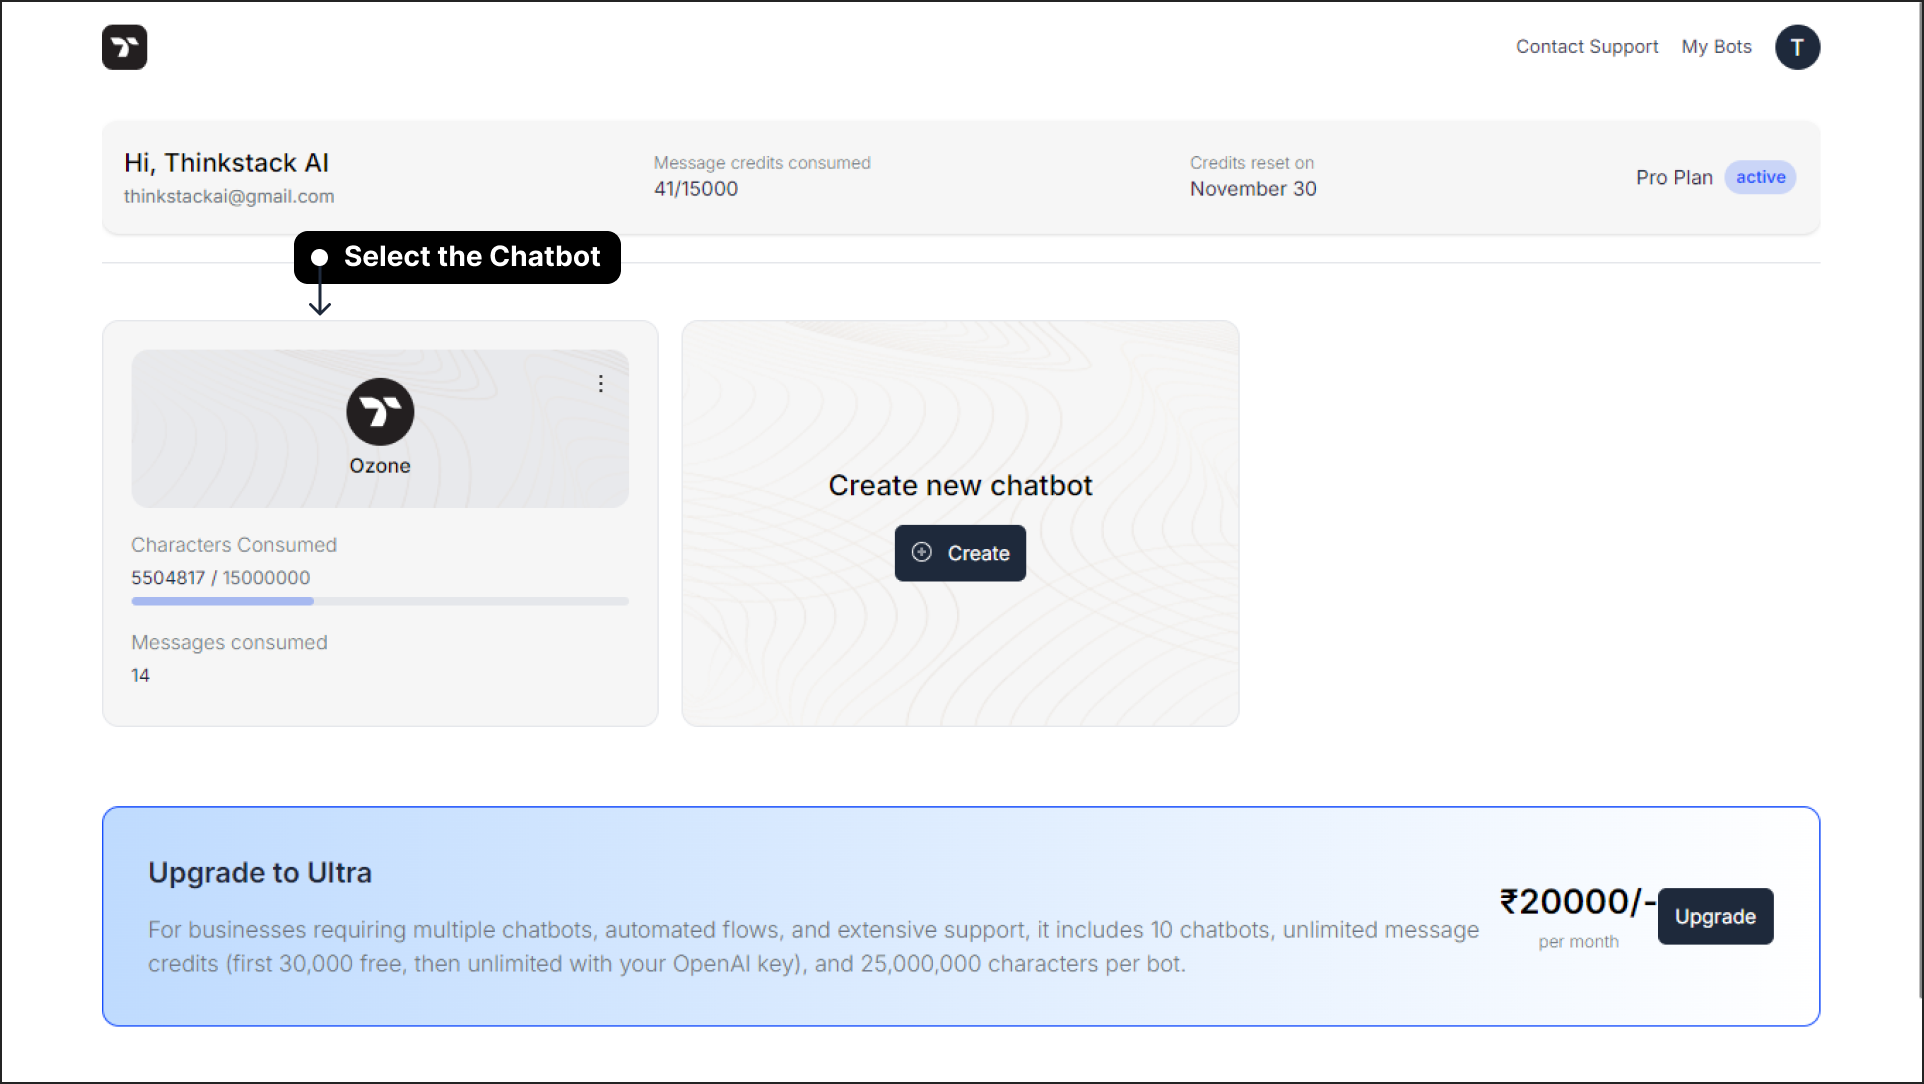
Select Your Chatbot: Click on the chatbot for which you want to configure lead settings.
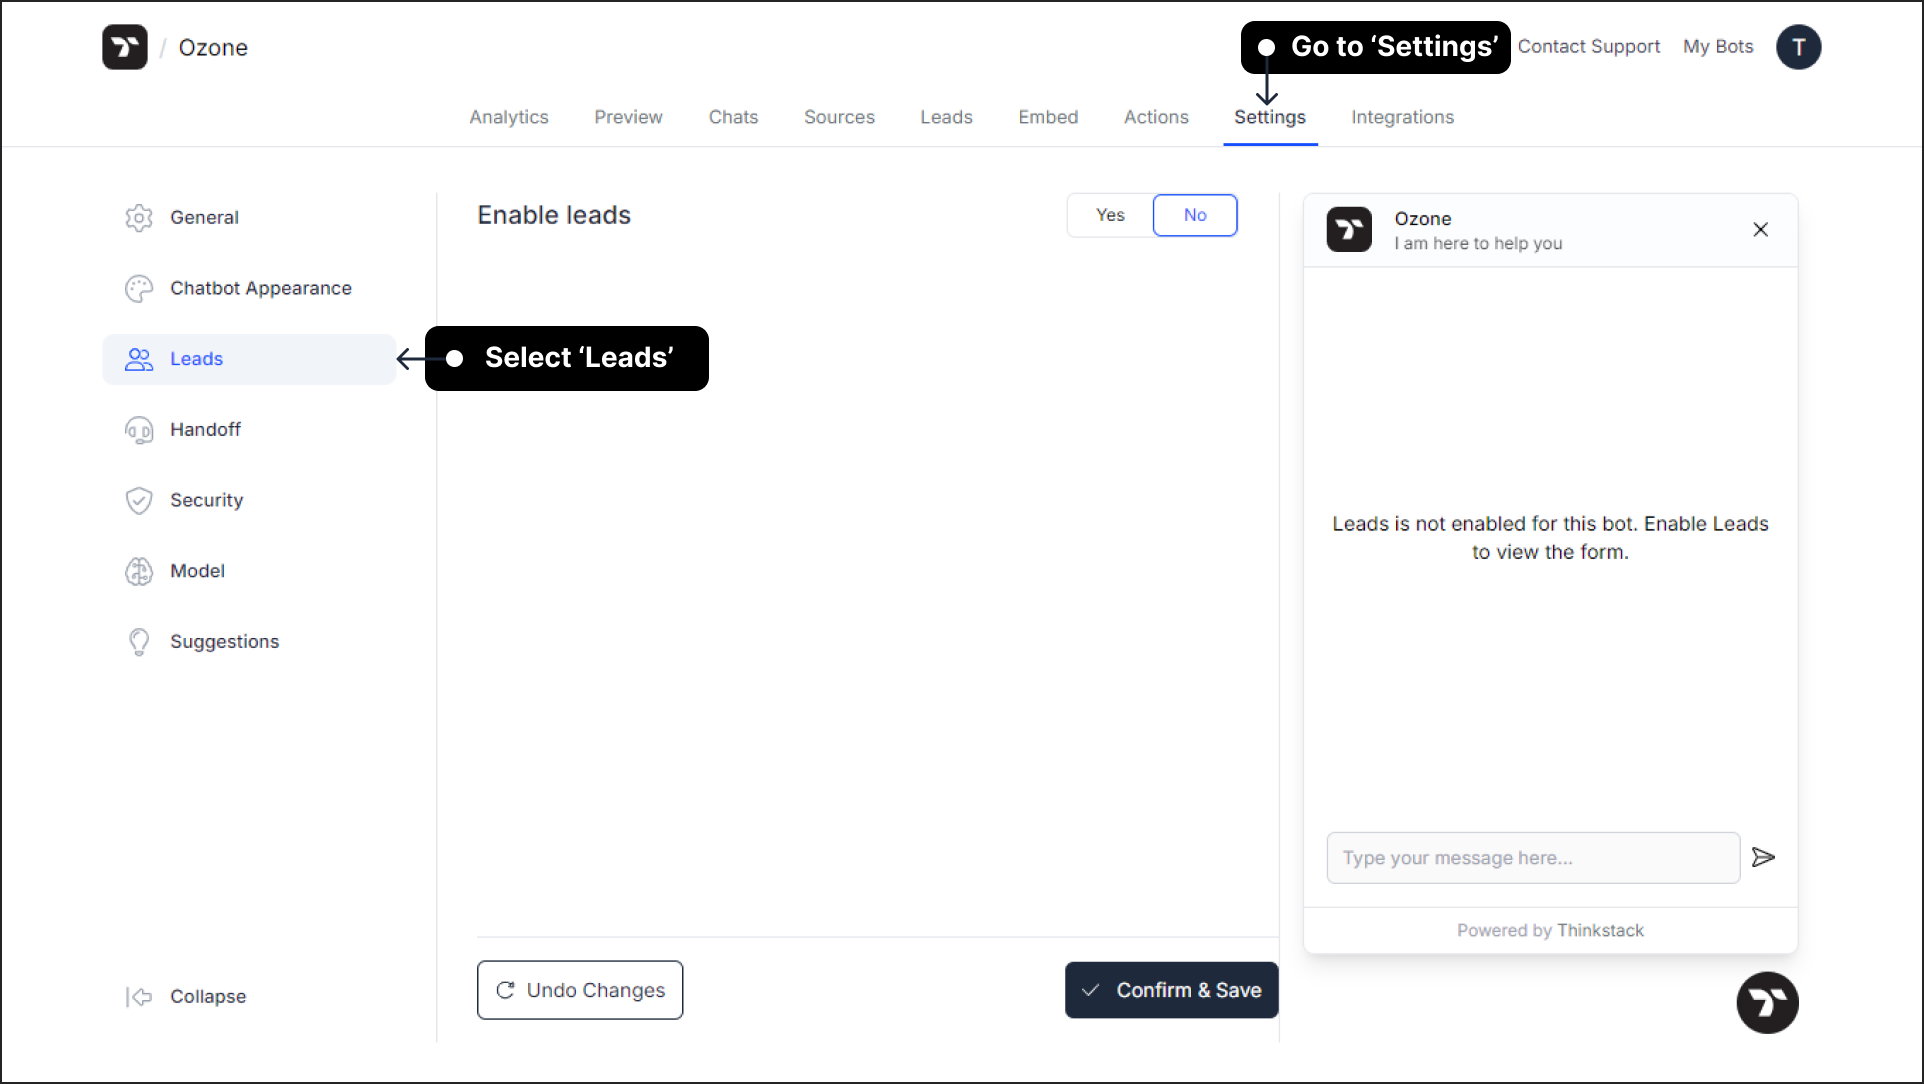
Access the Lead Settings: Navigate to the ‘Settings’ section. Select ‘Leads’ from the left sidebar.
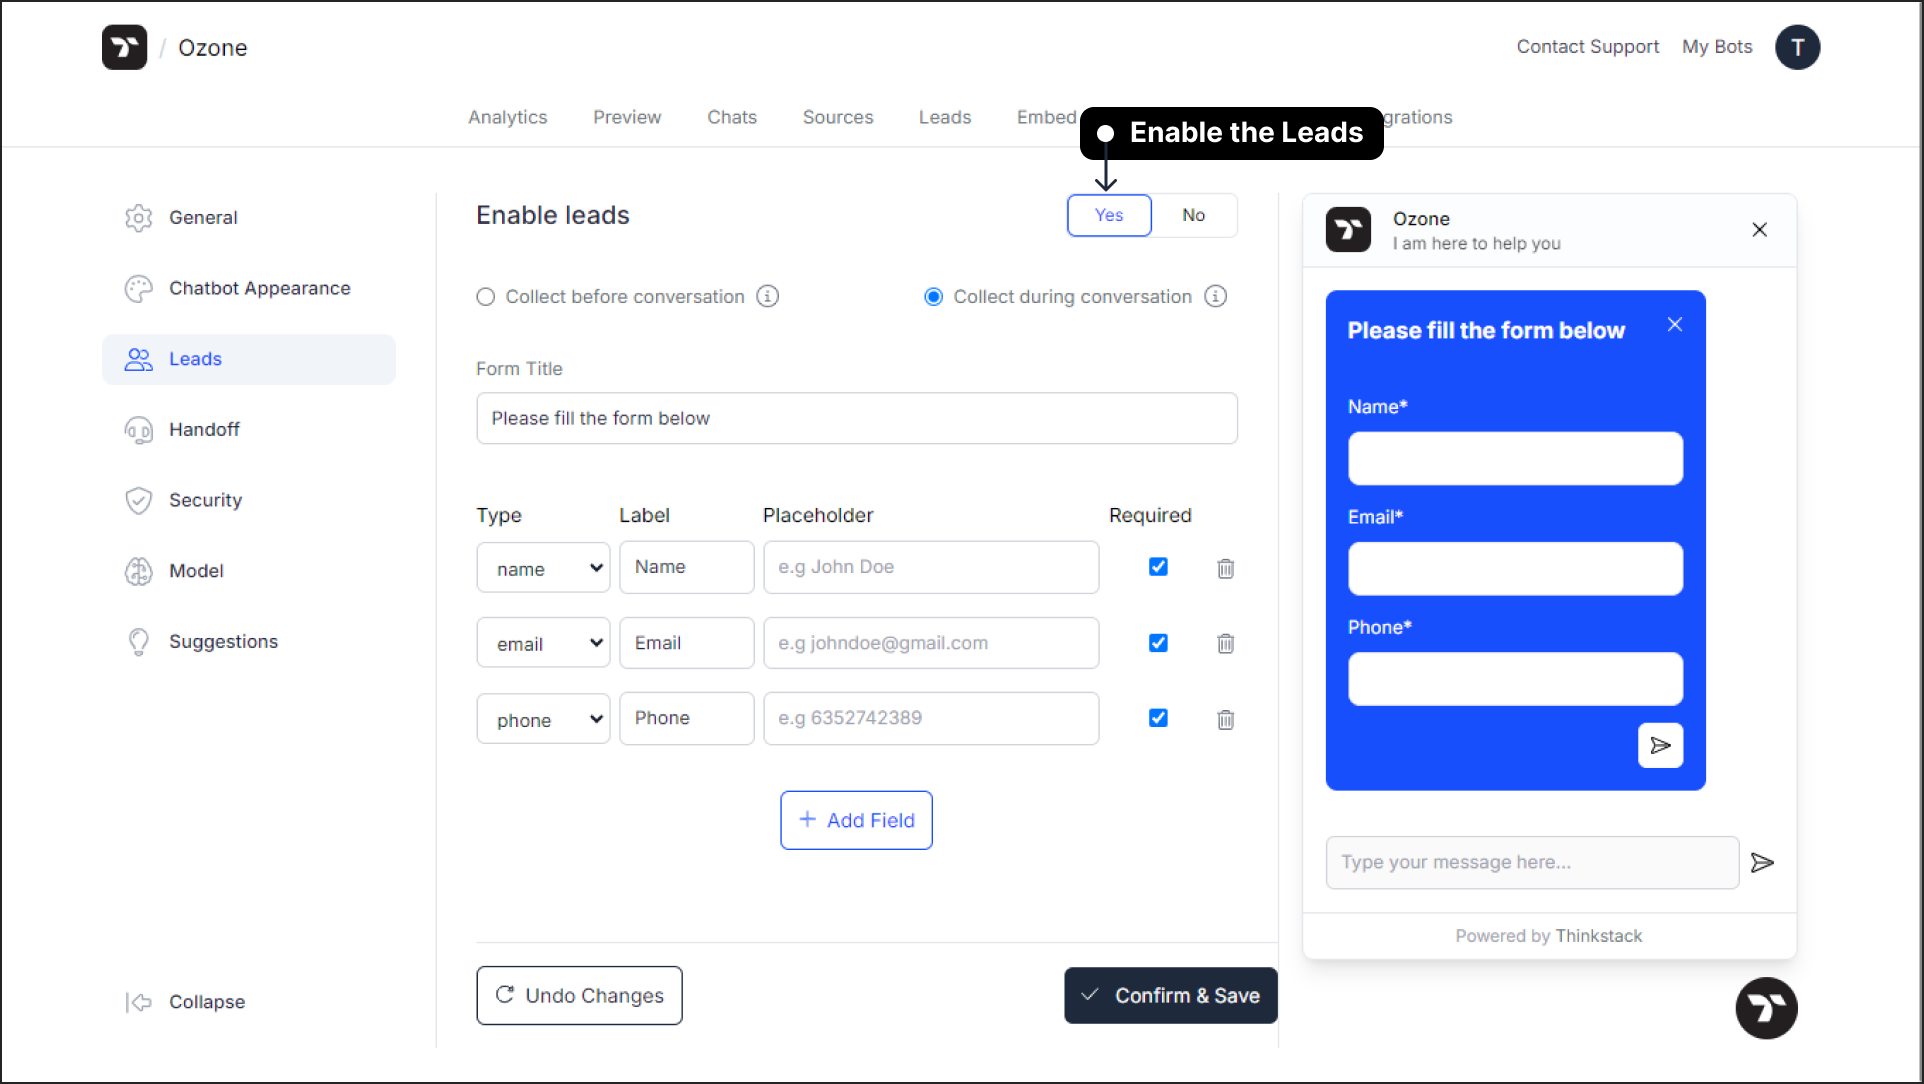
Enable Leads: Toggle the button to enable lead collection.
Choose a Lead Form Display Option: Decide if the lead form appears before the conversation (mandatory to proceed) or after the first response (optional and closable by the user).
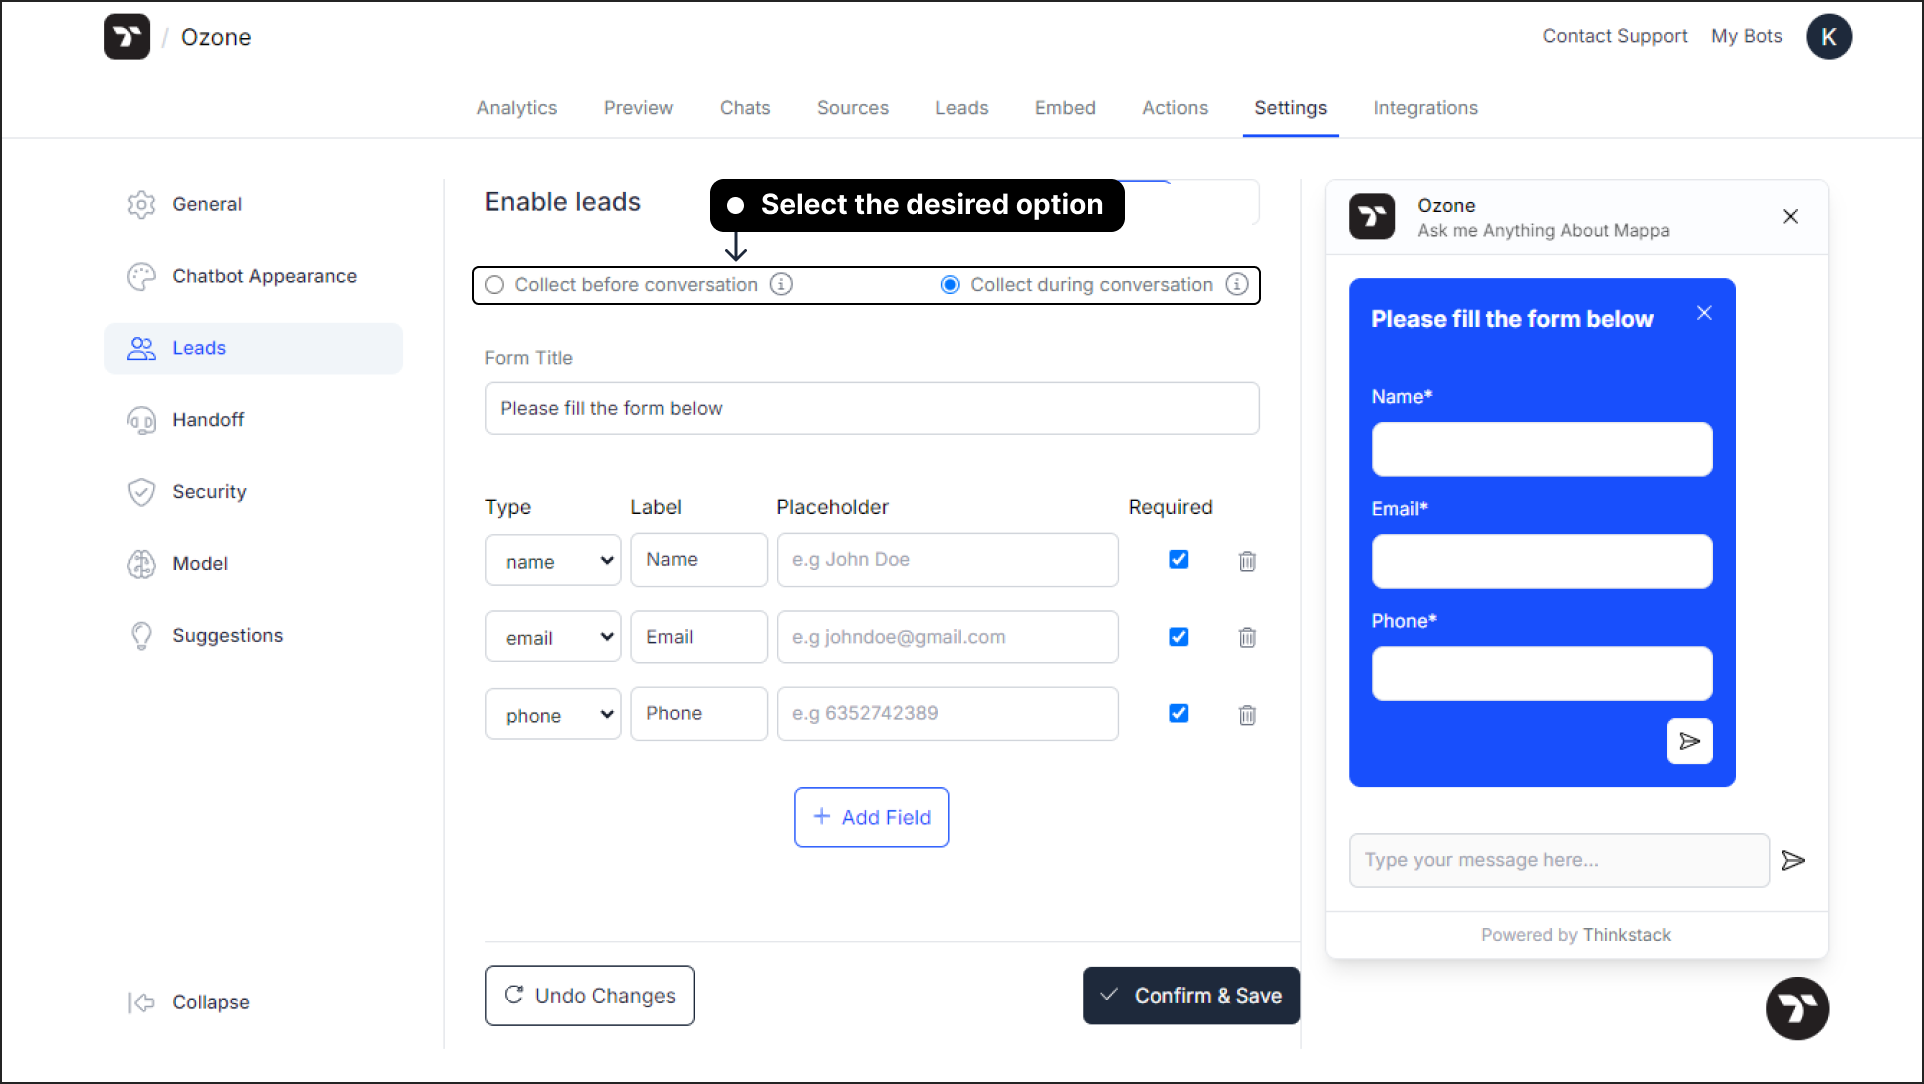 Note: If you choose to display the lead form after the conversation, the form will appear immediately after the chatbot’s first response.
Customize Lead Form Fields: Begin by giving your form an appropriate title. Choose the field type (options include Name, Email, Phone Number, or Text), assign a label to each field, and add placeholder text to guide users on what to enter.
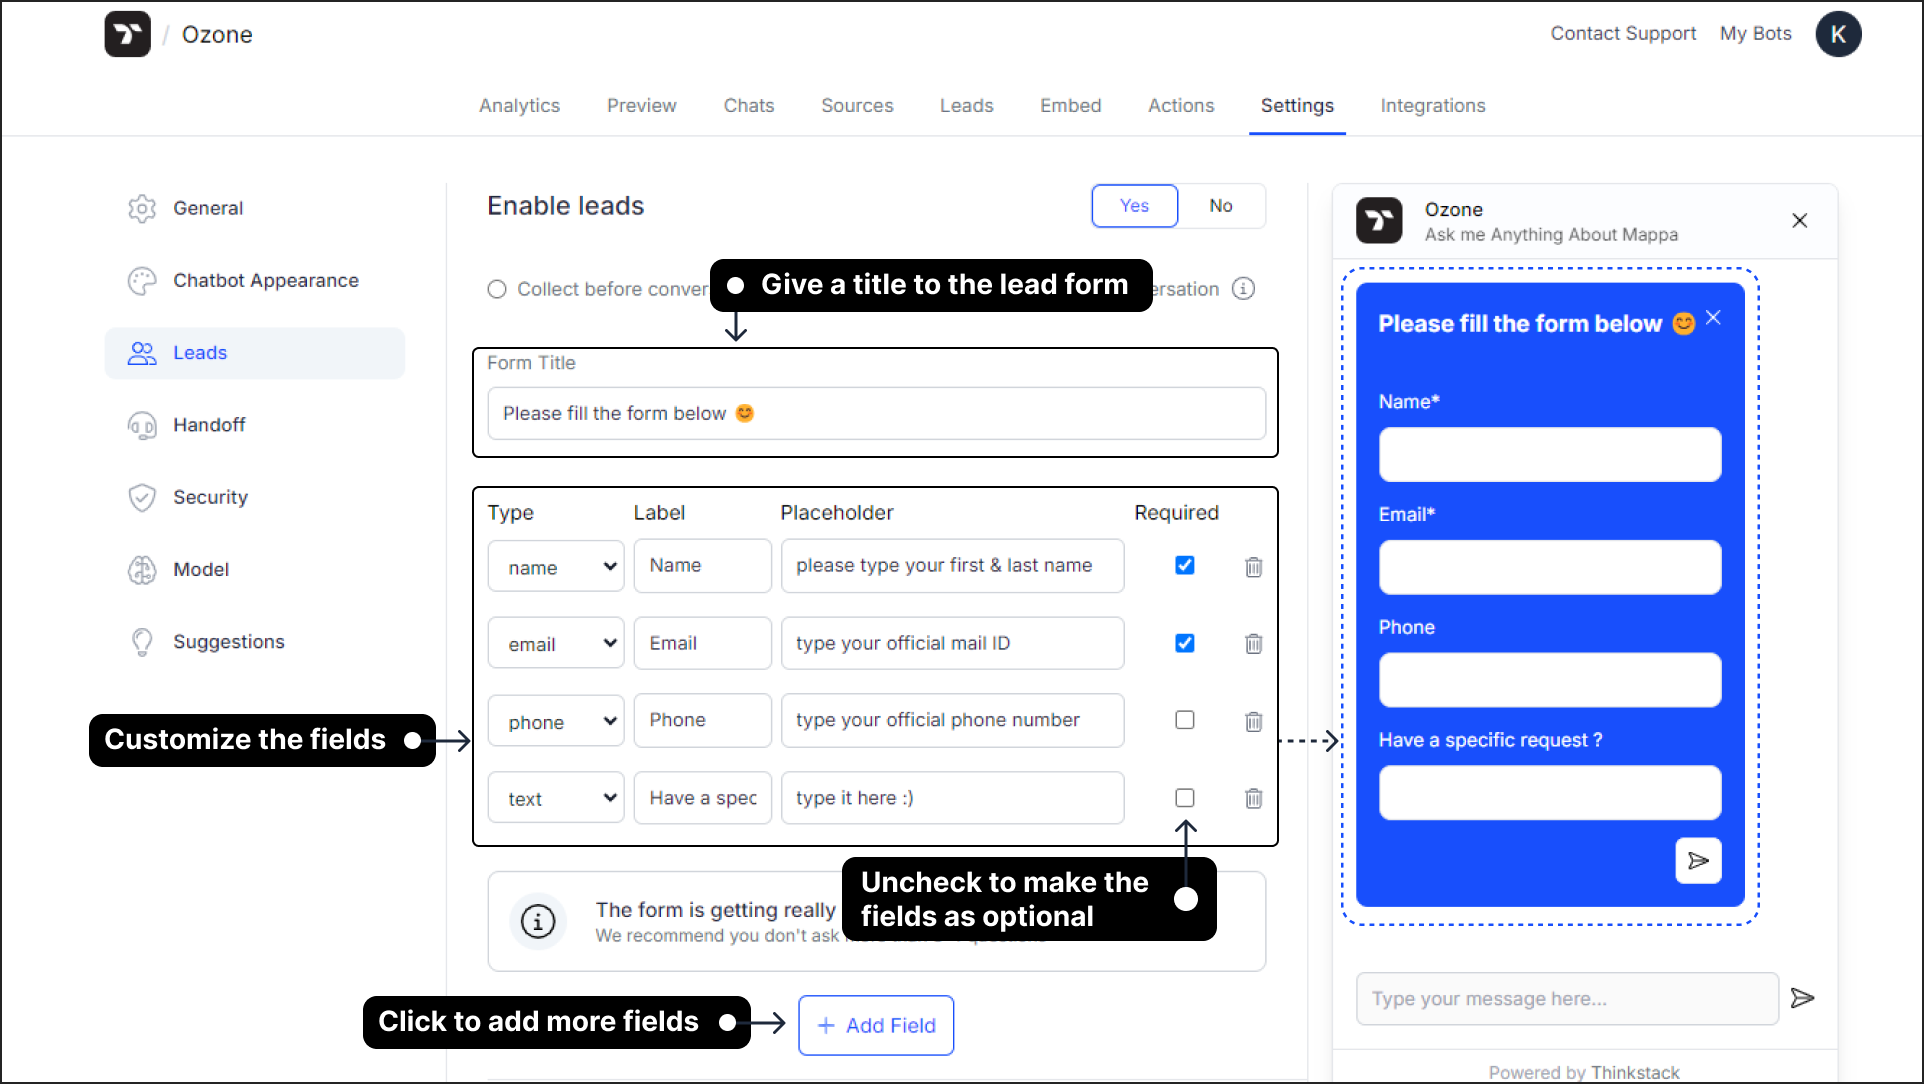 Note: For essential fields, mark them as mandatory by checking the corresponding box. You can add up to 6 fields by clicking on + Add Field, but we recommend keeping it concise with 3–4 fields to ensure users complete the form quickly.
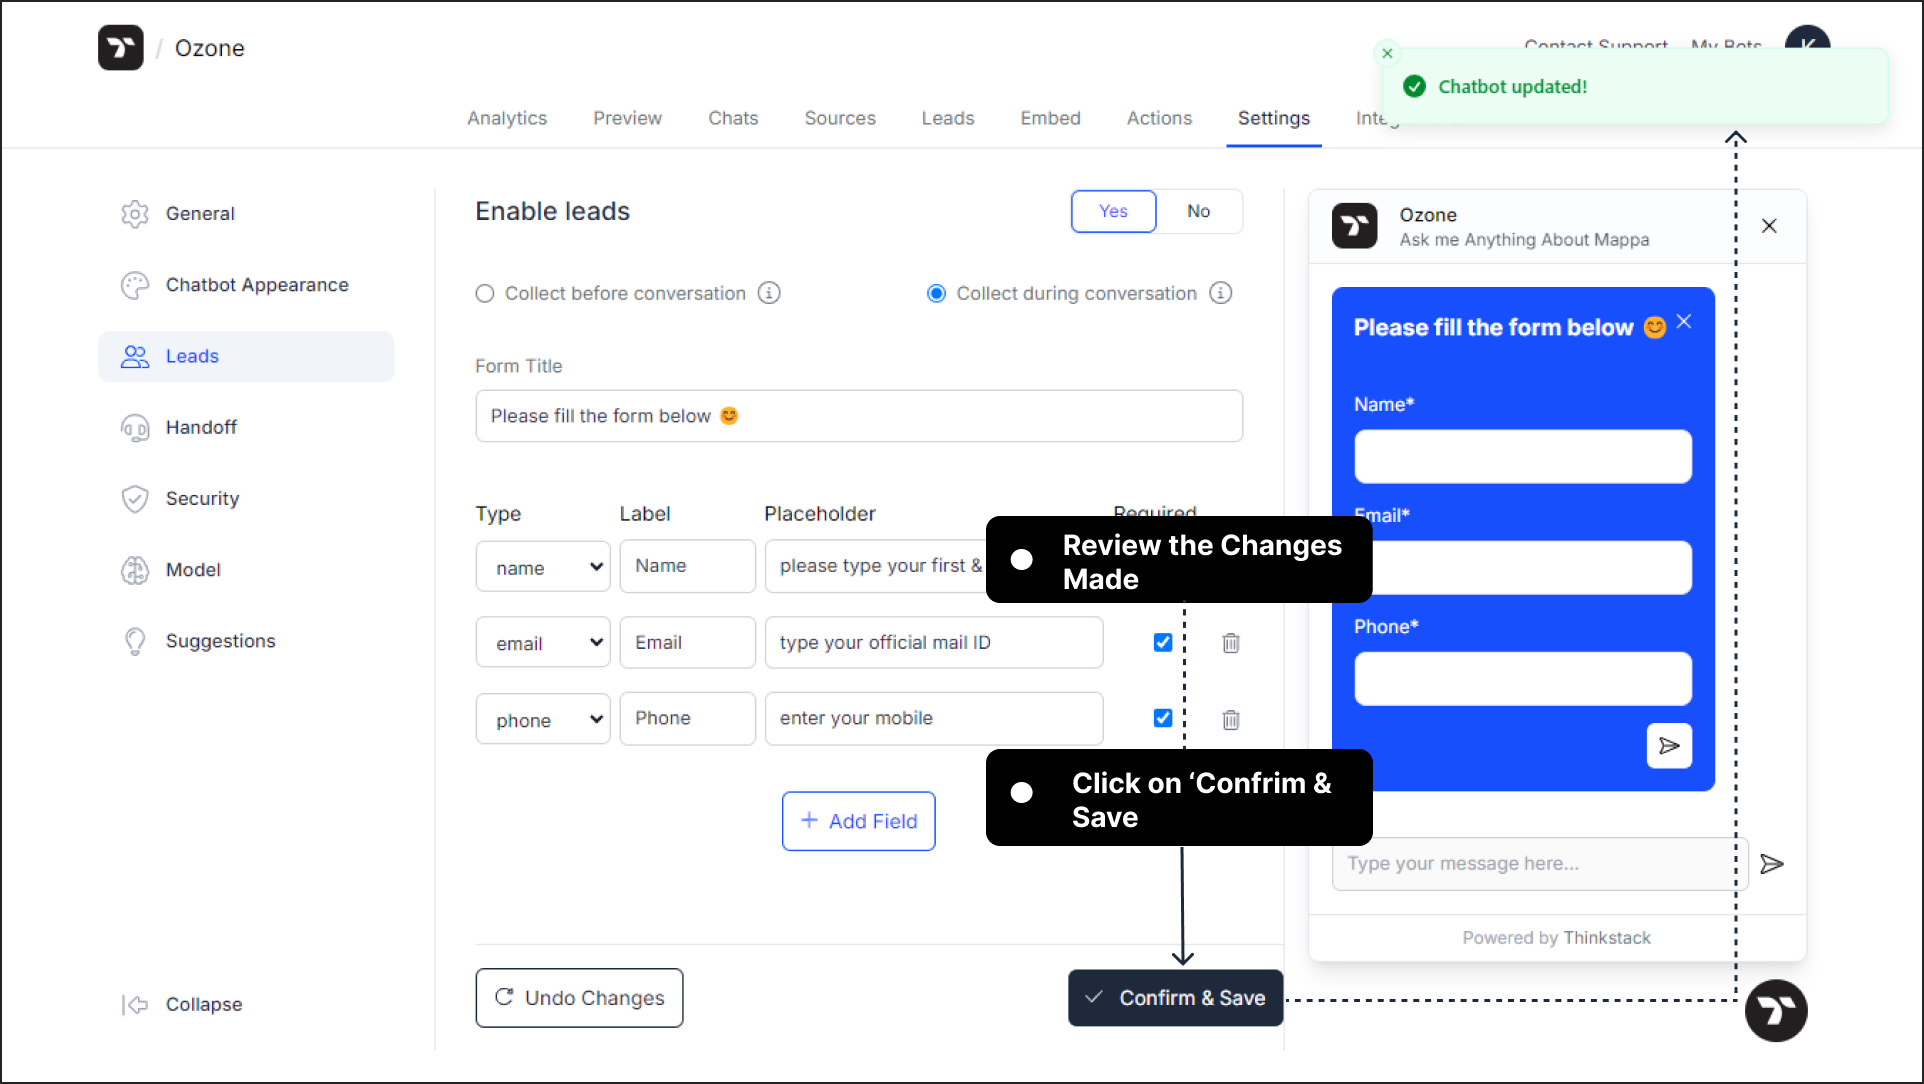
Save Changes: Click the ‘Confirm and Save’ button to apply the changes.
Testing the Lead Form#
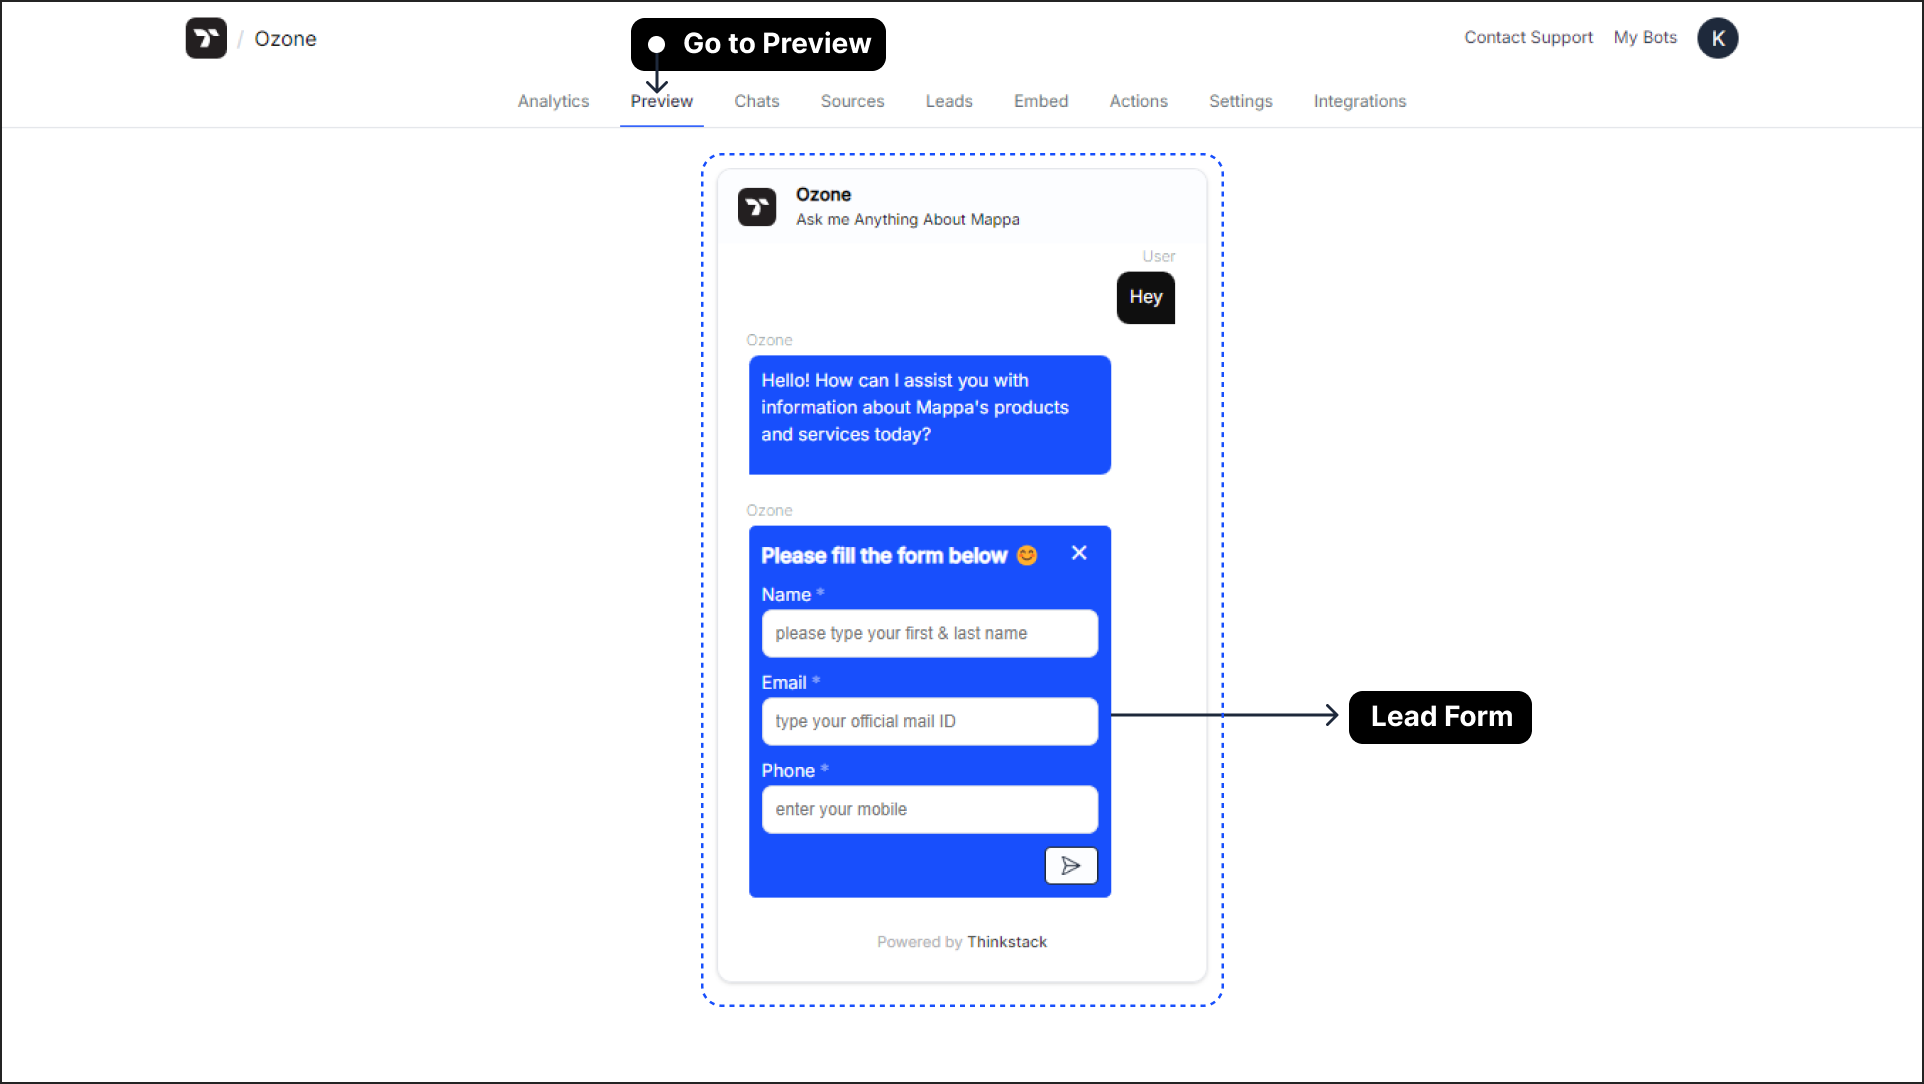
Lead form Preview: Go to the ‘Preview’ section. Verify if the lead form appears based on your configuration.
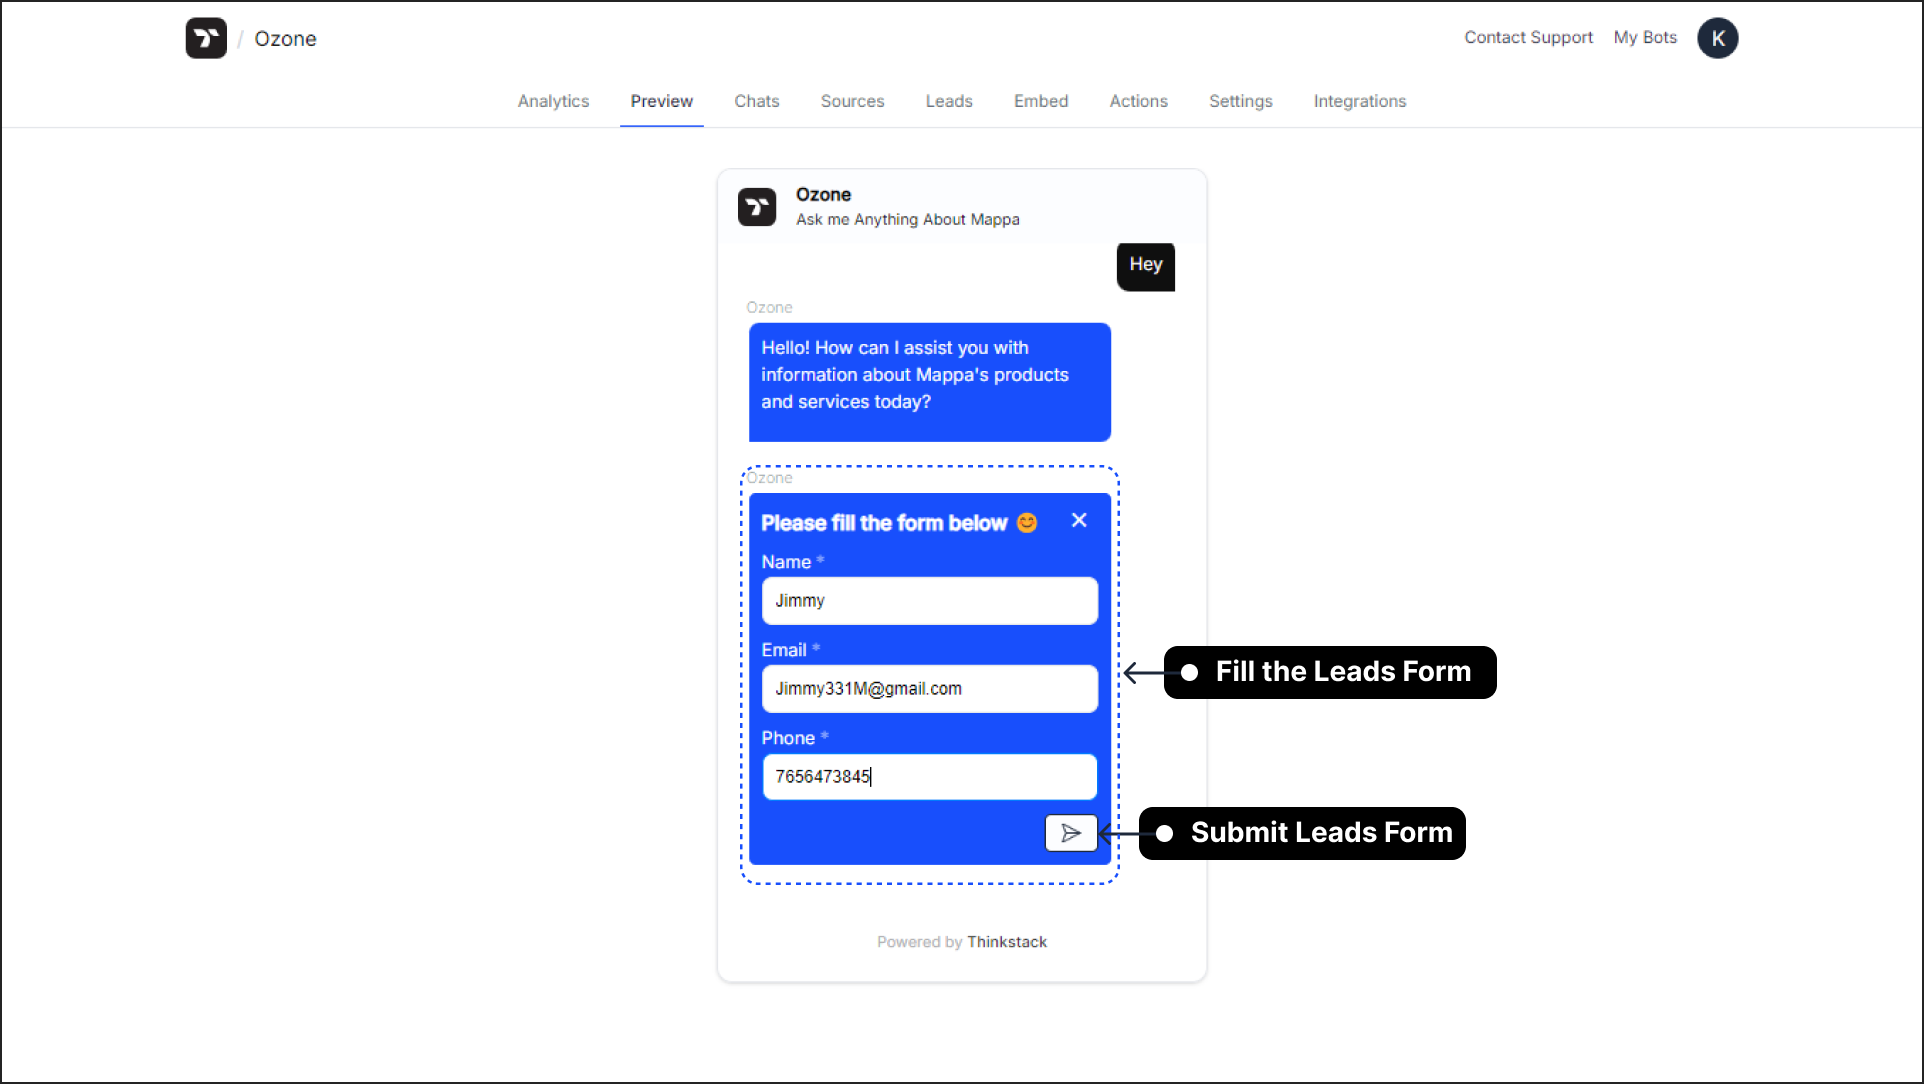
Test Form Submission: Fill out the leads form and submit the details.
Viewing Submitted Leads#
Navigate to Leads Section: Go to the ‘Leads’ tab in the top navigation bar.
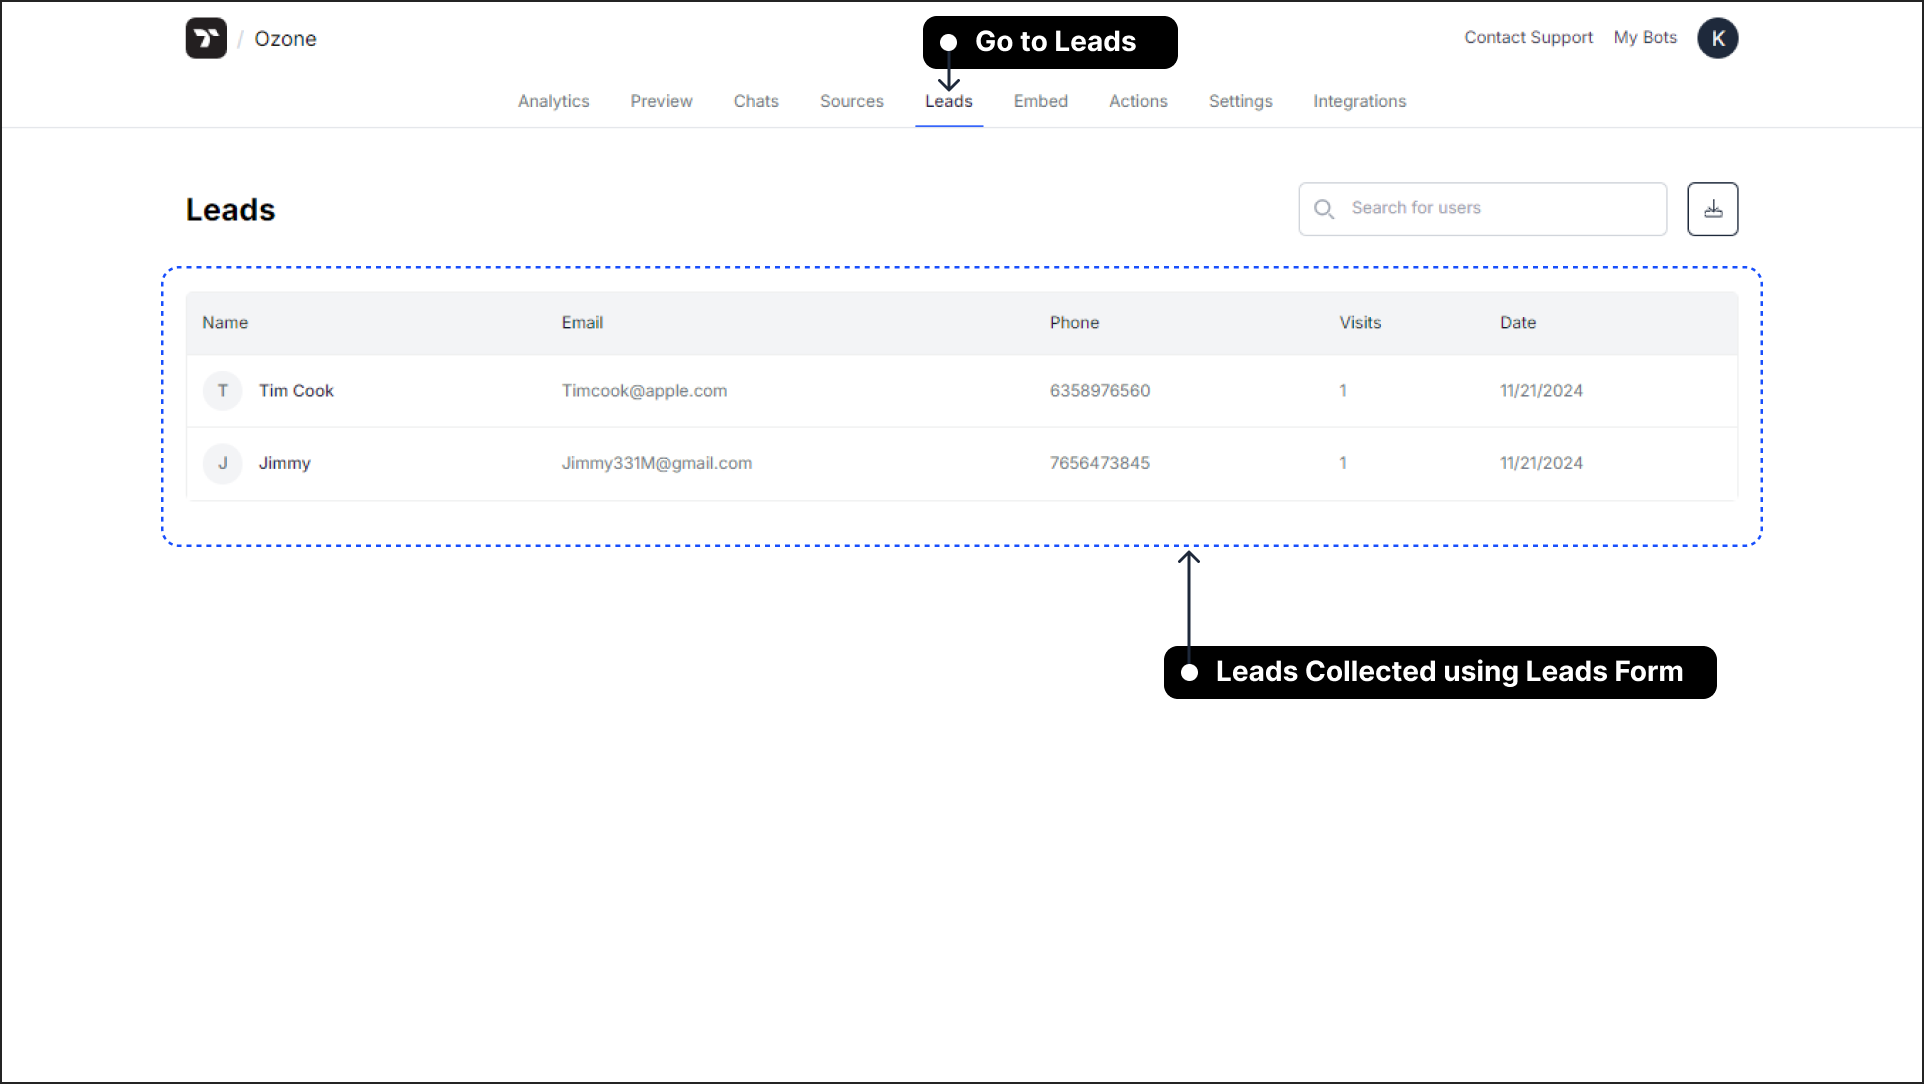
Review Collected Data: View the submitted information in the respective fields.
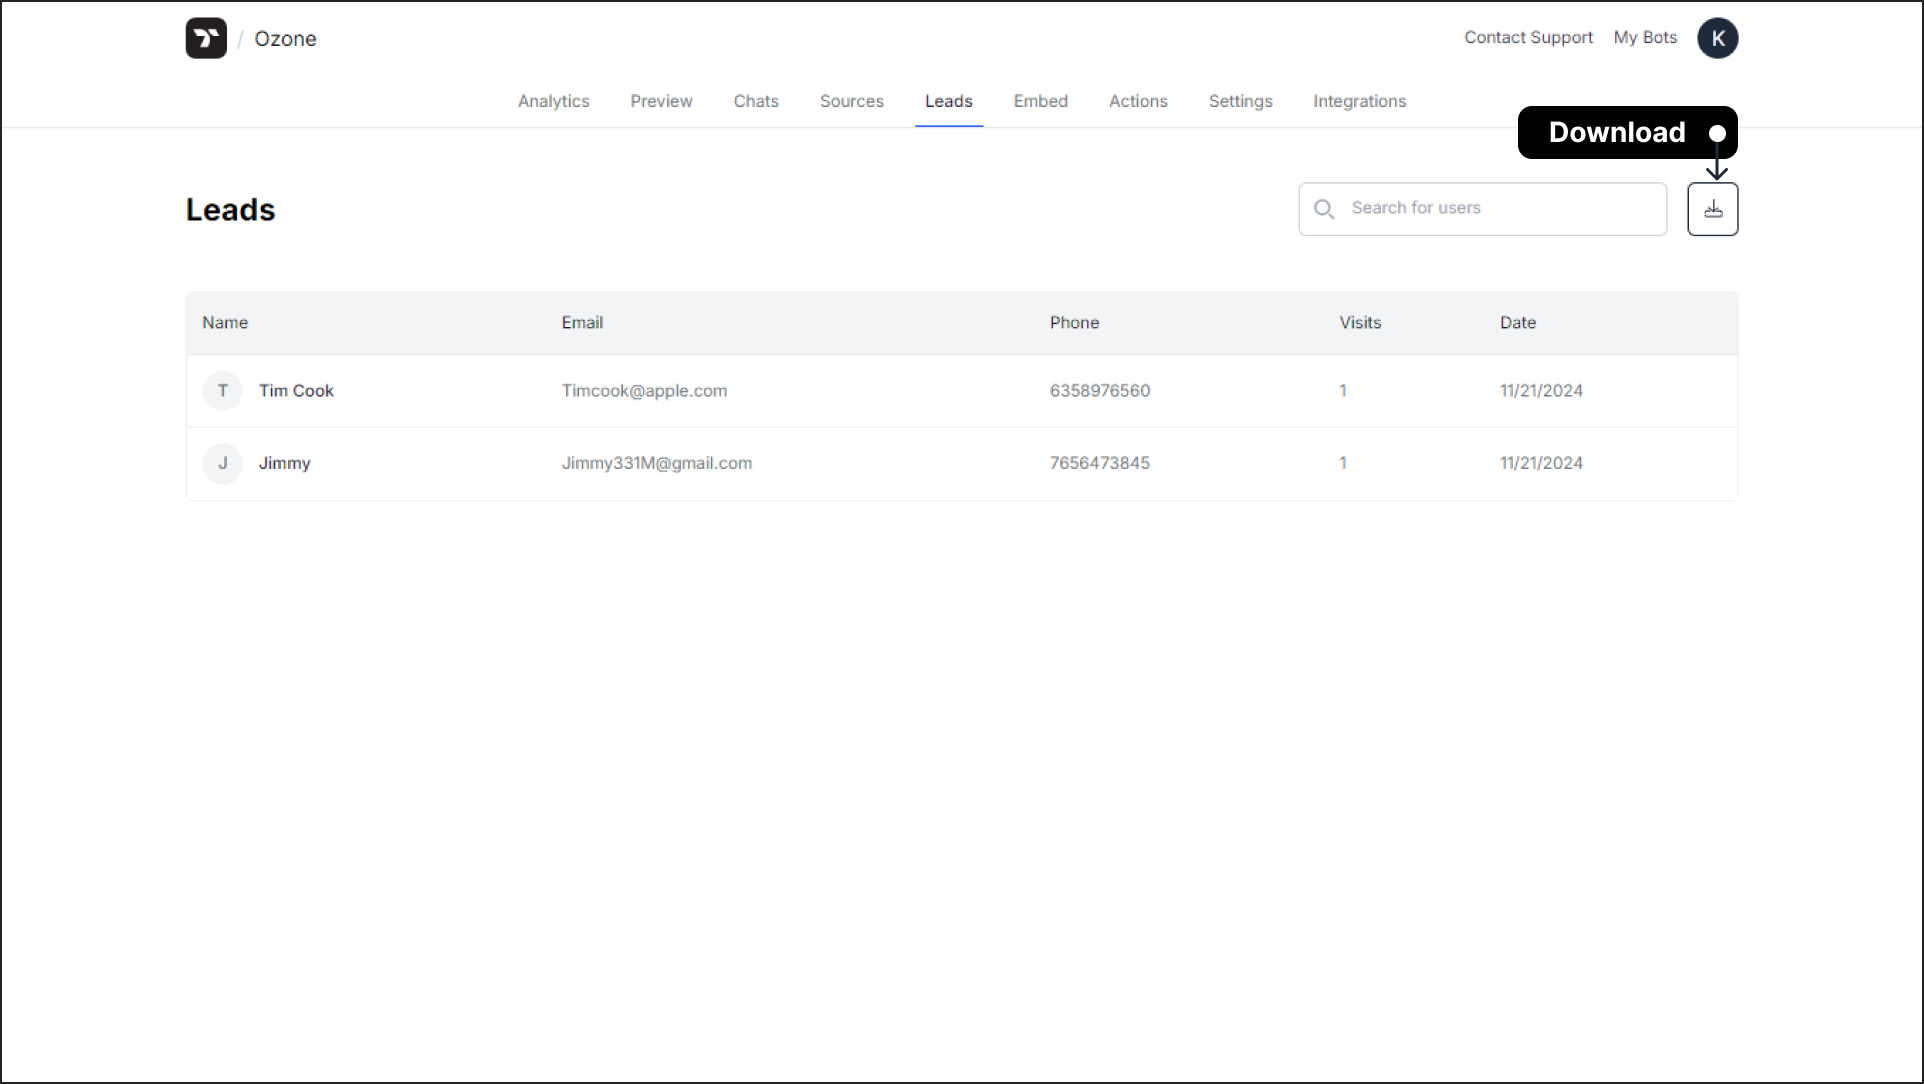
Export Lead Data: Download the data in CSV format for review or to share with your sales team.
That's a wrap! 🎉 You're now ready to customize the Lead Settings to make your chatbot collect the leads of your potential customers.