How to Add Team Members?
Let's explore how to add team members to your Thinkstack account :
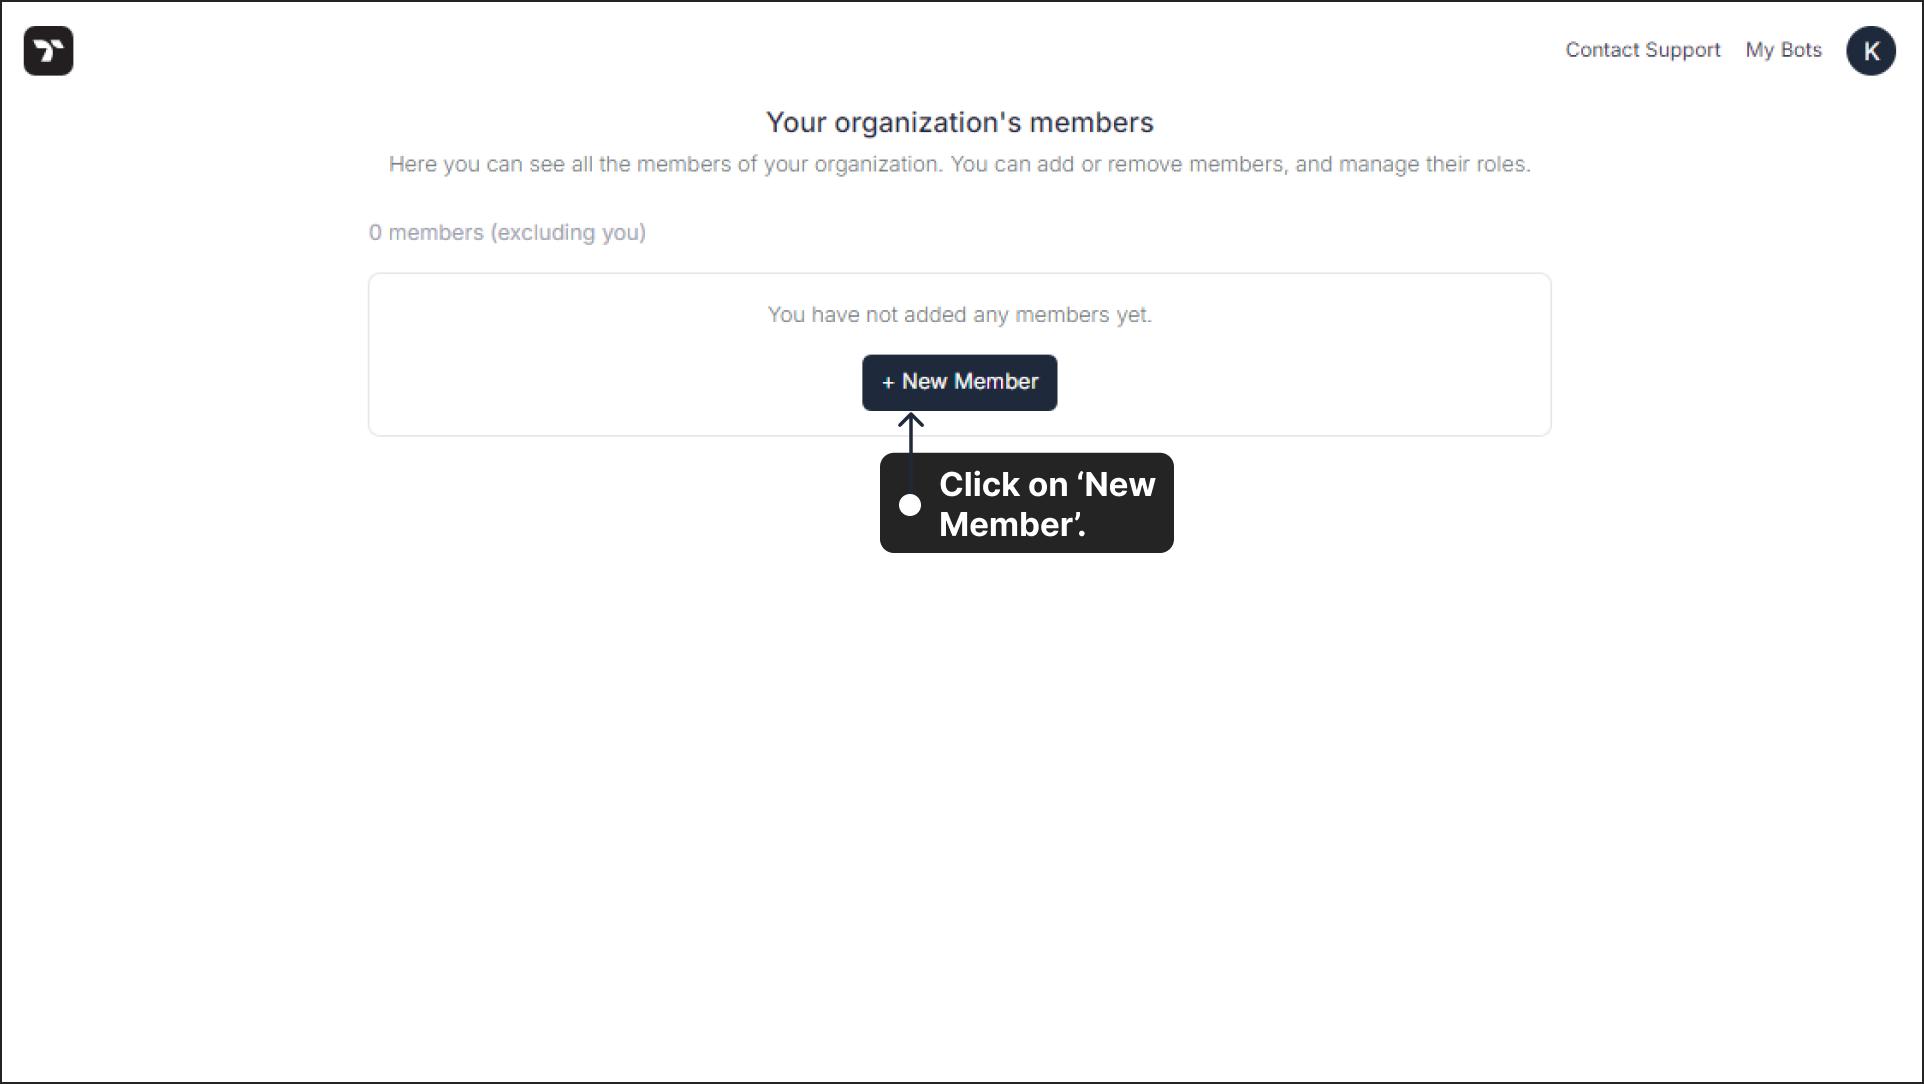
Log in to Thinkstack with your credentials, then click on your profile icon located on the right side of your screen. From there, select 'Members'.

Click the 'New Member' button to add a new user.
After clicking the 'New Member' button, a dialog box labeled 'Add New Member' will appear. Enter the Name and Email of the member you want to add.
Set a password and confirm the same for the new member. This password will be used for their first login to their Thinkstack account. After logging in, they can change their password.

Note: When configuring, you can choose how to share the email and password details with the new member. The password will only be sent if the 'Send password in email' checkbox is selected during the setup. Otherwise, the admin must share the password manually.

Assign a role to the new user. You can choose between two roles: Agent and Manager. Select the role based on the level of access you want to grant.

After assigning a role, you can easily assign one or many chatbots to them by selecting the names of the existing chatbots.
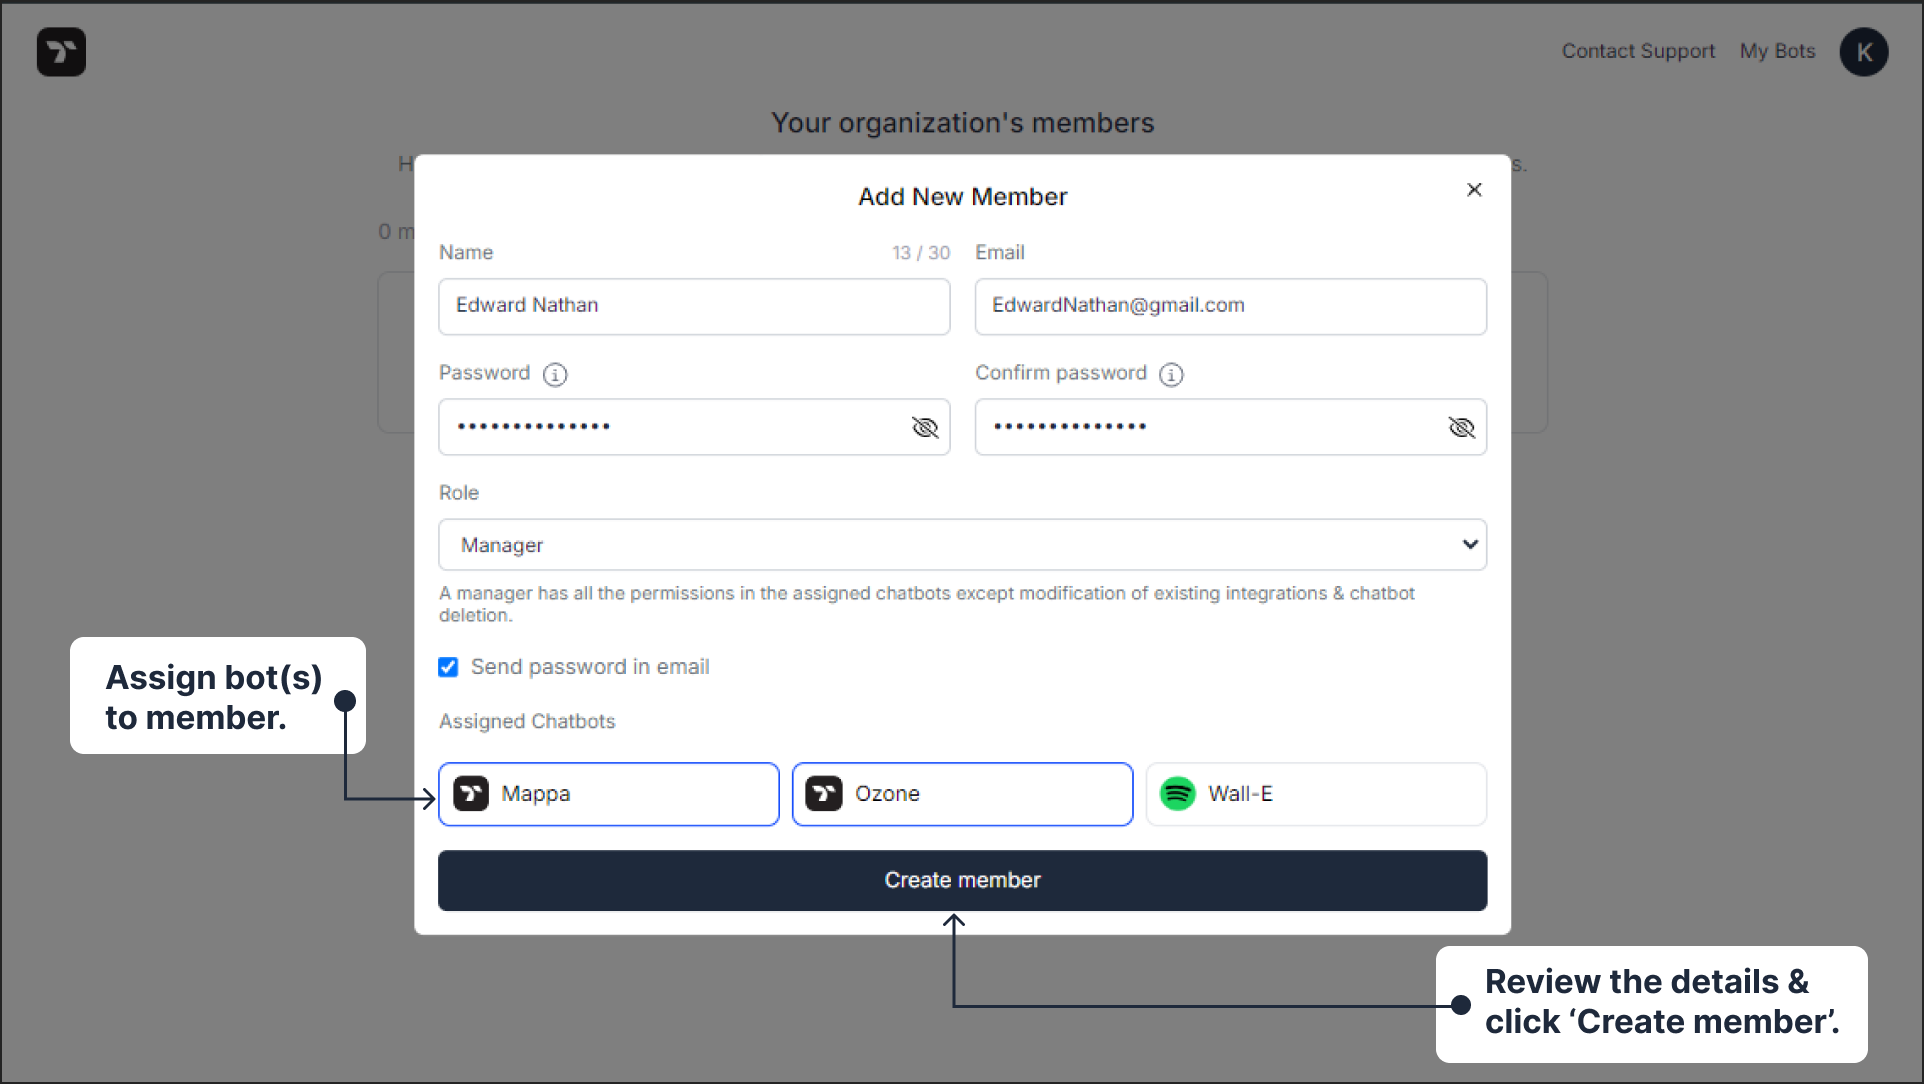
- Once you've entered all the necessary details, review your selections. If everything looks correct, click 'Create Member'.
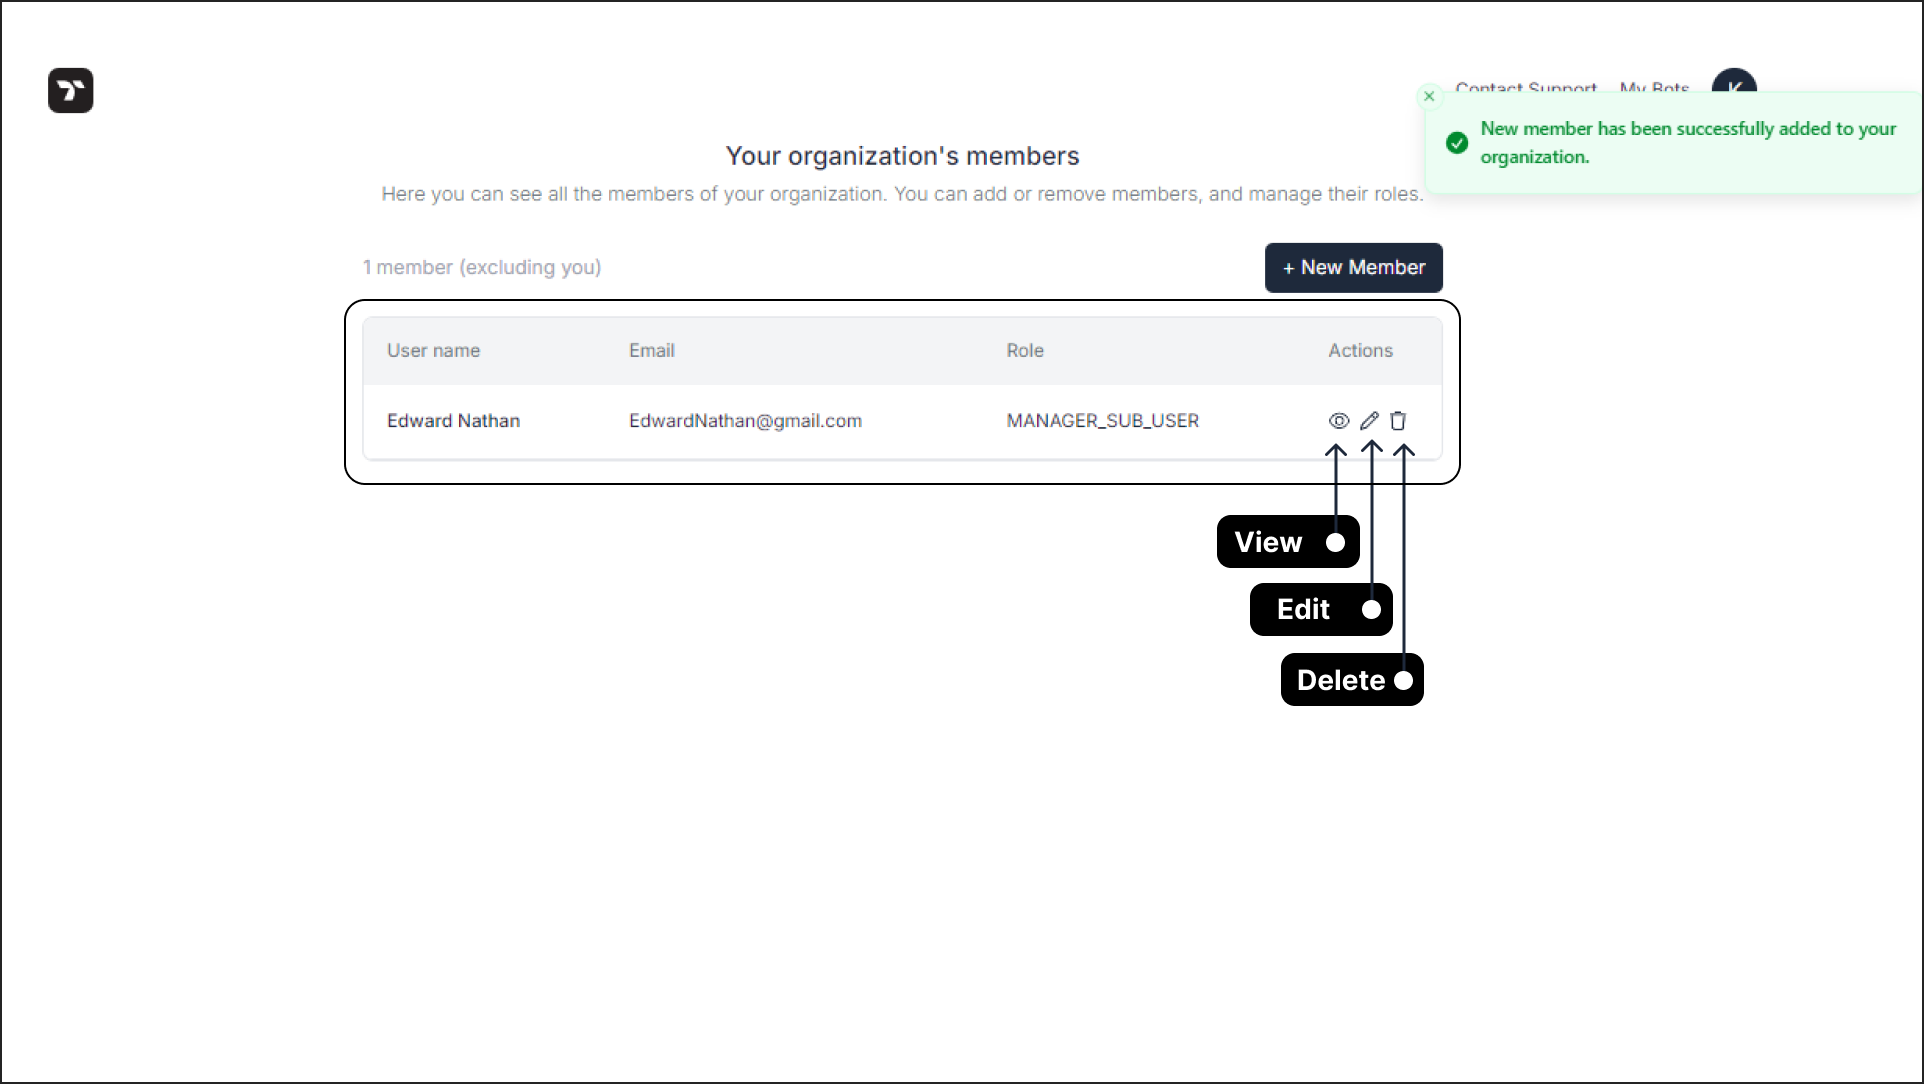
That's it, You’ve successfully added a new member. You can view their details in the table displaying the user information you added.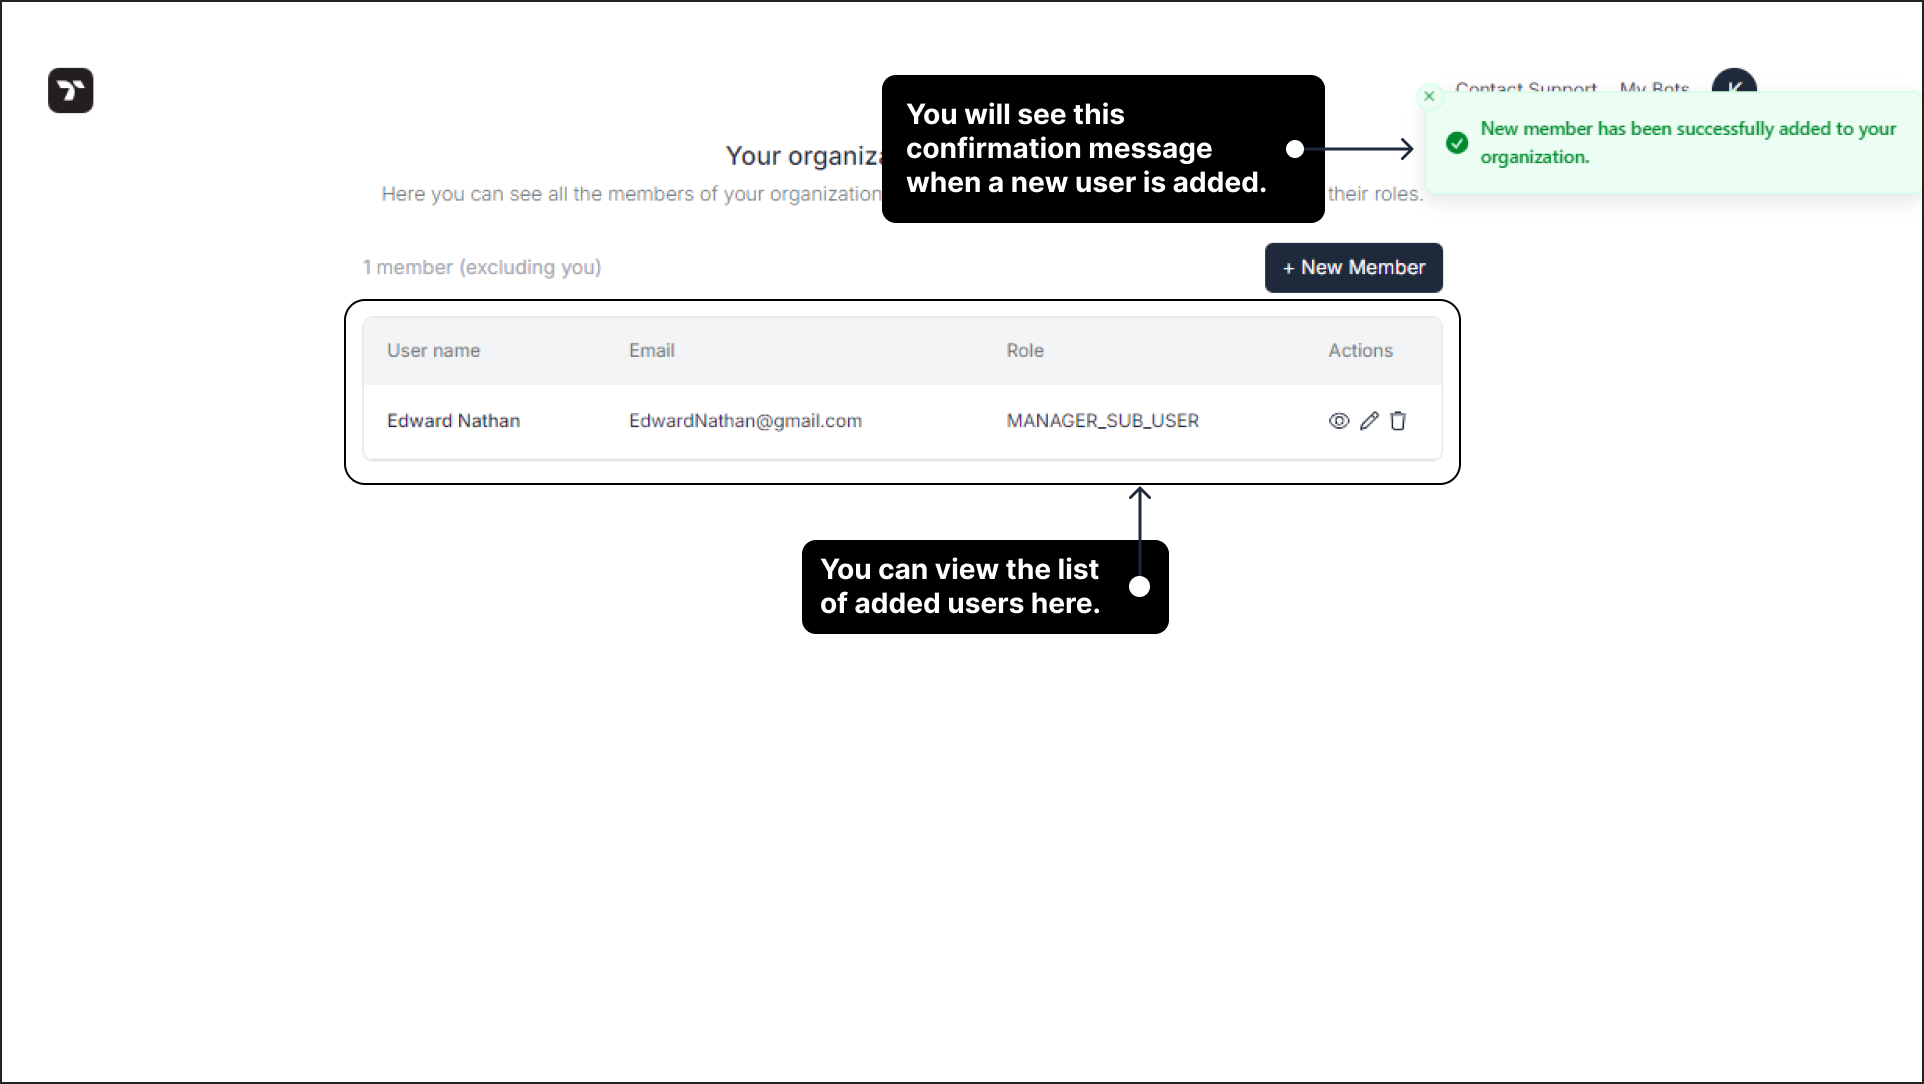
You can also view and edit the username of the members, assign other chatbots to them, change the role, and also delete the members.