Zapier Integration
Thinkstack can be integrated with Zapier to use with multiple applications like Google Sheets, Zoho, Salesforce, etc. for various different purposes such as Lead Generation, Ticket creation etc.
info
The following guide shows how to integrate and automate Zapier with Thinkstack to capture new leads and add them to Google Sheets.
Let’s get started assuming that you already have a Thinkstack account with a chatbot along with a Zapier account.
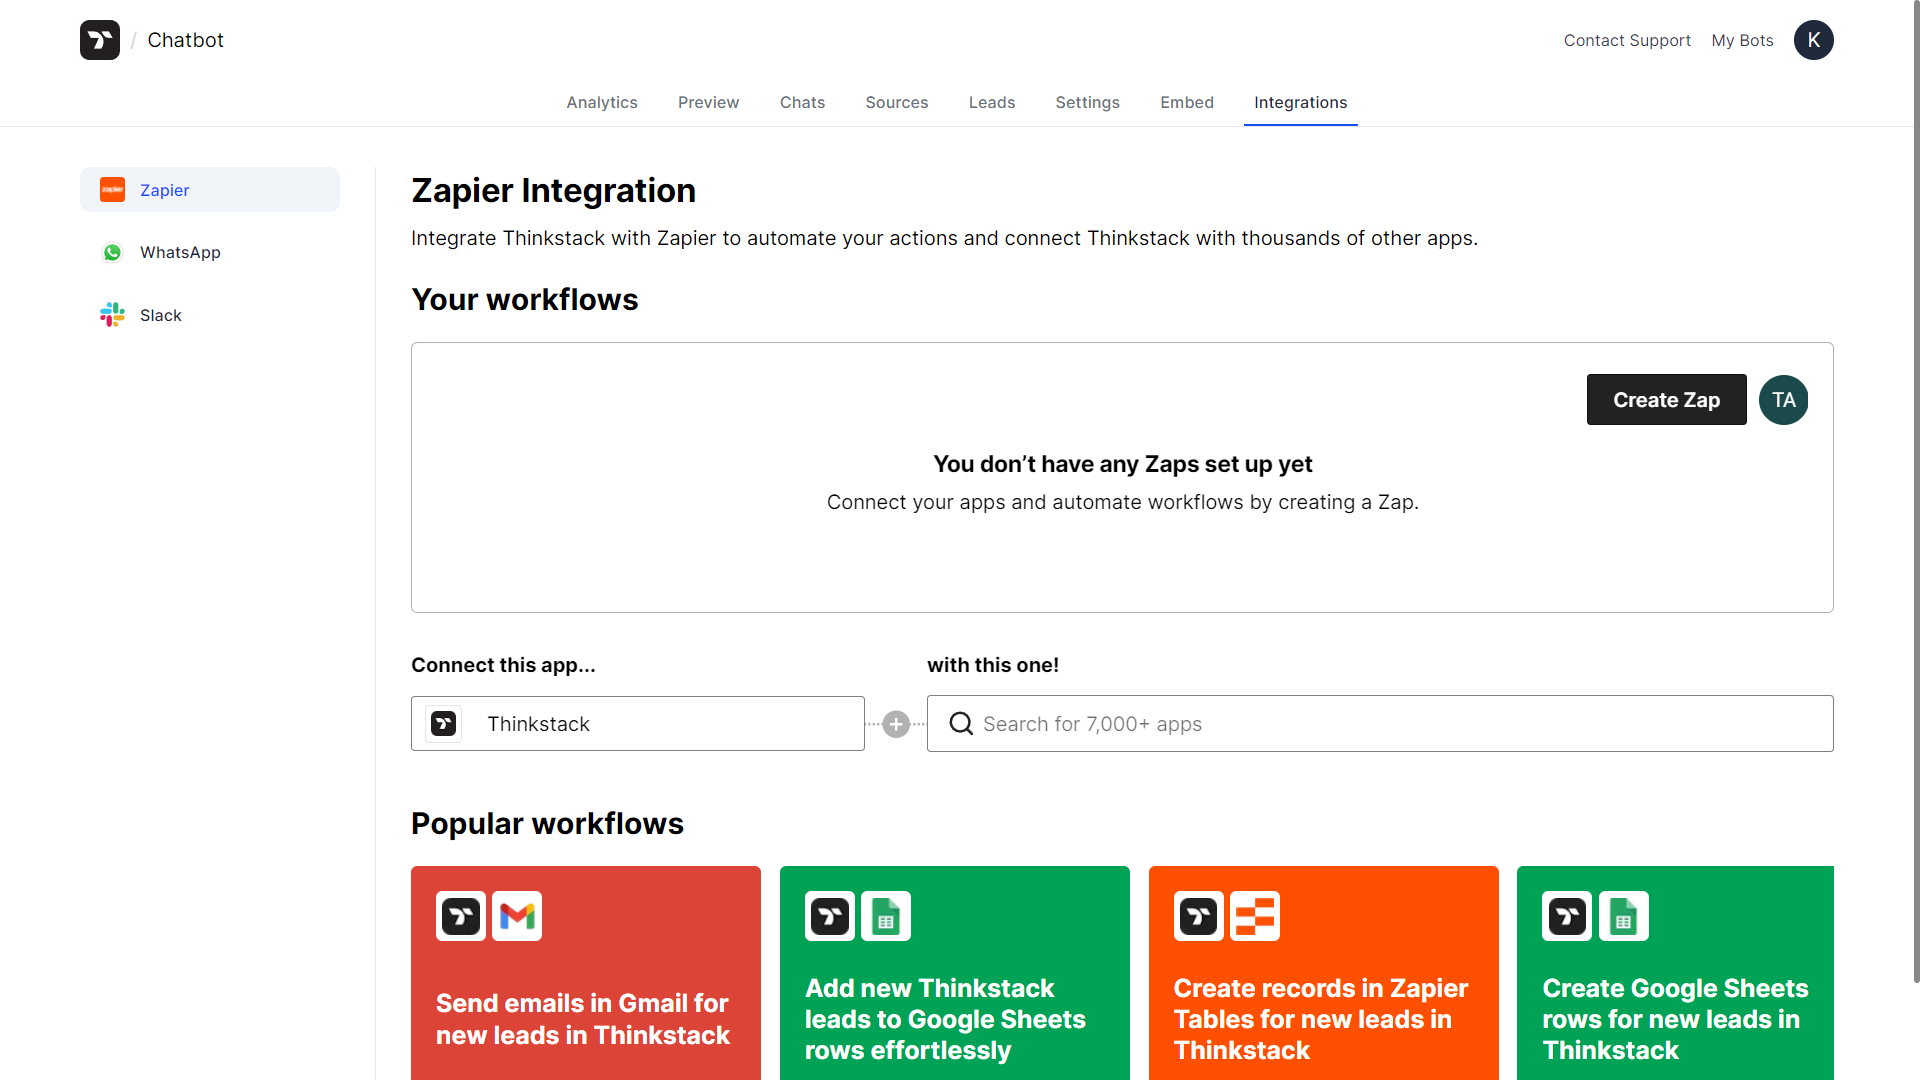
Login to your Thinkstack account. Go to your desired chatbot's Integrations page. Now under Your workflows you should login to Zapier by clicking on Login, to login your Zapier account.
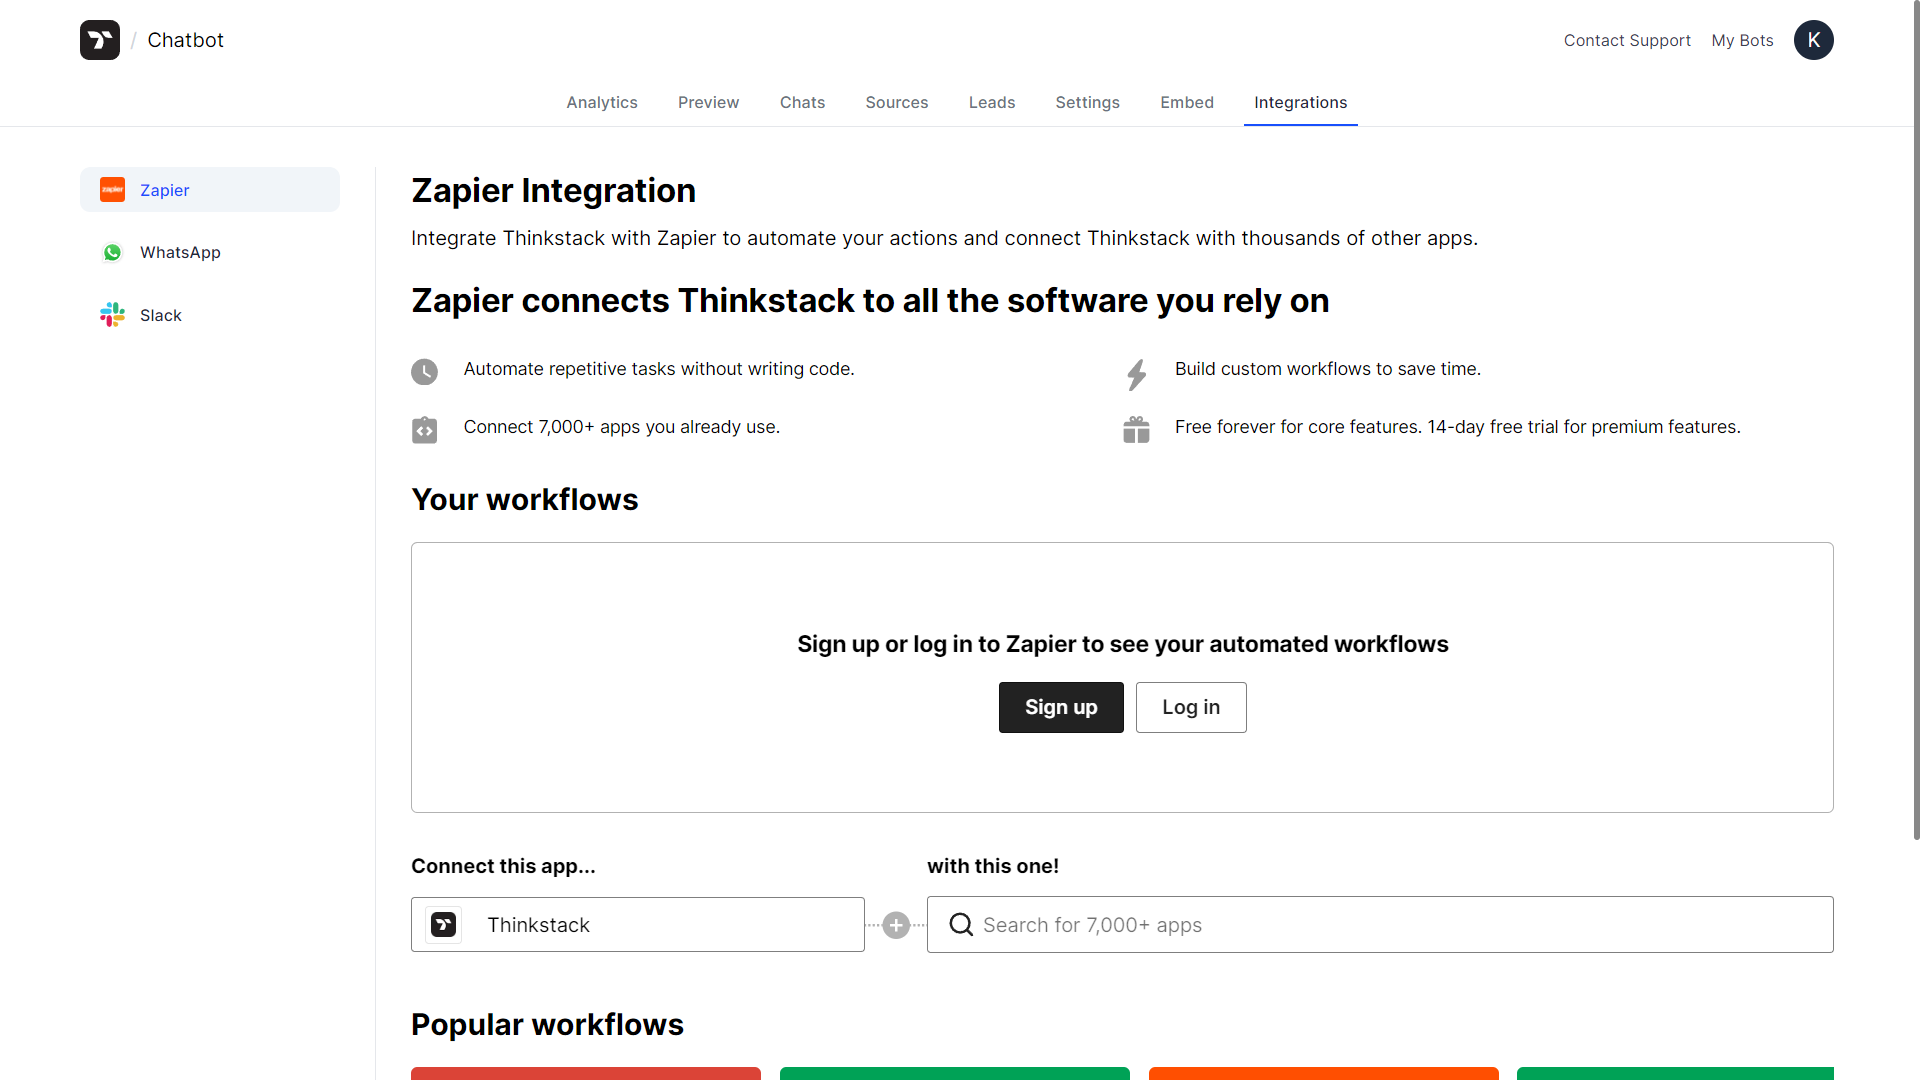
After successful login to your Zapier account. Under Popular Workflows click on Thinkstack + Google Sheets workflow (Zapier template).
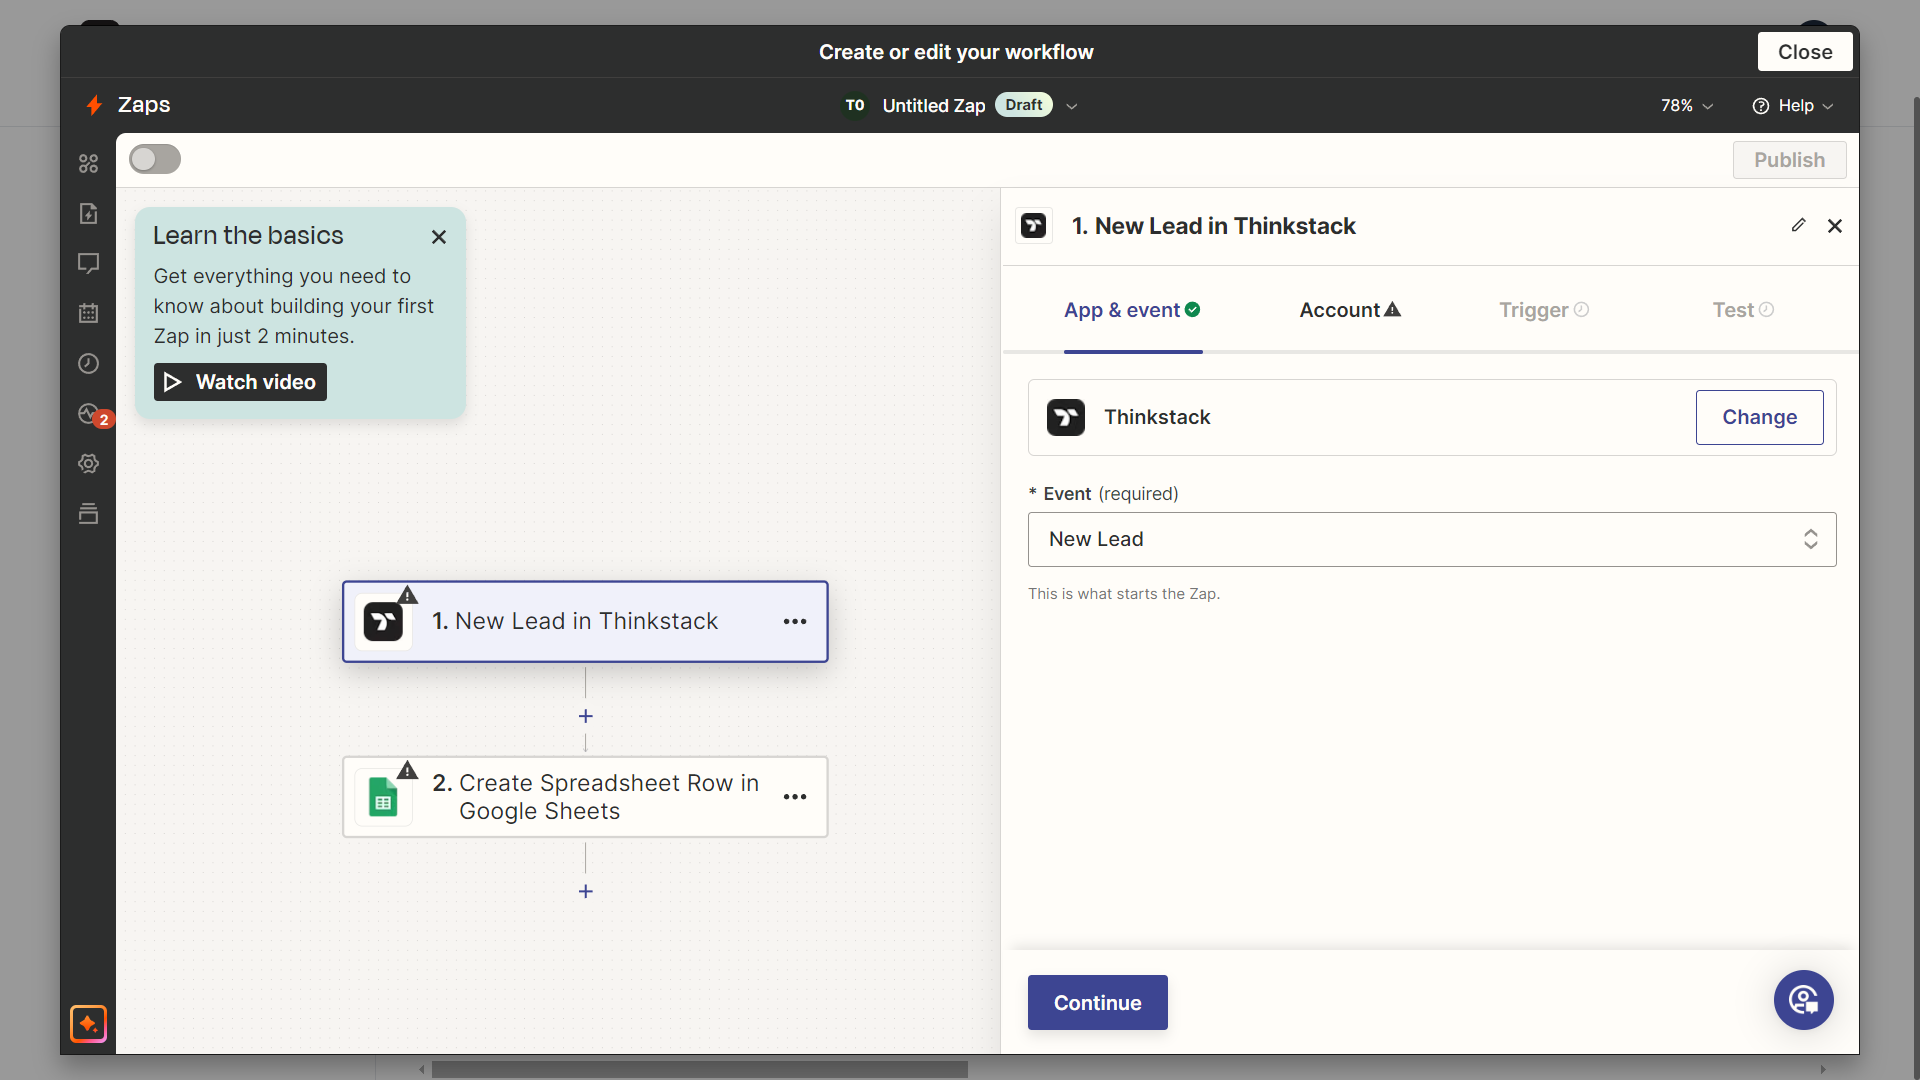
After clicking on that workflow, a Zapier window opens up where you can create or edit your workflow. In Zapier, a workflow consists of Trigger and Action. Here you can see that both the Trigger and Action are already selected, since we selected one of the popular workflows.
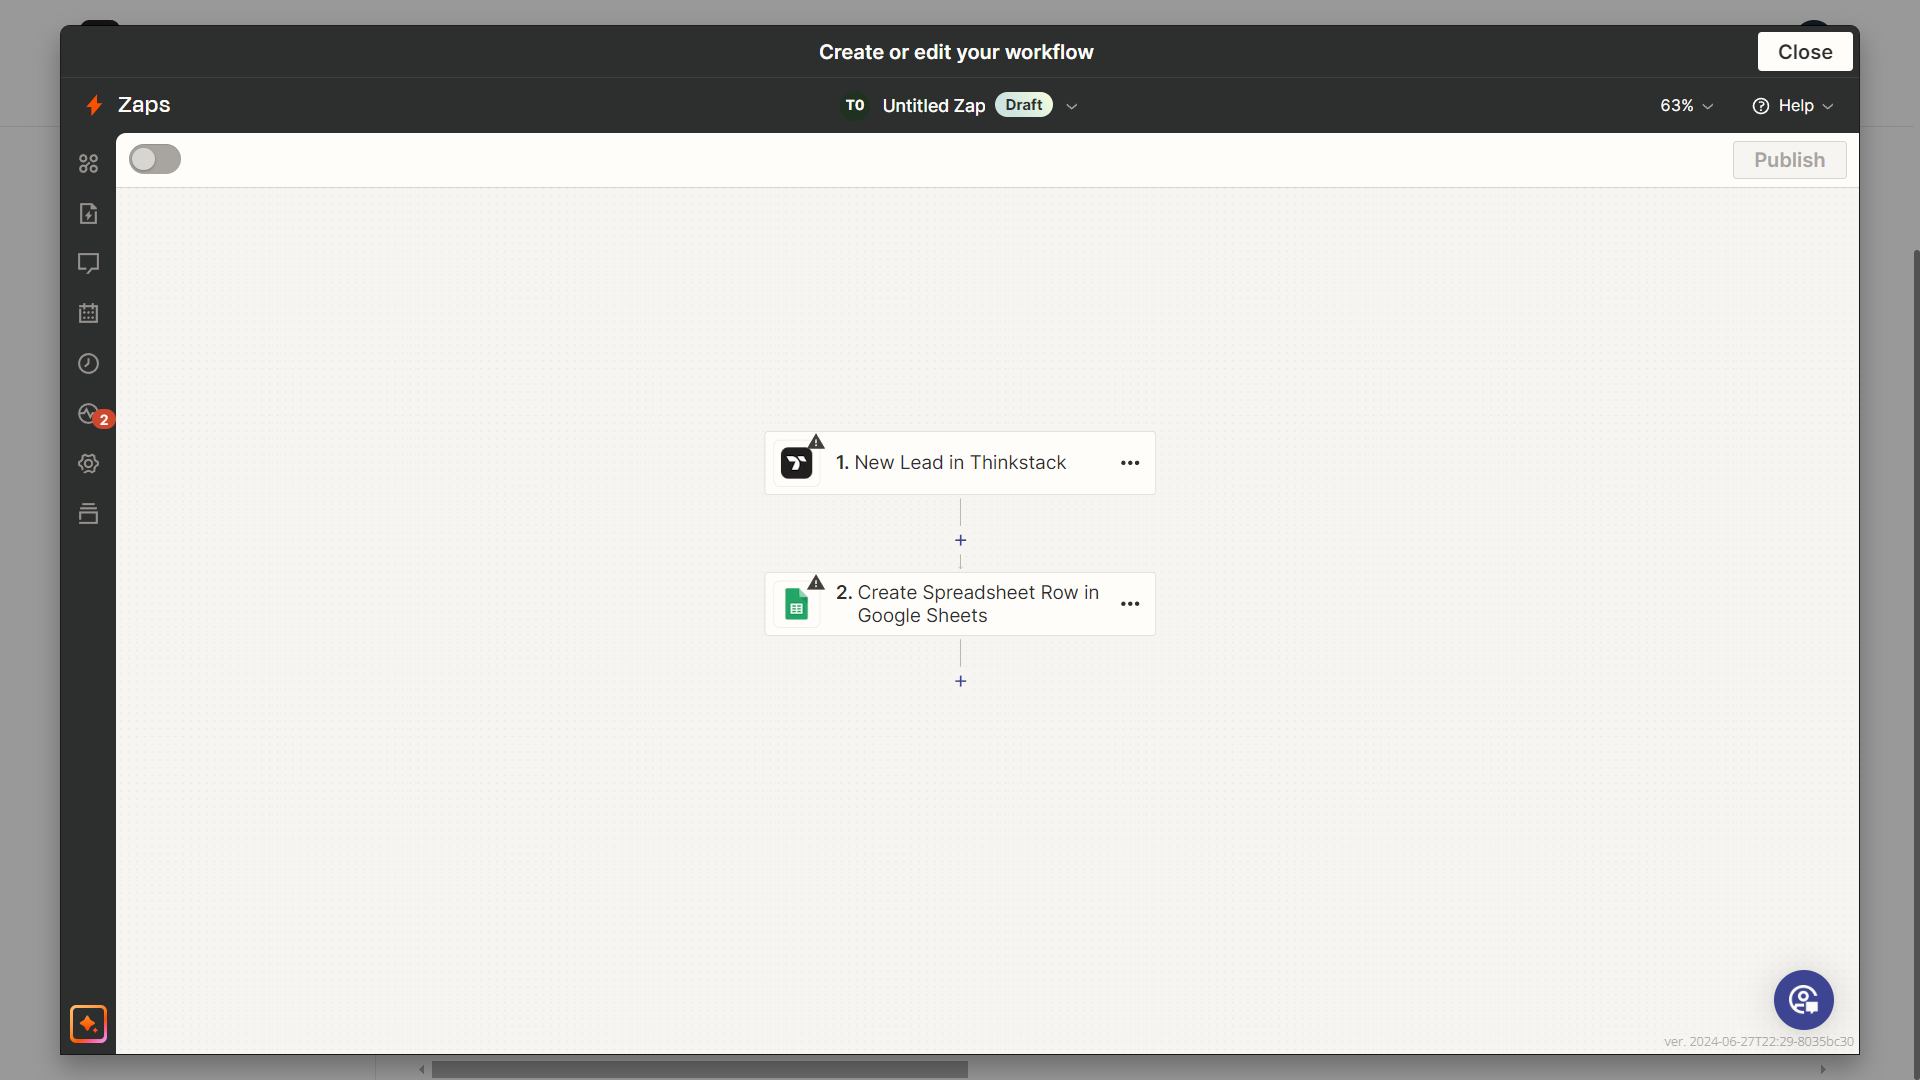
Now let us start customizing the Trigger part of the workflow. Here you need to select the event of Thinkstack that will trigger the workflow under the App & Event section. Then click on Continue.
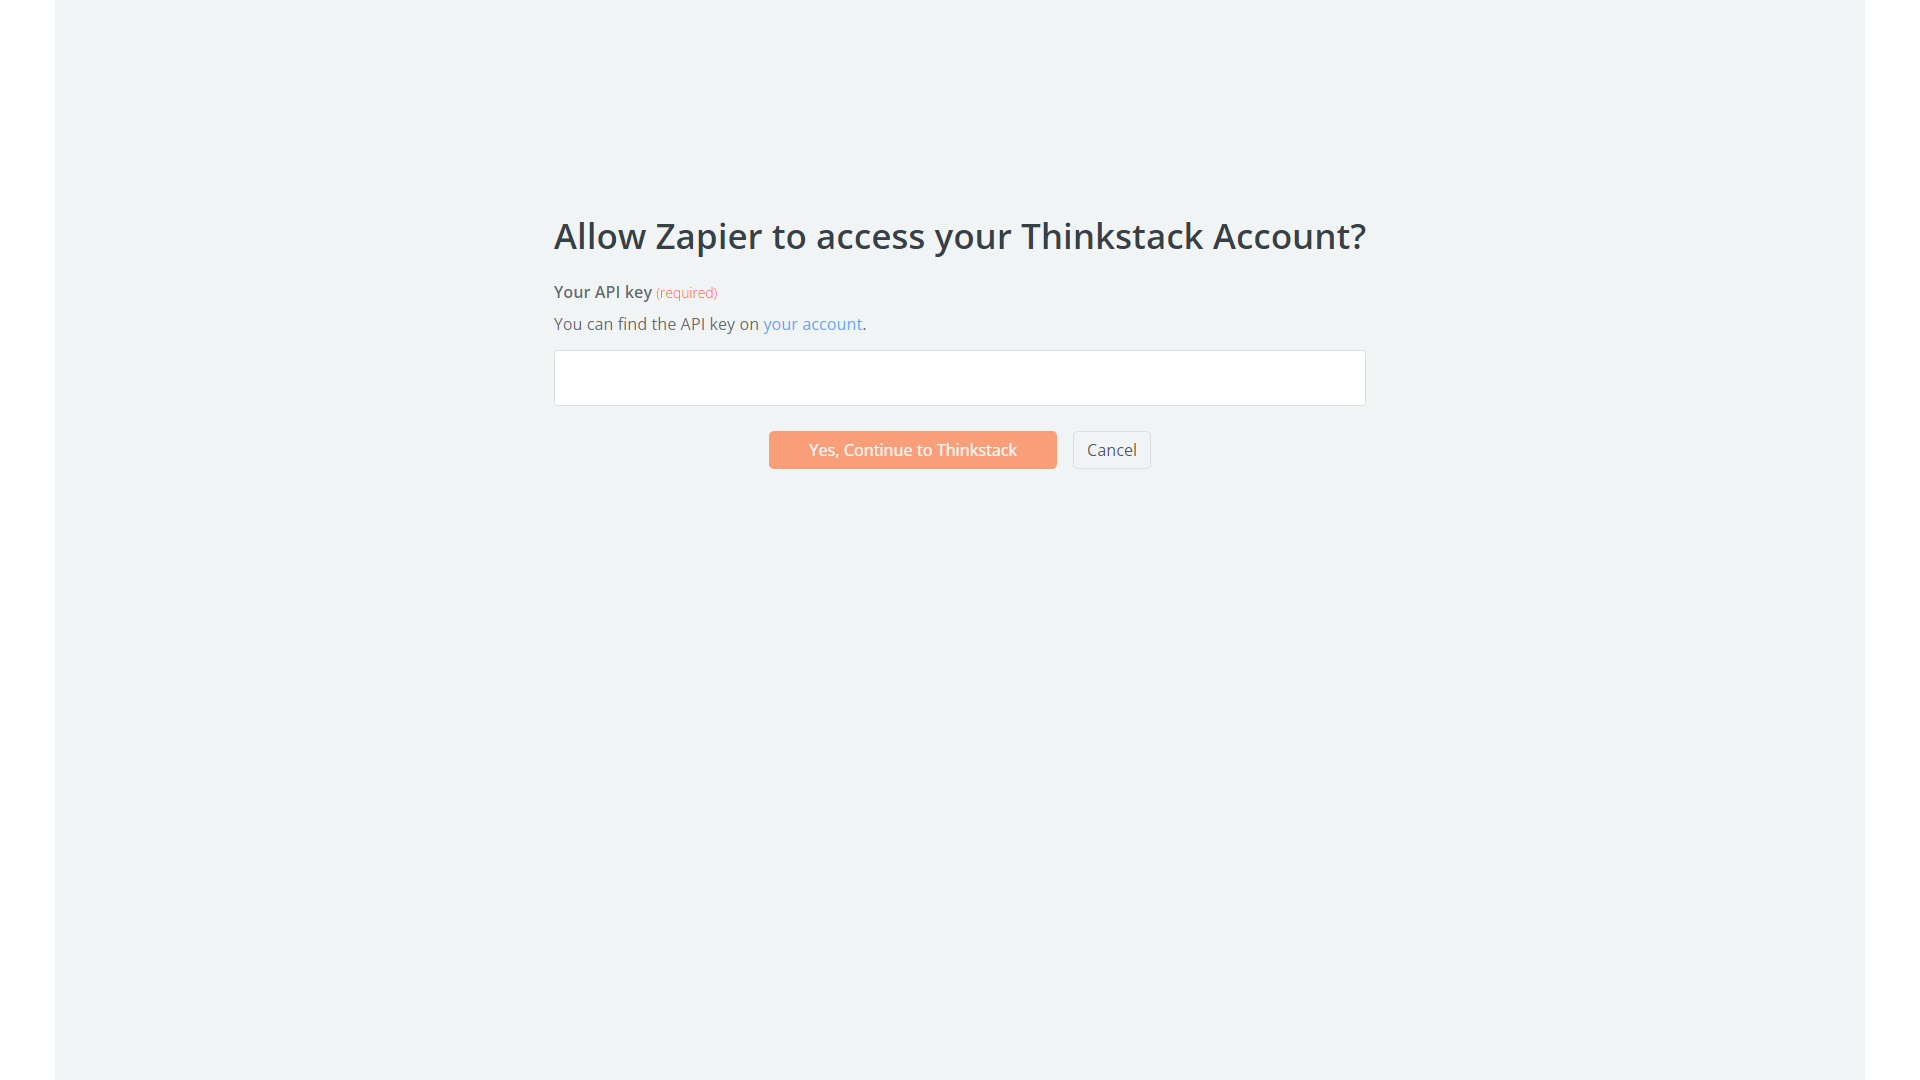
In the Account section, click on Sign in. A new window will appear and you need to enter your API key which can be found by clicking on the link provided.
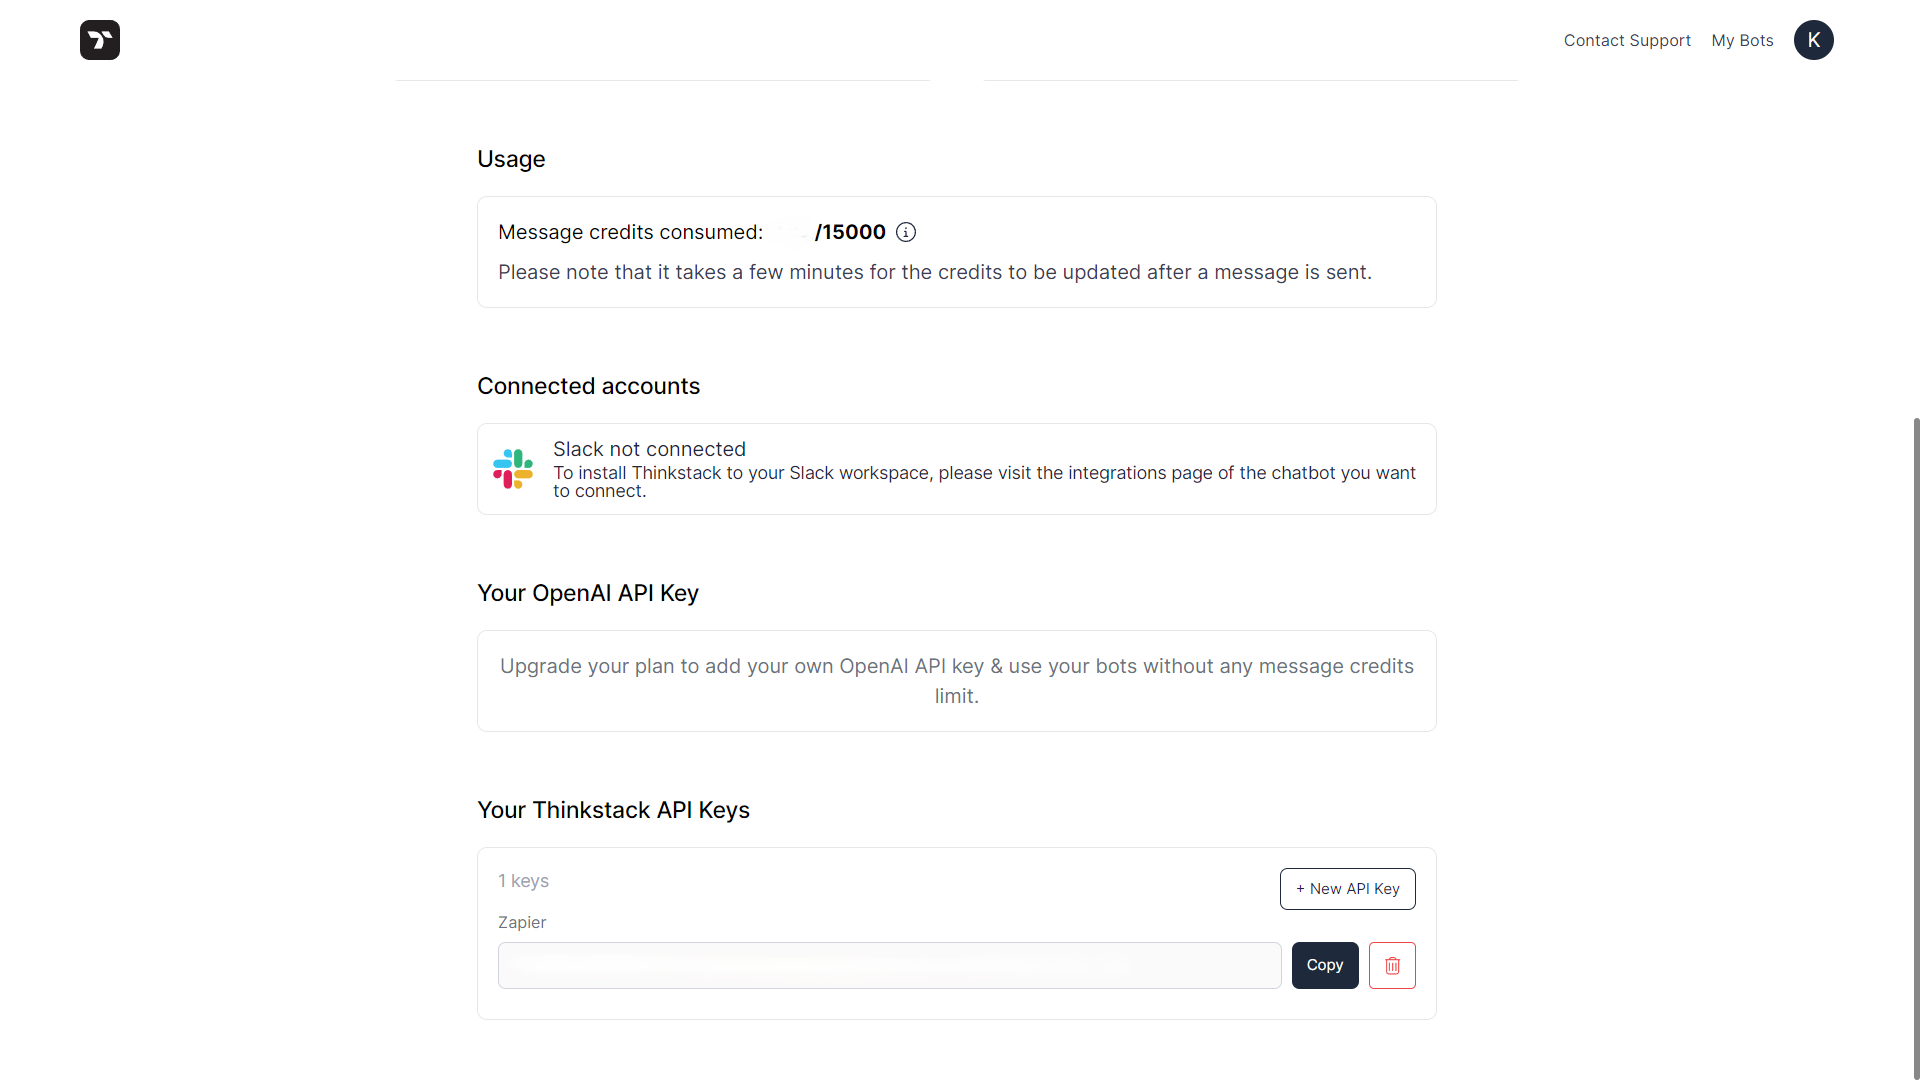
After clicking on the link you will be redirected to the “My Account” page.
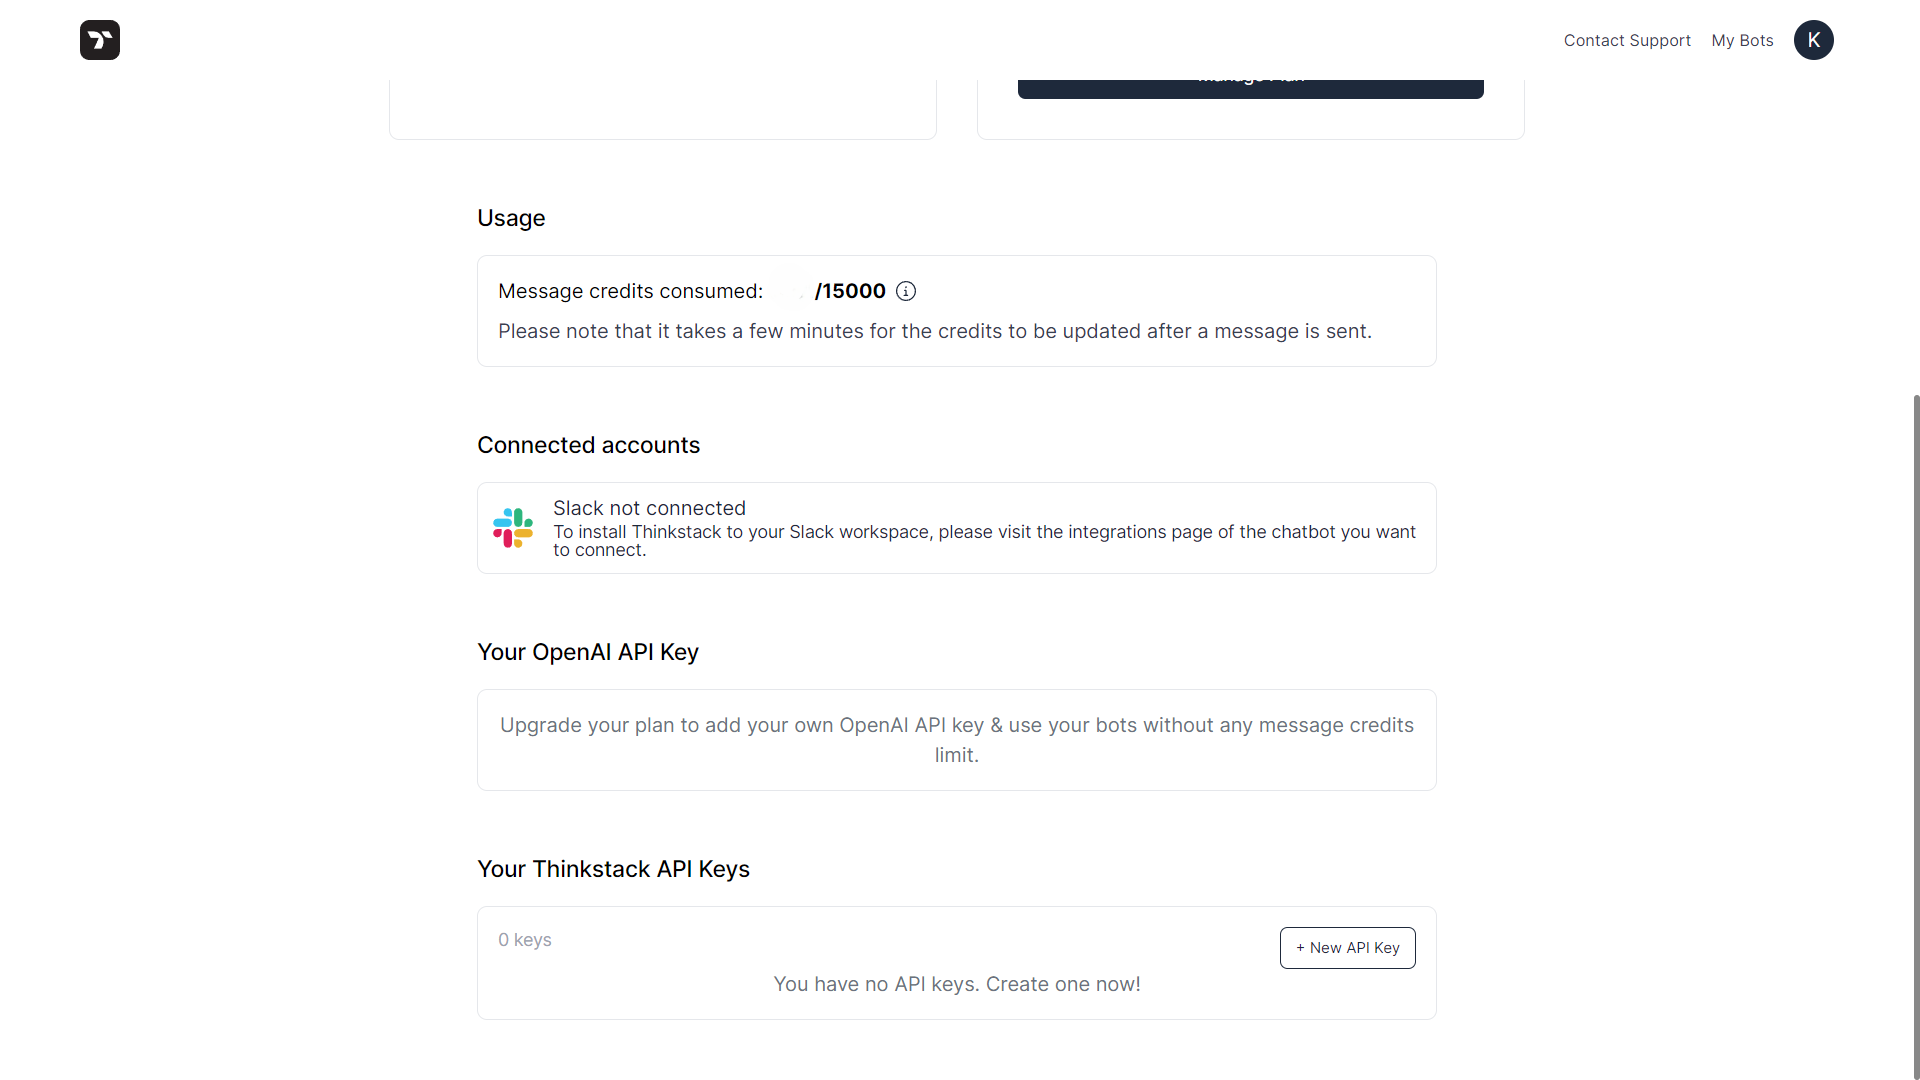
Scroll down and you will see the Your Thinkstack API Keys section. Click on +New API Key.
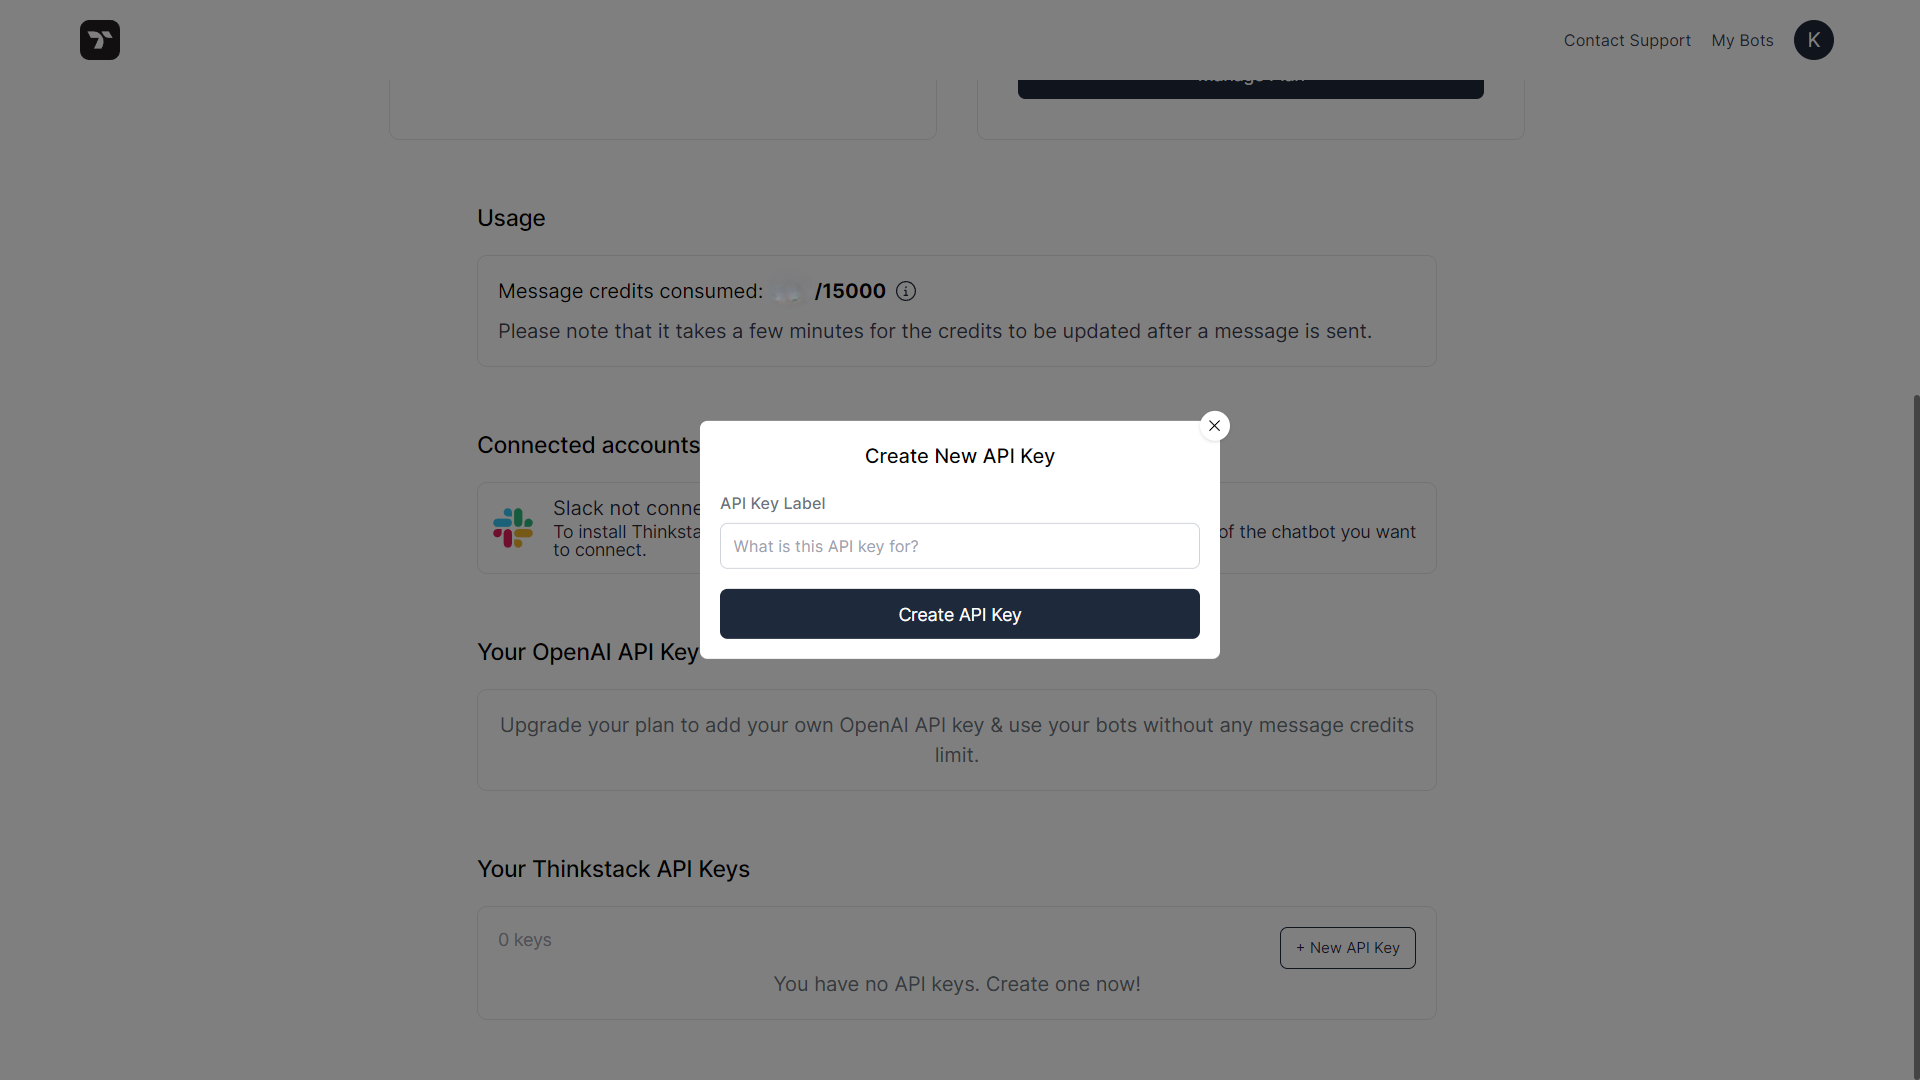
Specify a name for which this API key would be used and click on Create API Key.

API Key has been successfully created. Now click on Copy to copy the API Key.
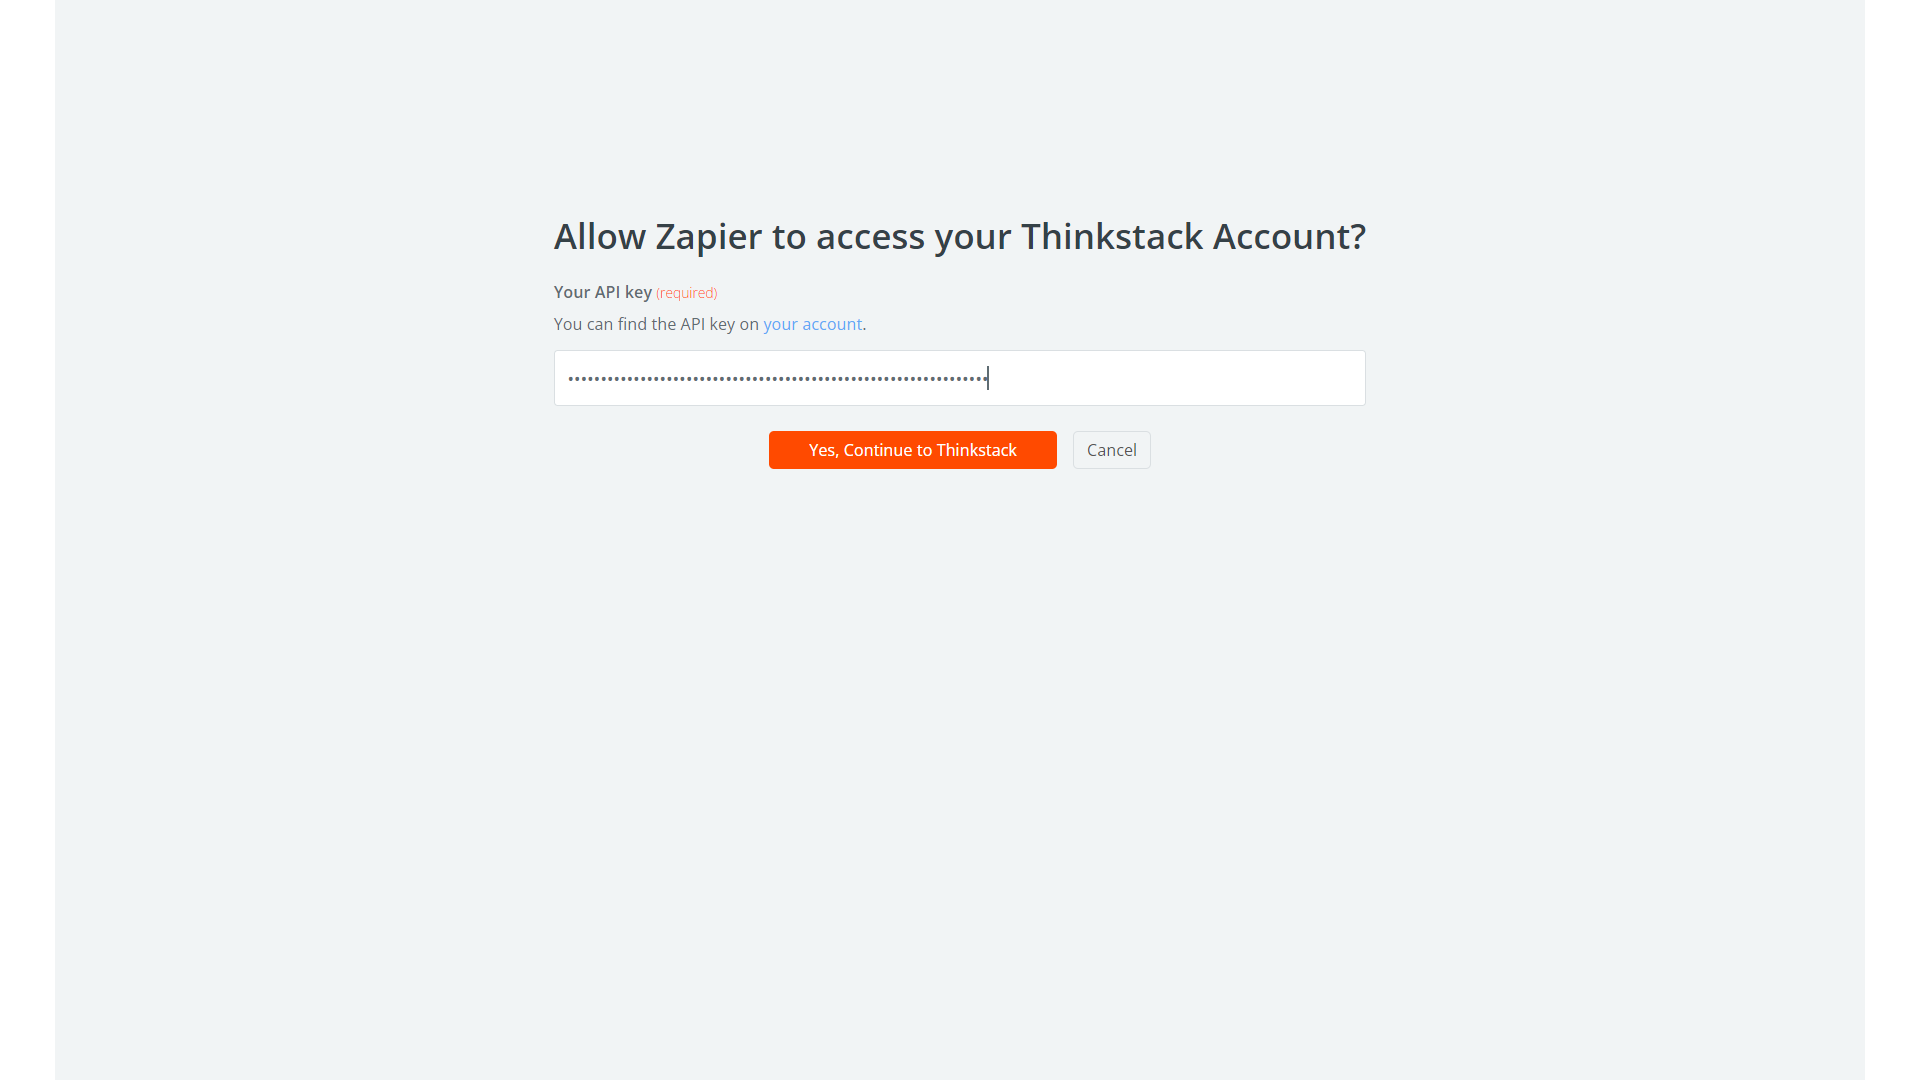
Now head back to the window where you need to input the API Key, paste the API Key and click on Yes, Continue to Thinkstack.
Zapier can now access your Thinkstack account. Click on Continue.
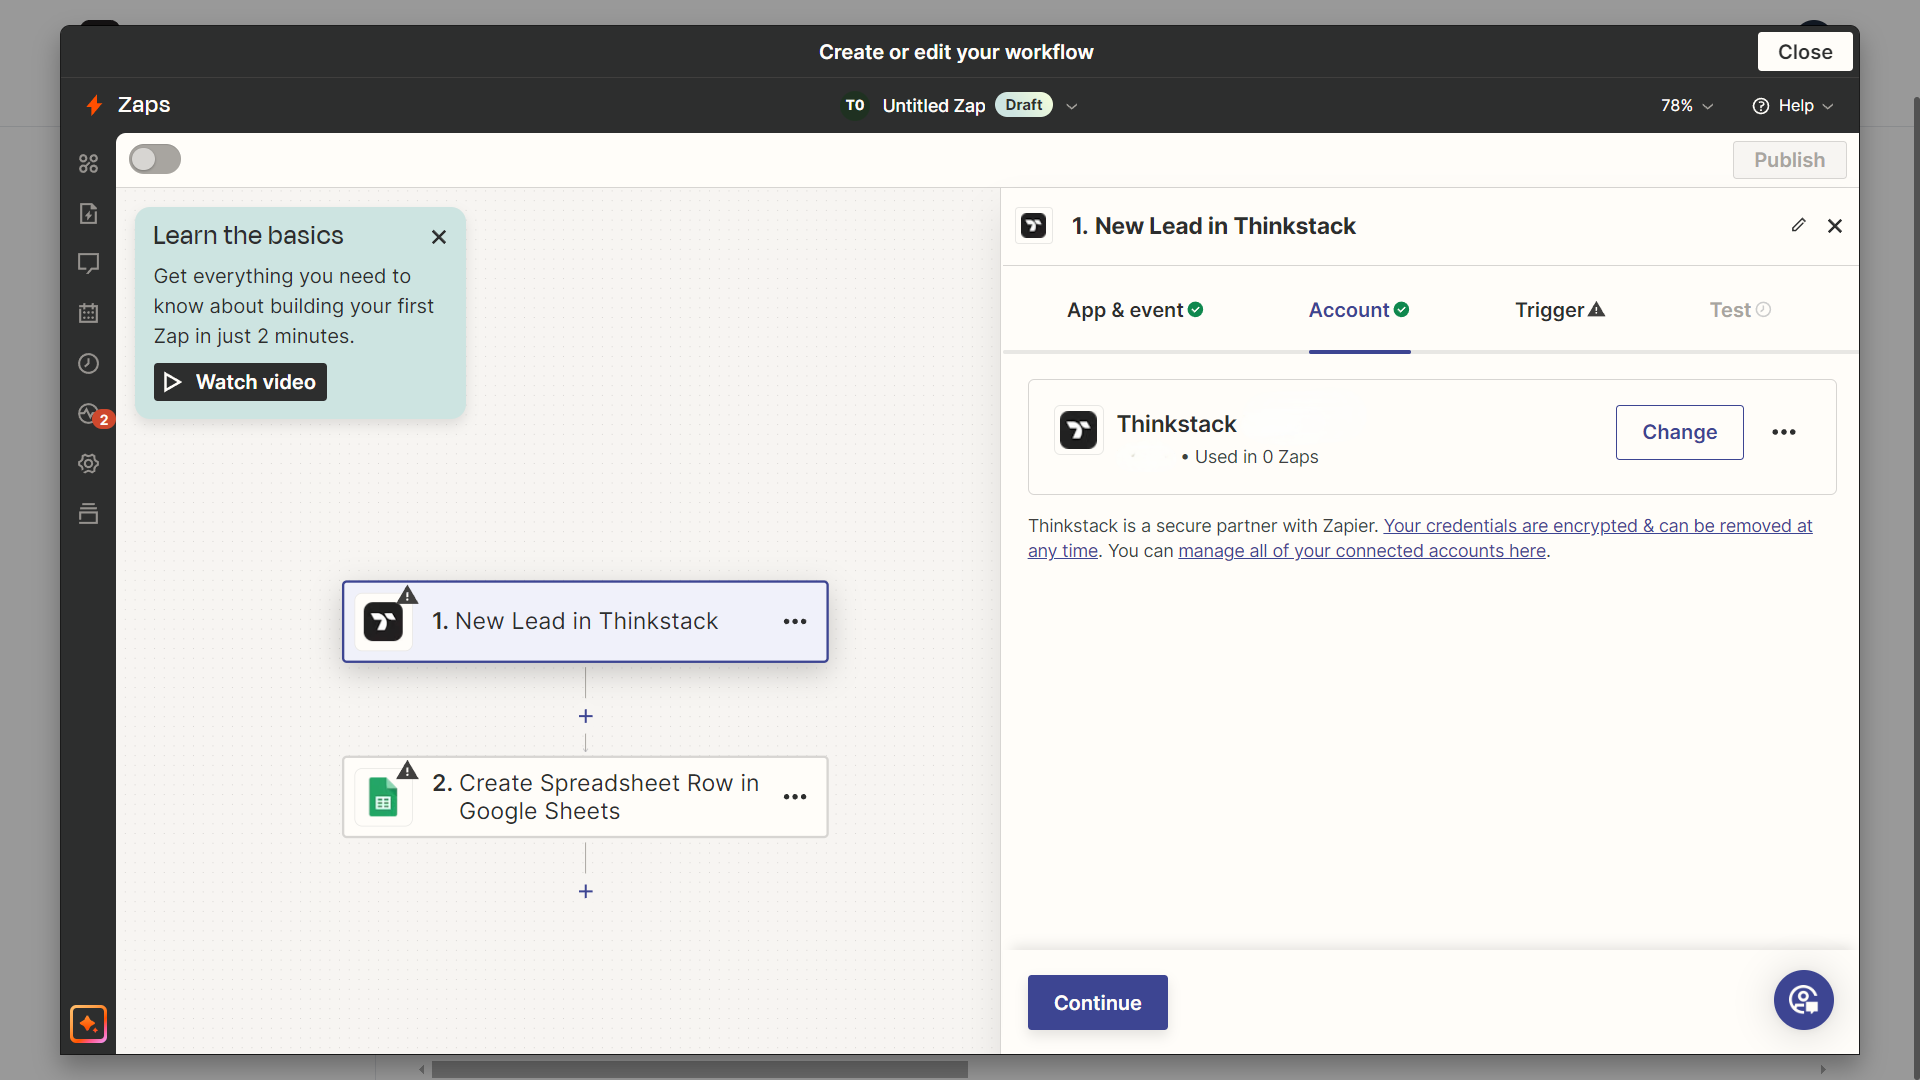
In the Trigger section, select your desired chatbot by clicking on dropdown and then click on Continue.

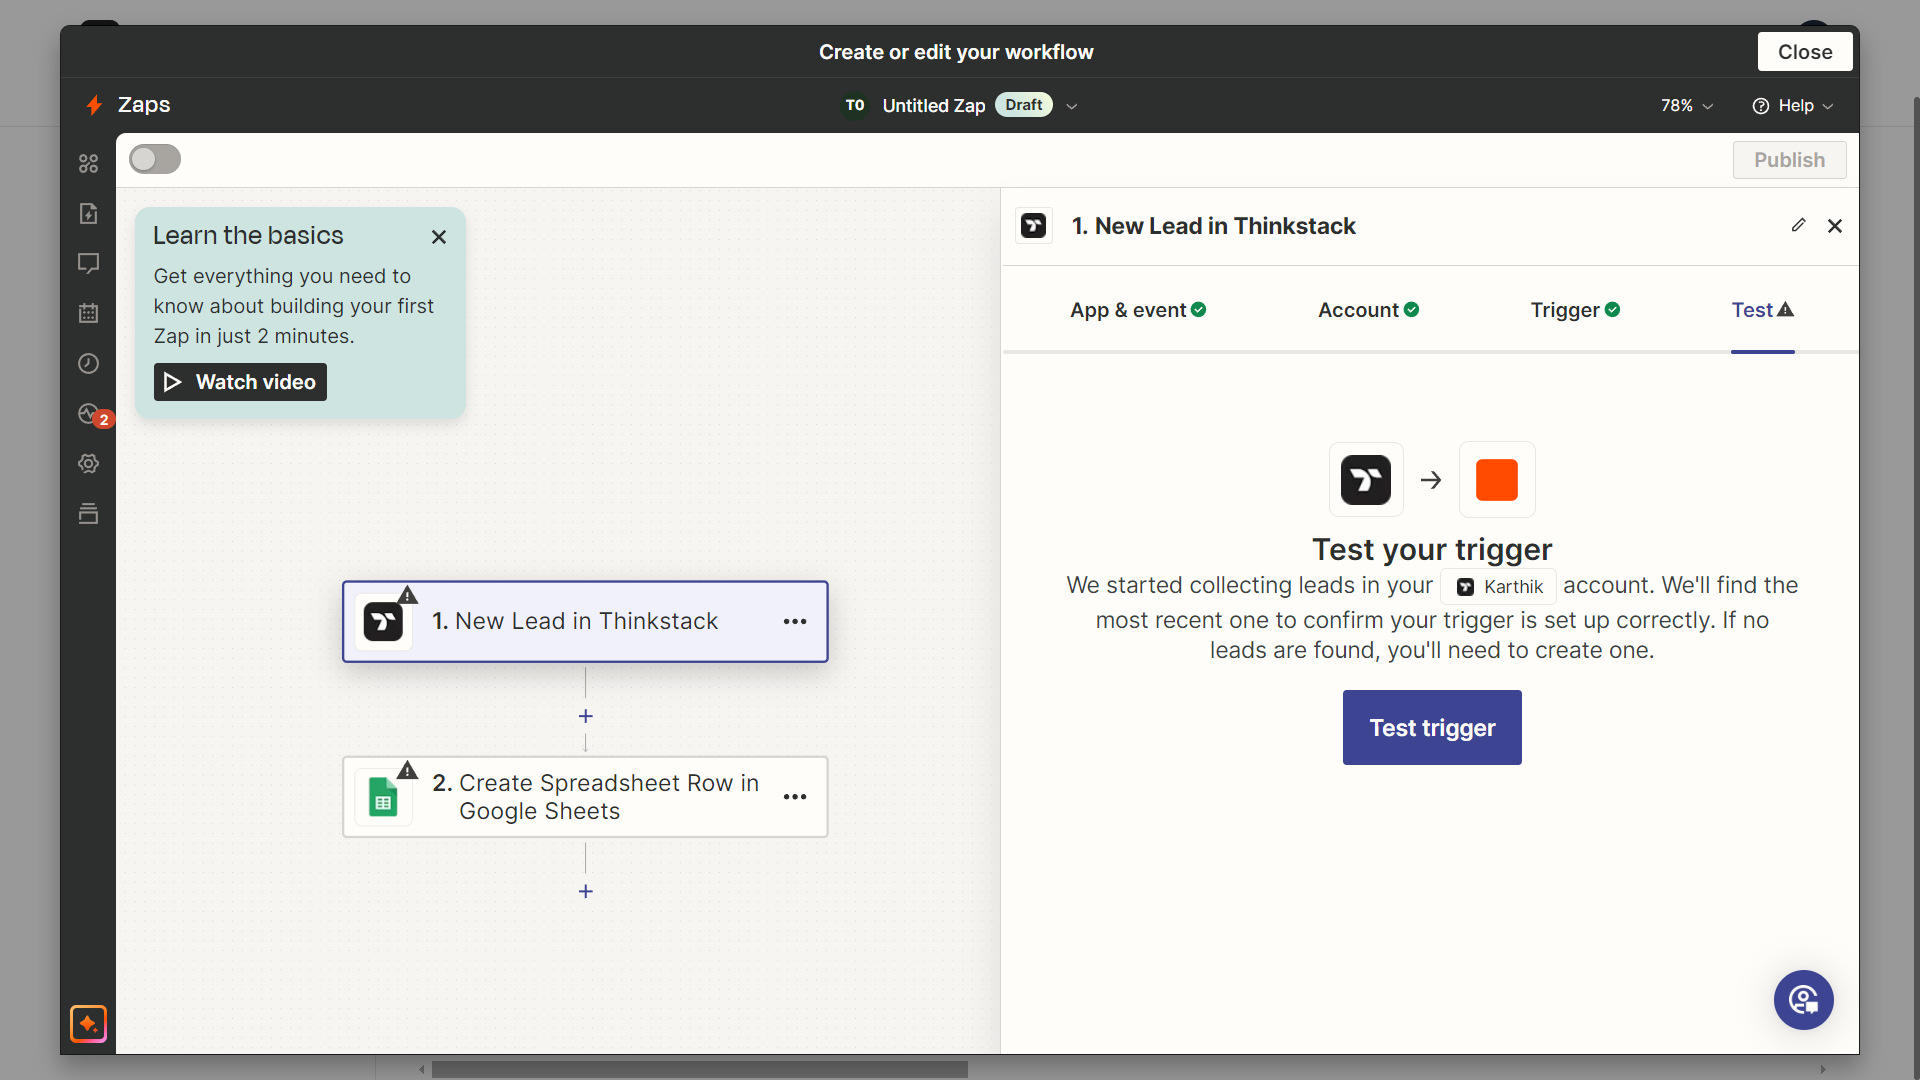
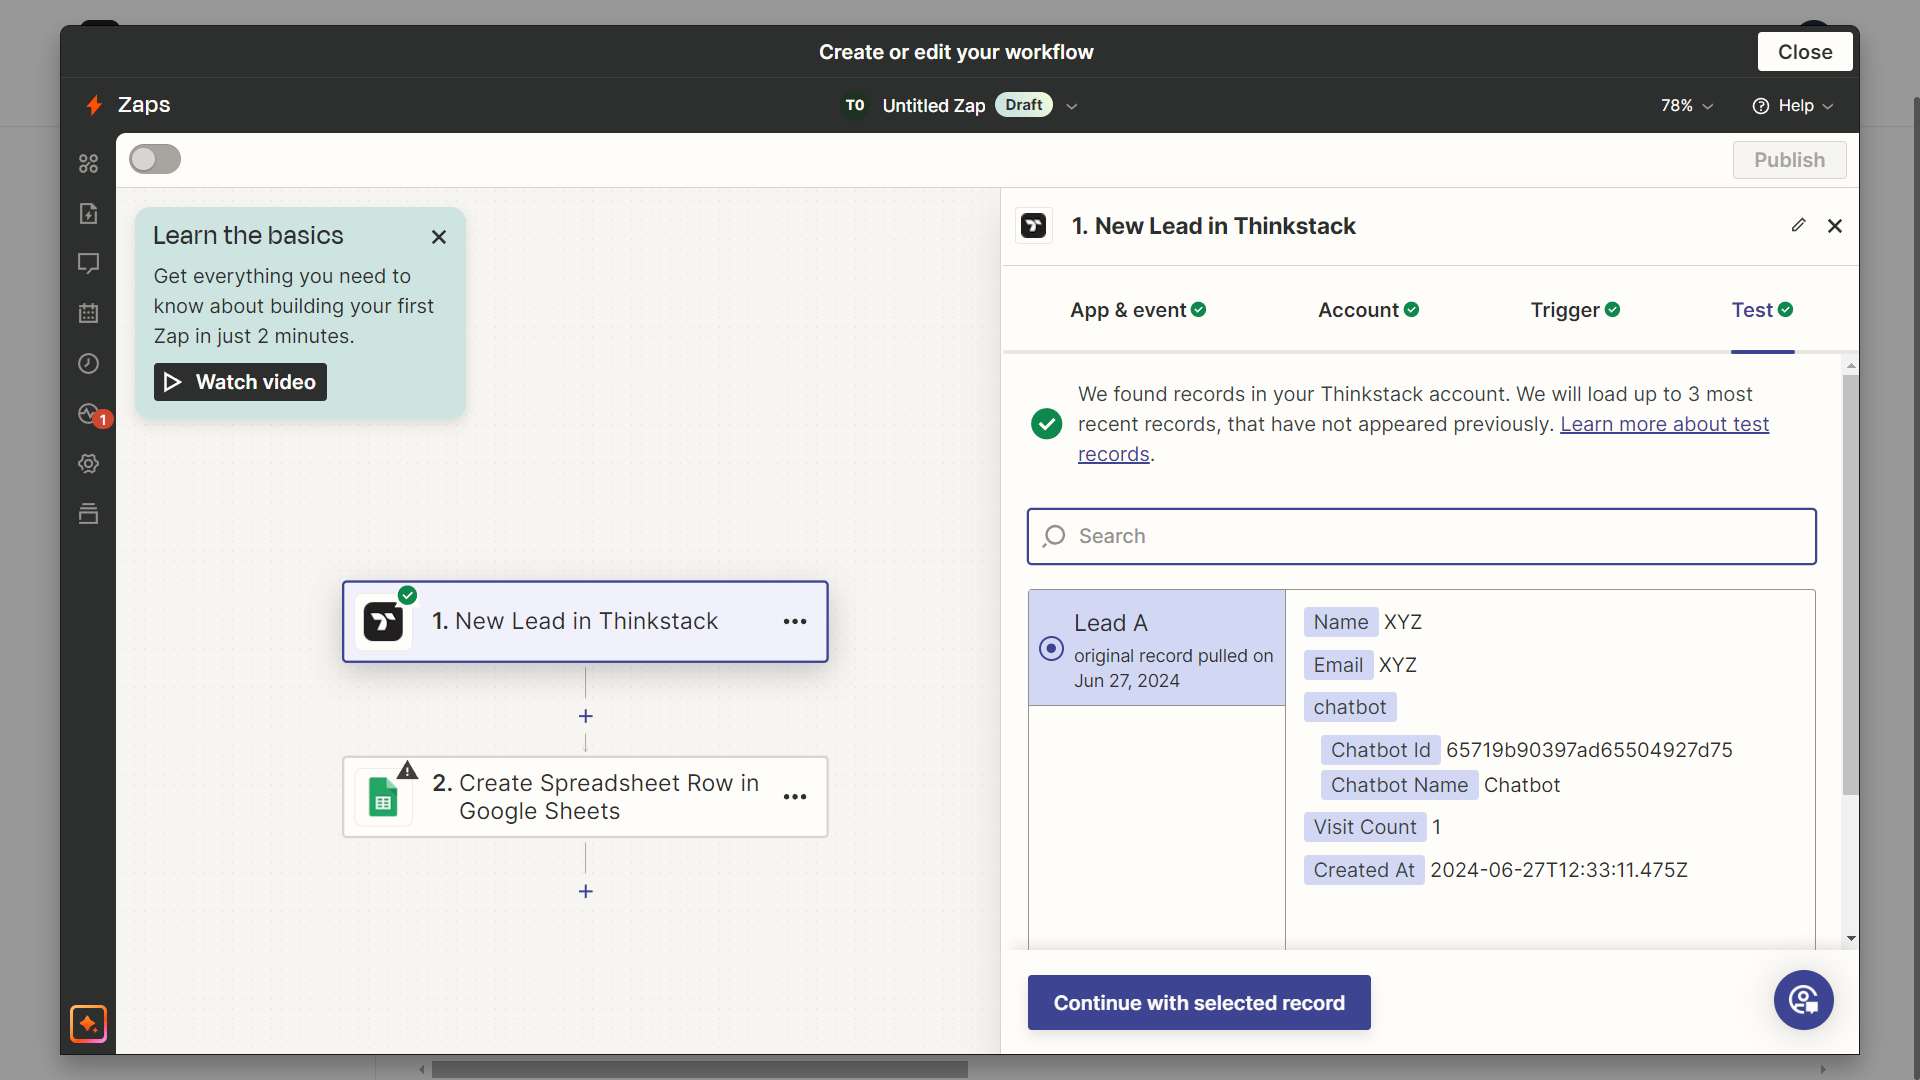
In the Test section, click on Test trigger and then click on Continue with selected record. Now we have finished setting up the Trigger part of the workflow.
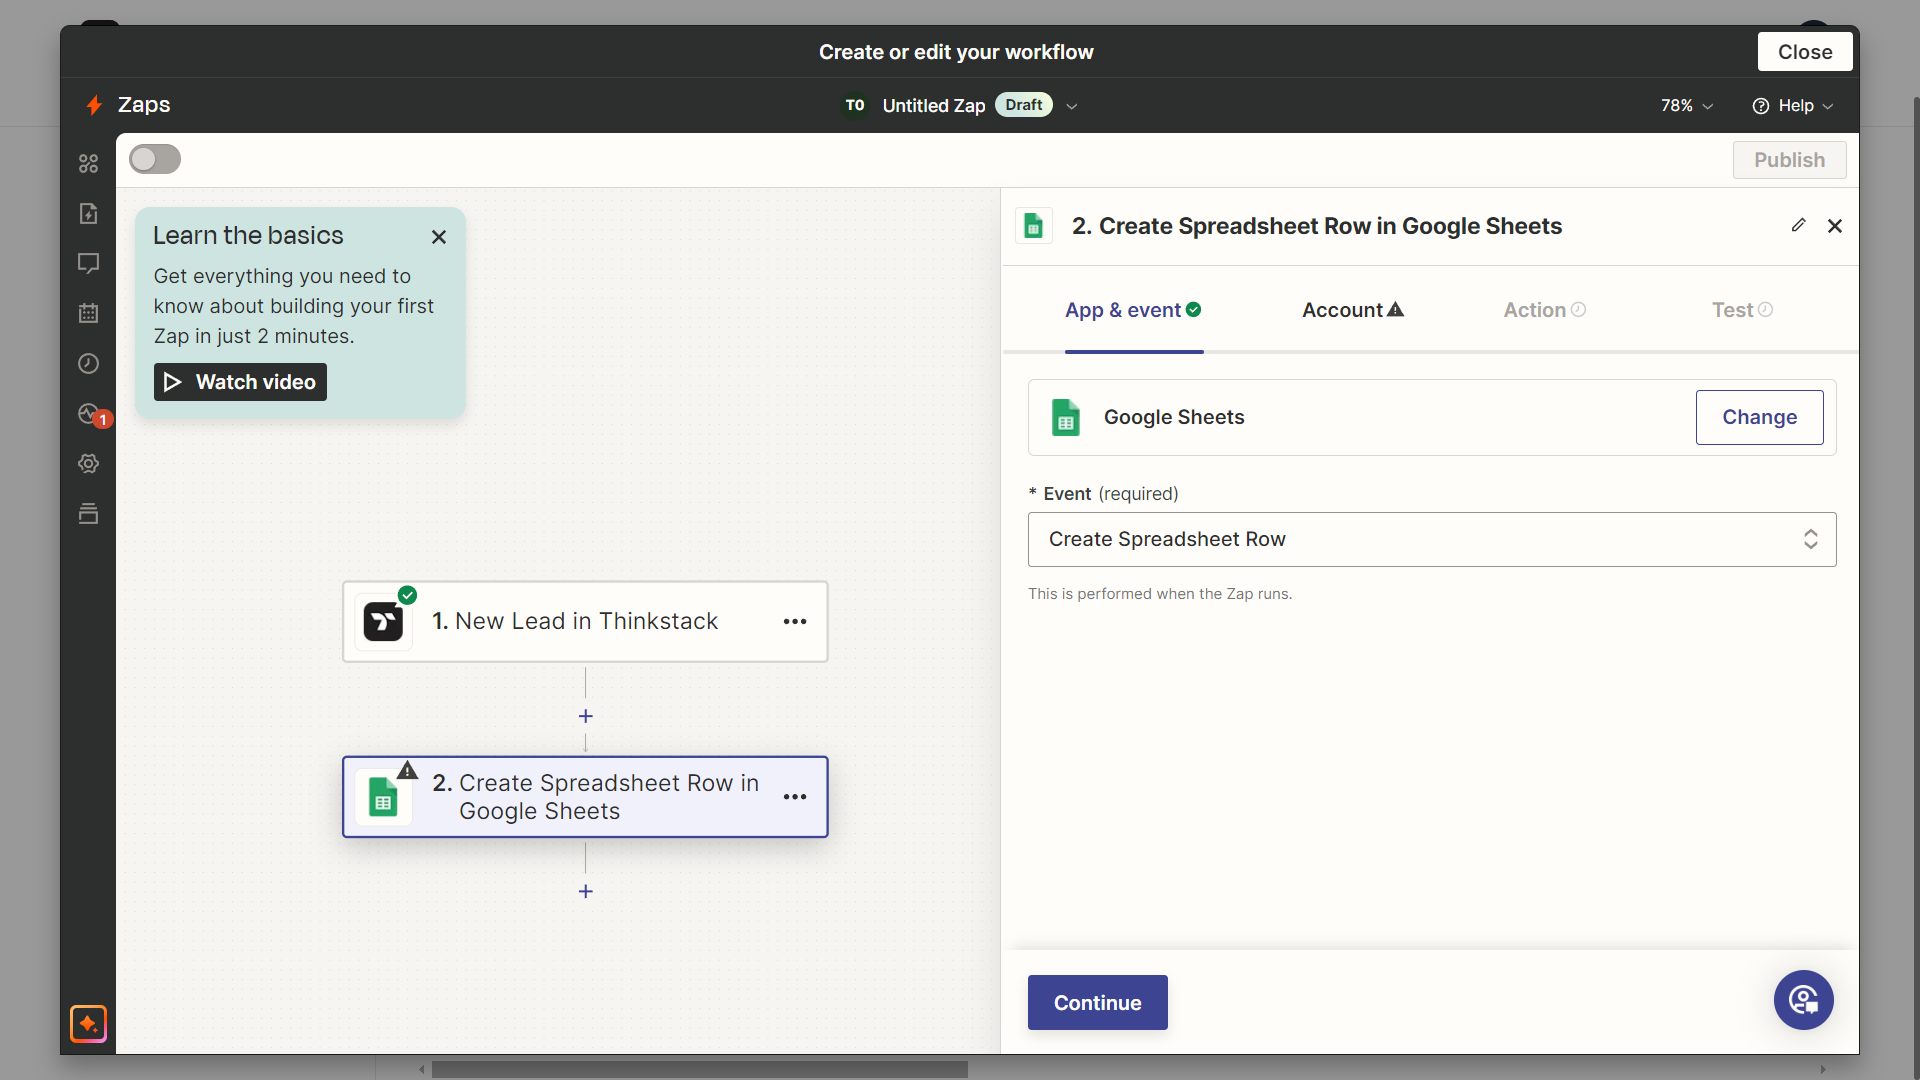
Let us customize the Action part of the workflow. Under the App & event section, click on the dropdown to select the event and then click on Continue.
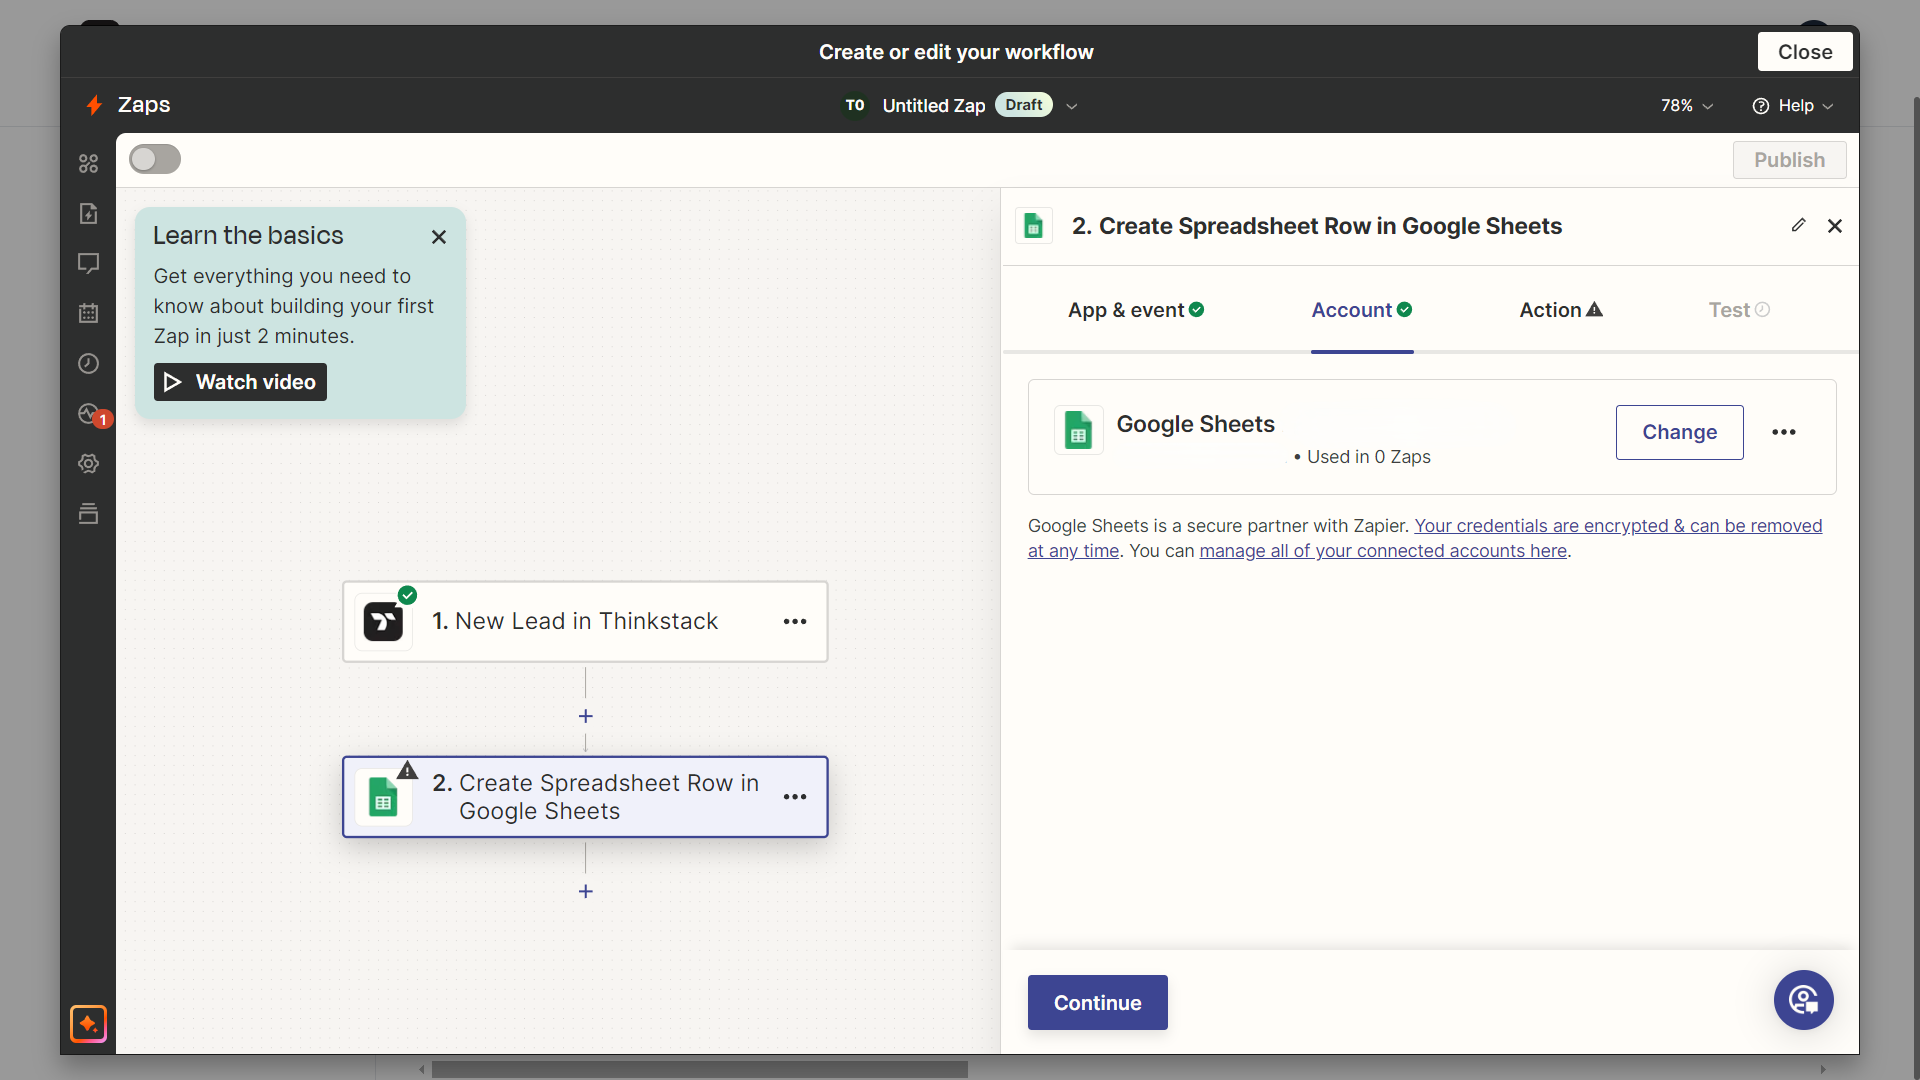
In the Account section, click on Sign in.
NOTE: You will need to have an active Google account in order to sign in successfully.
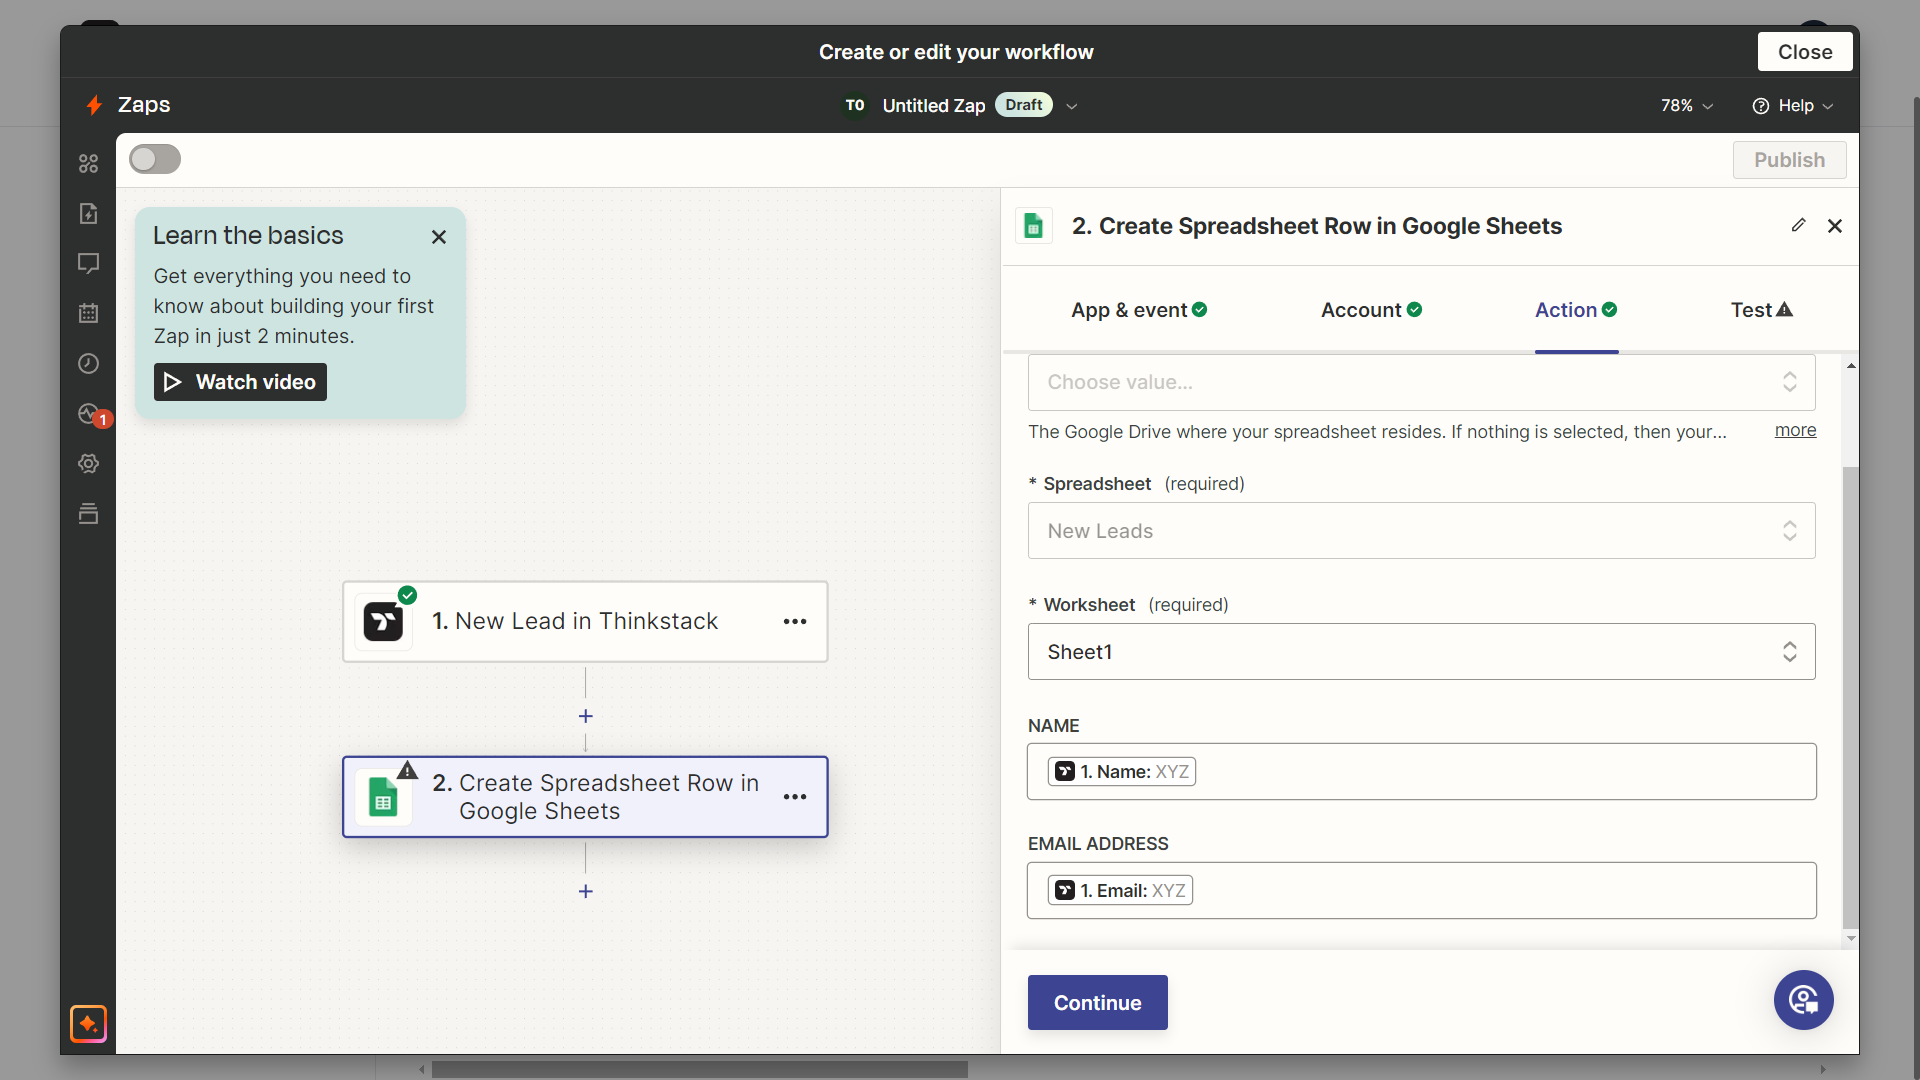
In the Action section, select the spreadsheet from the dropdown along with the worksheet. Below these fields the headers from the spreadsheet will populate with a dropdown. Values in the dropdown will be fields that you add while enabling leads. Choose the variables accordingly and click on Continue.
NOTE: To be able to select a spreadsheet from the dropdown, you will need to create a google sheet in the account which you used to login in the previous section. Otherwise you can also use an existing Google Sheet.
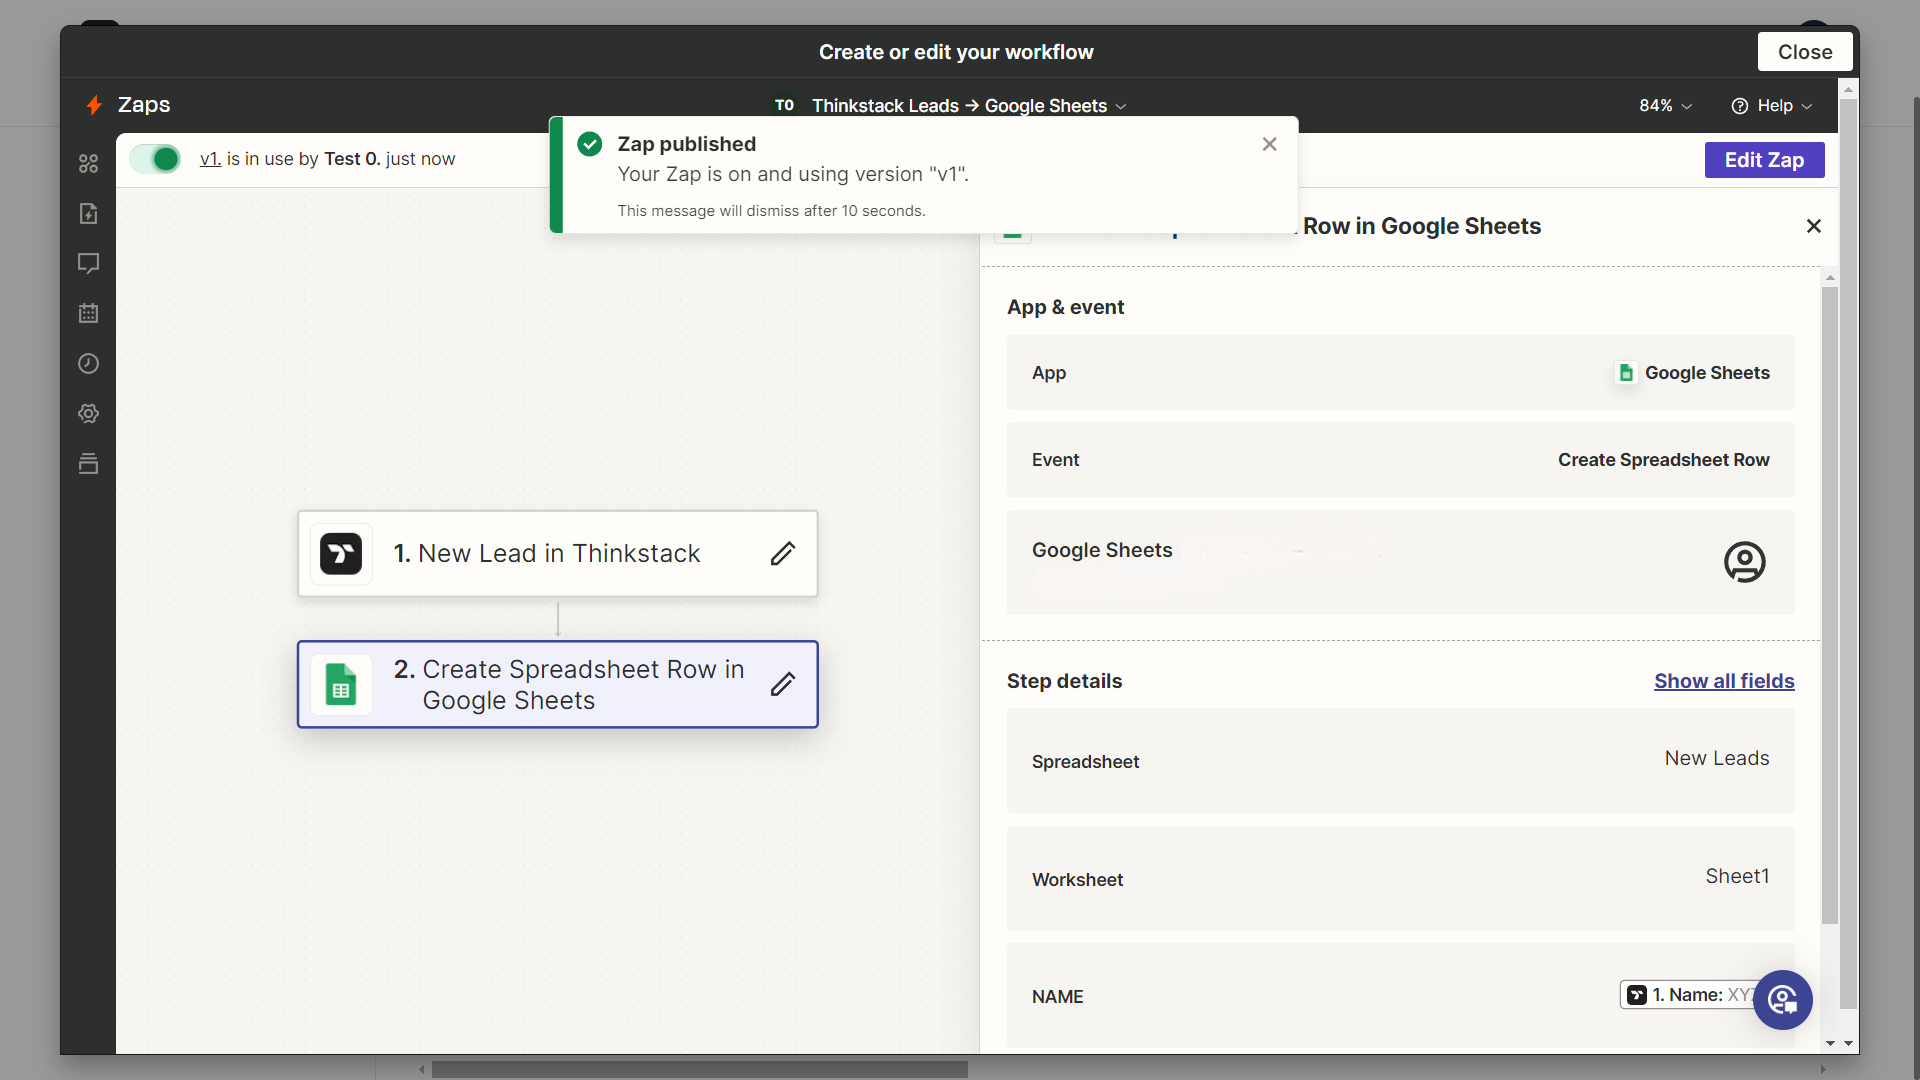
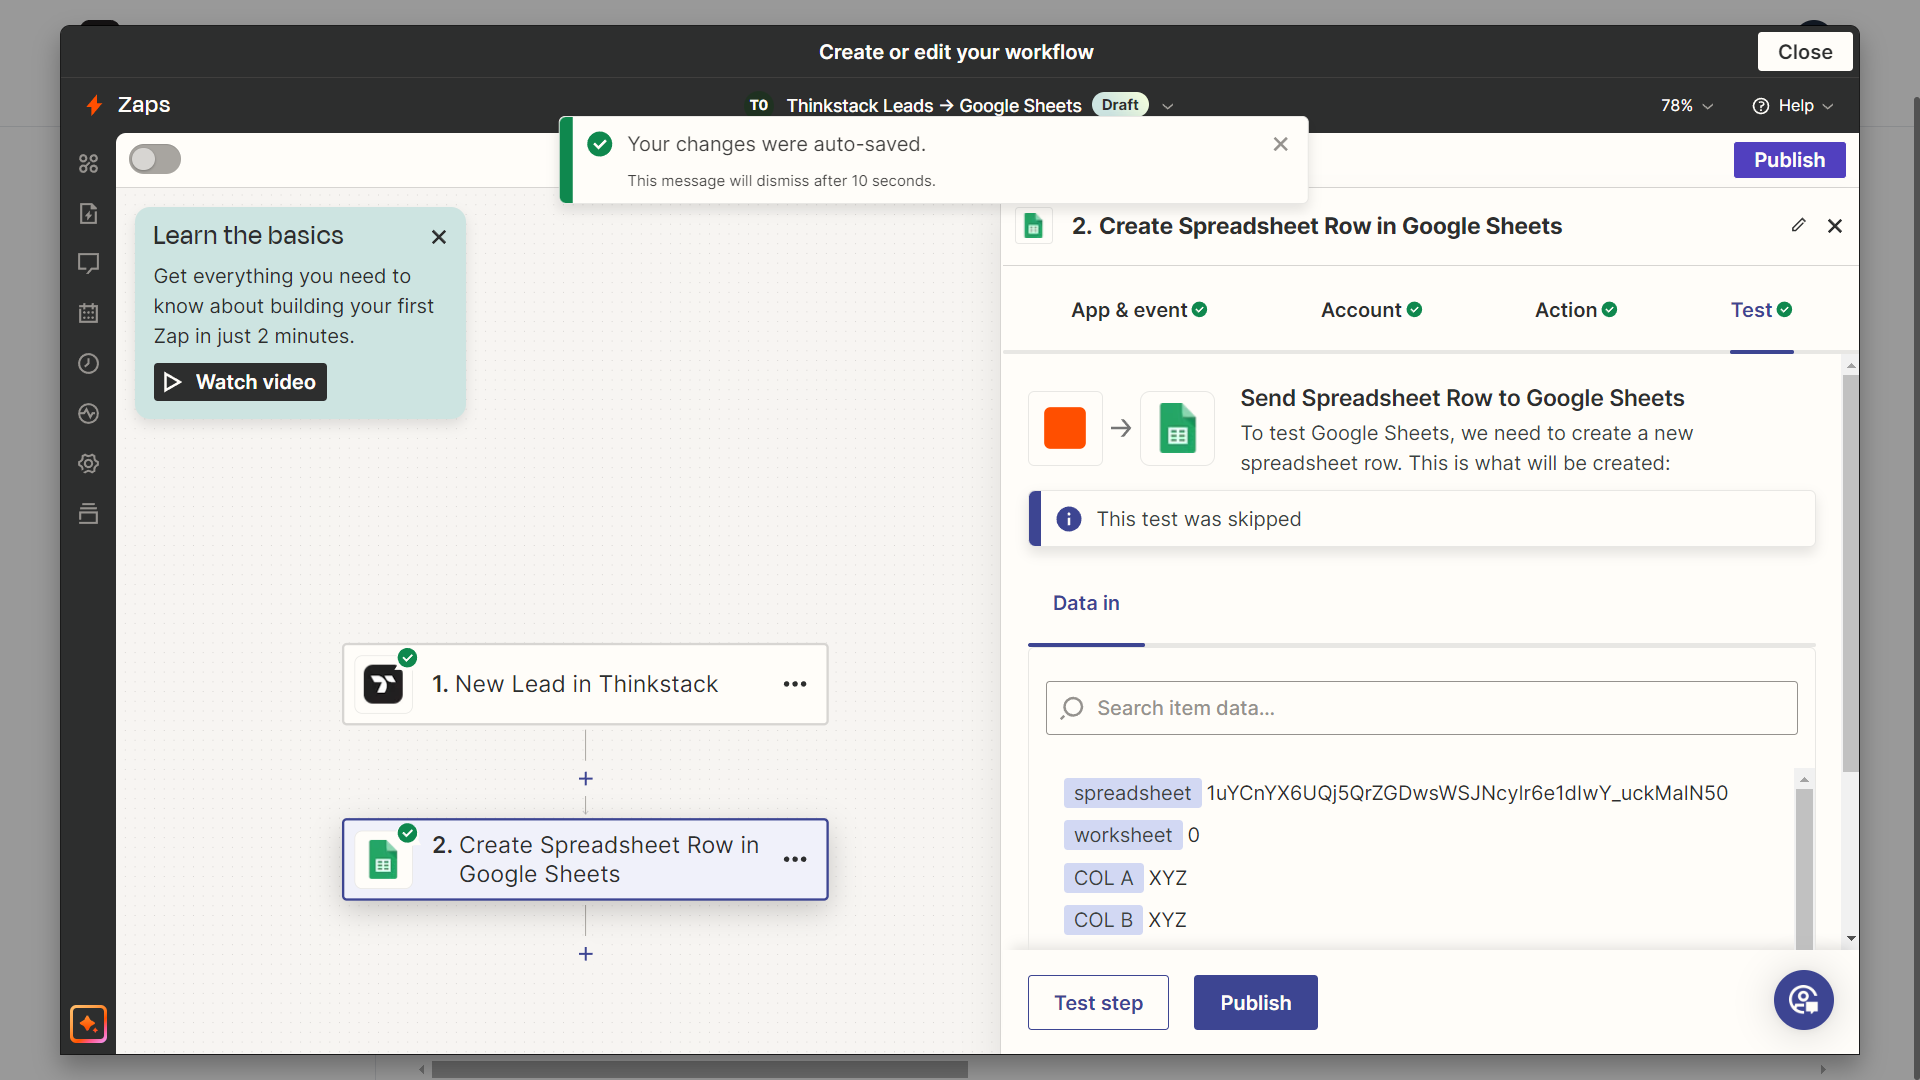
In the Test section, click on either Test step to check if it is working correctly or click on Skip Test. Specify a name for the workflow and click on Publish.
Finally you have successfully created and published a workflow using Zapier.