How to Add the Thinkstack Chatbot to Your Wix Website
info
This guide walks you through the steps to easily integrate the Thinkstack chatbot into your Wix site and start engaging with your visitors in real time.
Copy the Chat Bubble Script#
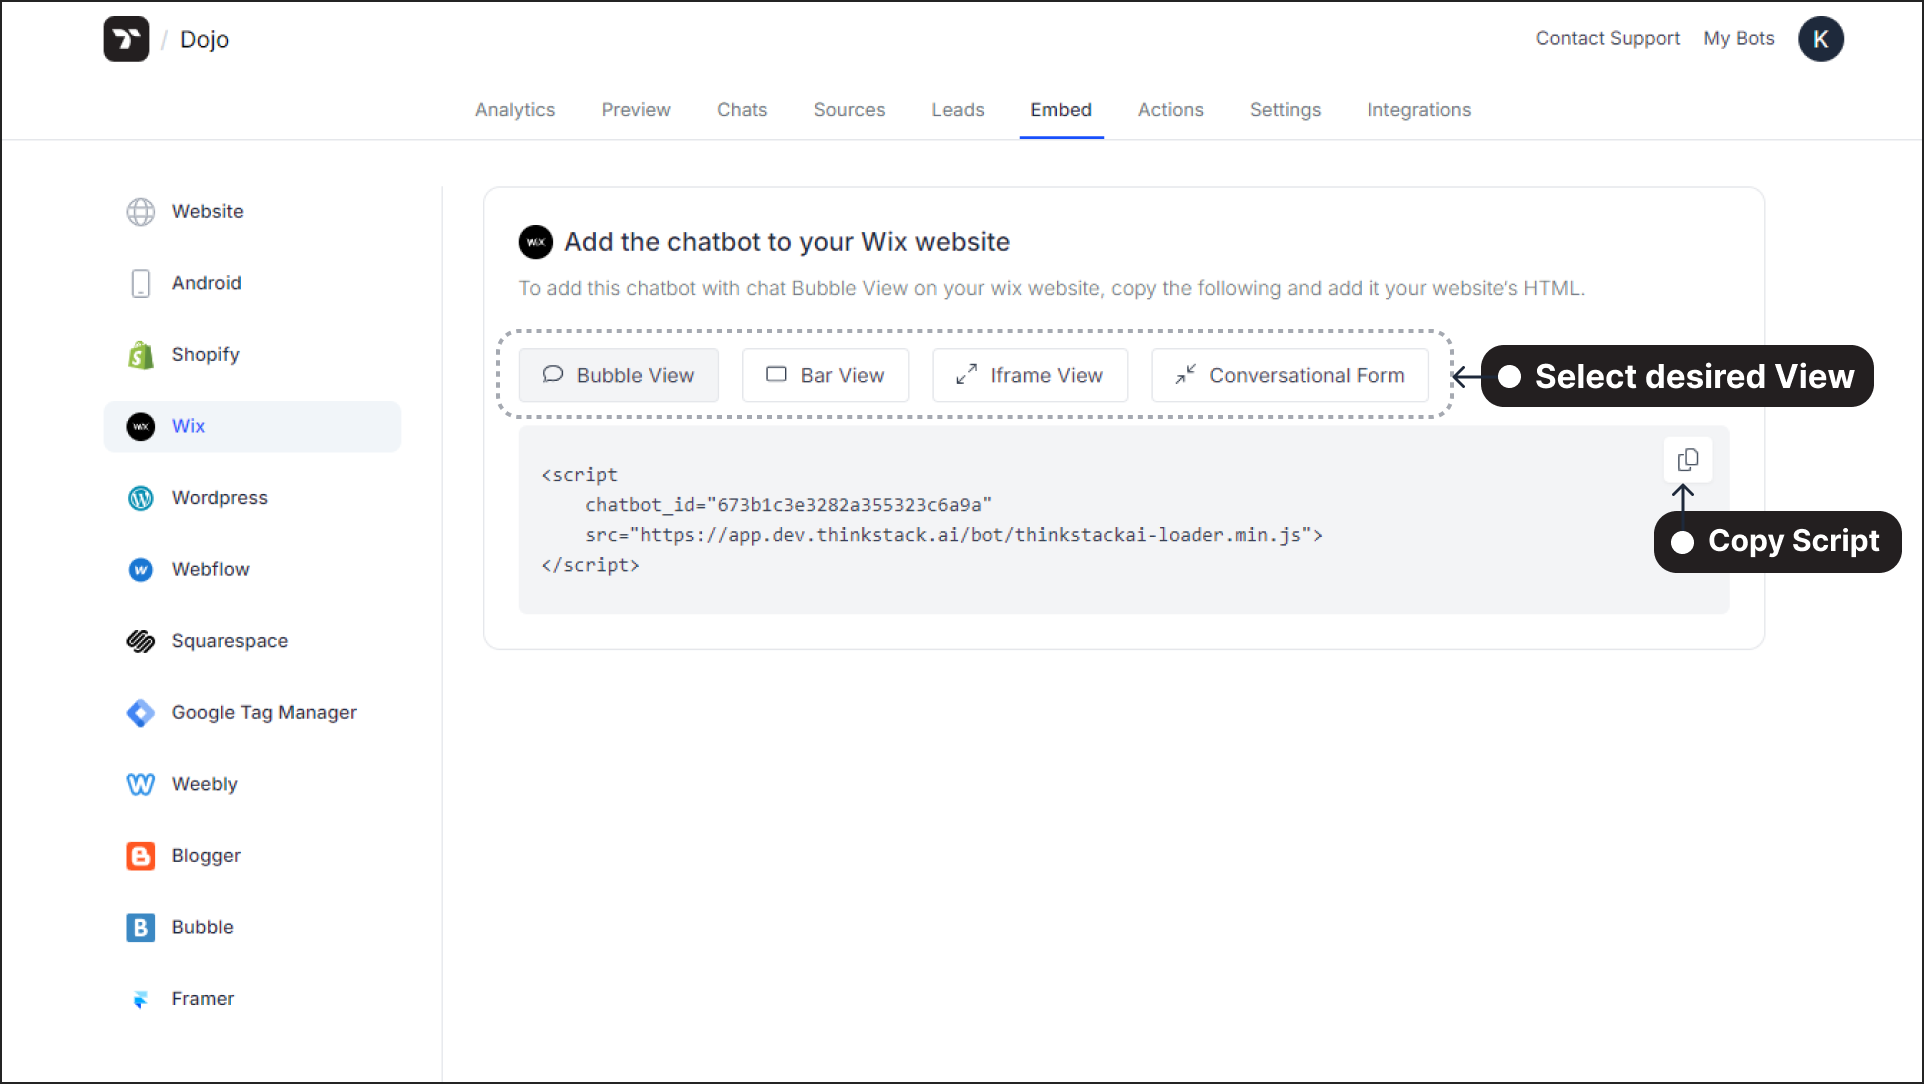
Log in to your Thinkstack Dashboard. Navigate to the Embed page. Copy the chat bubble script provided.
Add the Embed Script in Wix#
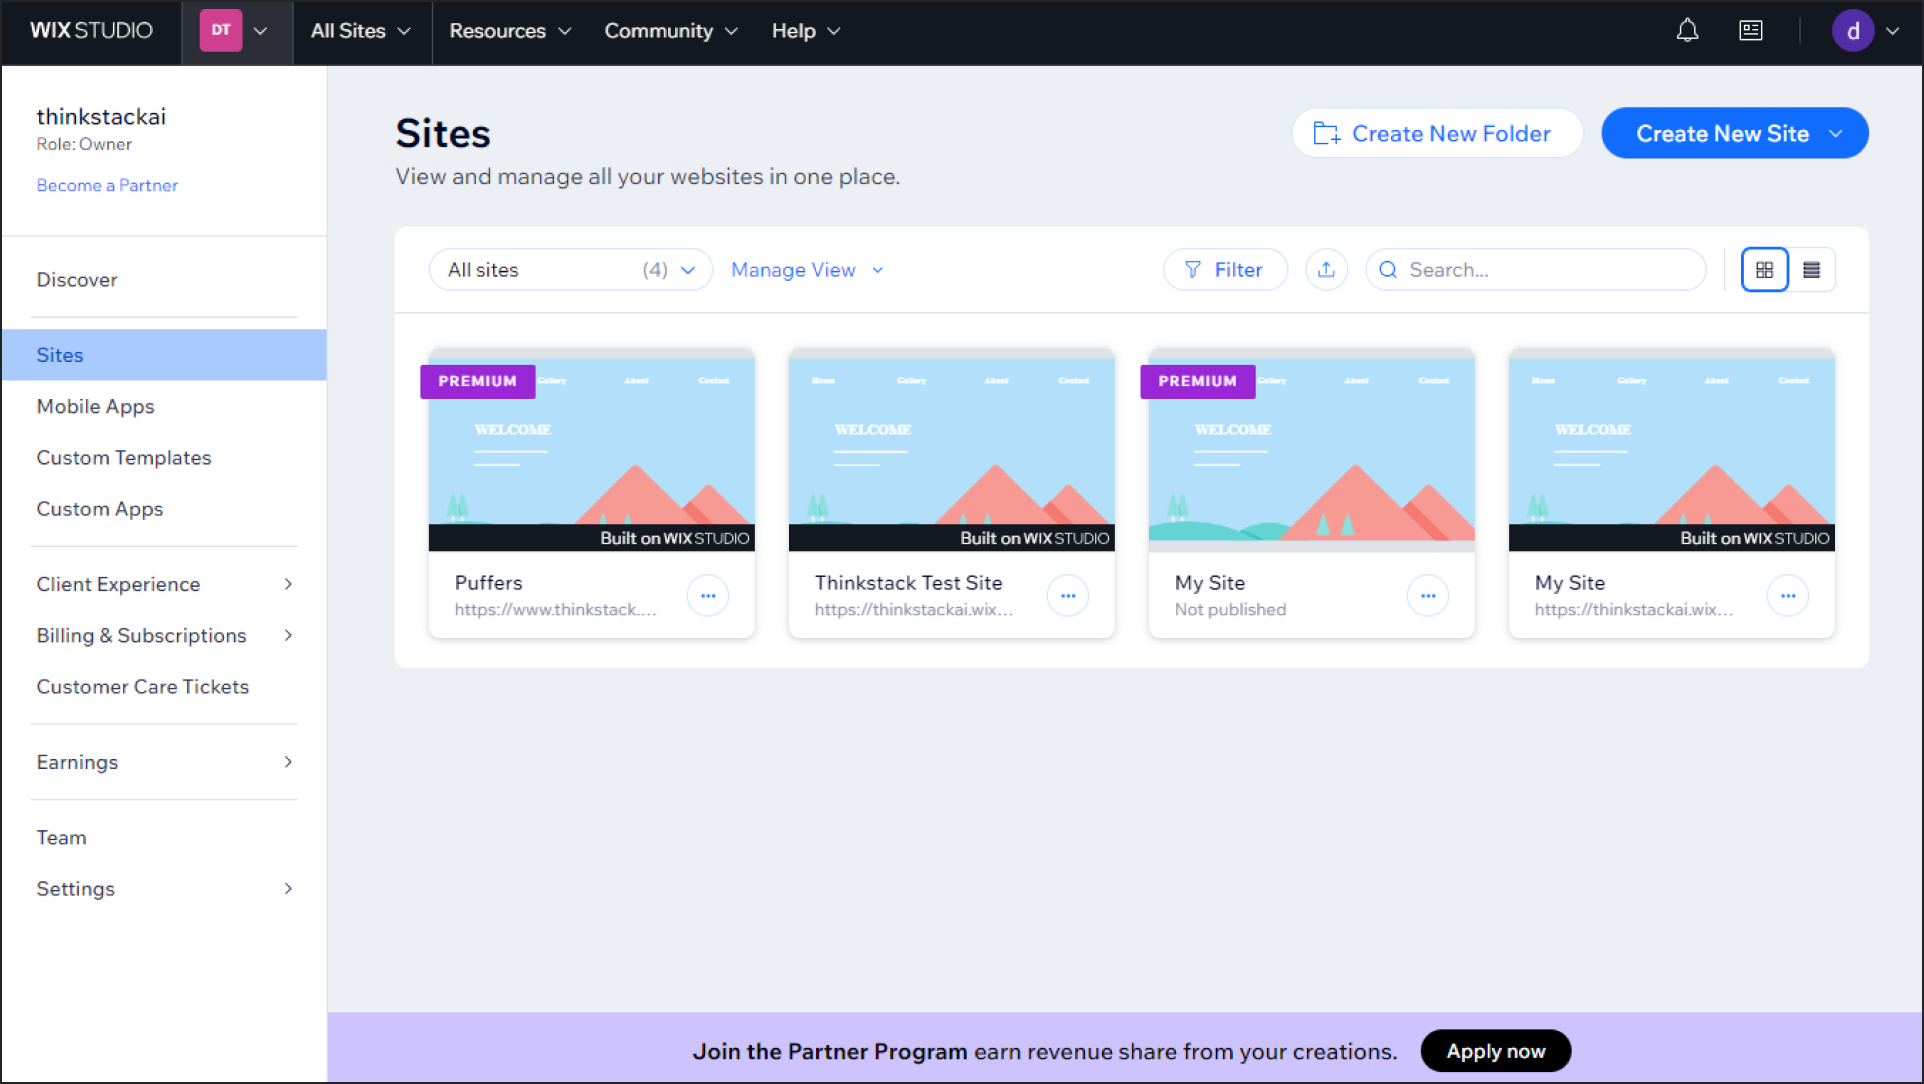
Log in to Wix Admin: Go to your Wix account at Wix.com and log in.
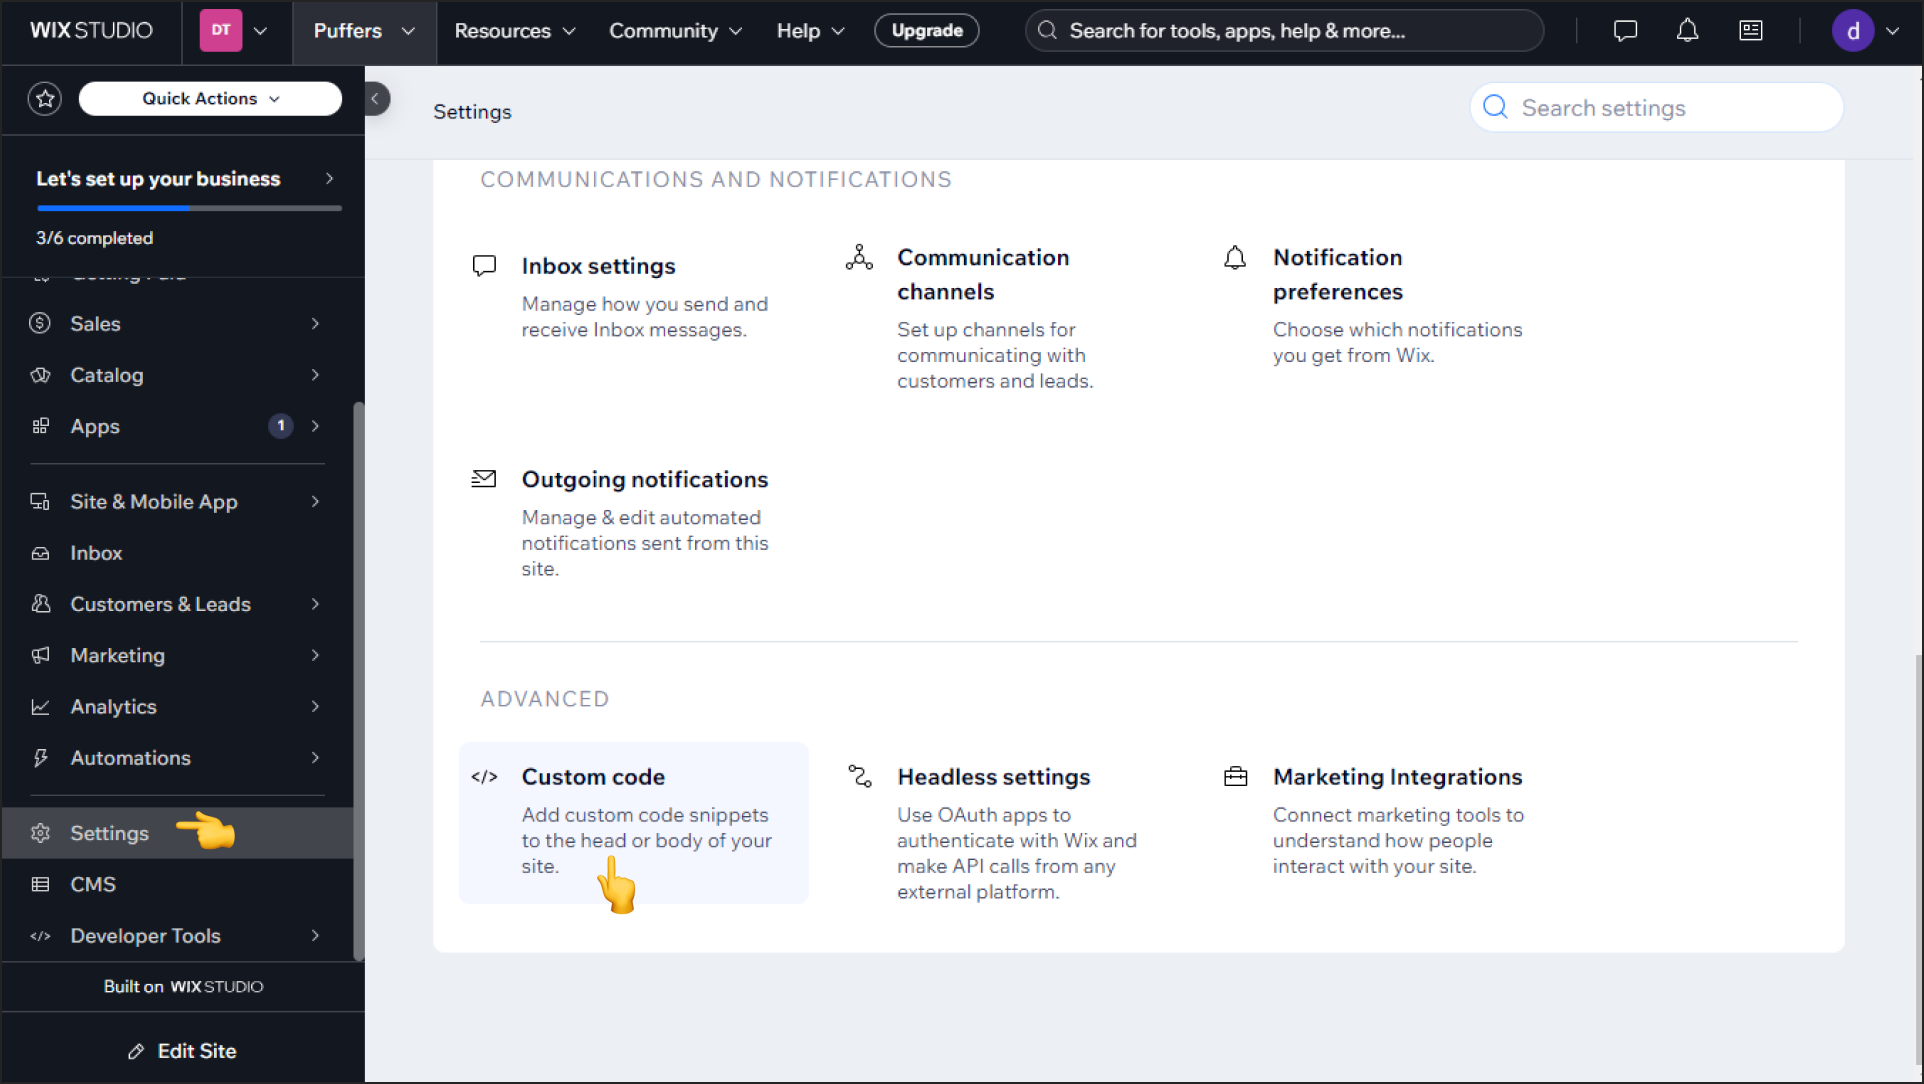
Access Custom Code Settings: From the site dashboard, click on Settings. Under the Advanced Settings section, select Custom Code.
Add Custom Code: Click the “Add Custom Code” button. Paste the Thinkstack embed code (copied earlier) into the provided field. Enter a name for the script (e.g., "Thinkstack Chatbot").
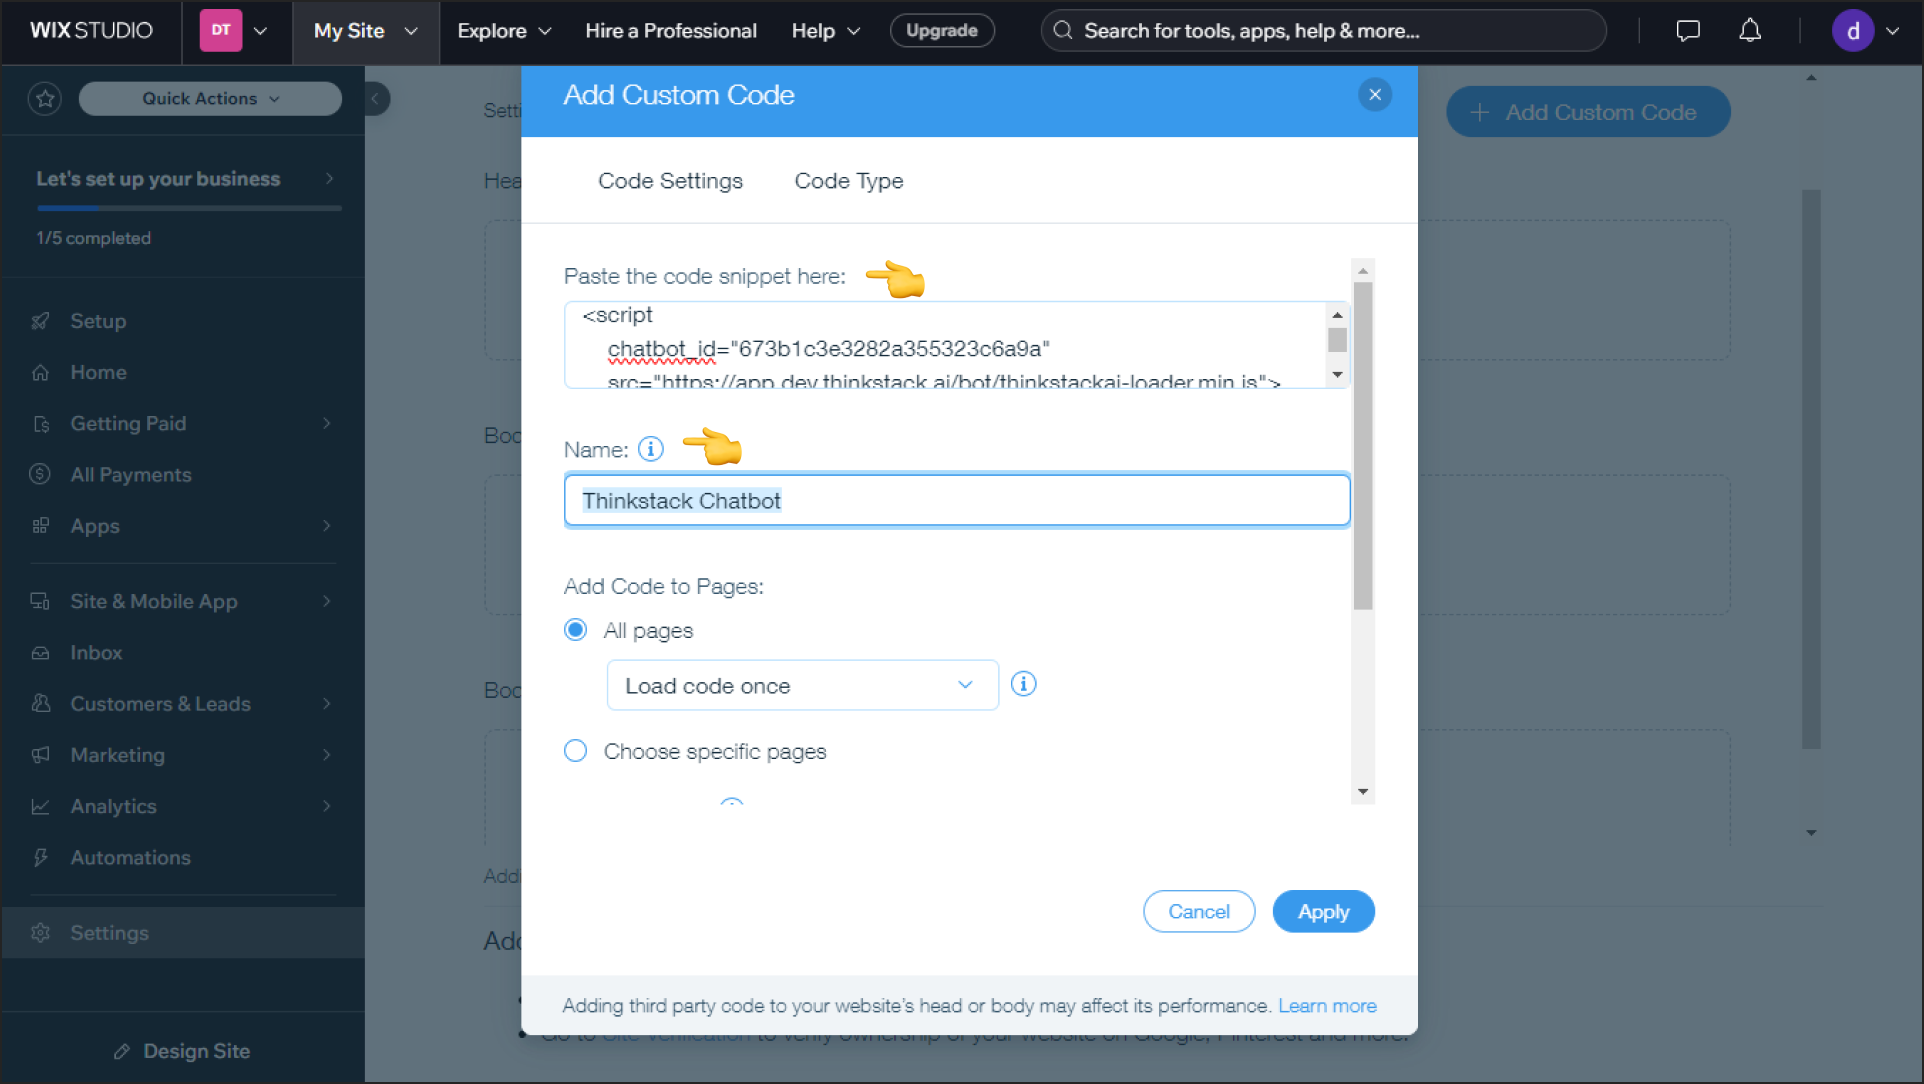
Choose Placement Settings: Set the script to load on All Pages or select specific pages where you want the chatbot to appear. Choose "Body End" as the placement option to ensure the script loads at the end of each page.
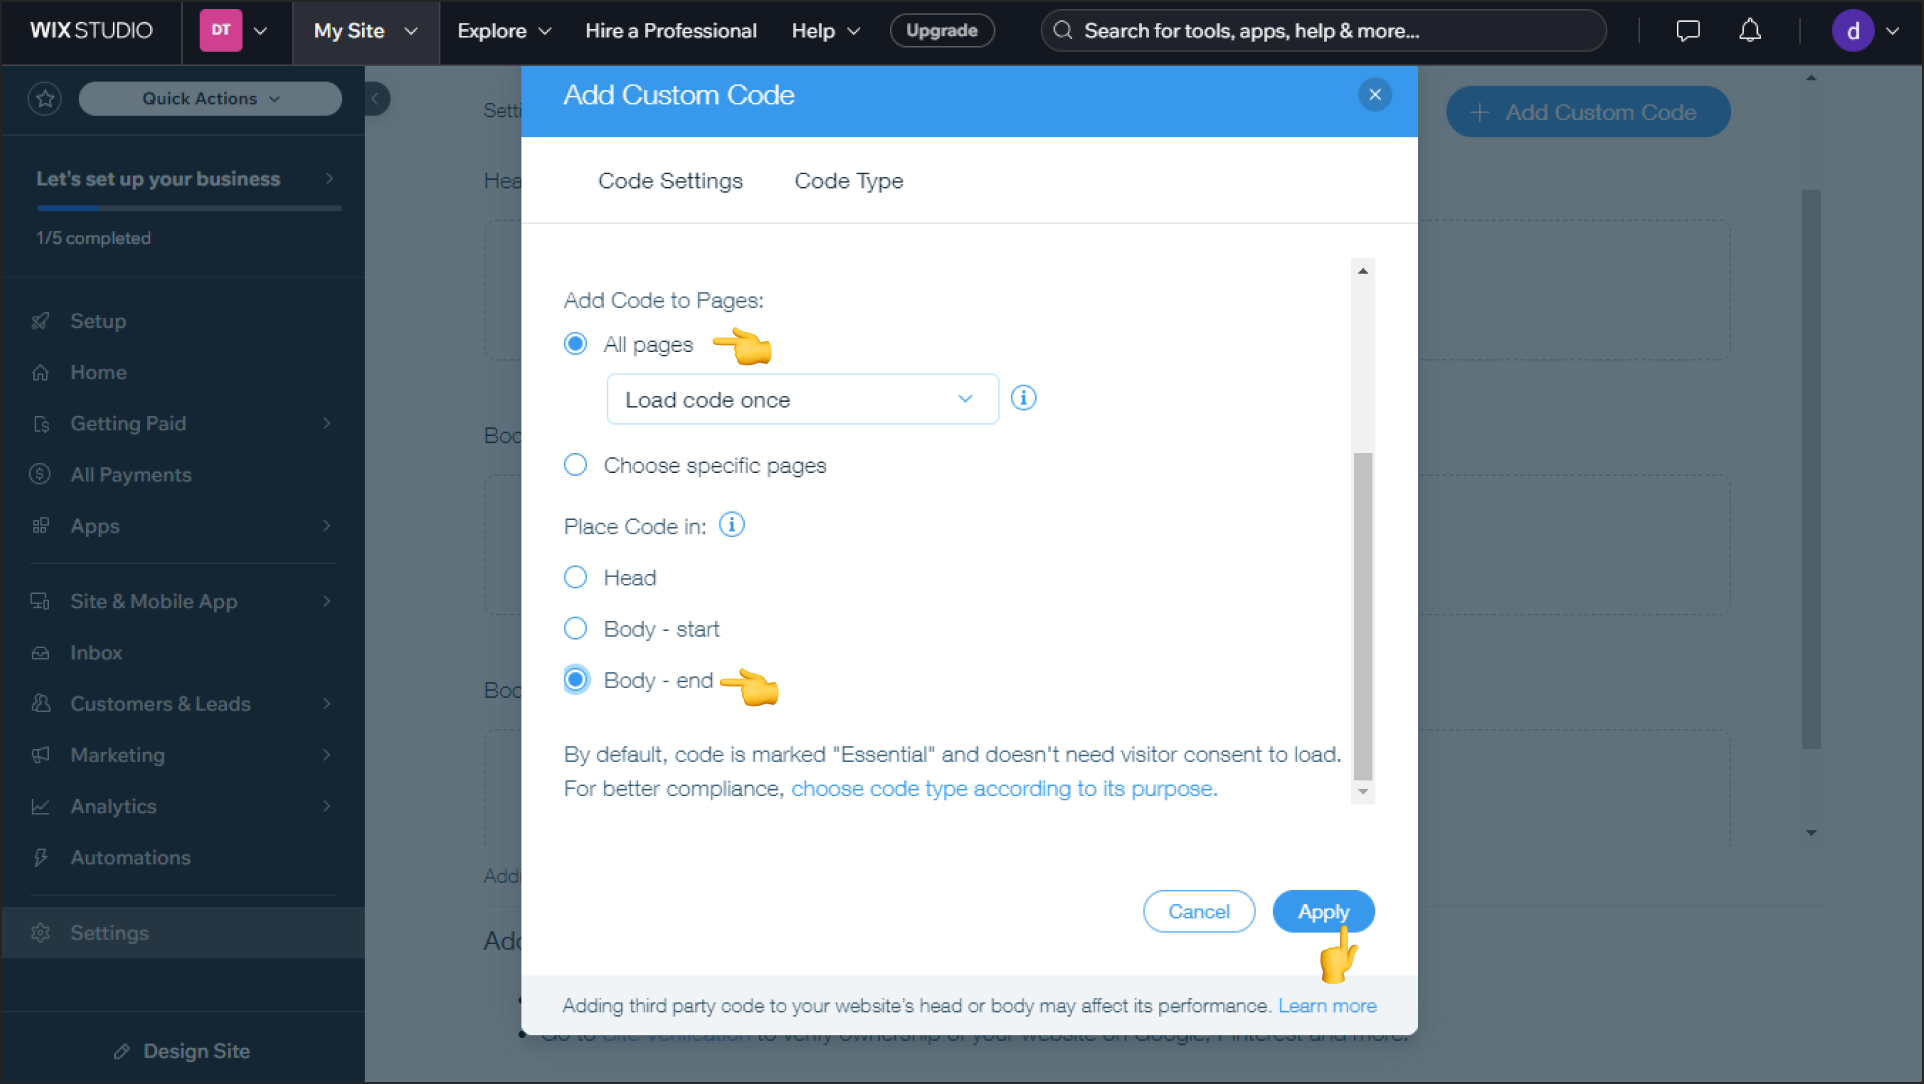
Apply and Save: Click “Apply” to save your changes.
Verify the Integration#
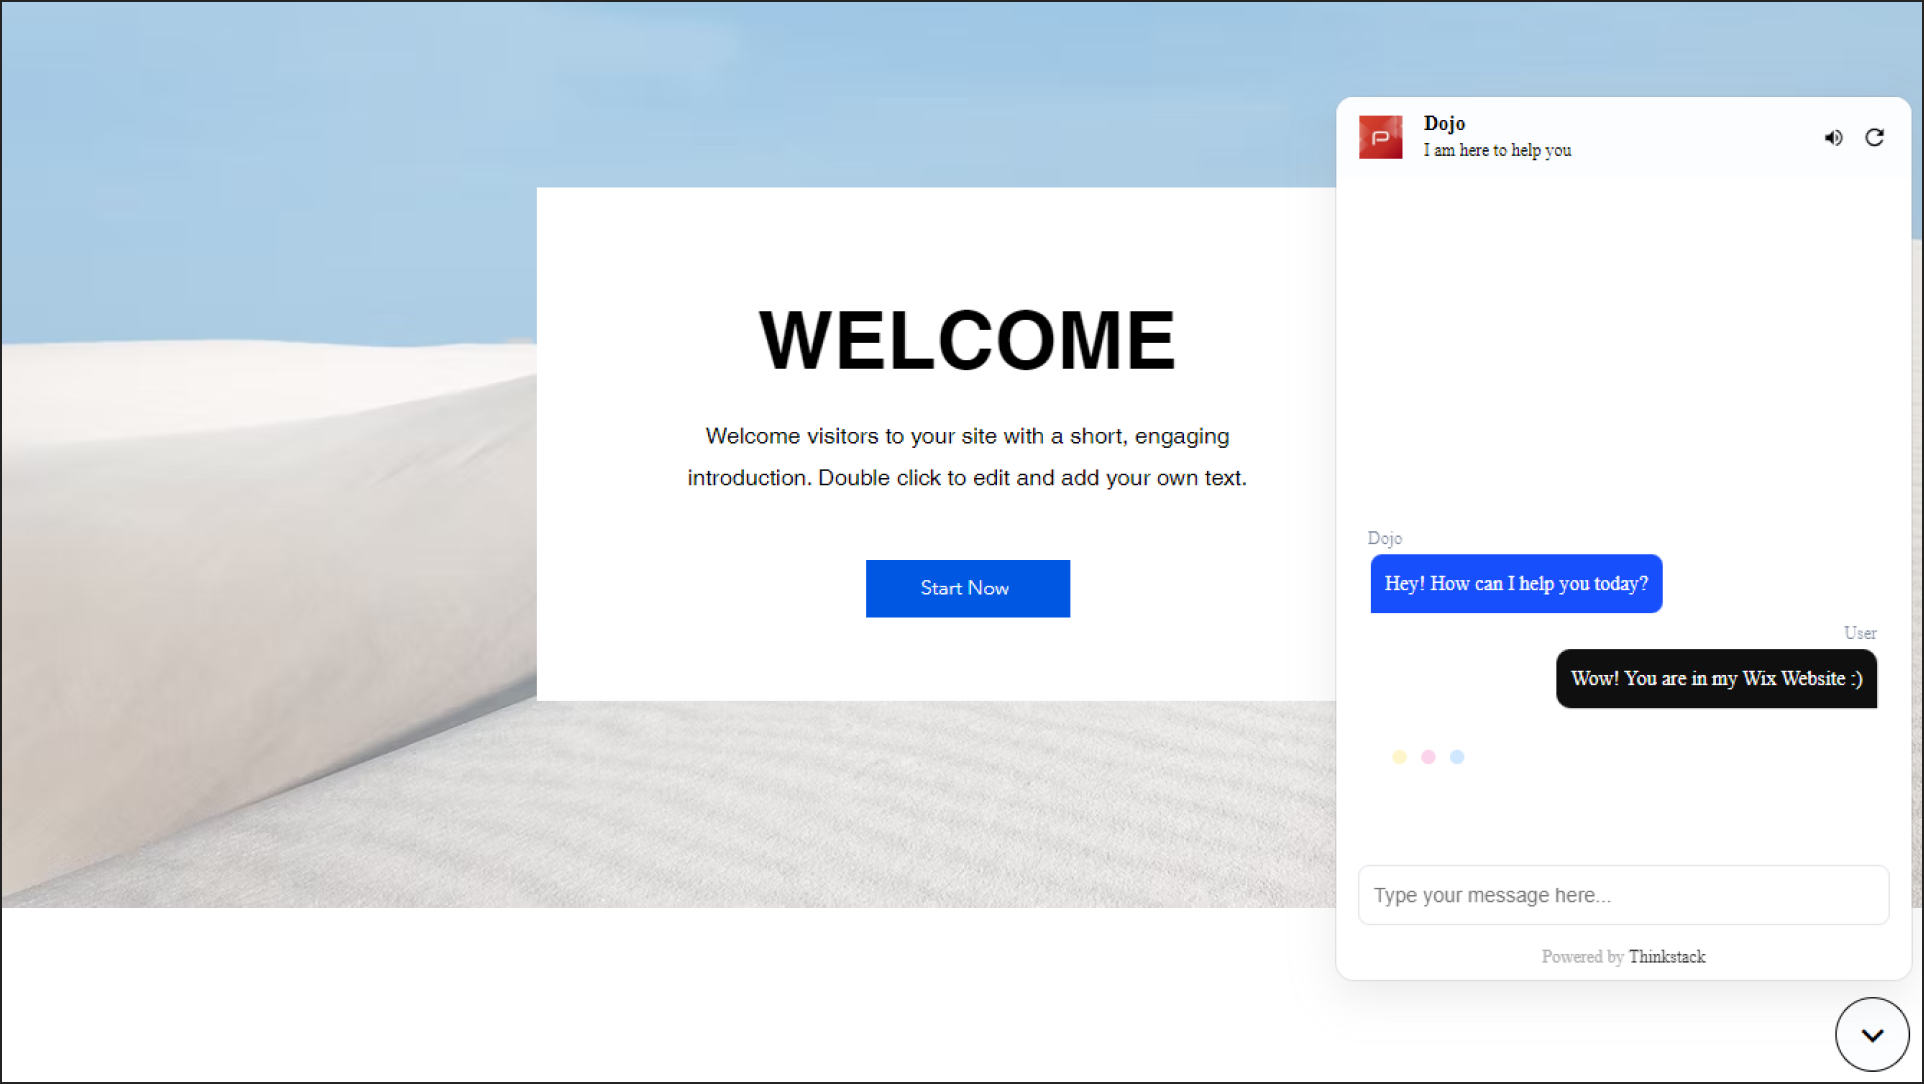
Go to your Wix website and refresh the page. Check for the Thinkstack chatbot bubble to confirm it appears and functions correctly.
Add a Bar-Type Chatbot#
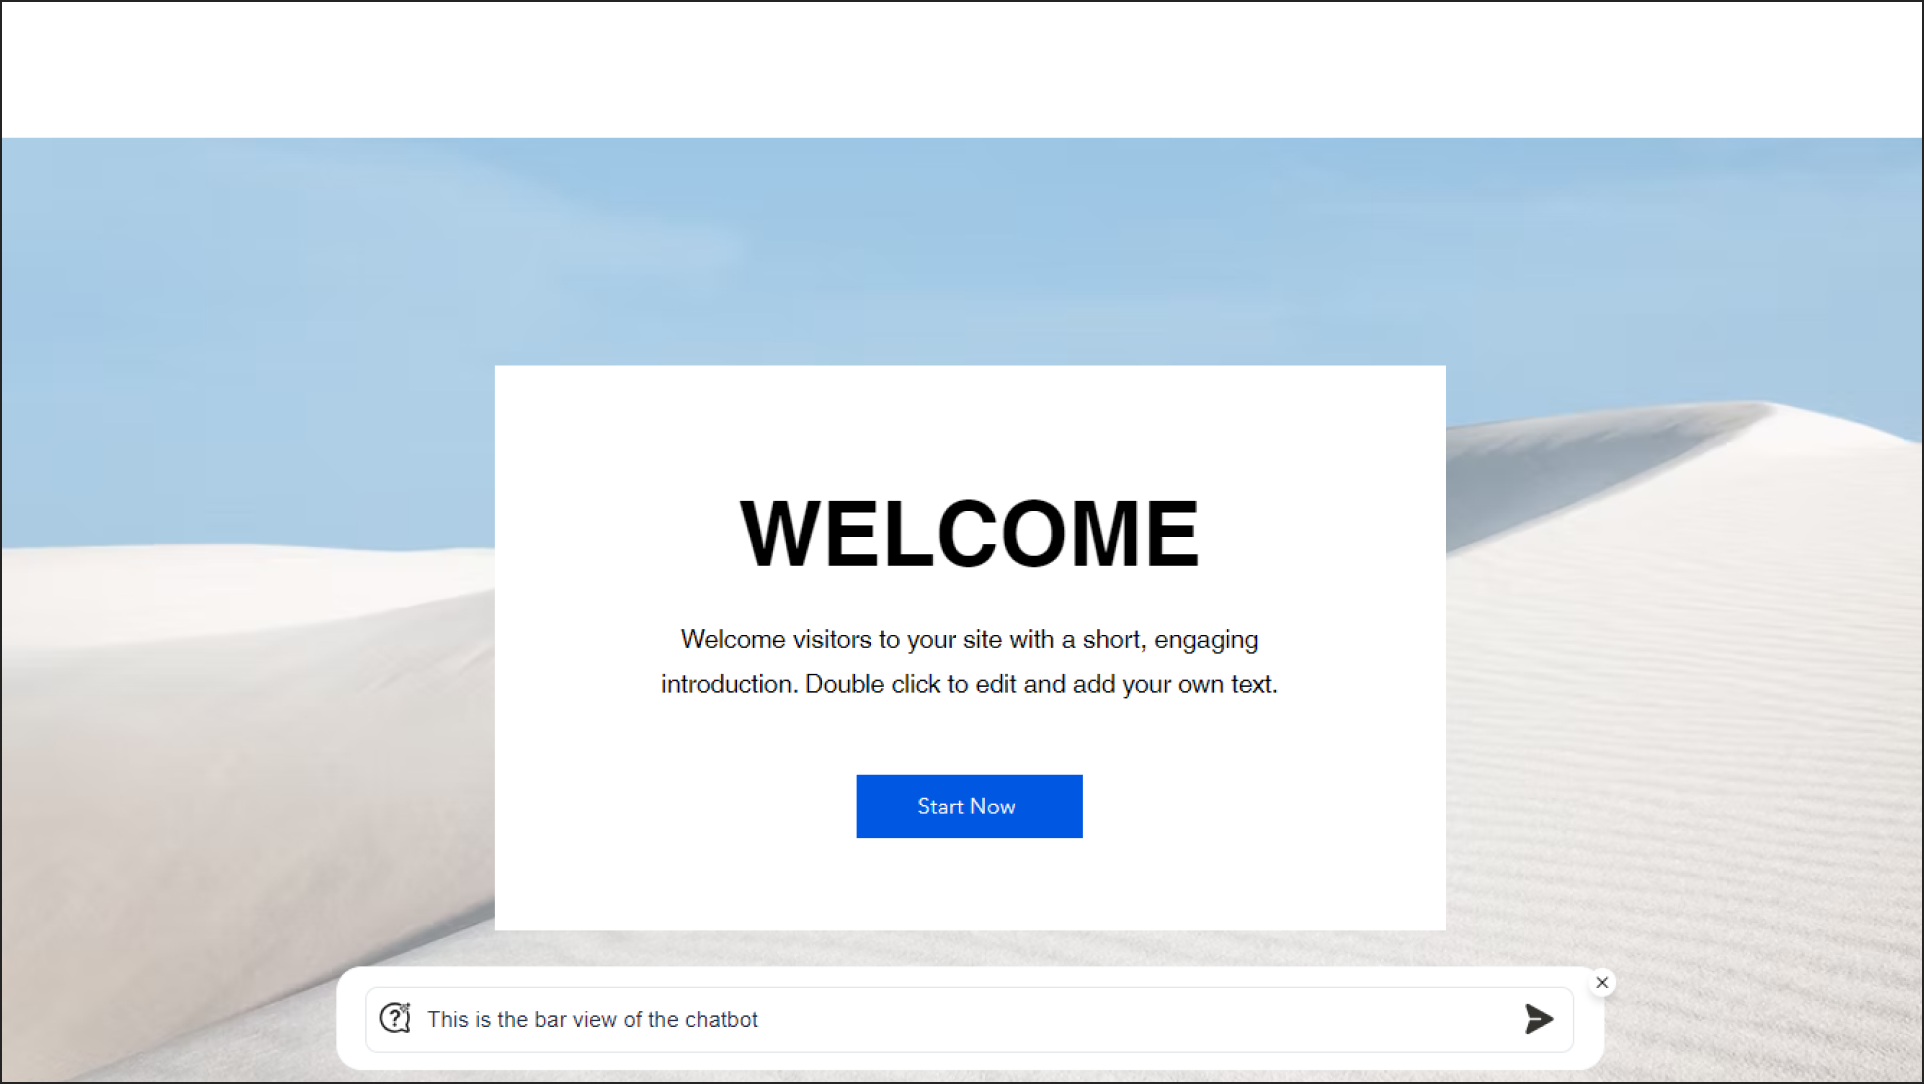
If you prefer a bar-type chatbot, use the specific script provided in the Thinkstack dashboard.
Example bar chatbot script:<script chatbot_id="673b2163235ece12e4a8e532" src="https://app.dev.thinkstack.ai/bot/thinkstackai-loader.min.js" data-mode="preview" data-type="expanded" data-style="font-size=16px&font-color=00f&query-font-color=39f"></script>Paste this script using the same steps in the Custom Code section.
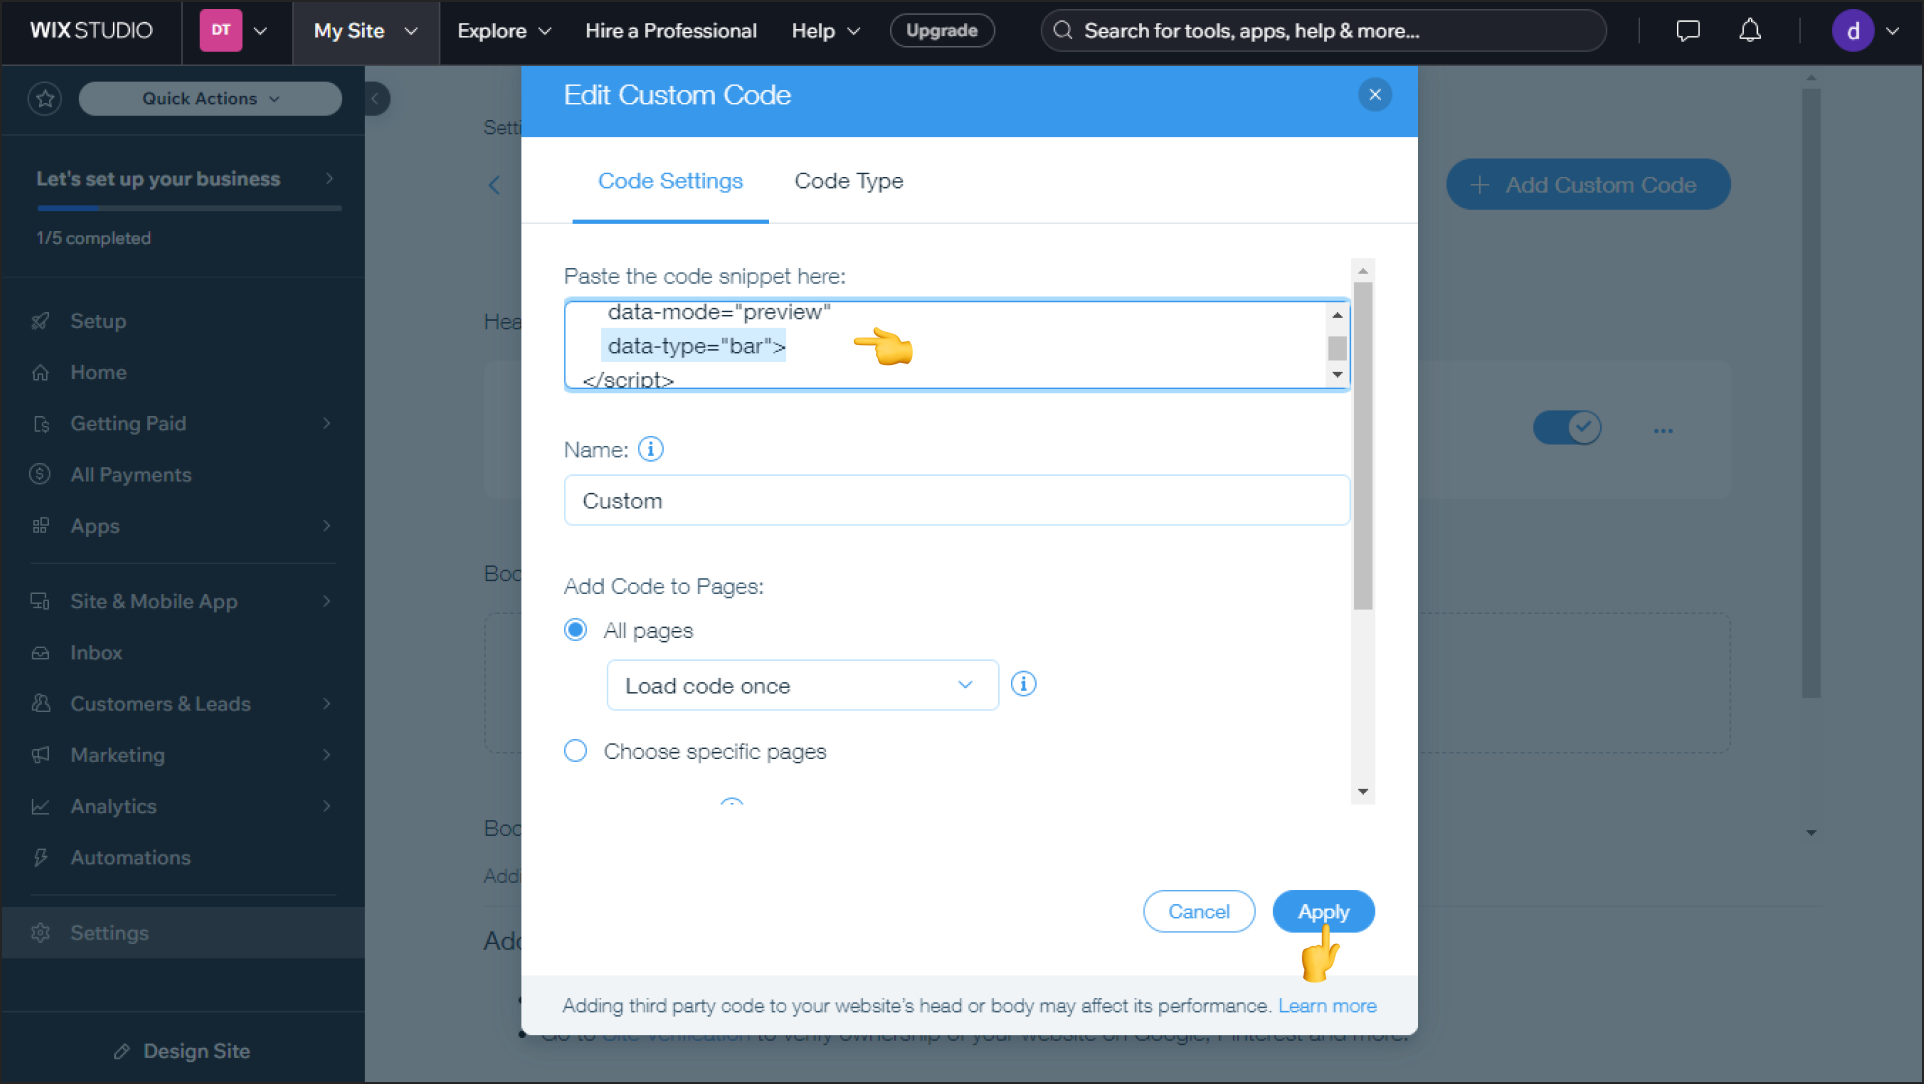
Save and refresh your Wix site.
That's a wrap🎉. You’ve successfully integrated the Thinkstack chatbot on your Wix website. Start engaging with your visitors through real-time, intelligent conversations.